Paper Pumpkin Storage

PP before

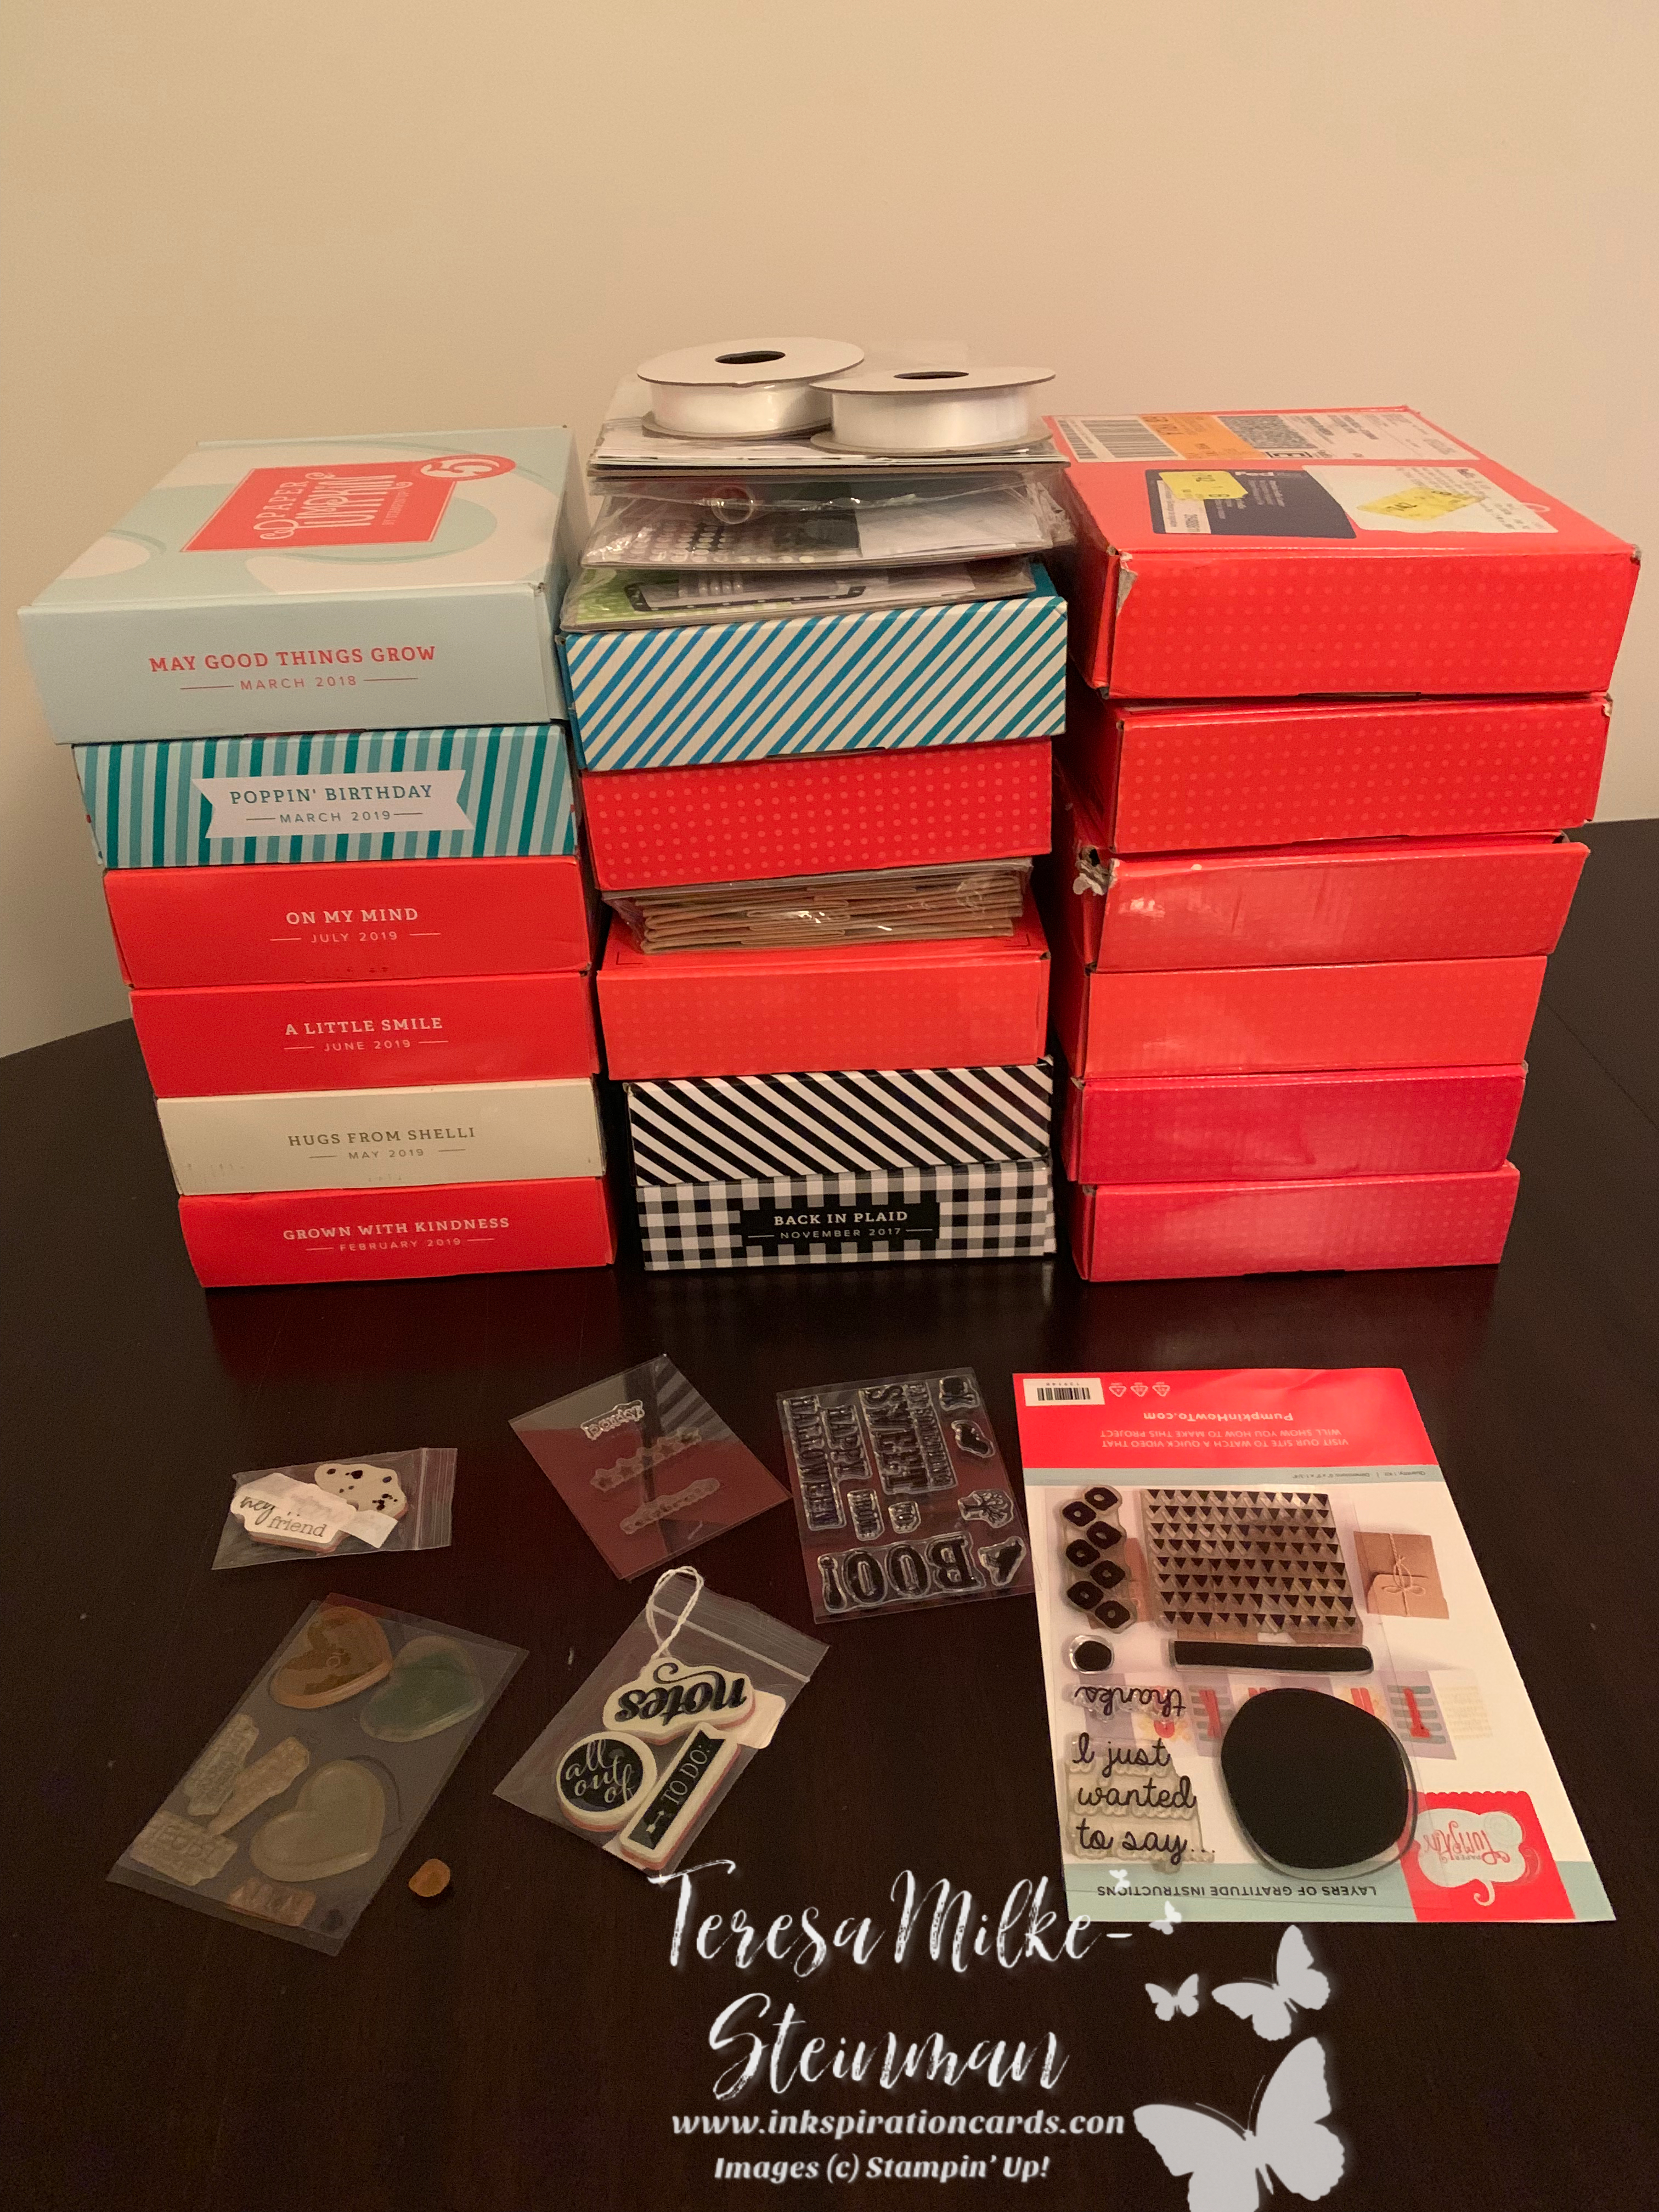
Like most of you I have a number of Paper Pumpkin boxes in my house. Some of them have what’s left of kits I’ve finished… some of them have kits that I’ve just about finished and some of them actually have kits that I haven’t even started!

I’ve been wanting to get them organized and see if I could shrink my pile of boxes for a while now. I finally took some time while I was off with my oldest munchkin just a week or so ago to get it done.

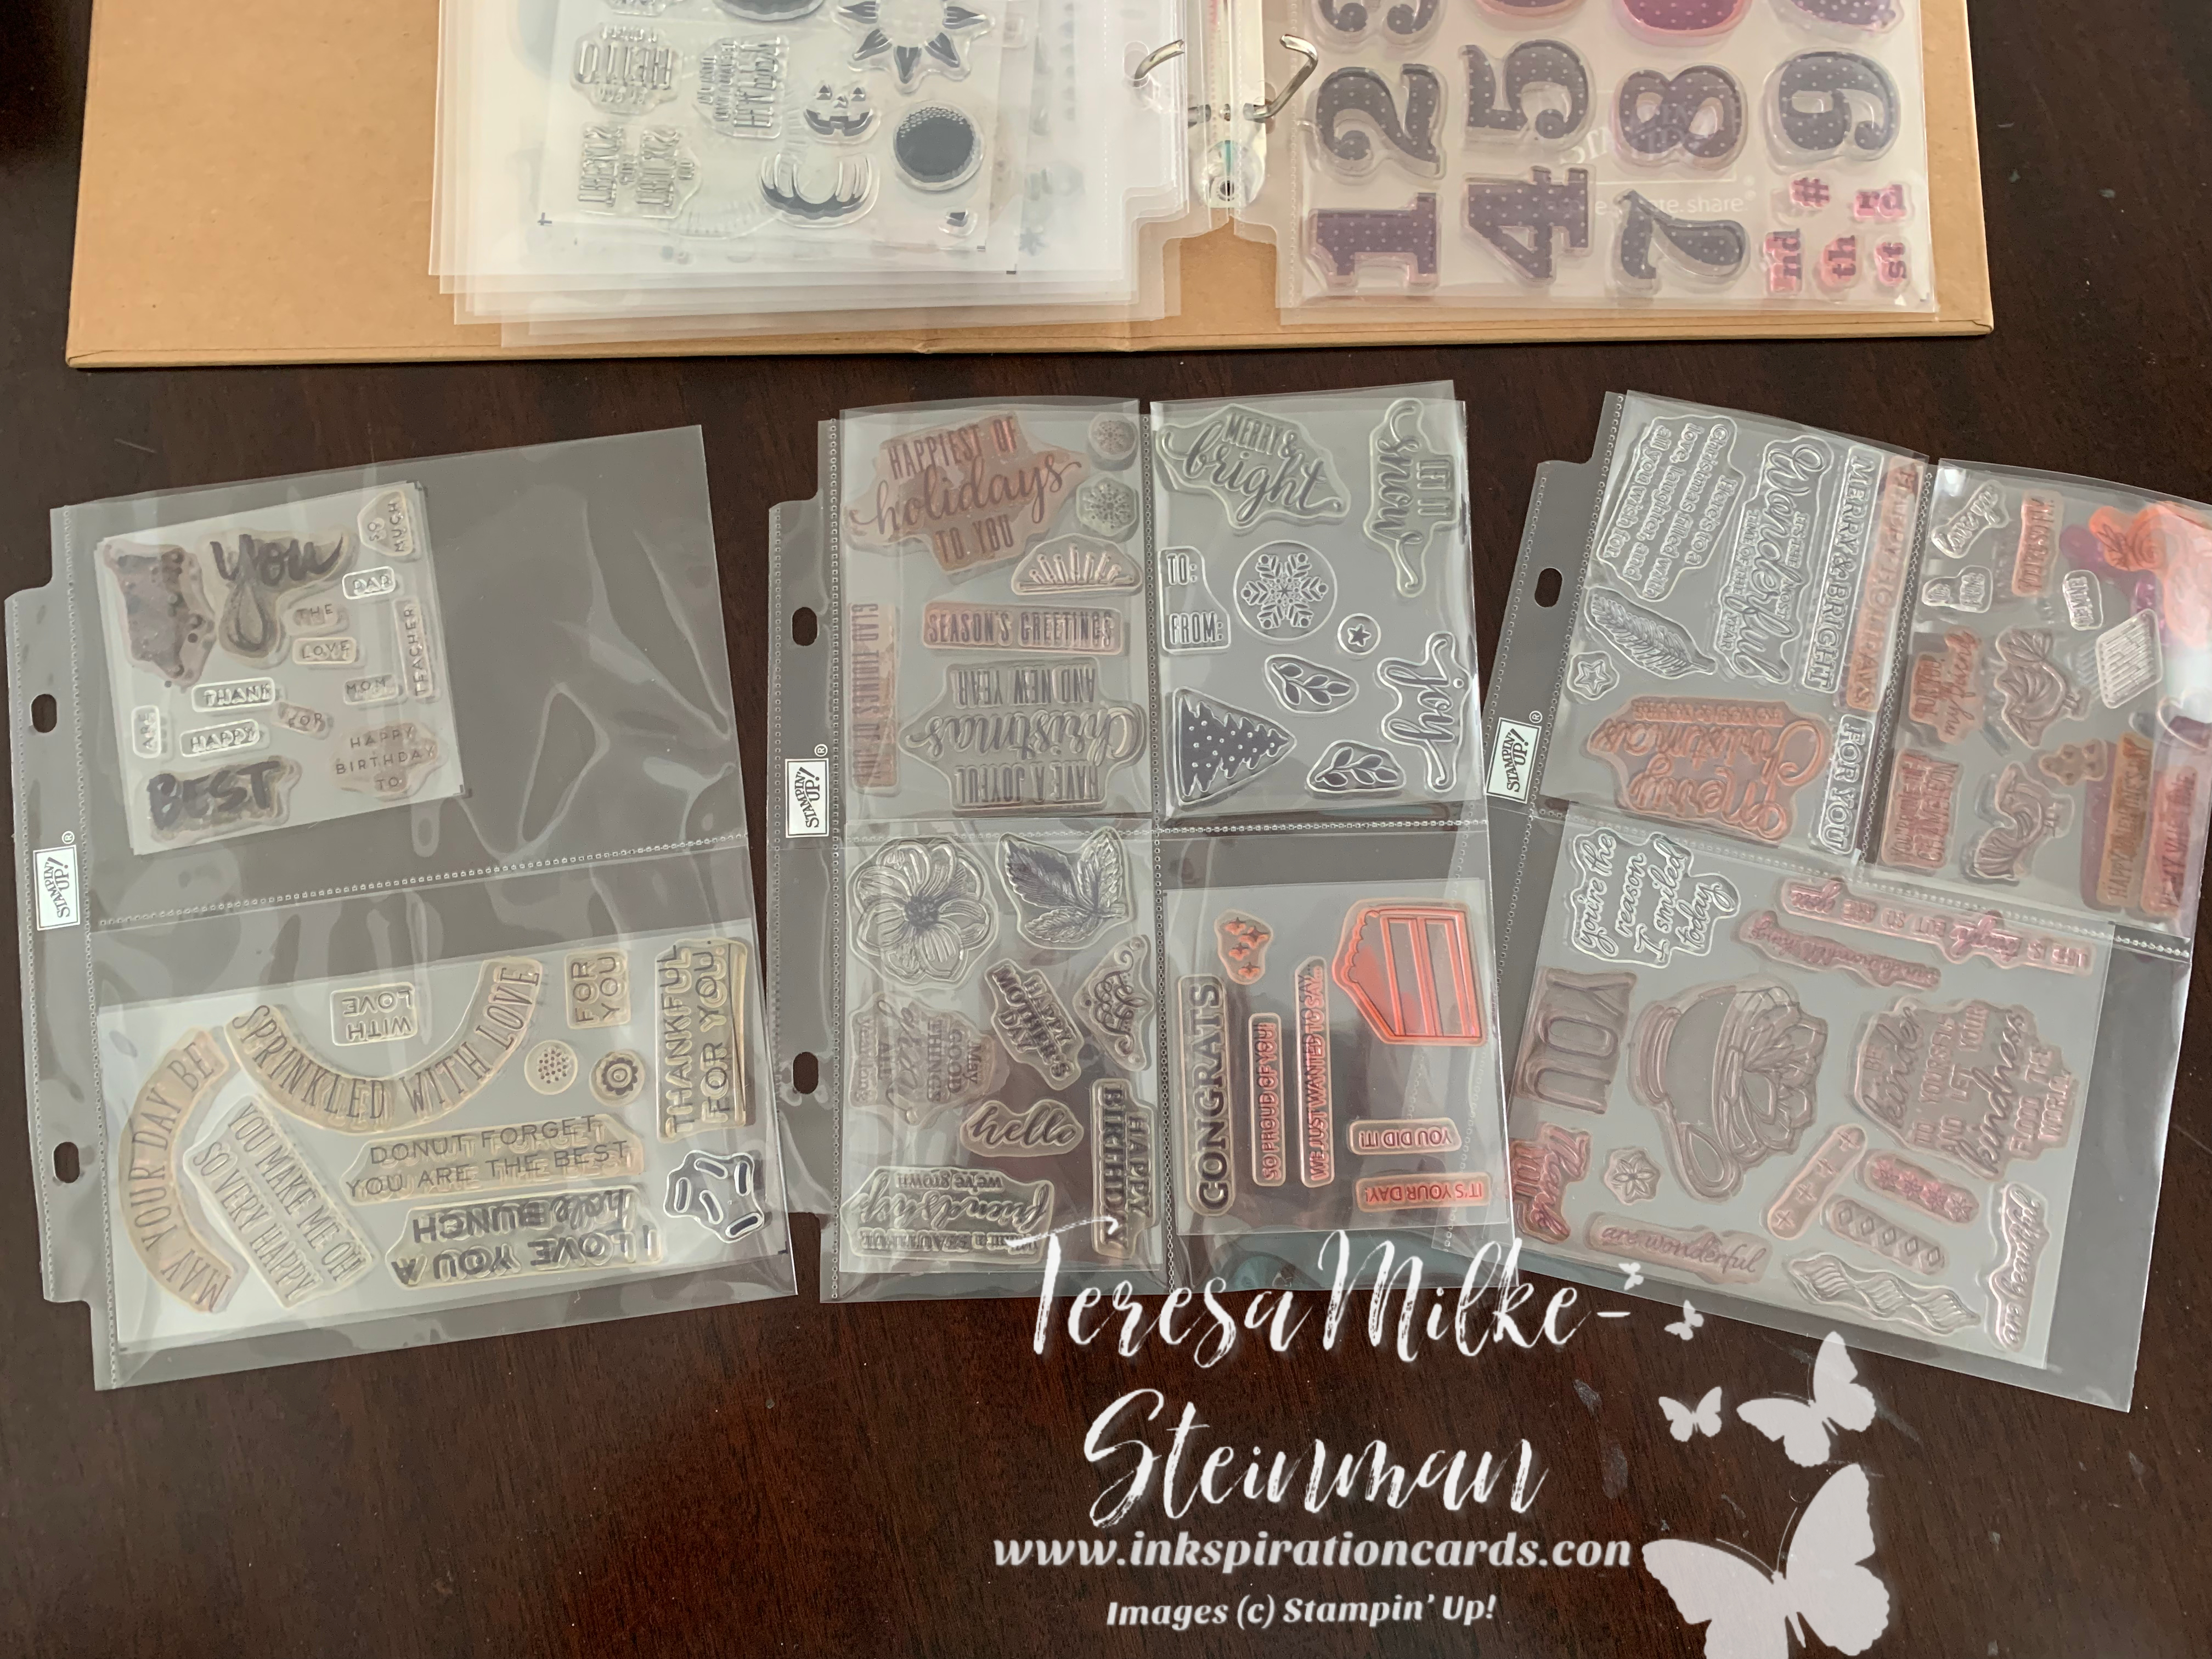
I decided to use a Memories & More album and pocket pages to store my Paper Pumpkin stamp sets. I thought the different sized pockets of the pages would work well since the stamp sets tend to be different sizes as well.

I had to trim a few of the acetate and plastic sheets that the stamp sets are on to help them fit into some of the pockets, but for the most part they fit very easily!

Paper Pumpkin in Pockets wm

I’m thinking of printing some labels or small sheets of paper to tuck in with the stamp sets with the name of the kit/stamp set and when it was released. (That project will have to wait for now)

Finished with Boxes wm

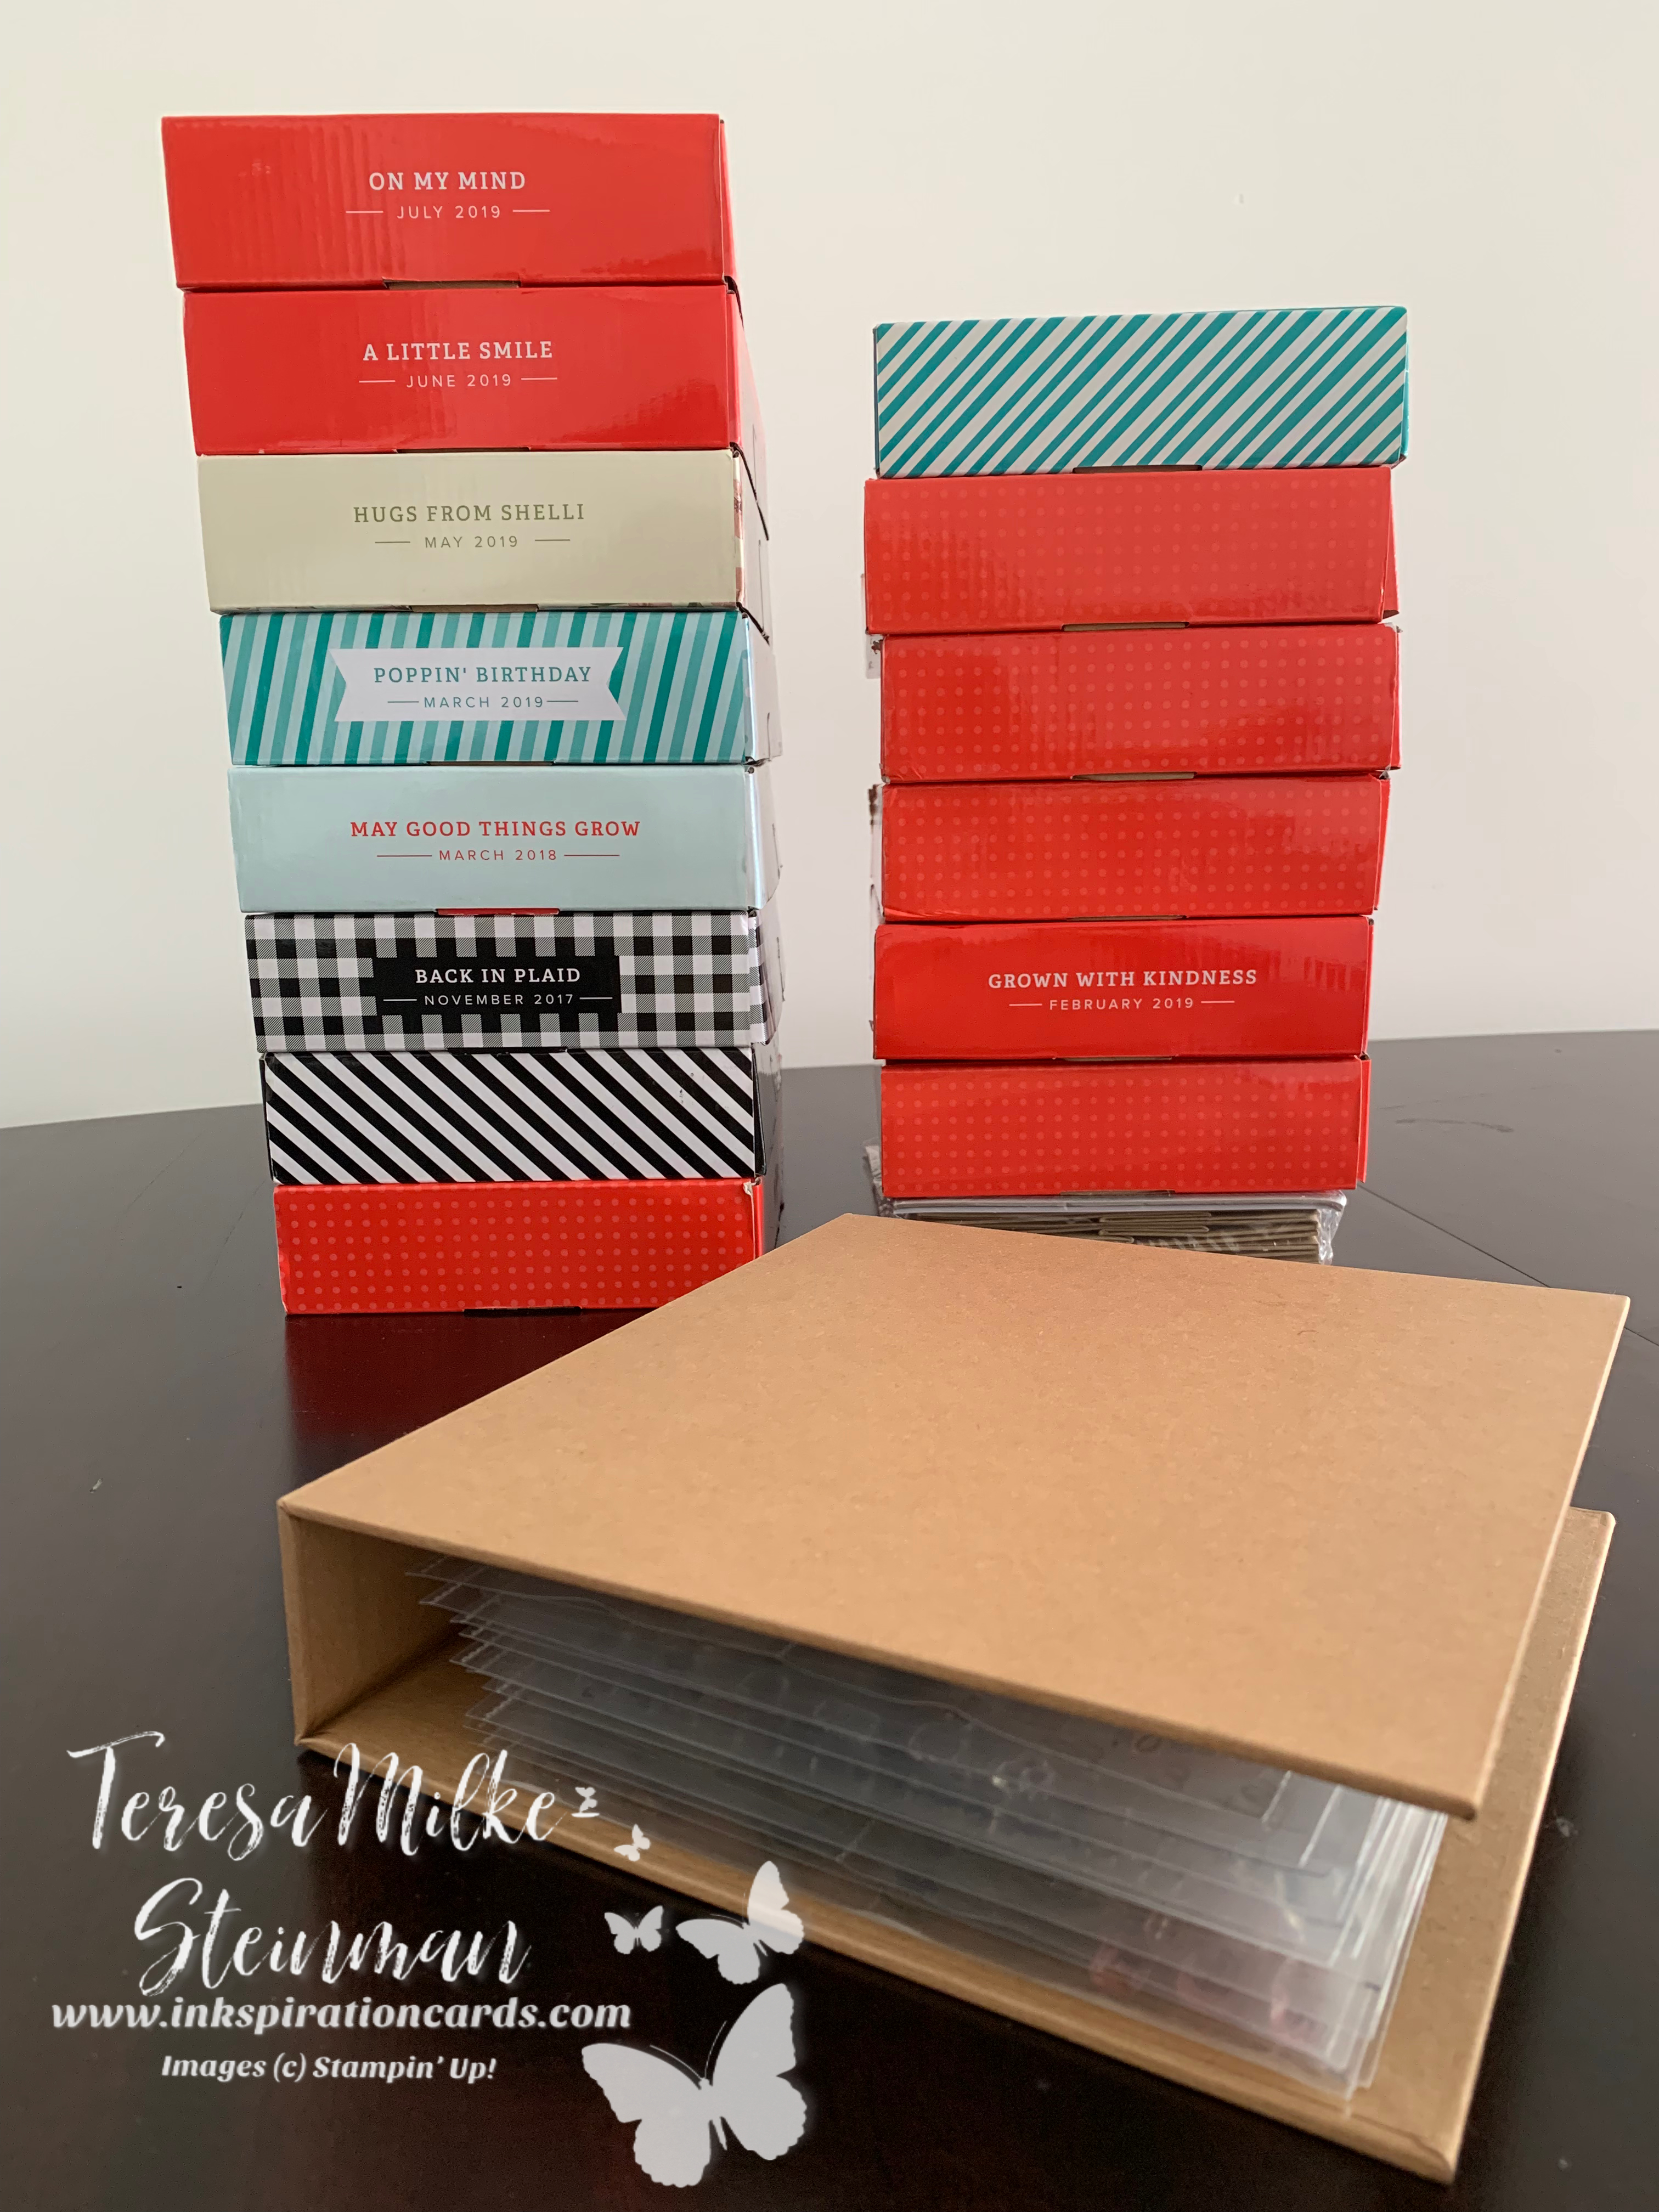
In the end, this album ended up holding all the Paper Pumpkin stamp sets I have up until March of this year. So I’ll have to pick up another one so I can keep this going.

Although I discovered a few more unfinished kits than I would have liked, I’m happy with how it turned out. I went from having 20+ boxes/kits down to 15 boxes!

Next is to work on finishing off the Paper Pumpkin kits I still have and to find some clear envelopes to store the instructions and leftover supplies in. I’ve seen some people use ones they bought from Amazon or Office Depot. I think I’ve also seen something at Dollarama, so I’ll have to figure out which option would work best. I’ll do another post once I get that figured out. I hope that you’ve found this helpful!

Free As A Magnolia

Thank You Birds wm

With this week’s project I took a very feminine direction. Petal Pink has really caught my eye lately and I’ve been really liking the Magnolia Lane Designer Series Paper so I thought I’d use those along side of Rococo Rose (one of the new In Colours).

The stamp set for this project is the Free As A Bird cling stamp set and I decided to stamp for the most part with Crumb Cake to help balance out all the pink by bringing in the real colours of nature. (You could do this even more by colouring the leaves with either Mint Macaron or Granny Apple Green.) The “thank you” I stamped with Rococo Rose and the flower with Petal Pink.

I then coloured the flowers on the branch using a Blender Pen with the Rococo Rose and the birds with Petal Pink, again using a Blender Pen. (Make sure to give your ink pad a good squeeze before you open it.)

To continue to bring the colours of nature and pink/femininity of the card together I used some Linen Thread and the Rose Metallic Thread to make a couple of bows to the left of the “thank you”.

I also coloured the flower next to the “thank you” with the Wink of Stella Glitter Brush to add a bit of bling to the card. (Unfortunately in the picture the light hit it so that it looks pink/yellow instead of clear/sparkly)

Click on the project sheet link to get a complete list of supplies for this project as well as step by step instructions!

2019 Free As A Magnolia Project Sheet

Wood vs Cling vs Photopolymer stamps

So you want to start stamping, but aren’t quite sure what the difference is between the different kinds of stamps. Hopefully this will help make it a bit more clear so you can decide which way you want to go when building up your stamp collection! I’ll start with wood stamps as these were the first kind of stamps available.

There are three pieces that make up a wood stamp; the red rubber that the stamp design is on, the foam and the wood block. The foam helps give a nice even stamped image and often the wood blocks are contoured to make it easier to hold the block as your stamping.

Now before I move on to the other kinds of stamps I want to briefly mention clear stamps as clear stamps are still readily available, however Stampin’ Up! no longer carries them.

Clear stamps still use the red rubber for the stamp images/phrases and have the foam cushion like wood stamps, but they don’t have their own block. For these stamps you need separate acrylic blocks that you would stick your stamp to when stamping and then peel off when finished. The acrylic blocks are often also contoured to make stamping easier, depending on where you get yours.

The one downfall with clear stamps is that when you stick the image sticker to the back of the stamp so you can “see” what you’re stamping they sometimes do not stick to the acrylic block for very long.

Rubber stamps

Cling stamps are new on the scene! Stampin’ Up! just launched them earlier this year. They’re very similar to the wood and clear stamps in that they have the foam cushion like wood stamps and you use acrylic blocks like with clear stamps. The bonus of cling stamps is that once you’ve attached the sticker image to the back of your stamp they stick to your acrylic blocks much better than clear stamps do.

*For those with a latex allergy the above stamps may not be your best bet.*

The other option with stamps is photopolymer. Similarly to clear and cling stamps you would use a separate acrylic block when you’re stamping and then you simply peel it off when you’re done. With this combination of photopolymer stamp and acrylic block you’re able to see through which makes it easier to line up your images and phrases and, heaven forbid you make a mistake, you can stamp over an image that maybe didn’t quite come out as clearly as you would have liked.

Photopolymer stamps

There isn’t a foam cushion like with the other kinds of stamps, so you may want to have a piece of foam (which you can easily find at your local dollar or craft store) or a paper piercing pad underneath when you’re stamping.

Photopolymer stamps are only available through Stampin’ Up! with your Paper Pumpkin subscription, but they are still available elsewhere.

I hope this has been helpful. Please let me know if you have any questions as I’m happy to help!


Free As A Bird

Bird Friend wm

I  haven’t had as much of a chance to play with the new In Colours that were launched with the new Annual Catalogue as I would have liked and so this week I decided to create a simple card focusing on one of the colours.

For this card I went a little smaller than my usual cards (4″ x 4″) and chose to use Whisper White cardstock to help make the Pretty Peacock really stand out. As for the images and phrases I went with the Free As a Bird cling stamp set.

To start off I simply stamped the phrase and images with Pretty Peacock ink and created a bit of a frame with the Pretty Peacock cardstock. For the smaller pieces of cardstock I also ran them through my die cutting machine using the Stitched Shape dies and popped them up using Stampin’ Dimensionals. Finally I added a bit of bling with a few Rhinestone Basic Jewels.

Here’s the project sheet… complete with supply list and step by step instructions. Post a pic of your project in the comments!

2019 Free As A Bird

Inside Envelope for Cards

I was asked a few weeks ago by a colleague if I could make a card for a bridal shower for her and she wondered about an envelope or something that she could use to put the monetary gift she was giving in that would keep it safe. I looked for some templates online and found an idea of what I wanted to do and so I thought that I would share it!

The template/measurements I used calls for a 7″ x 7″ piece of Designer Series Paper. I used some Botanical Butterfly DSP that I had leftover from Sale-a-bration for these, but you can use whatever Designer Series Paper you would like depending on the occasion and colour(s) you want.

To start make sure to score the DSP so when you fold/crease the DSP the design you want to see is on the outside. For this envelope I wanted the butterflies on the outside of the envelope and so I scored and folded the DSP with the black and white checkers facing up.

You’ll want to score the DSP at 3/4″ along the bottom, 1 1/4″ along the top, then at 2″ and 5″ for your side flaps.

Once you’ve scored your DSP, cut off the corners along the score lines as shown in the picture below on the left. If you like you can leave the edges square or you can use scissors, a corner rounder or even a circle punch like I did to create rounded edges.

When using the circle punch to round your edges don’t use the guide as you usually would when wanting to punch a circle, simply insert the corner of the paper directly into the punch so only the corner you want rounded is in the punch.

Now you’re ready to start using your adhesive! One option would be to have the bottom fold on the inside of the envelope like I did for this one which would mean you would put your adhesive on the bottom flap in order to adhere the first side flap and then add some more adhesive to the inside edge of the side flap to adhere the other side flap. The other option is to have it on the outside in which case you would simply use adhesive on the side flaps first and then adhere the bottom. Then fold the flap over to close the envelope.

Here’s the one I made recently for my colleague. I used some Gingham Gala Adhesive Backed Sequins propped up on some Mini Glue Dots so that the Whisper White Solid Bakers Twine was able to wrap around to close the envelope without too much fuss. Just make sure one end of the twine is under one of the glue dots to ensure that it stays in place.

In card DSP envelope

More #simplestamping

magnolia abounds

I decided to take a stab at this month’s #simplestamping challenge. I’ve done a few so far and I enjoy when Stampin’ Up! adds a twist to things because sometimes I find it hard to stick just with the stamps, ink and paper that we’re usually allowed to us. For this month’s challenge they threw in that we’re able to use like Designer Series Paper.

I actually ended up creating two projects, using the Magnolia Lane Designer Series Paper for both. As for the stamp sets, for the first one I chose to use the Beauty Abounds cling stamp set and for the second (scroll down for that pic) I decided to use First Frost.

In terms of cardstock and ink colours, I pulled from the Magnolia Lane DSP and went with Mossy Meadow and Petal Pink.

With the first project I simply used 4 squares with each one featuring a different design from the DSP. Then in keeping with the square theme I stamped a phrase onto a larger square and then used the 4 as a background. I wanted to add a little bit more to the project so I decided it would be nice to stamp some bubbles using Petal Pink ink and then a phrase on top using Mossy Meadow ink.

I really like how it turned out and I’m thinking I may step this project up even a little bit more. Here’s the project sheet for you…

2019 Magnolia Abounds Project Sheet

And here’s the second project I created for this challenge…

With wedding season upon us I thought this might be nice. I simply used a strip of Magnolia Lane Designer Series Paper and then placed the word congratulations on top to create a banner.

first frost

A Blended Beautiful You

Beautiful You wm

For this week’s project I was inkspired to pair one of the new In Colours with the Beautiful You cling stamp set. Initially I was thinking of using two of the new In Colours for this project, but really liked the idea of adding some twine and so I ended up going with Pretty Peacock and Mint Macaron. I’ll admit this is an unlikely colour combination, but I think it works nicely…. it moves towards a monochromatic effect but not quite.

As always I started with stamping my images and phrase, which all come from the Beautiful You cling stamp set. I used Mint Macaron to stamp the phrase as well as the squiggle underneath the woman and Tuxedo Black Memento Ink to stamp the woman. Once my woman had dried I used my Blender Pens to colour her hat and dress using Pretty Peacock.

I then used a couple of the Stitched Nested Labels Dies for the phrase and it’s border and popped it up using some Stampin’ Dimensionals. I then used some of the Mint Macaron twine from Nature’s Twine and then topped the project off with a few Rhinestone Basic Jewels.

Here’s the project sheet… complete with a list of supplies and step by step instructions. Enjoy!

2019 July Beautiful You

A Cure for Inkspiration Block

Thank You Flowers wm

My creative energy and inkspiration has been running a little low these past couple of weeks. Leading up to my munchkins school fun fair (where I had a table) I was creating a lot of different projects (cards, recipe tins, bookmarks/tags and even some home decor pieces) and with everything leading up to the end of the school year being so busy I ended up draining myself and my inkspiration.

Thankfully this past weekend we were going up to my in laws farmhouse and I was able to get some much needed rest and relaxation! I also knew that I would want to do some crafting while I was up there (it’s not often there are three other adults around to keep my munchkins occupied and so I wanted to take advantage).

Without much inkspiration to come up with a new project I dipped into my pile of old projects I hadn’t finished. I’m sure I’m not the only one that has started a project (or two or three) and thought you were going to make more than you did or you ran out of time/energy to finish and so you have extra pieces that have yet to be put together. So I packed what pieces I had and the supplies I would need to finish these off and was feeling pretty good about my plan.

As an added bonus my inkspiration and creative energy started coming back and I ended up tweaking a couple of the designs. I’m happy with how they turned out…. I’m also even happier that they are done and I won’t have them hanging around my craft space anymore reminding me that I didn’t finish them.