Timeless Tropical Birthday

These days I’m trying to craft as much as I can. Stamping and paper crafting are totally my happy place and we all need to spend as much time in our happy place as possible given what’s going on in the world right now! So I was happy when this sketch challenge showed up in my inbox.

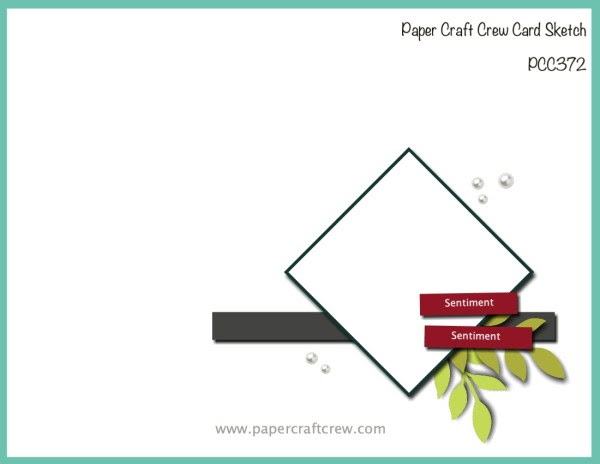
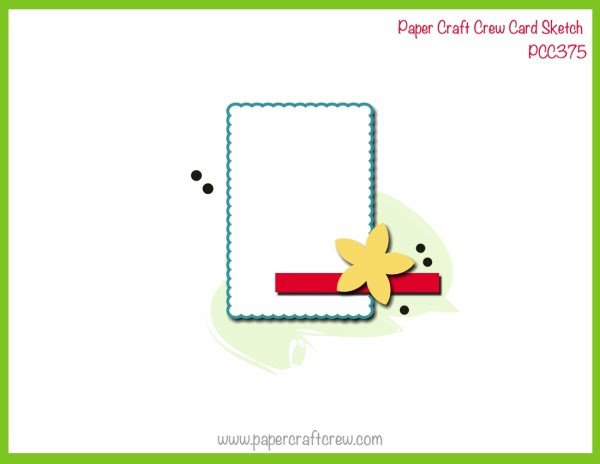
This week’s Paper Craft Crew challenge (PCC375) is a horizontal sketch challenge. Here’s the sketch…

PCC 375

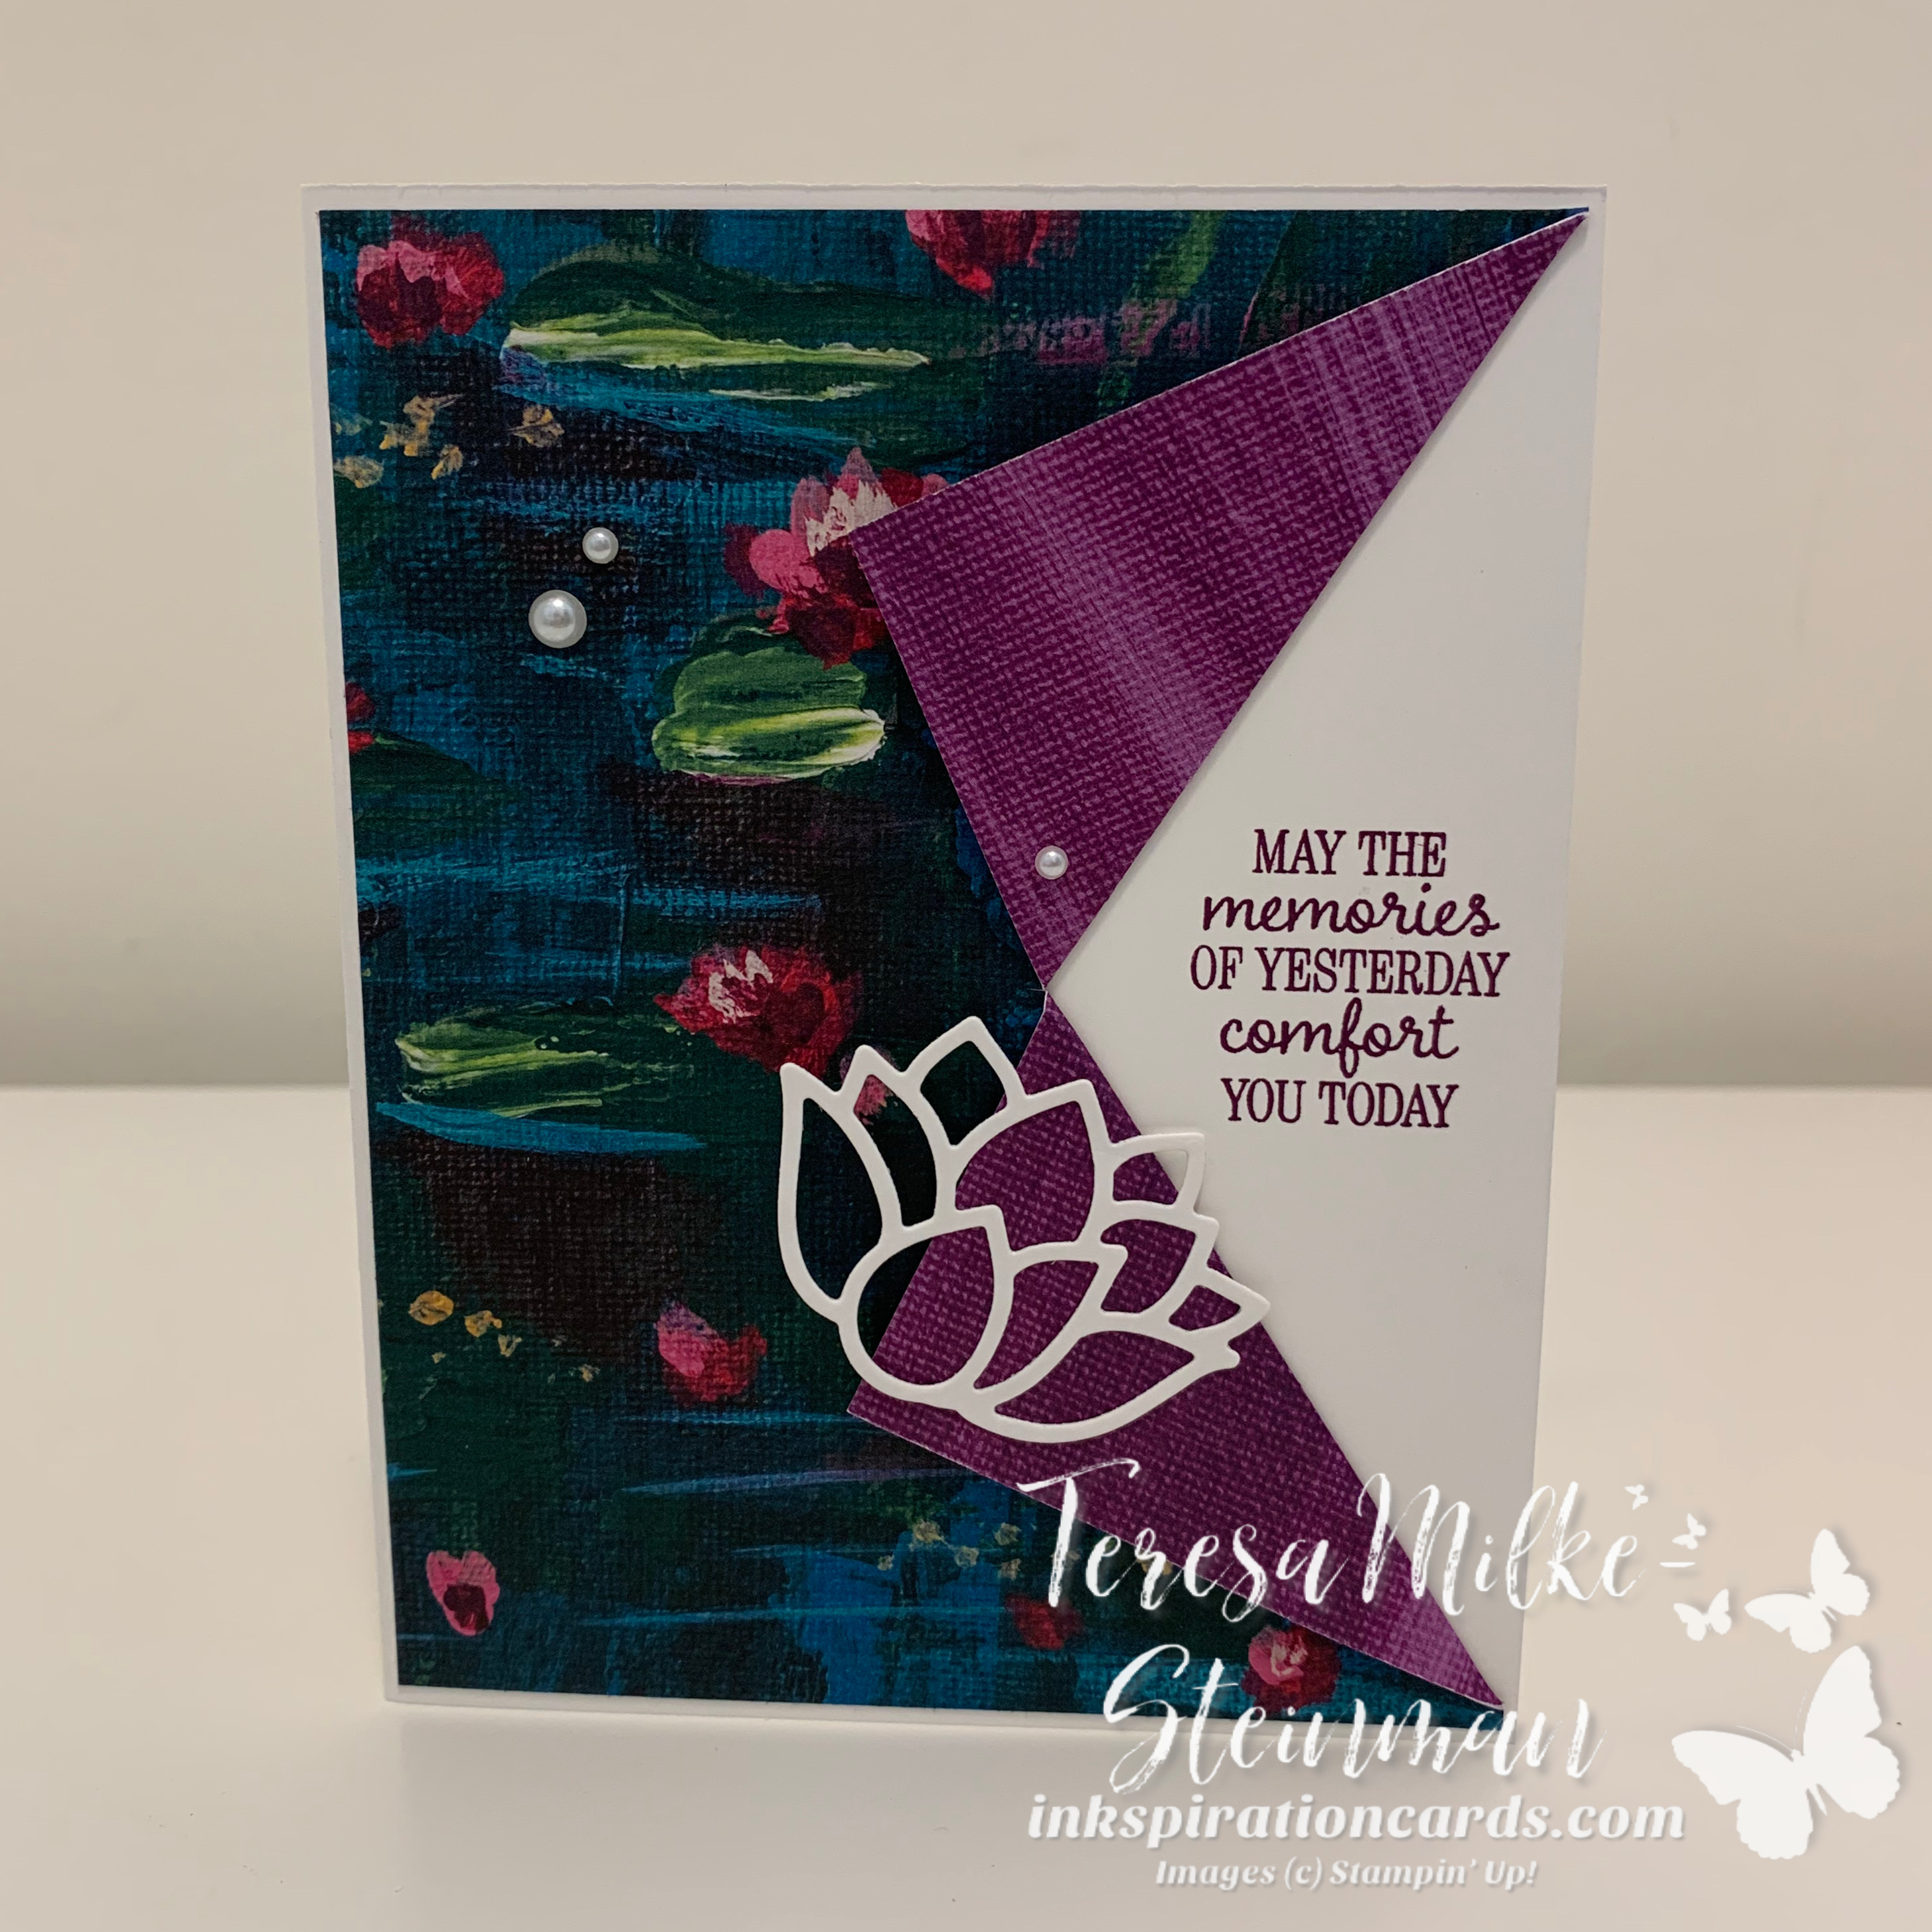
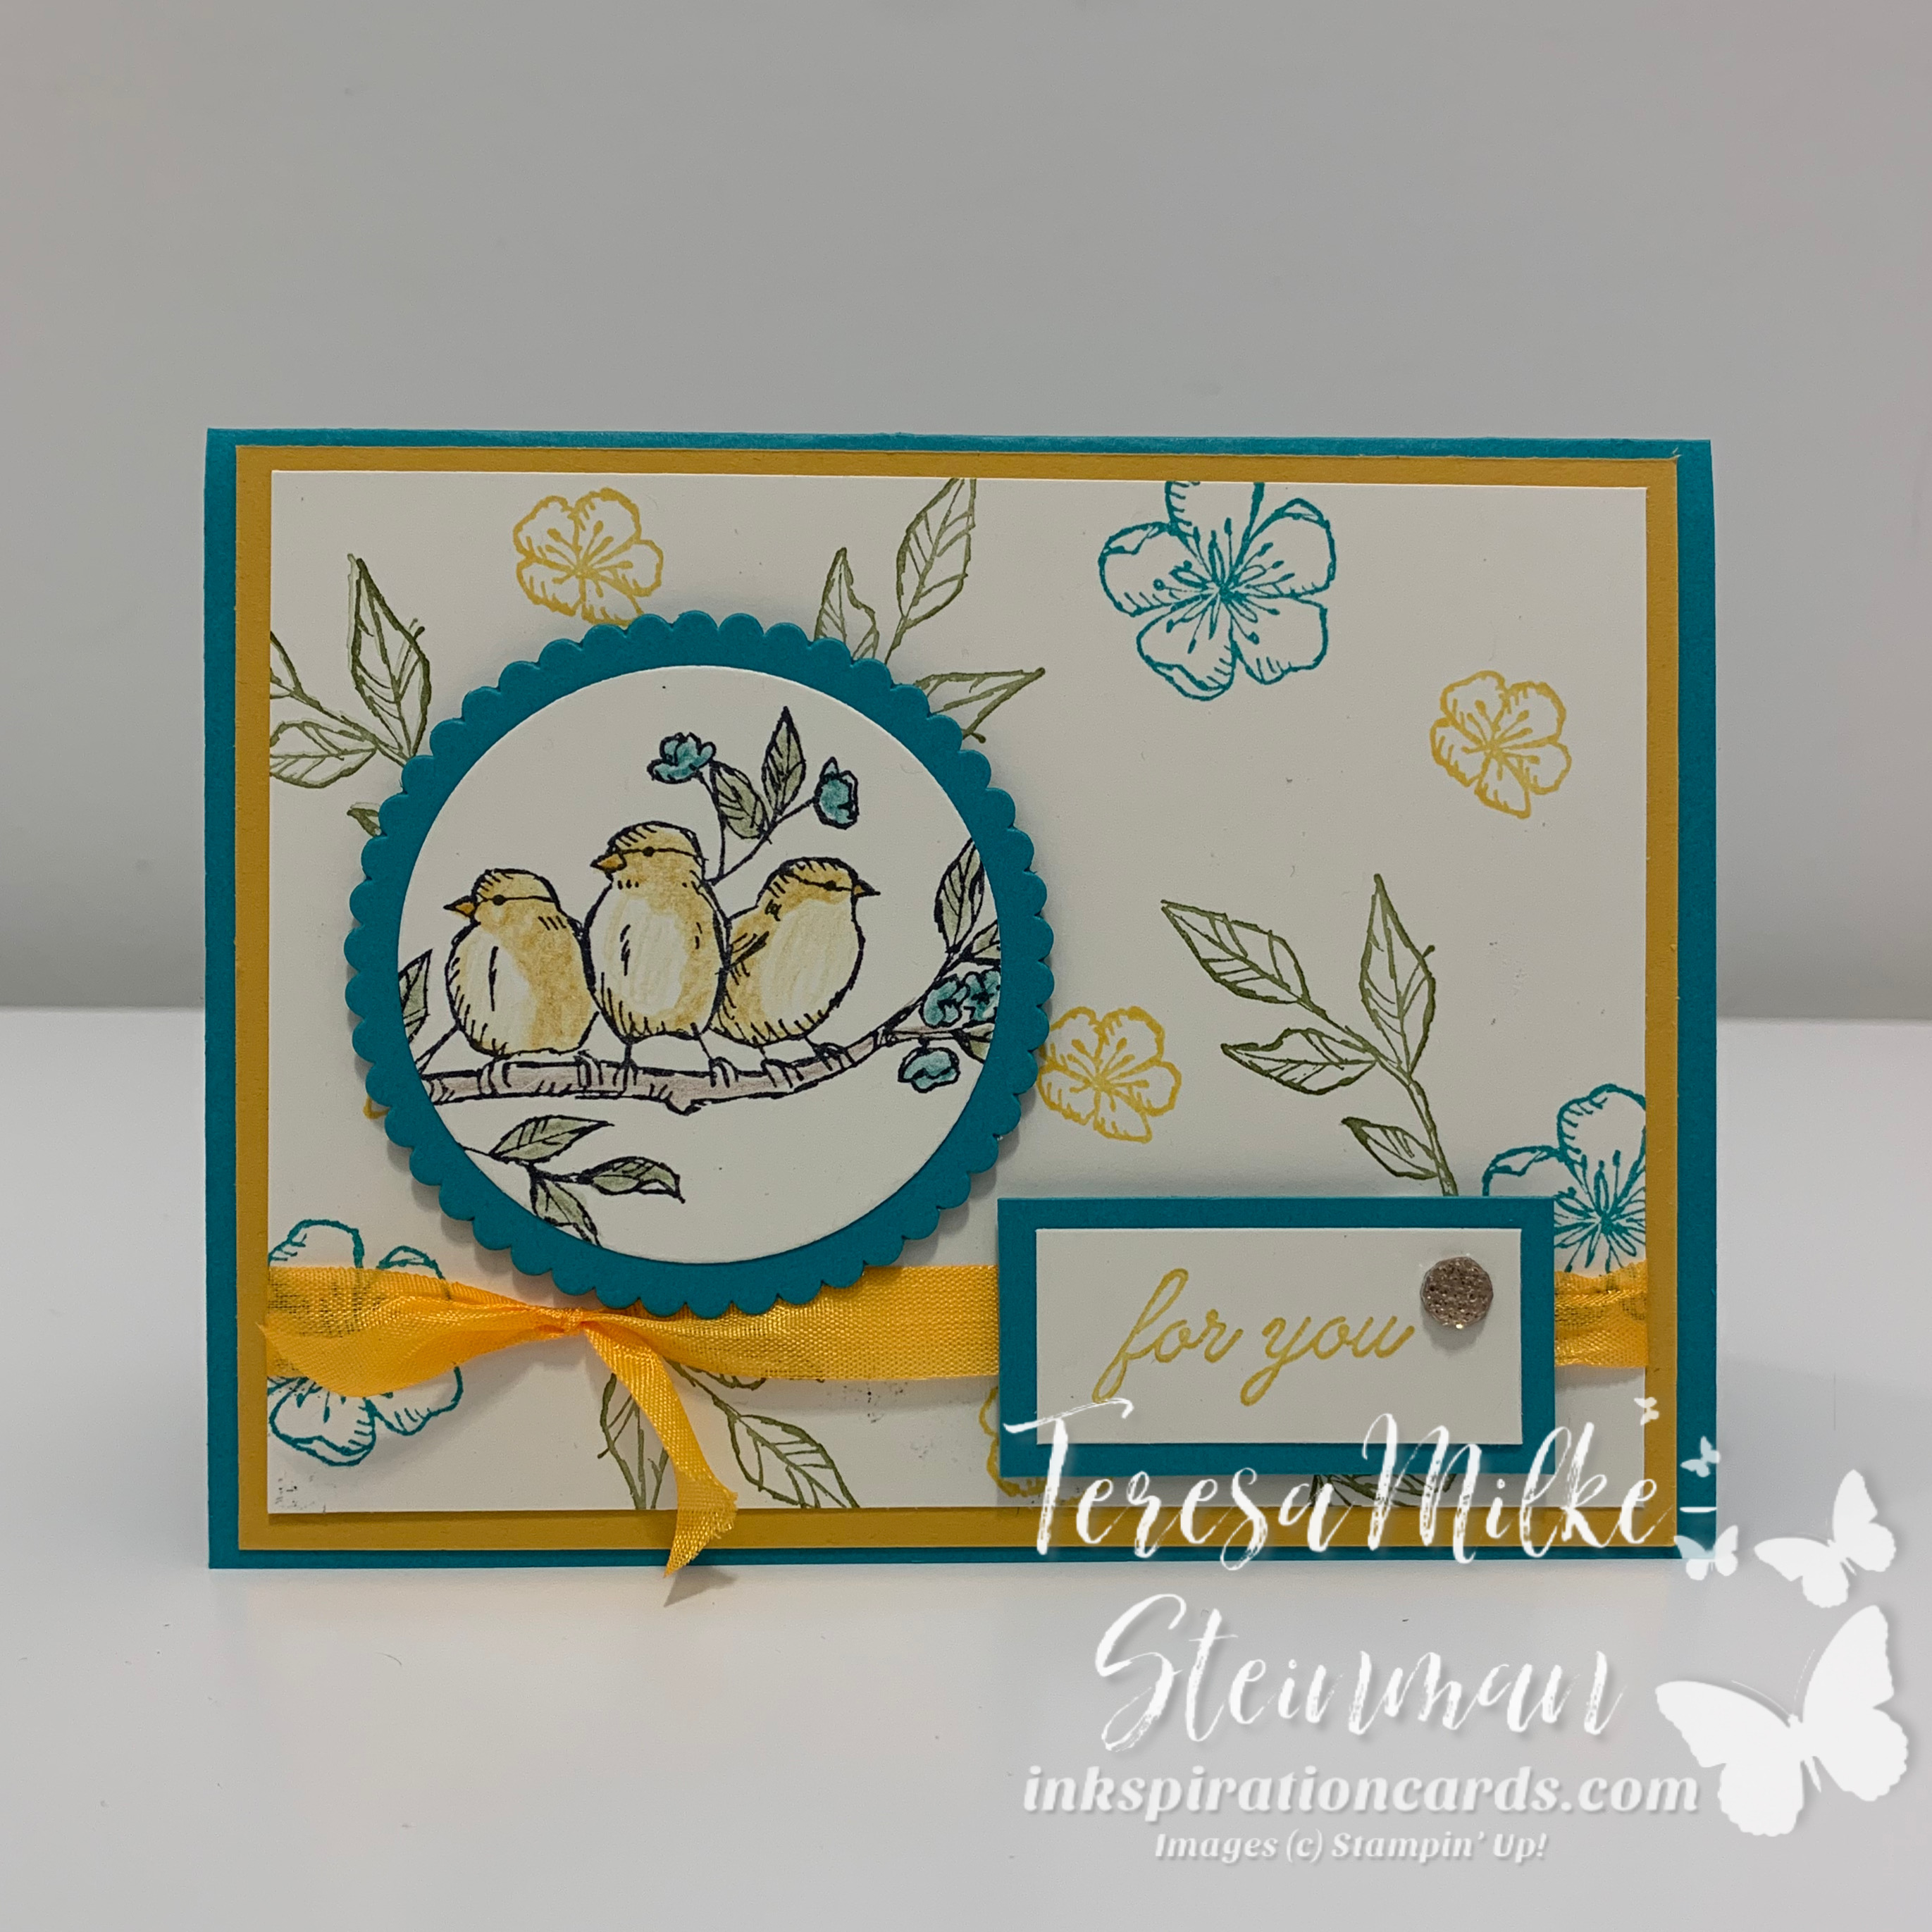
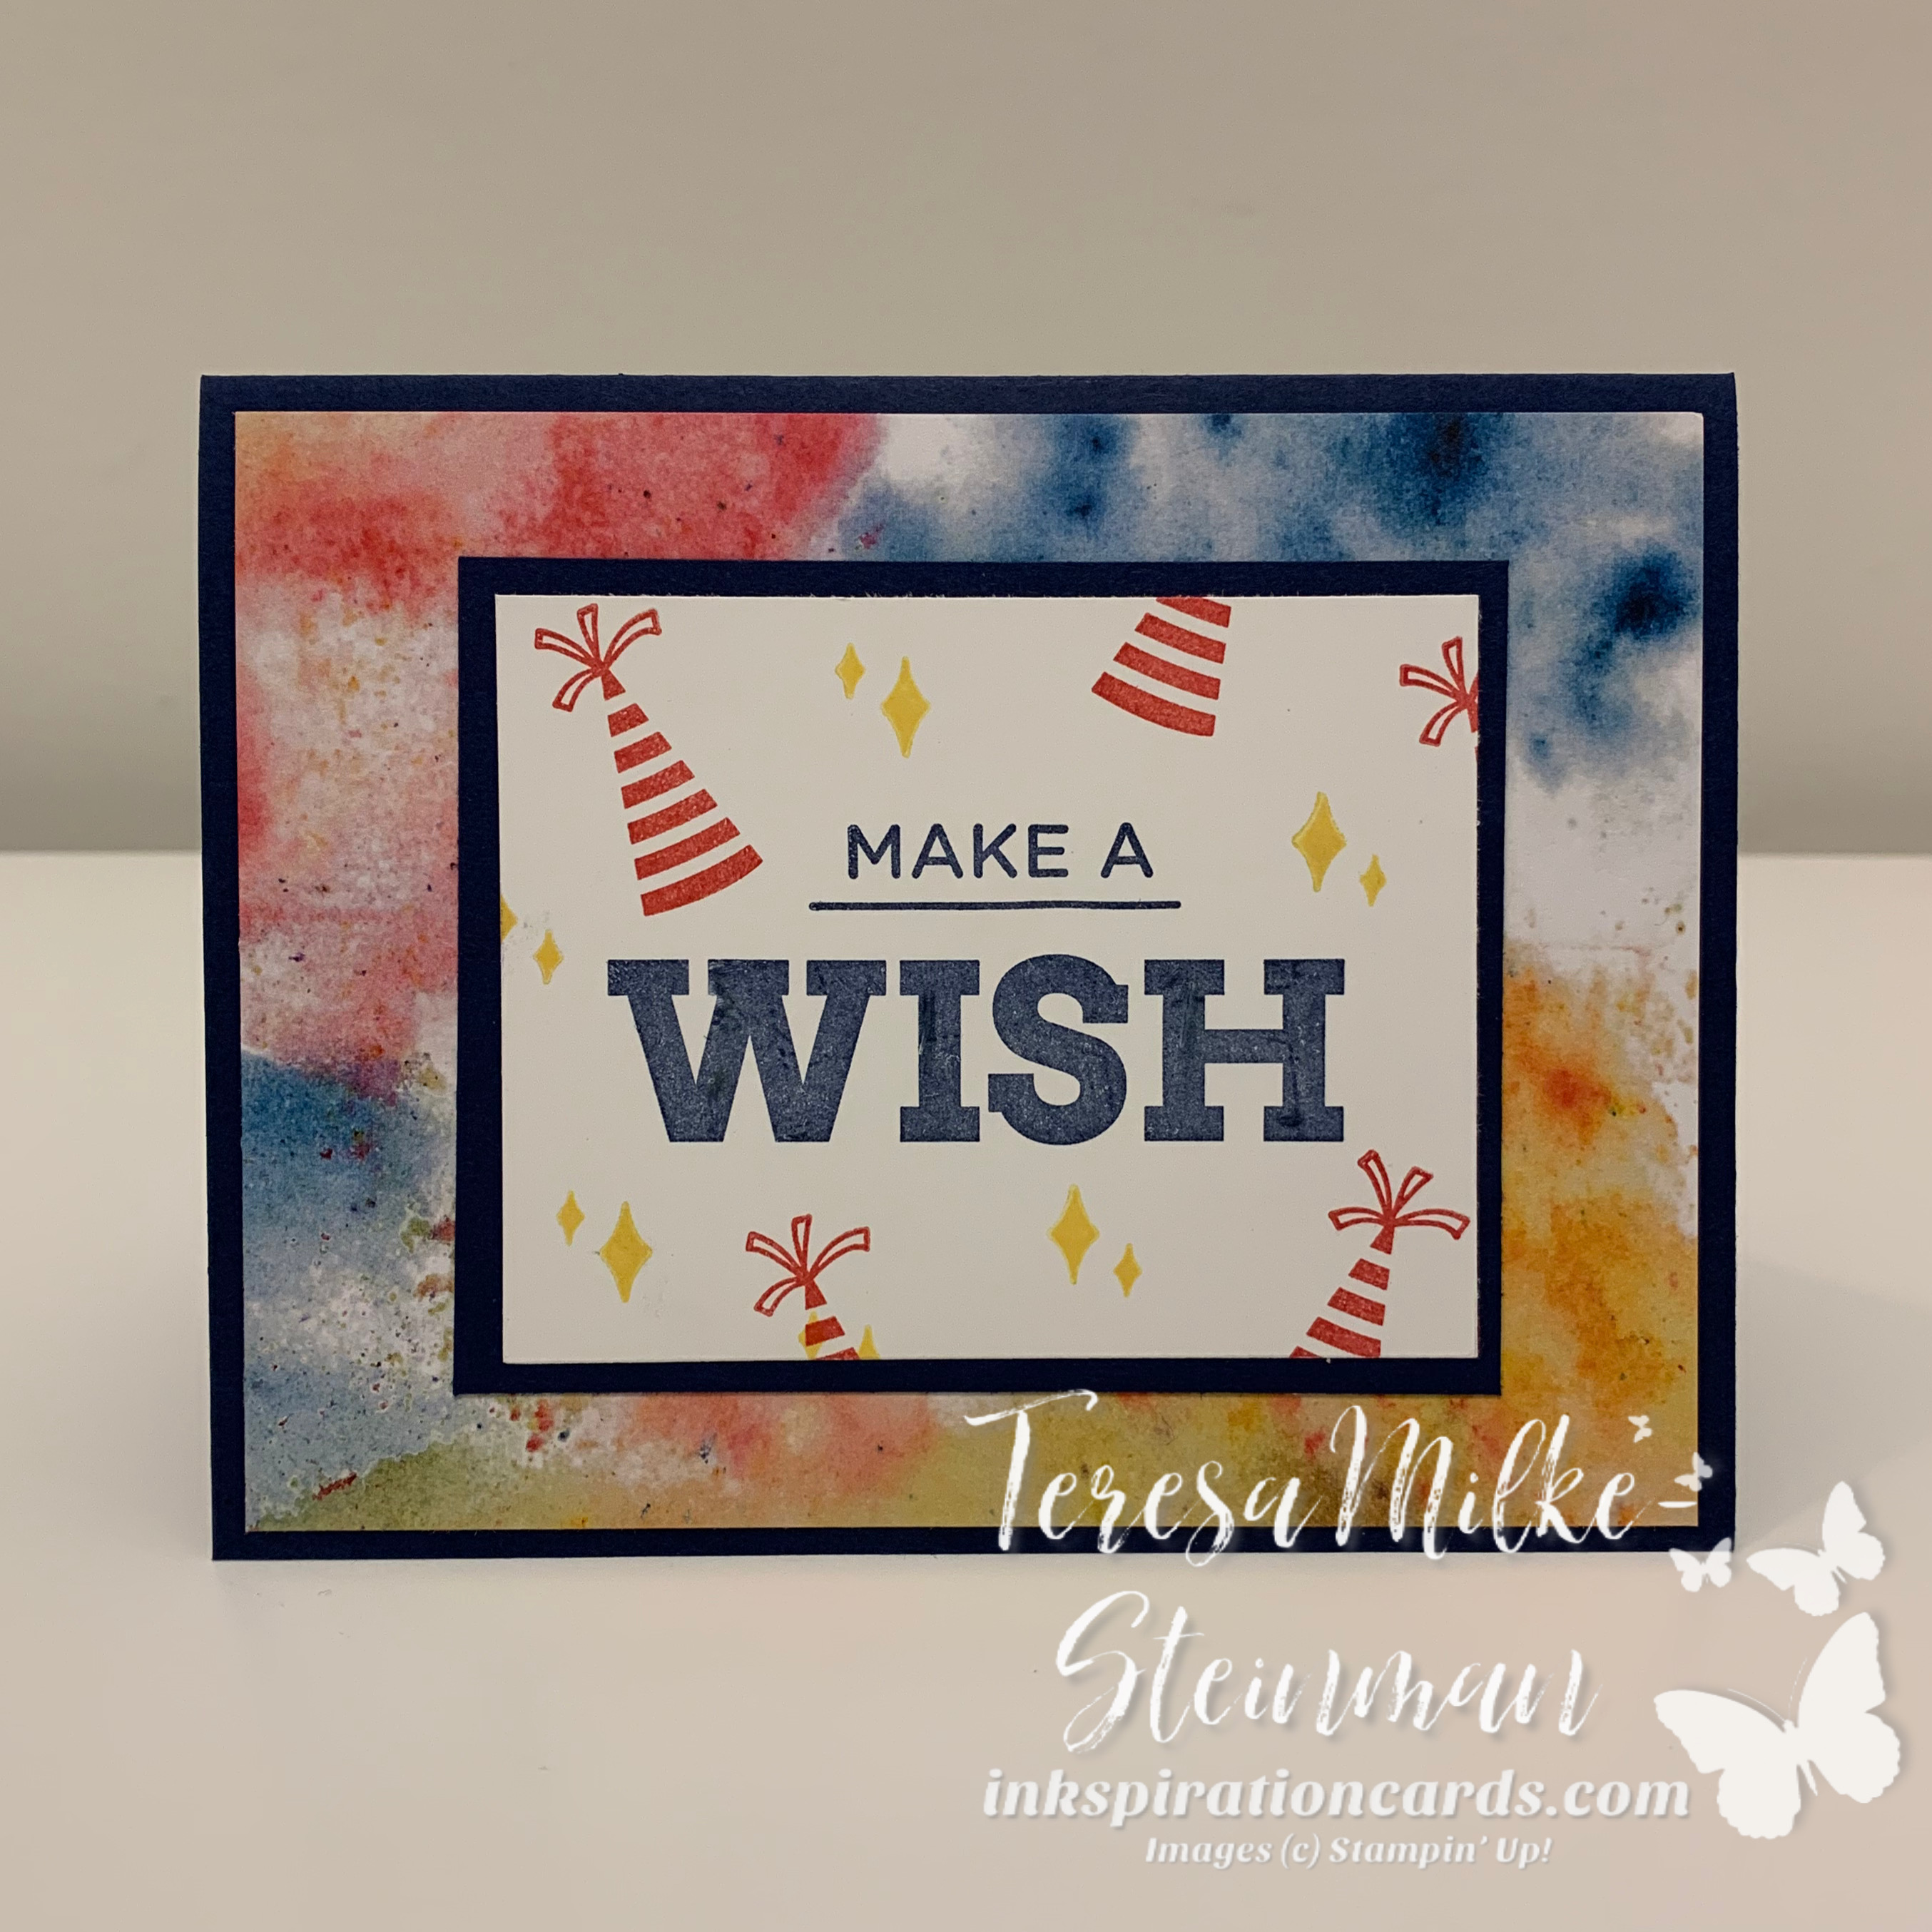
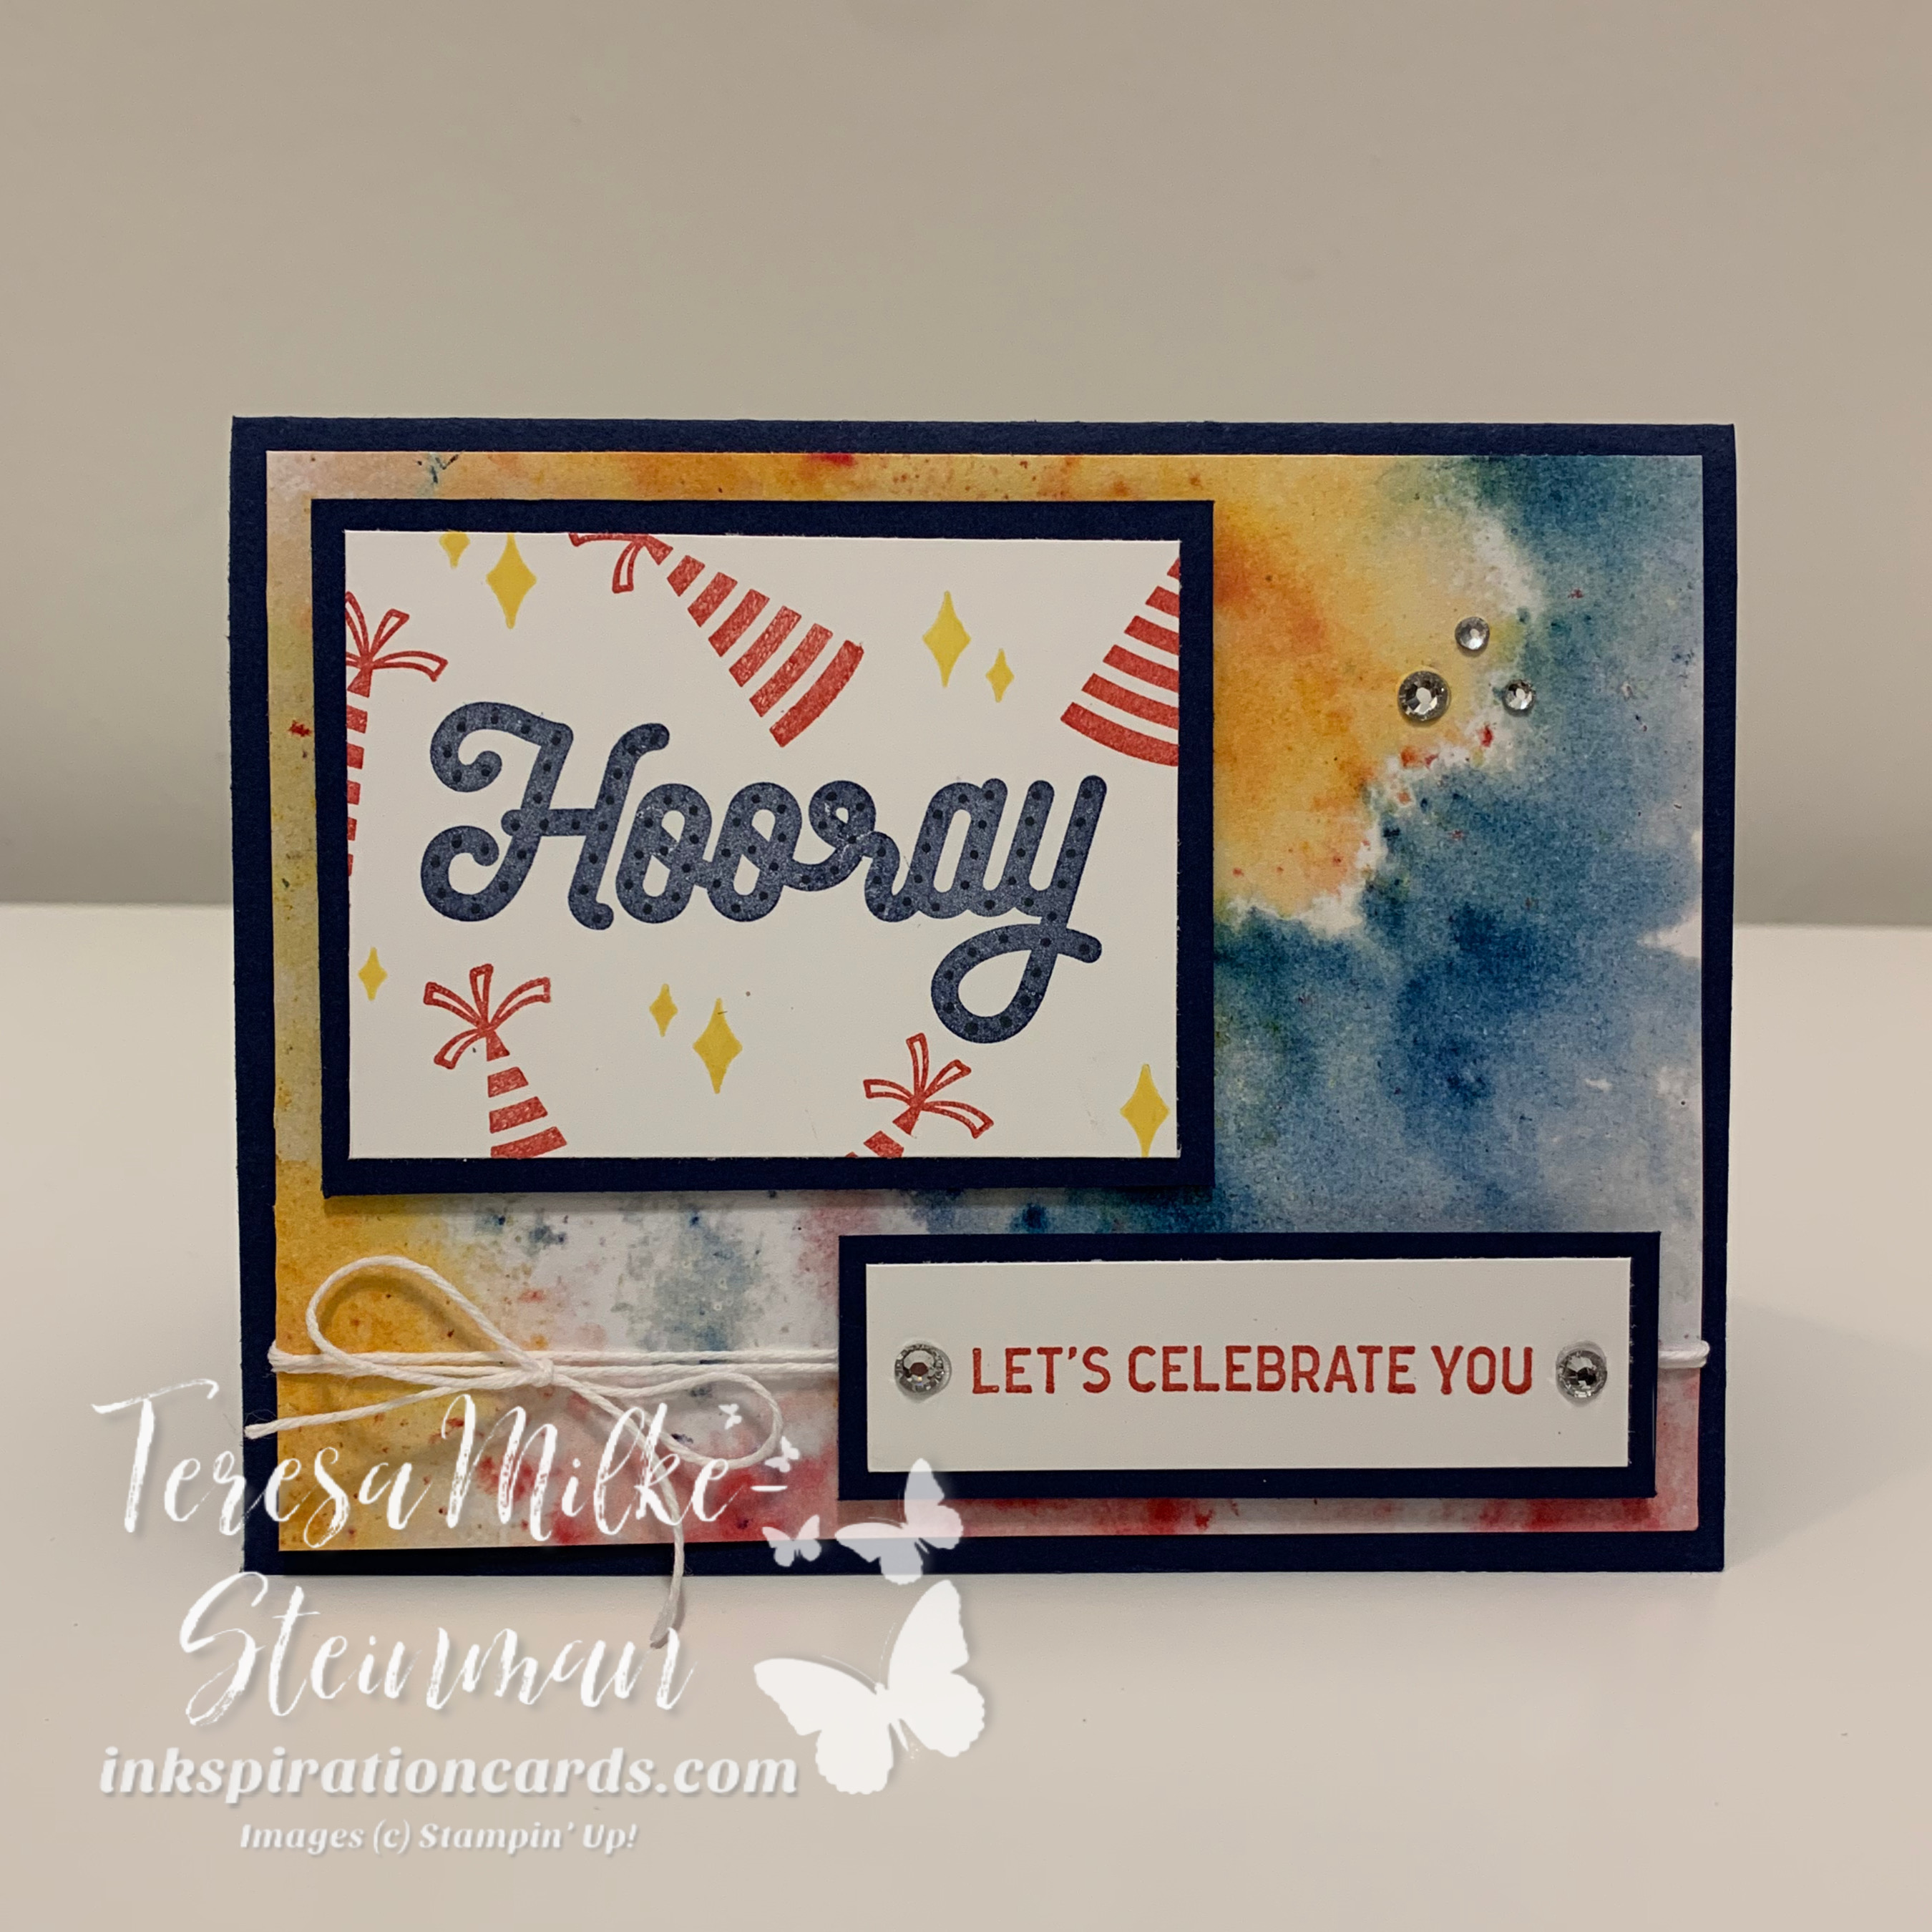
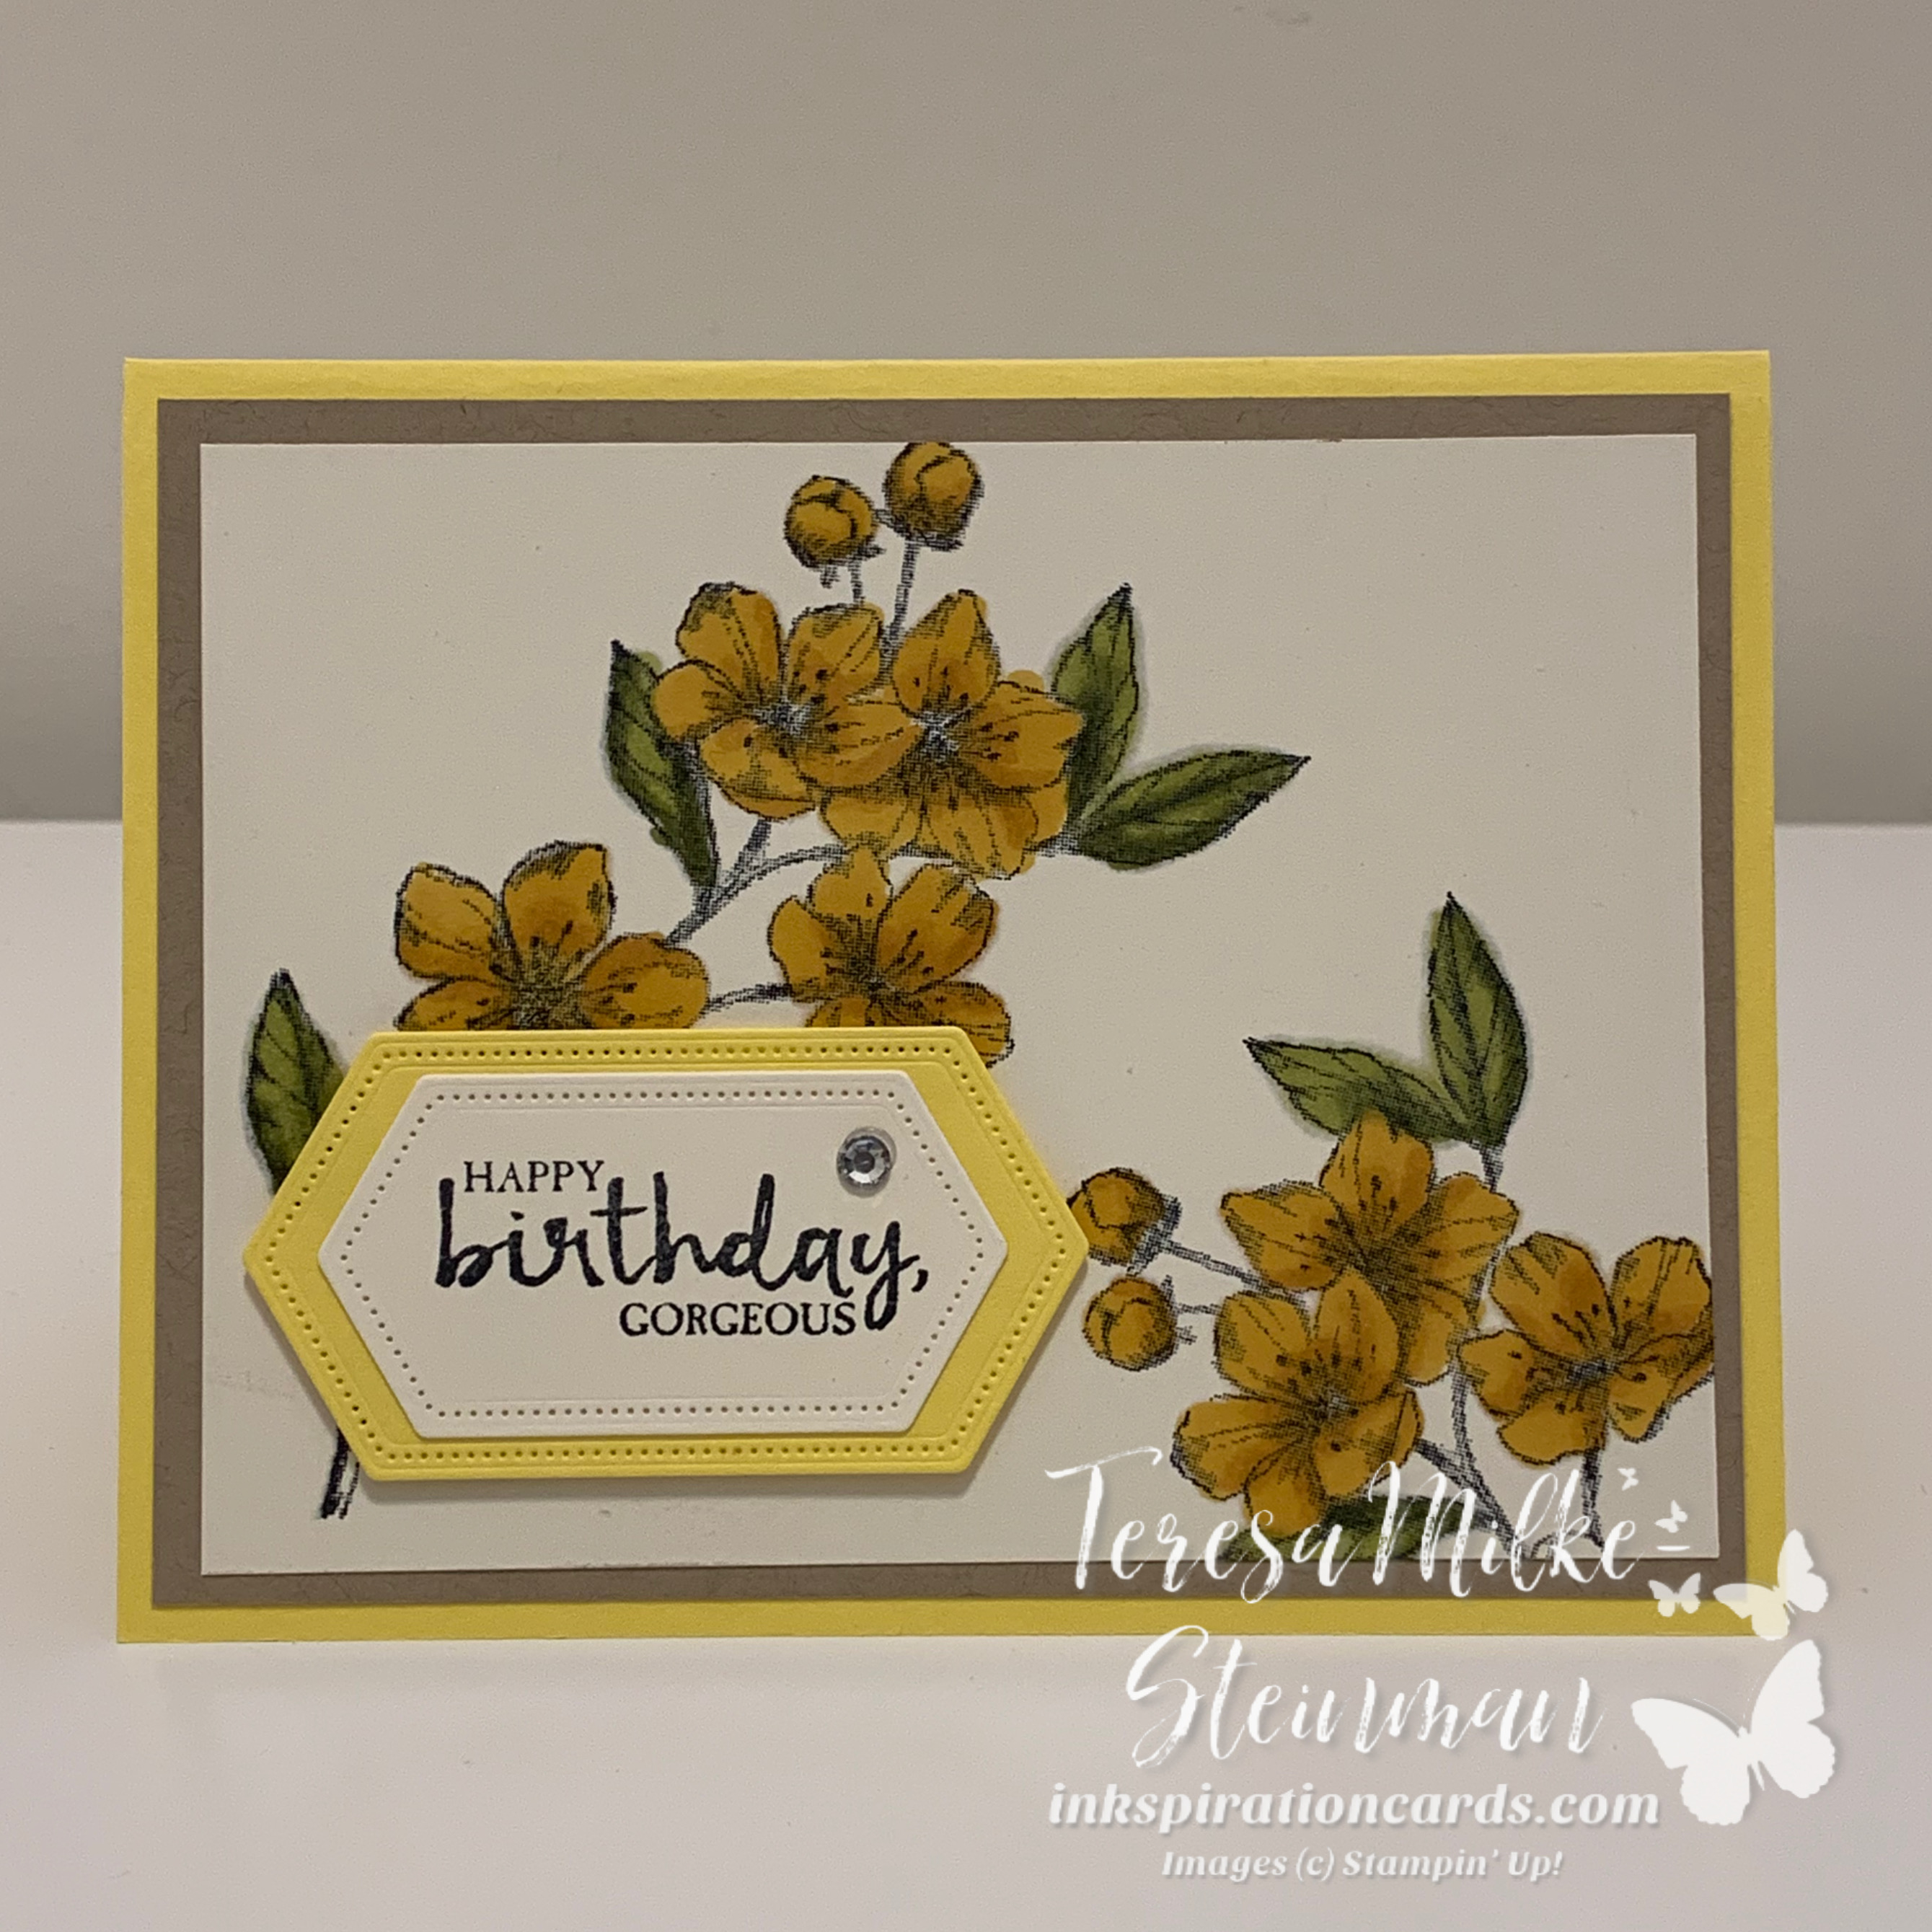
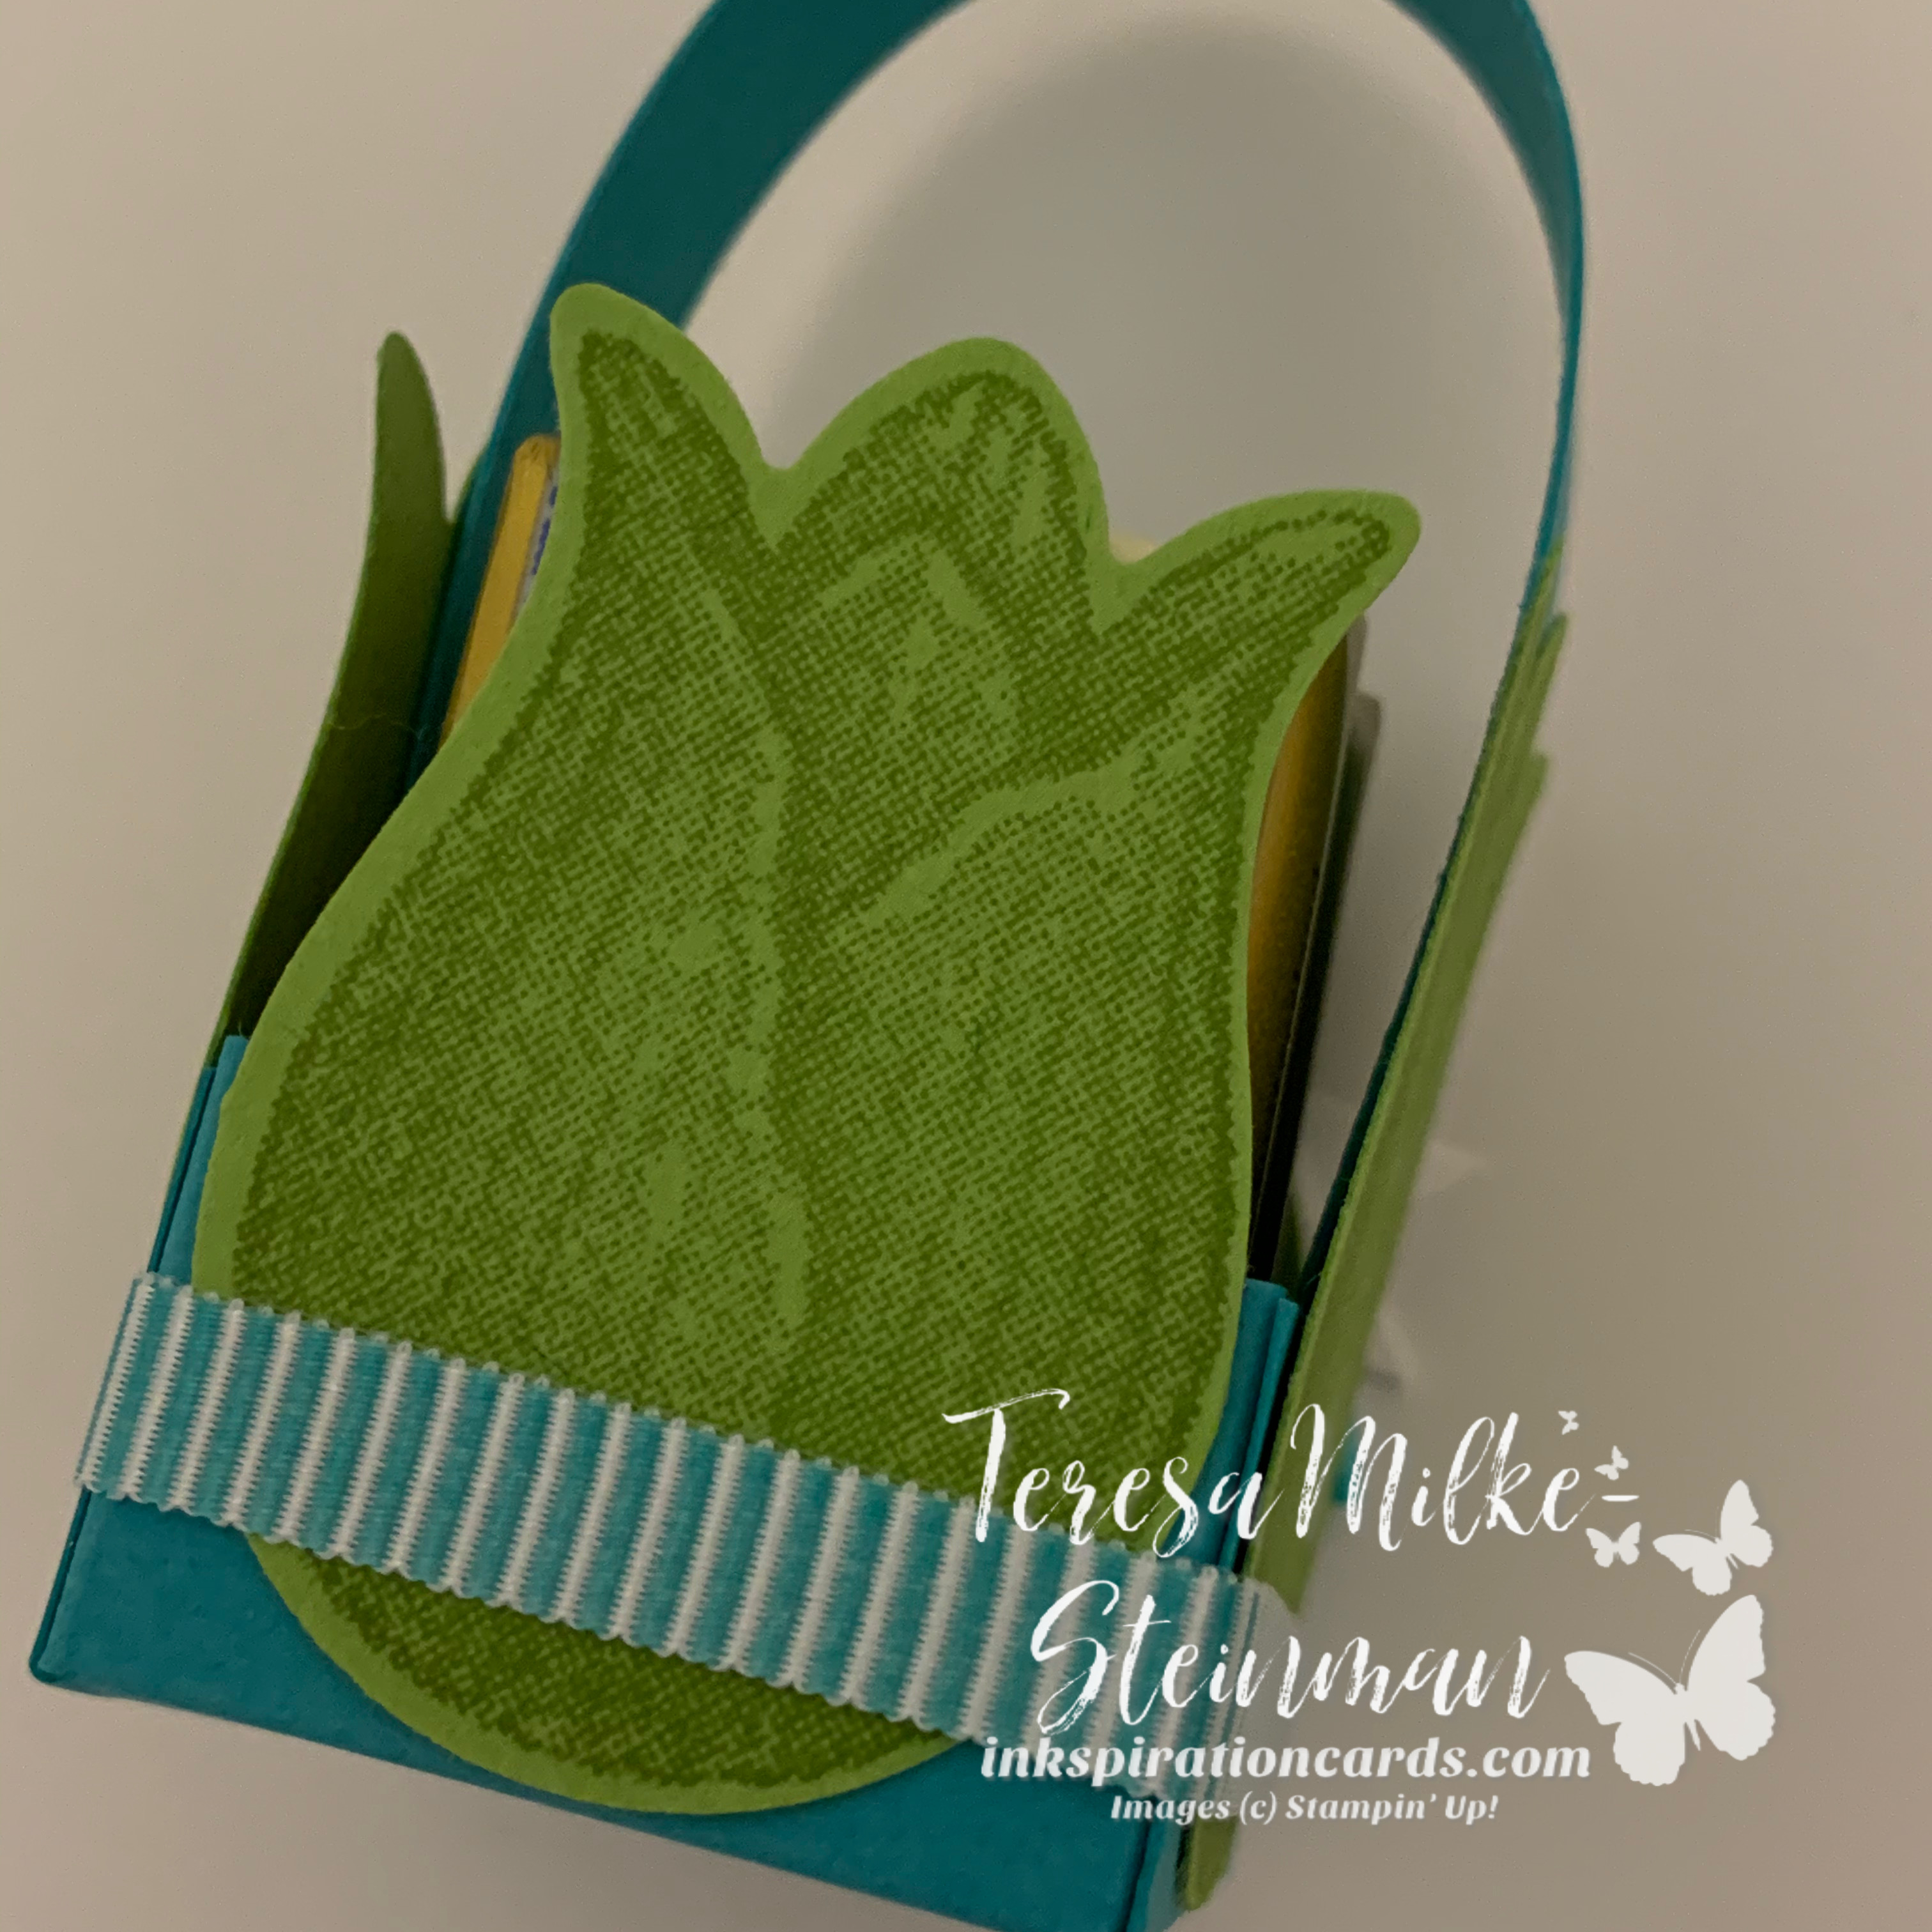
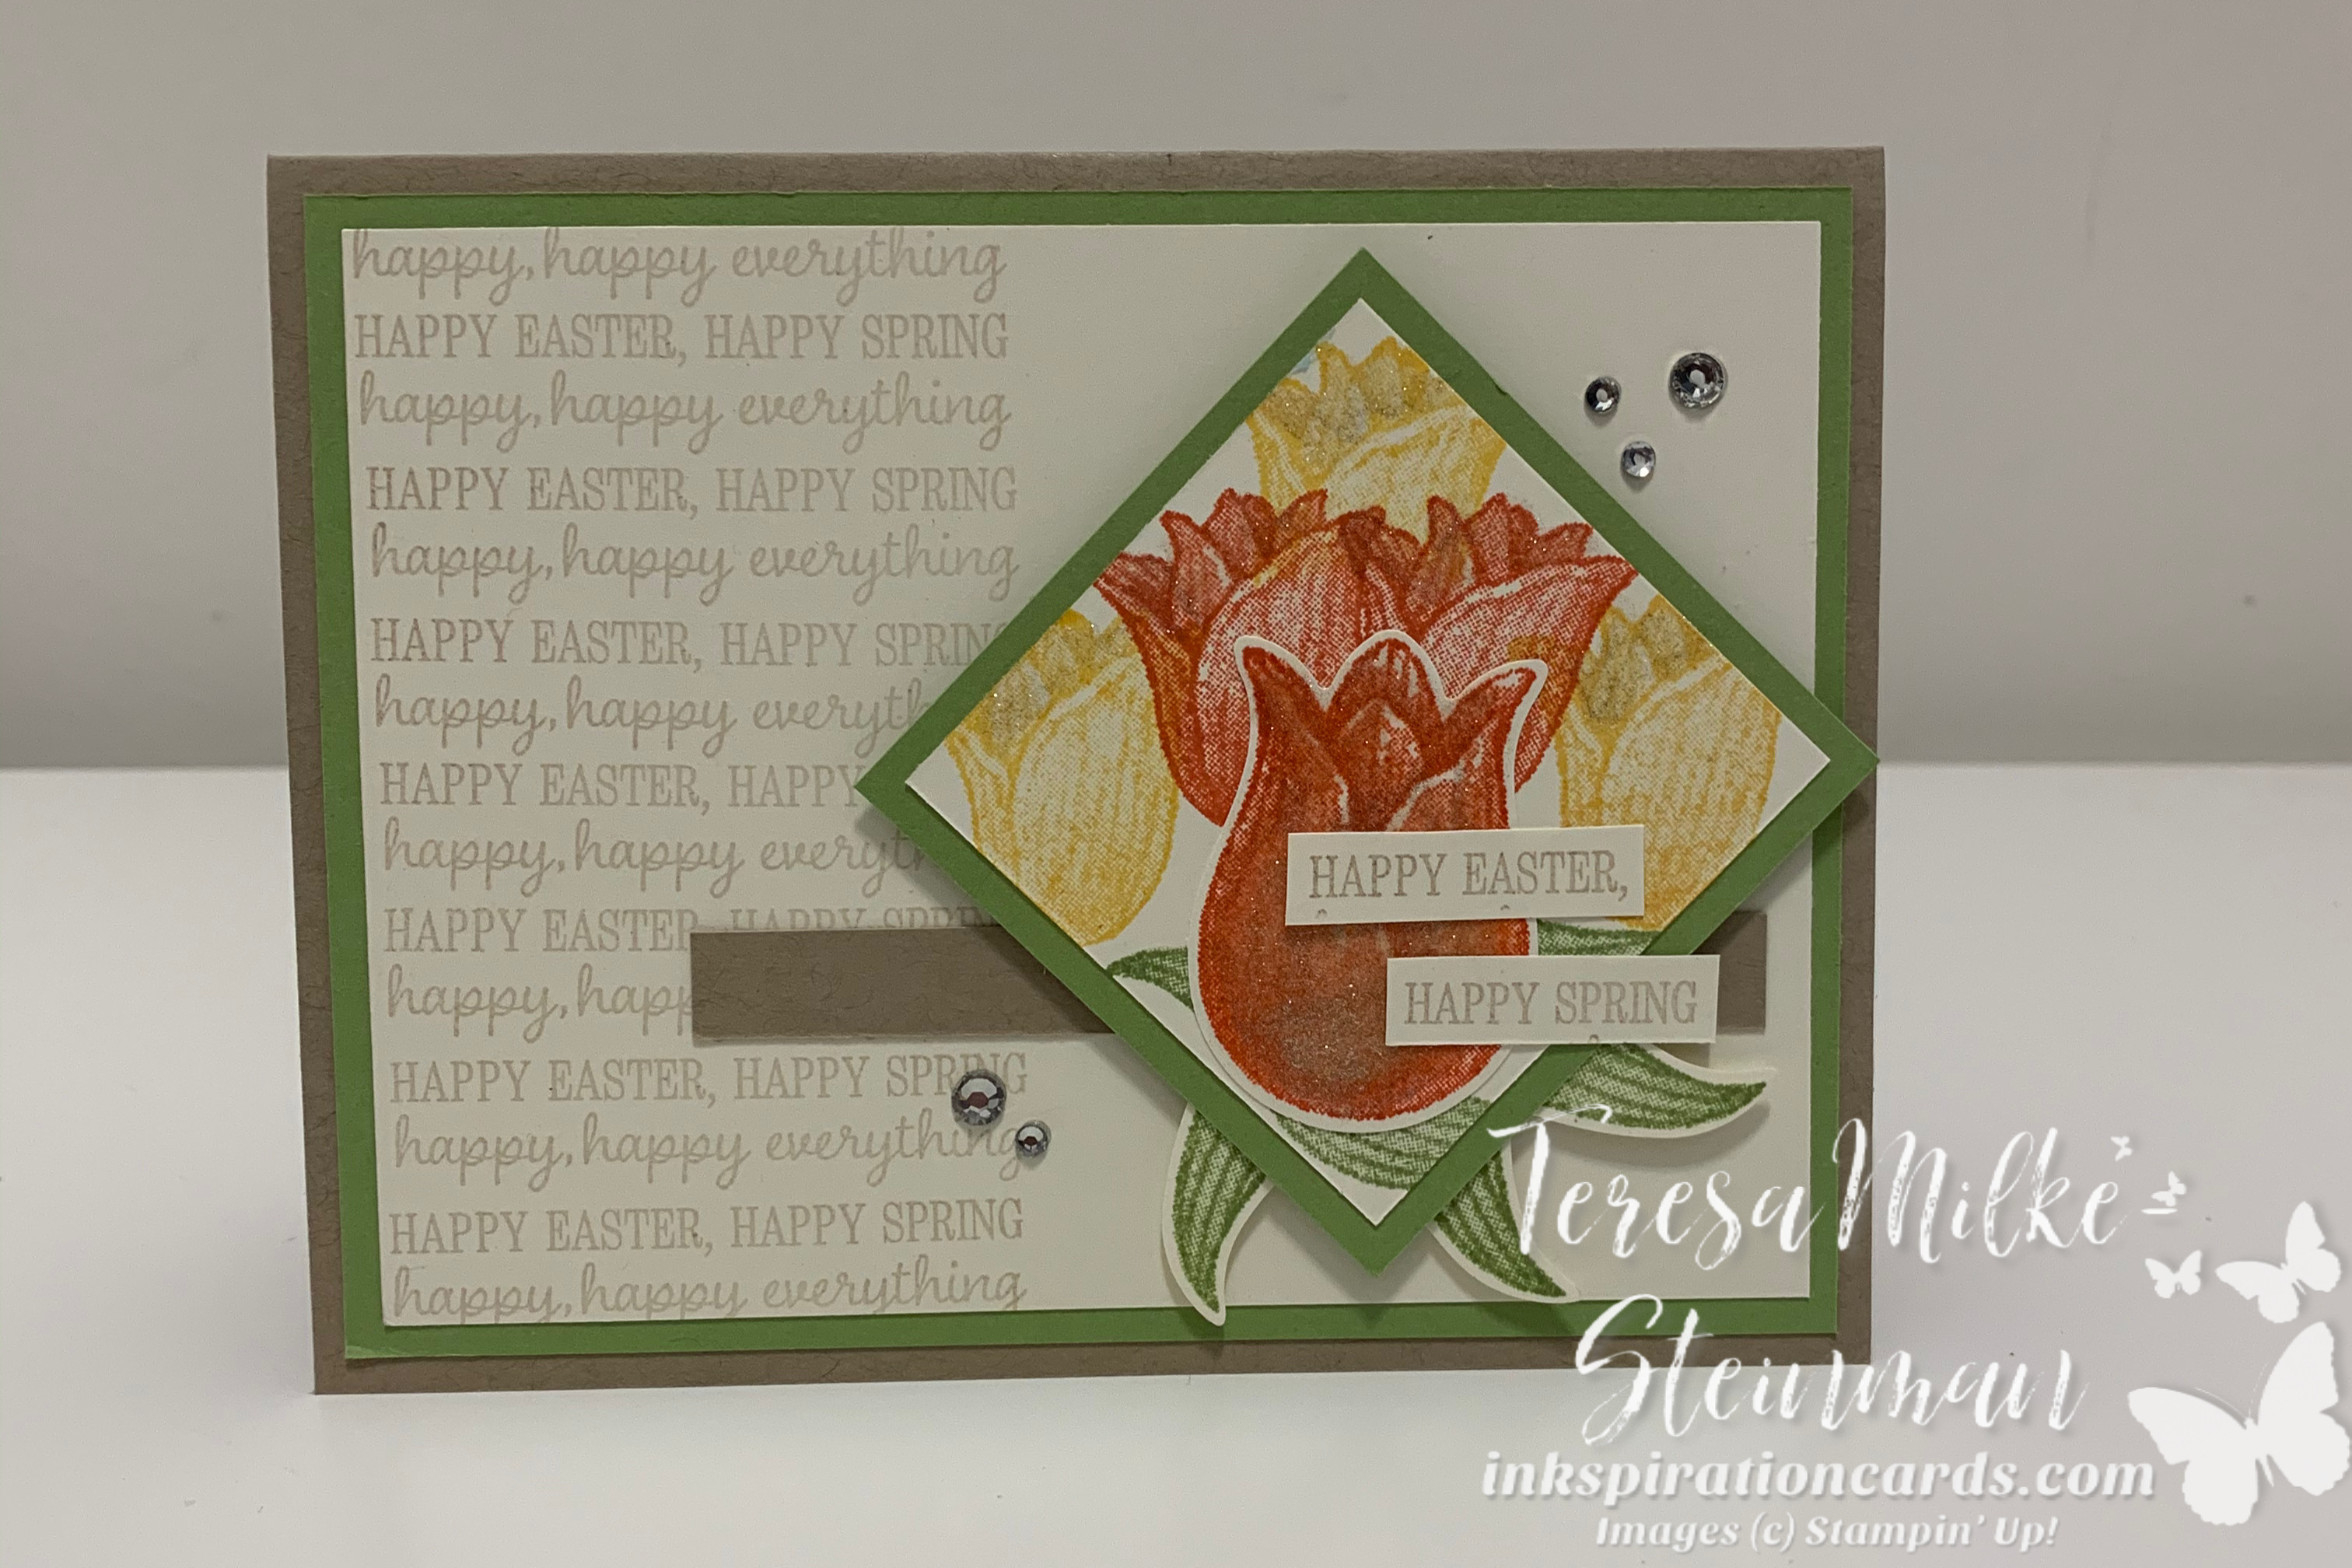
The inkspiration for my card started with the Timeless Tropical cling stamp set. From there I decided to use Daffodil Delight and Crumb Cake as my main colours with Very Vanilla for stamping and Pool Party for an extra splash of colour. For the Crumb Cake card mat I also wanted to add a bit of extra texture and so I used the Coastal Weave 3D embossing folder.
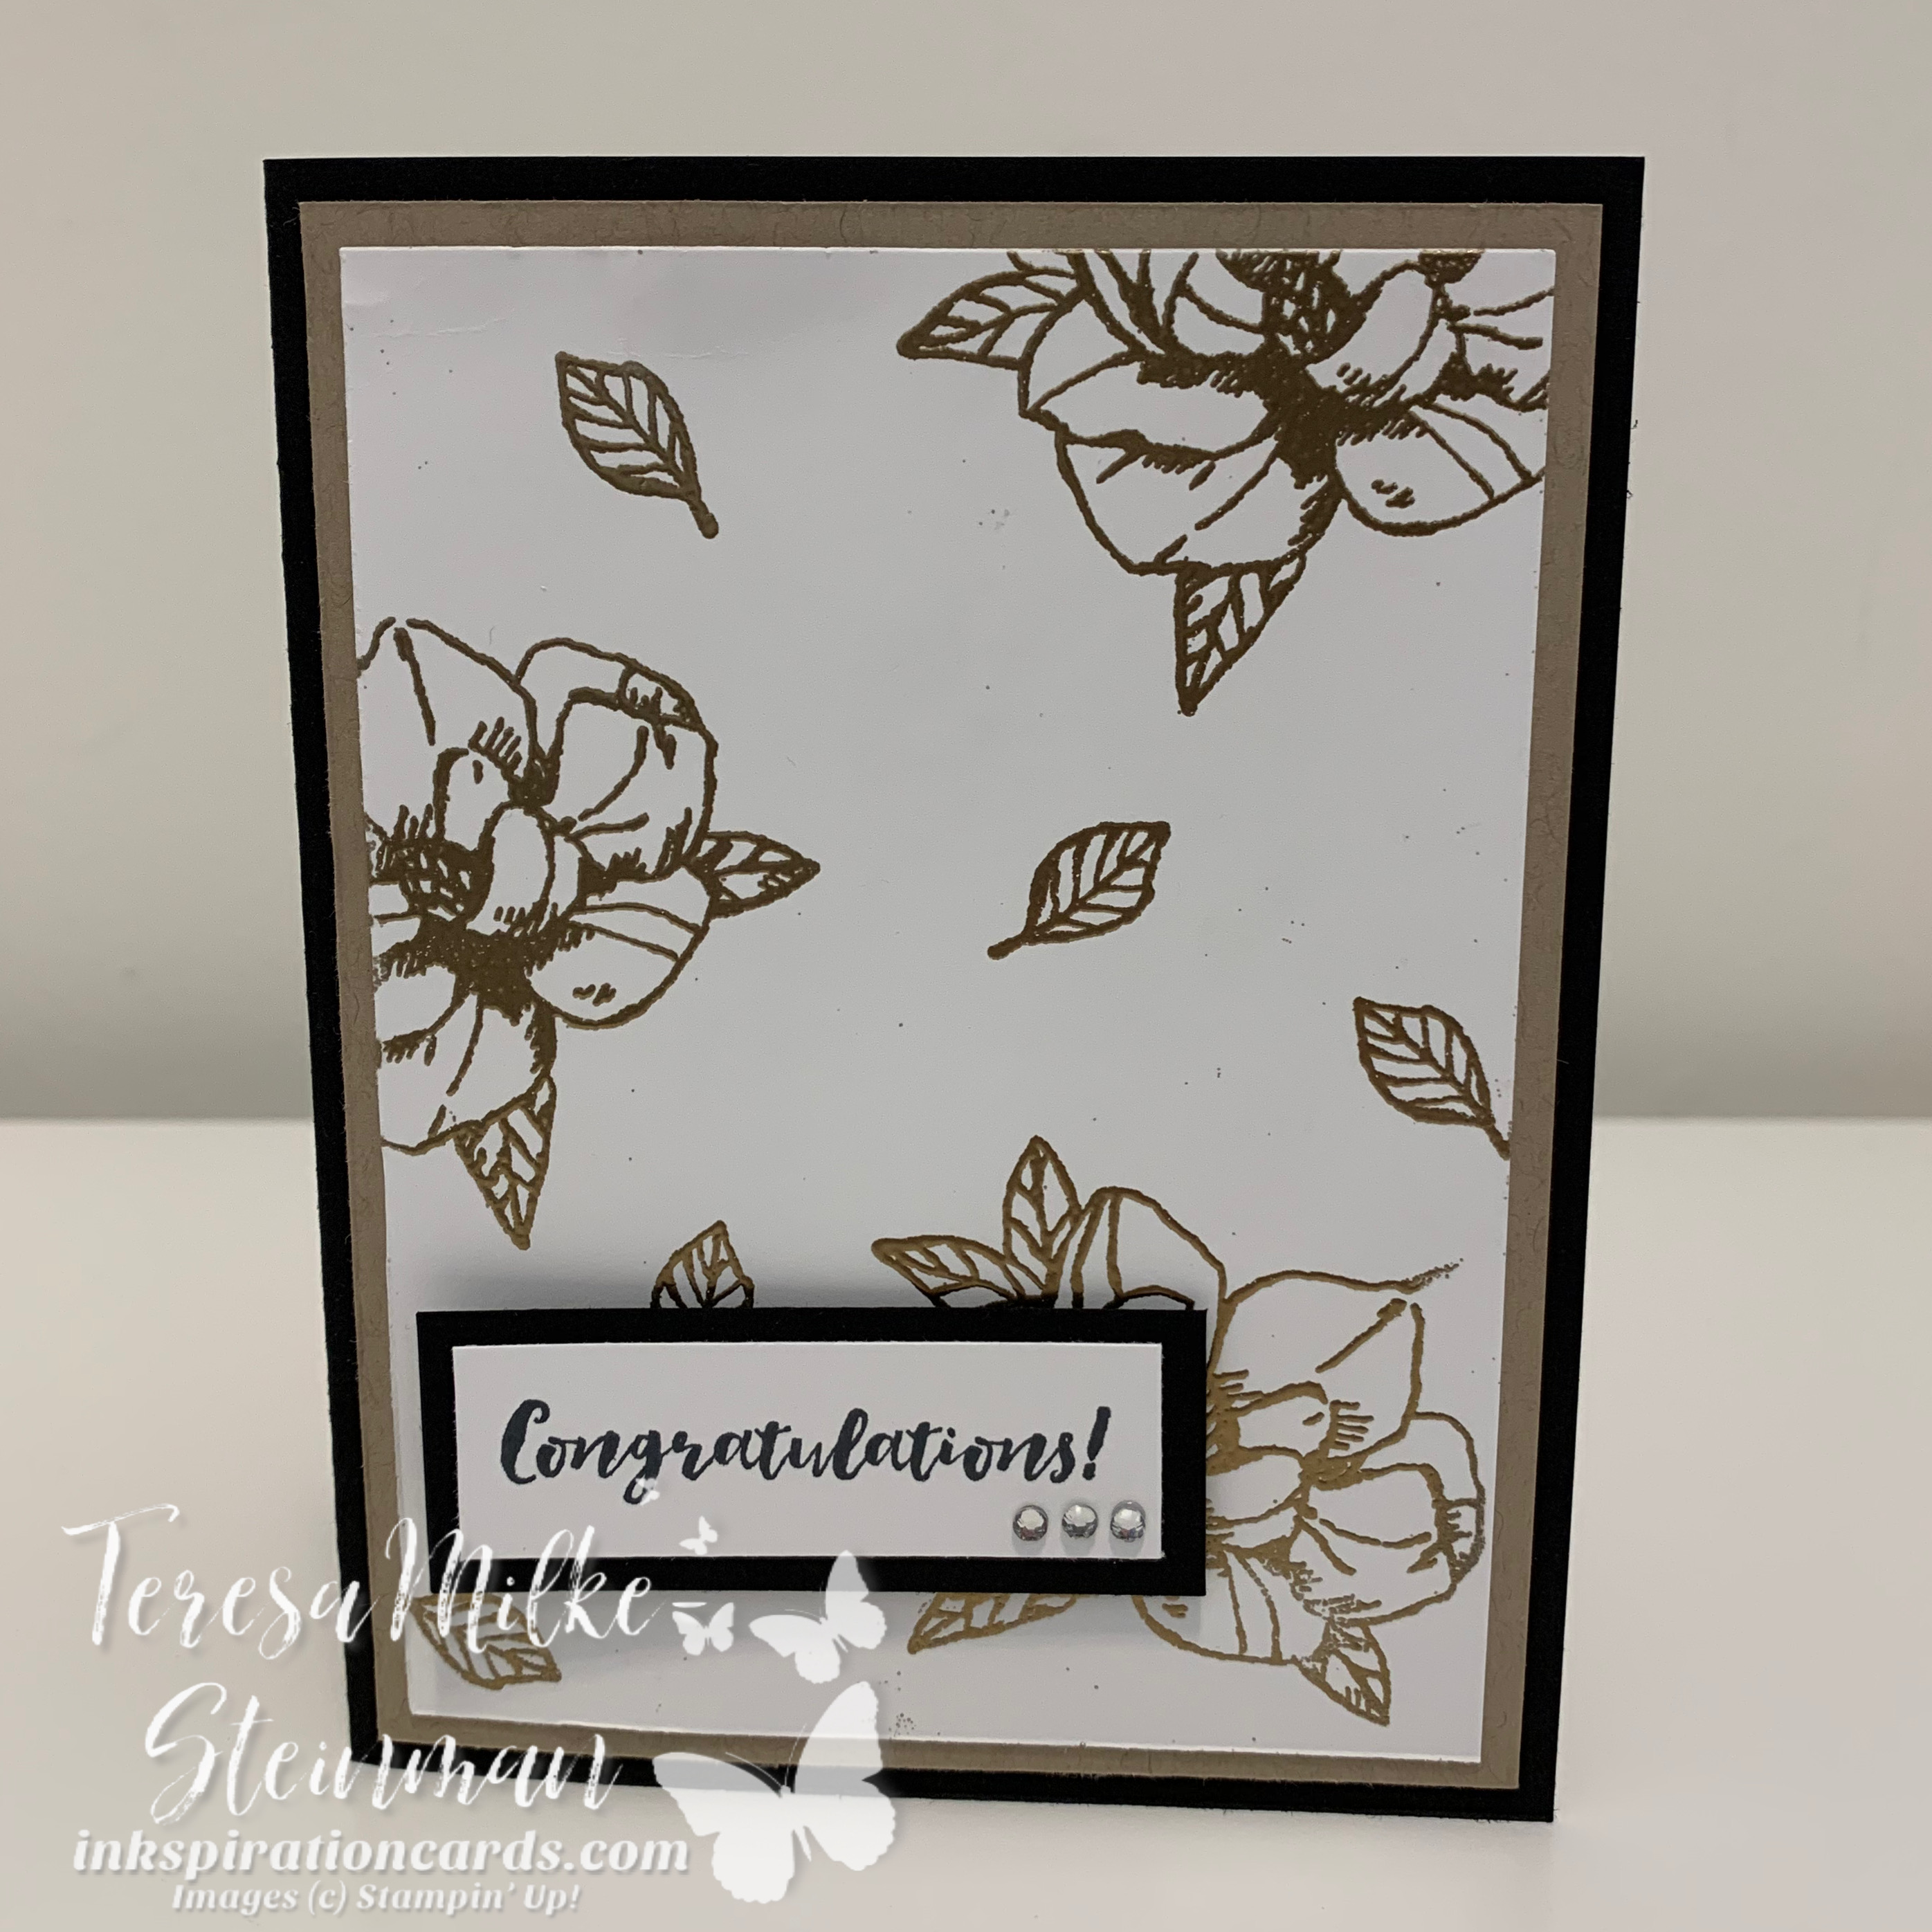
Here’s my card…

Coastal Birthday wm

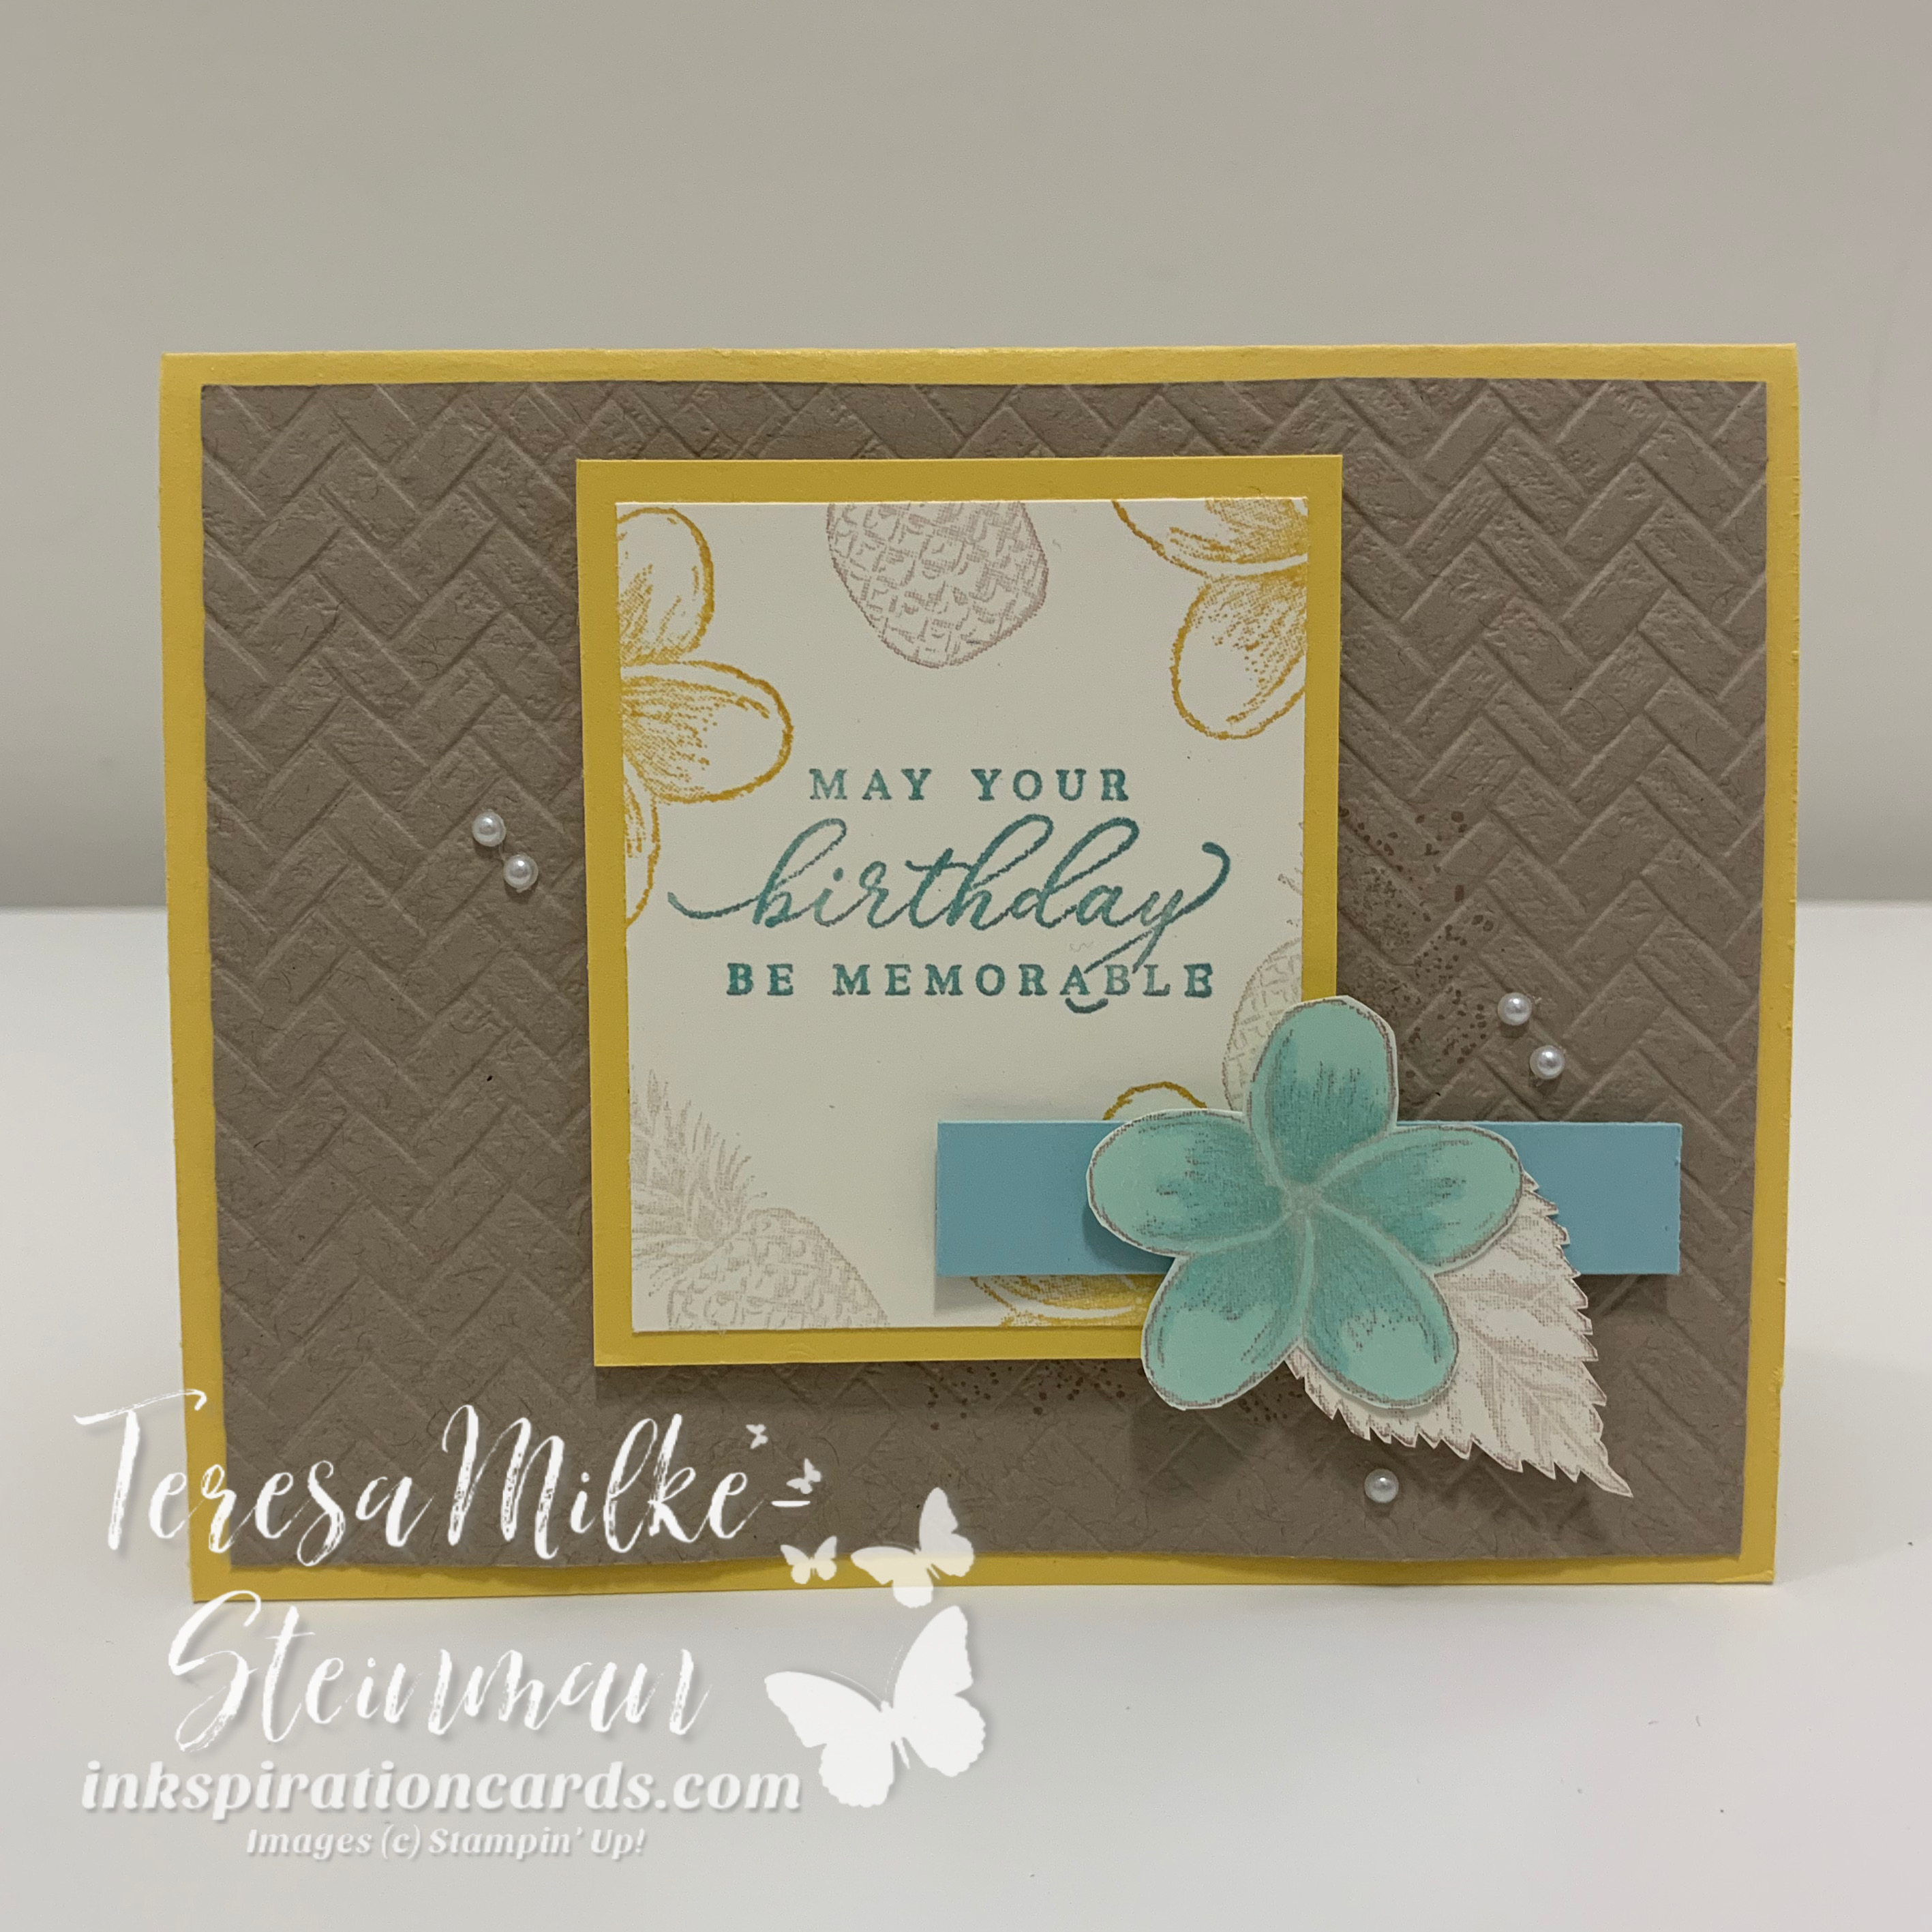
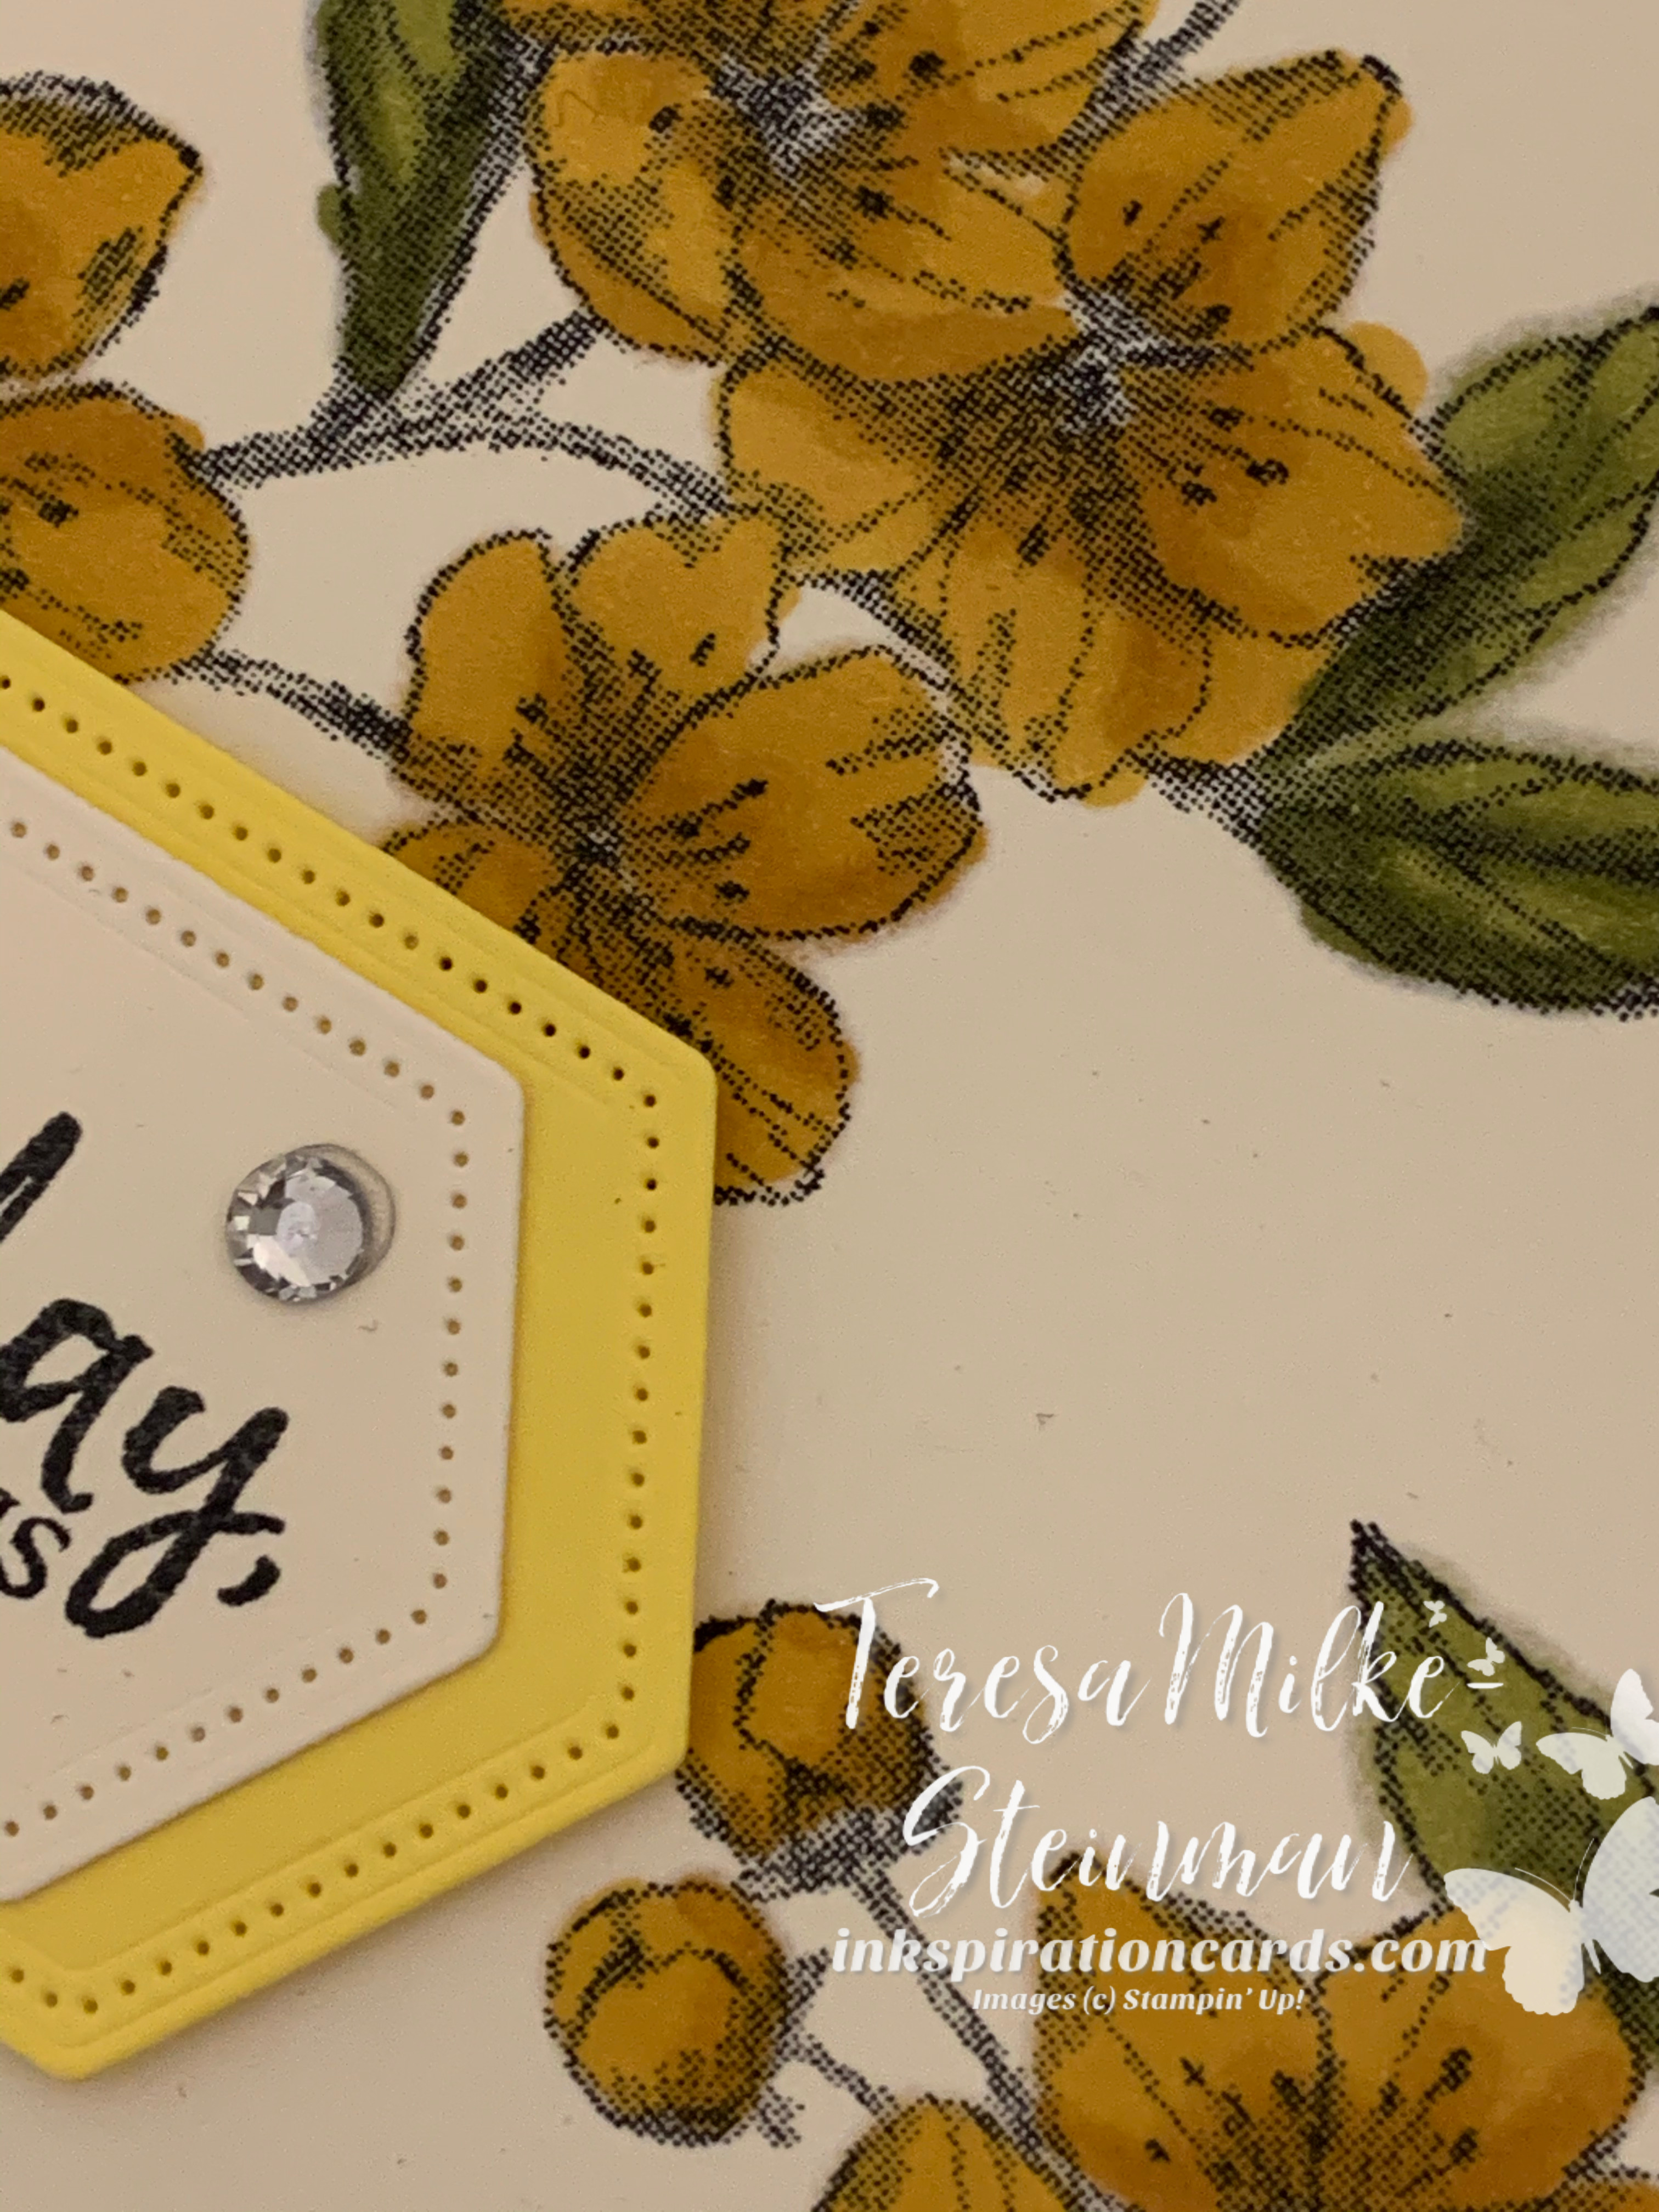
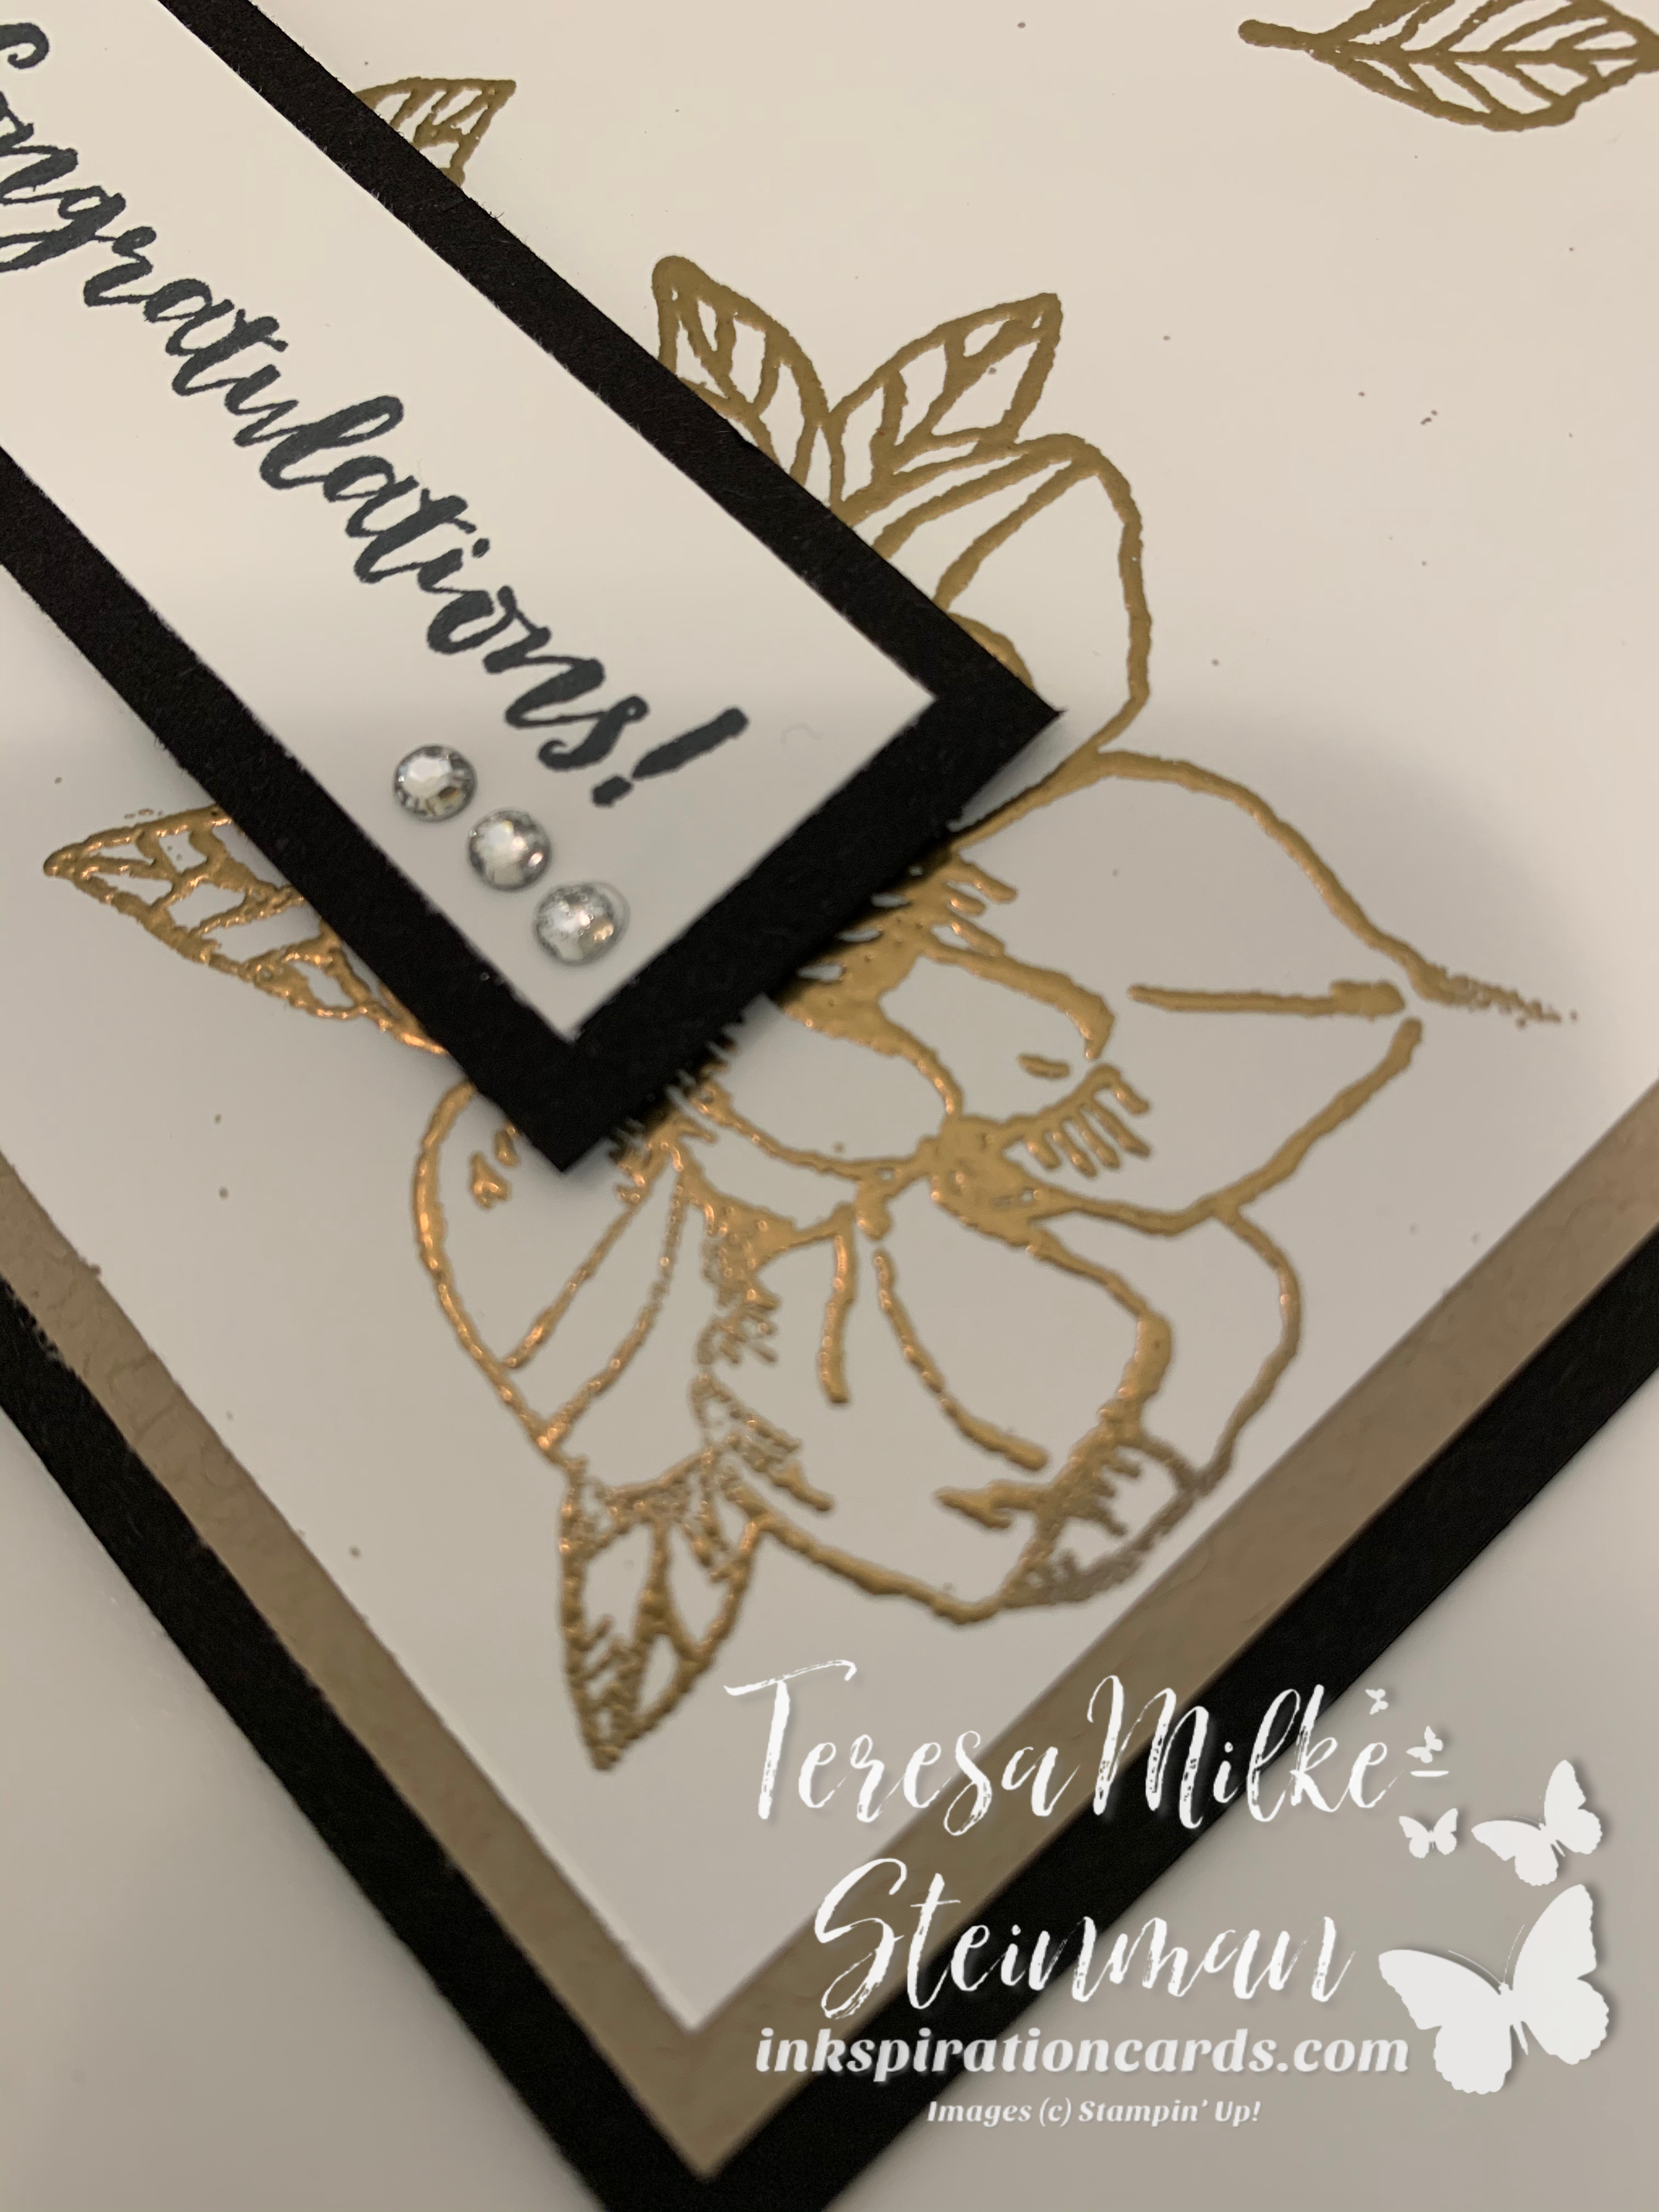
I popped up the phrase using Stampin’ Dimensionals and added a few Pearl Basic Jewels. The flower and leaf I fussy cut, not as bad as you might think, and then I coloured the flower using the Pool Party Stampin’ Blends.

As a little something extra behind my popped up phrase and images, I stamped the paint splatter image from the Beauty Abounds cling stamp set using Crumb Cake ink.

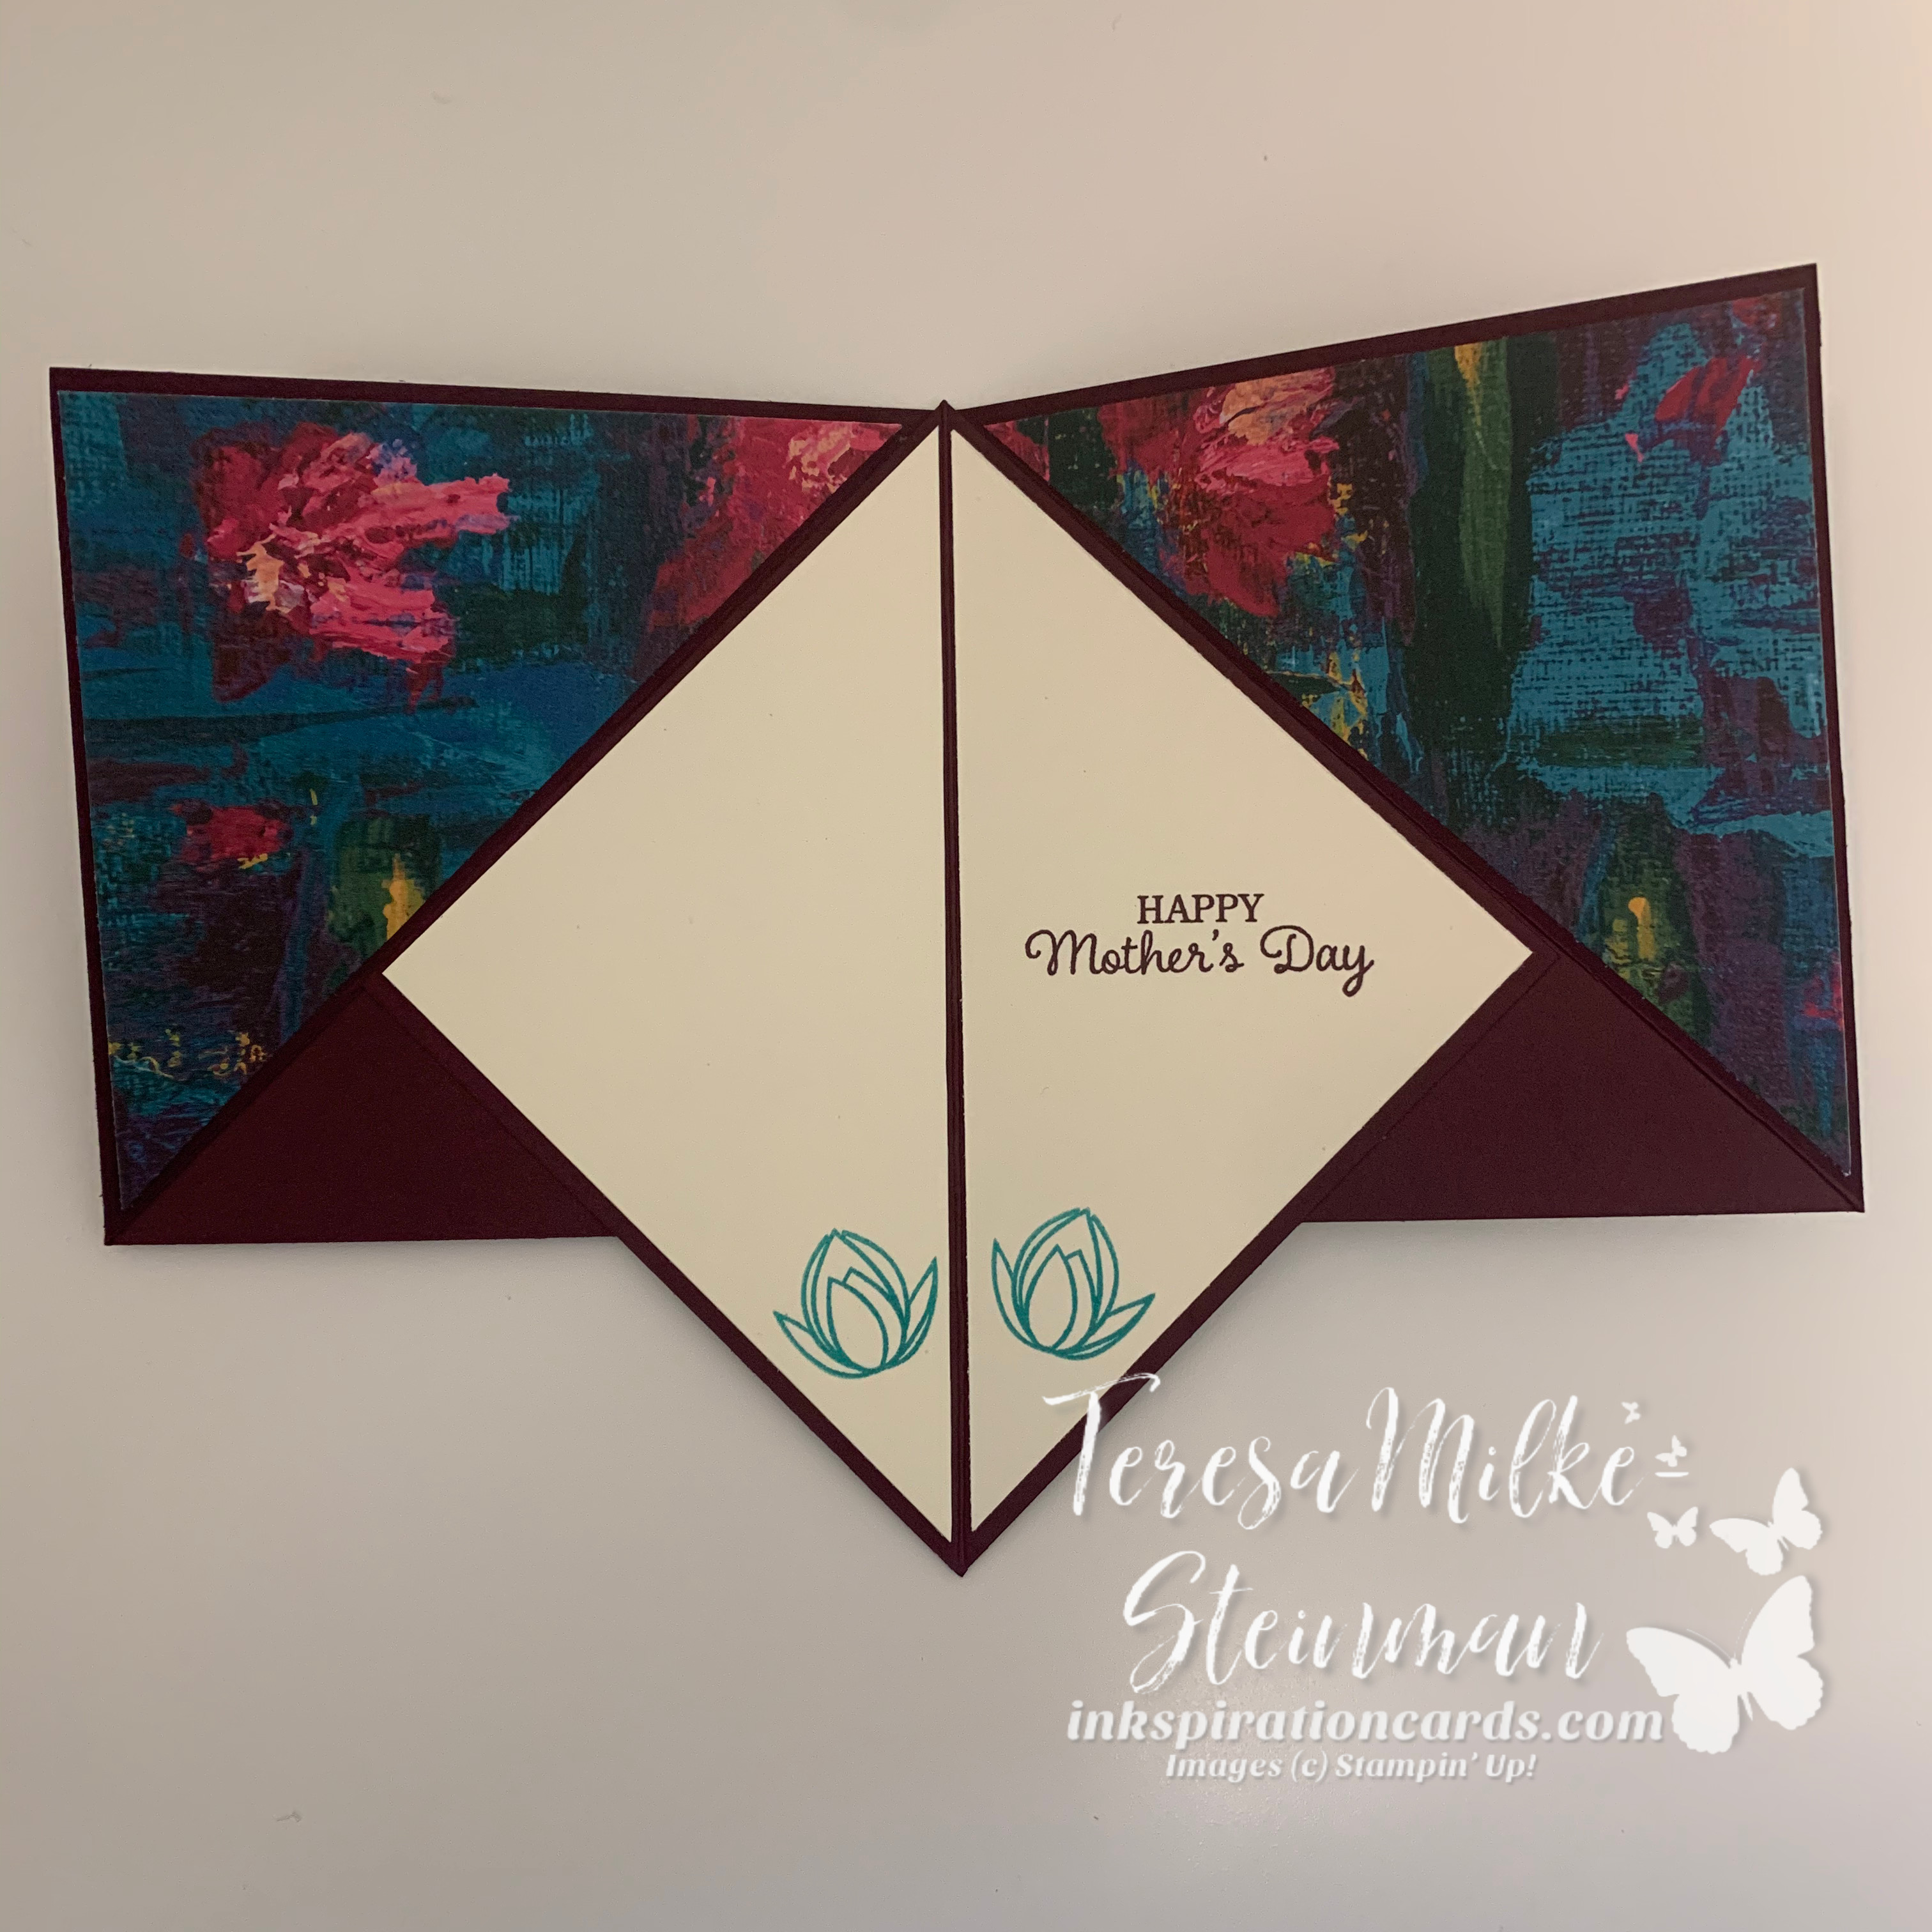
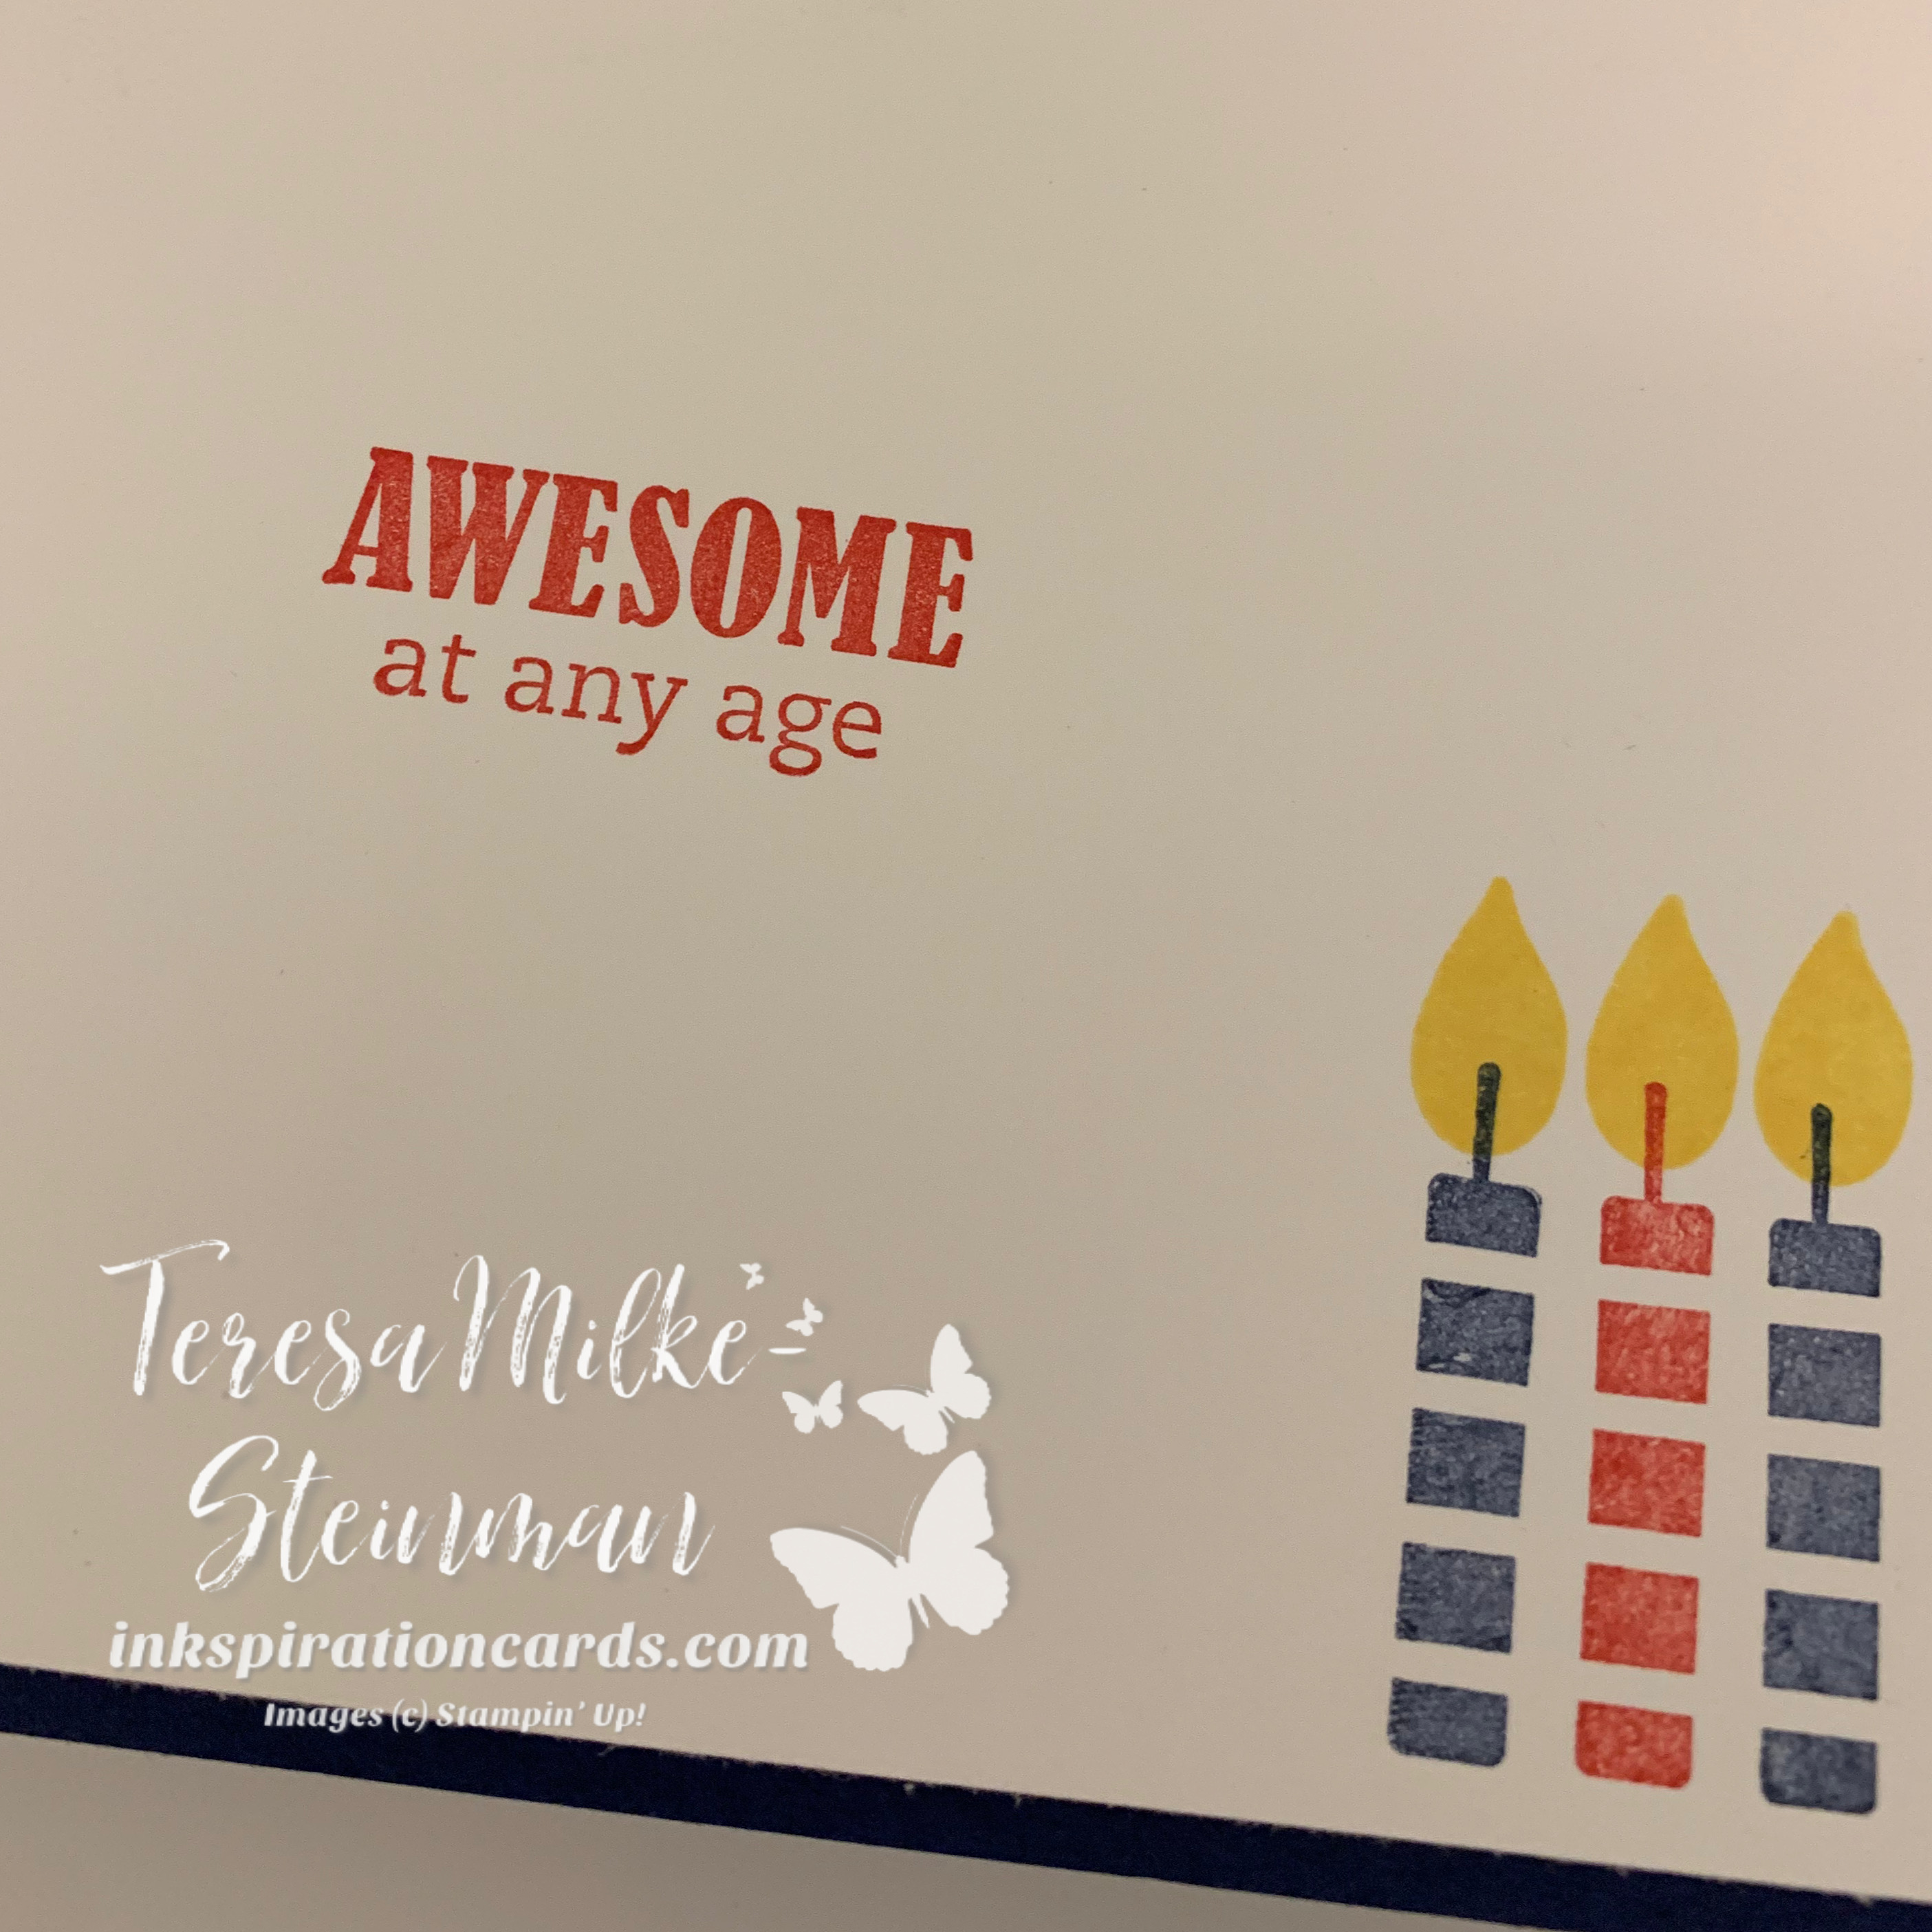
I also stamped and blended a flower on the inside of the card. I’ve been doing a lot of colouring lately with my cards, that’s another go to for me when I’m stressed or upset. I’m actually starting to wonder if all this colouring I’ve been doing has been to help keep things in check.

Either way I had fun creating this card and if you’d like to check out the other entries to this week’s challenge head over to papercraftcrew.com/pcc-375.

And if you like this card make sure to follow my blog so that you’ll get notified whenever I post.

Simple Fold with Designer Series Paper

As soon as I saw the Lily Pad suite of products in the Sale-a-bration catalogue back in November I knew I had to have them all and I was lucky enough to be able to do just that. Ever since I have been creating with the stamp set, dies and/or Designer Series Paper whenever I get the chance.

The inkspiration for this card came from another demonstrator, Tracy Helman Held. I just love the look of the Designer Series Paper being folded back like this and it’s so easy. This is definitely something I will be recreating with some of my other DSP!

DSP Fold wm

You don’t need much for this card. I used Whisper White cardstockBlackberry Bliss ink, the Lily Impressions Designer Series Paper and the Lily Pad dies.

For the phrase I used one from the Timeless Tulips stamp set and the small lily from the Lovely Lily Pad stamp set was stamped on the inside of the card. I also put a strip of the same DSP on the inside.

DSP Fold inside wm

I also added a few Pearl Basic Jewels on the outside of the card because I always like to add a bit of bling. The DSP is really pretty though, so you don’t have to.

I love how quick and easy it is to create this beautiful card and it’s a great way to showcase the DSP, plus you can see both designs at the same time.

If you like this card make sure to follow my blog so that you’ll be notified whenever I post.

Colouring with Free as a Bird

Colouring and crafting has been my go to when I’m feeling stressed and upset for a long time and so with everything going on in the world right now I thought that we could all use some art “therapy” (so to speak). Which is where this card came from… out of my desire to just pop onto my Facebook page and do some crafting with whomever hopped on with me.

I decided to use the Free as a Bird cling stamp set because I wanted to use my Watercolour Pencils and these images work really well for that. Plus I wanted to do something that had a Spring feel to it.

Birds for you wm

That’s actually also why I went with Bermuda Bay and Crushed Curry for the colours of this project. I also decided to throw in a little bit of Old Olive ink for the leaves.

For the birds I used colours from both sets of Watercolour Pencils; Bermuda Bay, Crushed Curry, Old Olive and Early Espresso. I also used the Layering Circles dies to frame the birds, wrapped some Crushed Curry seam binding ribbon around the card front and added a Gold Faceted Gem for my little bit of bling.

Birds for you inside wm

I also added an extra piece of Whisper White cardstock and stamped a simple flower using Bermuda Bay ink on the inside of the card.

This was a really fun card to make and I enjoyed creating it with those who joined me on my page! If you like this card then make sure to follow my blog so that you can get notified whenever I post.

Teepee Fold

I’m back with another project for this month’s Fancy Fold Blog Hop! This month we were asked to create a Teepee Fold card and while this fold is totally new to me apparently this fold has been around for a while, as I learned from Tina Zinck’s video.

I love the Lily Impressions Designer Series Paper and Lily Pad dies that you can get right now as part of Sale-a-bration and so I couldn’t resist using these as my jumping off point for my card.

From there I decided to use Blackberry Bliss cardstock as my base for the teepee. I also used Blackberry Bliss ink for the phrases that came from the Strong & Beautiful and Timeless Tulips stamp sets as well as for the paint splatter behind the lilies which came from the Beauty Abounds stamp set.

I also used Bermuda Bay ink to stamp the small lilies on the inside of the card and Bermuda Bay cardstock for the die cut lilies on the outside of the card. Finally to add a bit of bling I added a few Rhinestone Basic Jewels around the outside of the card.

Teepee inside wm

This card was really fun to make and so I decided to create a simple instruction sheet to share with you. It has the measurements you’ll need and the step by step instructions to make your own Teepee fold card.

I didn’t add a list of supplies as I wanted to leave that up to you. Of course you’ll want your paper trimmer, SNAIL Adhesive, maybe some Stampin’ Dimensionals and whatever stamps, ink, colours of cardstock and Designer Series paper you want.

2020 Teepee Fancy Fold Sheet

If you enjoyed this card make sure to follow my blog so that you’ll be notified whenever I post. You can also check out the next project on this blog hop on Nadine Schwema’s page.

Celebrate with #simplestamping

With everything going on in the world right now I am very thankful that I am fully stocked up on stamps, ink and paper (along with a lot of other embellishments, etc.) and can easily re-stock without leaving my house. Art, colouring and stamping is so enjoyable and relaxing for me which is totally what is needed right now, I can’t imagine my life without it! I’m also thankful for the monthly #simplestamping challenges from Stampin’ Up!, while I love challenging myself and trying new techniques and folds, I really enjoy getting back to basics.

This month’s #simplestamping challenge is to create a birthday card using stamps, ink and paper, especially Designer Series Paper. Immediately I thought of using my See A Silhouette DSP… I had gotten this pack of DSP back in the fall and with all my holiday crafting and cardmaking I hadn’t had the chance to create anything with it yet.

Broadway Birthday Simple wm

I paired the DSP with the Broadway Birthday photopolymer stamp set and pulled the colours for stamping from the DSP; Night of NavyReal Red and Daffodil Delight. For the cardstock I used Night of Navy and Whisper White.

To attach the “Make a Wish” to the front of the card I decided to stick with SNAIL Adhesive (you can pop it up with Stampin’ Dimensionals if you like). I also added an extra piece of Whisper White cardstock on the inside of the card and decided to stamp a little something on the inside as well.

Broadway Birthday Simple inside wm

As I was creating this card for the challenge I got hit with some more inkspiration and decided to step things up a little bit and make another card. I used the same Designer Series Paper and stamp set as the foundation, but added a few simple extras.

Broadway Birthday wm

Even though I wanted to step this card up, I still wanted the DSP to shine through. So I kept the cardstock for stamping fairly small.

In addition to Broadway Birthday and the See a Silhouette DSP, I also used phrases from the Itty Bitty Birthdays cling stamp set, some Whisper White Solid Baker’s Twine, a few Rhinestone Basic Jewels and I popped up both stamped pieces of cardstock with Stampin’ Dimensionals.

Here’s the inside…

Broadway Birthday inside wm

I really love how both of these cards turned out and as I kept creating with this one sheet from the See a Silhouette pack of DSP it started to remind me a bit of the universe and all the different colours and patterns, etc. that are out there. I can’t wait to create some more with this pack of DSP!

If you like these cards make sure to follow my blog so that you’ll get notified whenever I post or sign up for my newsletter and have inkspiration sent right to your inbox!

Blends & Blossoms

I have always loved to colour! Crayons and pencil crayons have been my go tos for decades, with markers only being used on occasion. That was of course before I started using Stampin’ Blends! My favourite is still pencil crayons, especially Stampin’ Up!s Watercolour Pencils, but the more I use the blends the more I love them… the colours are so vivid and you can create so much depth with them!

So with a class coming up featuring these great alcohol-based markers I’ve got a bunch of ideas floating around in my head. This card is not one for my class, but just one of those ideas.

The images come from the Forever Blossoms cling stamp set which I stamped on Very Vanilla cardstock using Tuxedo Black Memento ink. Once the ink dried I pulled out my Daffodil Delight and Old Olive Stampin’ Blends to colour the blossoms and leaves. The darker blends help give the “shadows” on the images.

Birthday Blossoms close up wm

The phrase came from the Beautiful You cling stamp set and I used the Stitched Nested Labels dies to cut that out as well as the layer beneath it. I then popped that up using Stampin’ Dimensionals and added one of the larger Rhinestone Basic Jewels to add a bit of bling.

Birthday Blossoms wm

I love how simple and beautiful this card is and I can’t wait to create more for my upcoming class.

If you liked this card make sure to follow my blog so that you’ll be notified whenever I post or if you’d like inkspiration sent right to your inbox then sign up for my weekly newsletter.

Cute Baskets for Spring

I can’t believe that March Break and the first day of Spring is next week! My munchkins of course are counting down the days til they’re off from school and so am I a little bit. I’m looking forward to taking some time off, but in the meantime I’m busy getting ready for the Spring is in the Air craft show that’s taking place at the Milton Sports Centre this coming Saturday.

One of the things that I’ve been busy making for the craft show are these cute little baskets filled with chocolates to celebrate Spring and Easter, which is a month away.

Spring Baskets wm

I originally saw this basket in a demonstrator group on Facebook and more recently made a similar version at my team meeting. These baskets are so cute and so easy to make and so I had to share them with you!

The measurements I used for my baskets are as follows:

  • 2 3/4″ x 2 3/4″ for the base of the basket
    • score all sides at 3/4″
    • cut two of the score lines on two sides that are opposite each other
  • 1/2″ x 5 1/2″ for the strap

Spring Basket wm

For all of the baskets I used the Timeless Tulip bundle. I stamped the large tulip first, then used the punch and adhered the tulips to the basket using the Tear & Tape Adhesive Then I stamped either “Happy Spring” or “Happy Easter” on a piece of Whisper White cardstock which I cut out with my Paper Snips and adhered with some Mini Dimensionals.

Spring Basket close up wm

The green and blue baskets were made with Granny Apple Green and Bermuda Bay cardstock and inks along with the Bermuda Bay Mini Stripped Ribbon for the bow. For the other baskets I used Calypso Coral cardstock and ink with Lemon Lime Twist cardstock, ink and ribbon.

I love how these little baskets turned out and I’m hoping they’re a hit at this weekend’s craft show. Wish me luck!

If you like this project make sure to follow my blog so you’ll get notified whenever I post. I also share projects like this as well as cards in my weekly newsletter which you can sign up for here.

Embossed Blooms

It looks like I’ve got embossing on the brain or something this week as there have been a few projects that have involved heat embossing! This project actually was sparked by one of the alternative cards I made from the February Paper Pumpkin kit – Lovely Day.

This one though features the blooms from the Magnolia Blooms stamp set from the Beginner’s Brochure and while I was initially thinking of just embossing one large bloom, I ended up embossing them all.

Embossed Blooms wm

I wanted to keep the colours for this card neutral to really help the embossed blooms stand out. So for the card base I used Basic Black cardstock, Crumb Cake for the card mat and then Whisper White for all the stamping.

So for the blooms I started by wiping the whole large piece of Whisper White cardstock with the Embossing Buddy (I DO NOT emboss without this anymore… it really helps keep your embossing contained to where you want it). Then of course I stamped the blooms and leaves using Versamark ink, sprinkled on the Gold Stampin’ Emboss Powder and set it using my Heat Tool.

Embossed Blooms close up wm

The “Congratulations” for this card came from the First Frost stamp set. I liked this font much better and felt like it went more with the blooms than the font from the Magnolia Blooms stamp set. This was simply stamped on a small piece of Whisper White cardstock using Tuxedo Black Memento ink, framed by a slighter larger piece of Basic Black cardstock and then popped up with Stampin’ Dimensionals.

I debated about adding a piece of metallic edged ribbon, but I ended up just adding a few Rhinestone Basic Jewels right under the word for a little extra bling.

I love how simple and pretty this card is!

If you like this card make sure to follow my blog so that you’ll get notified whenever I post or if you’d like project ideas and tips sent right to your inbox then sign up for my weekly newsletter!

Paper Craft Crew Challenge #372

I think I’m finally done with winter and it probably doesn’t help that I have a Spring craft show coming up in a couple of weeks. Needless to say I’m creating a lot with the Timeless Tulips bundle right now and so I wasn’t surprised when this design popped in my head for this week’s Paper Craft Crew Challenge (PCC372).

Here’s this week’s sketch…

PCC 372

I used Crumb Cake cardstock for my card base as well as for the little strip of cardstock behind the tulips. Pear Pizzazz was for the card mat as well as the mat behind the tulips.

For the words I used Crumb Cake ink and for the tulips I used Daffodil Delight and Calypso Coral.

Easter Spring wm

I also punched out the large tulip in front, to give an additional layer, and a few Pear Pizzazz leaves using the coordinating punch from the bundle.

Easter Spring close up wm

To finish it off I added Wink of Stella to the tulips, popped up the “frame” using Stampin’ Dimensionals and then added a few Rhinestone Basic Jewels to add even more bling to the card.

Here’s the link to check out all the cards for this week’s Paper Craft Crew Challenge.

And if you liked this card make sure to follow my blog so that you’ll be notified whenever I post!