#simplestamping with the 2020-2022 In Colours

It’s been a while since I participated in one of Stampin’ Up!s #simplestamping challenges. Things have been pretty hectic around here with having to work from home as well as home school my two munchkins. So when I saw this month’s challenge I thought it was about time to give it another go.

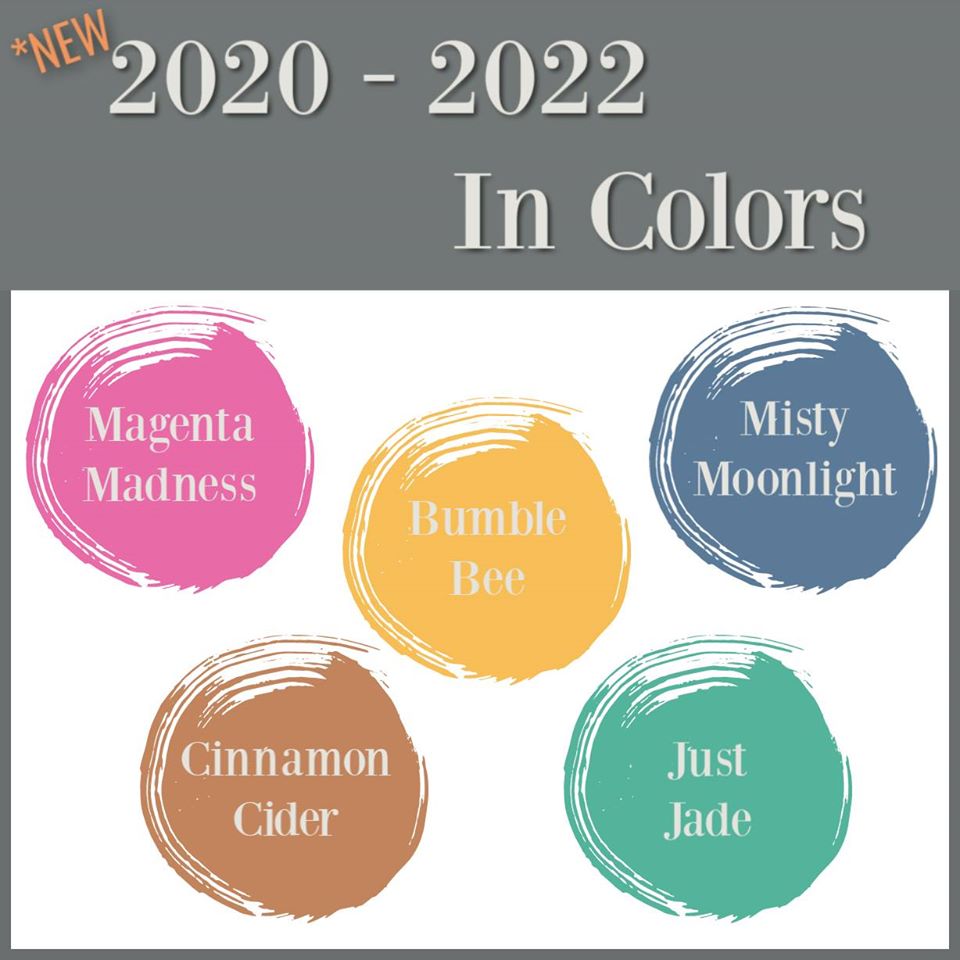
This month’s #simplestamping challenge was to create any kind of card using only stamps, ink and paper featuring the new 2020-2022 In Colours. So when I was looking at the new ink colours I thought these colours would work really well with the Timeless Tropical cling stamp set. I played around with what colours to use with which images for a bit and in the end used 4 out of the 5 colours; the only In Colour I didn’t end up using was Magenta Madness.

aTimeless Tropical close up wm

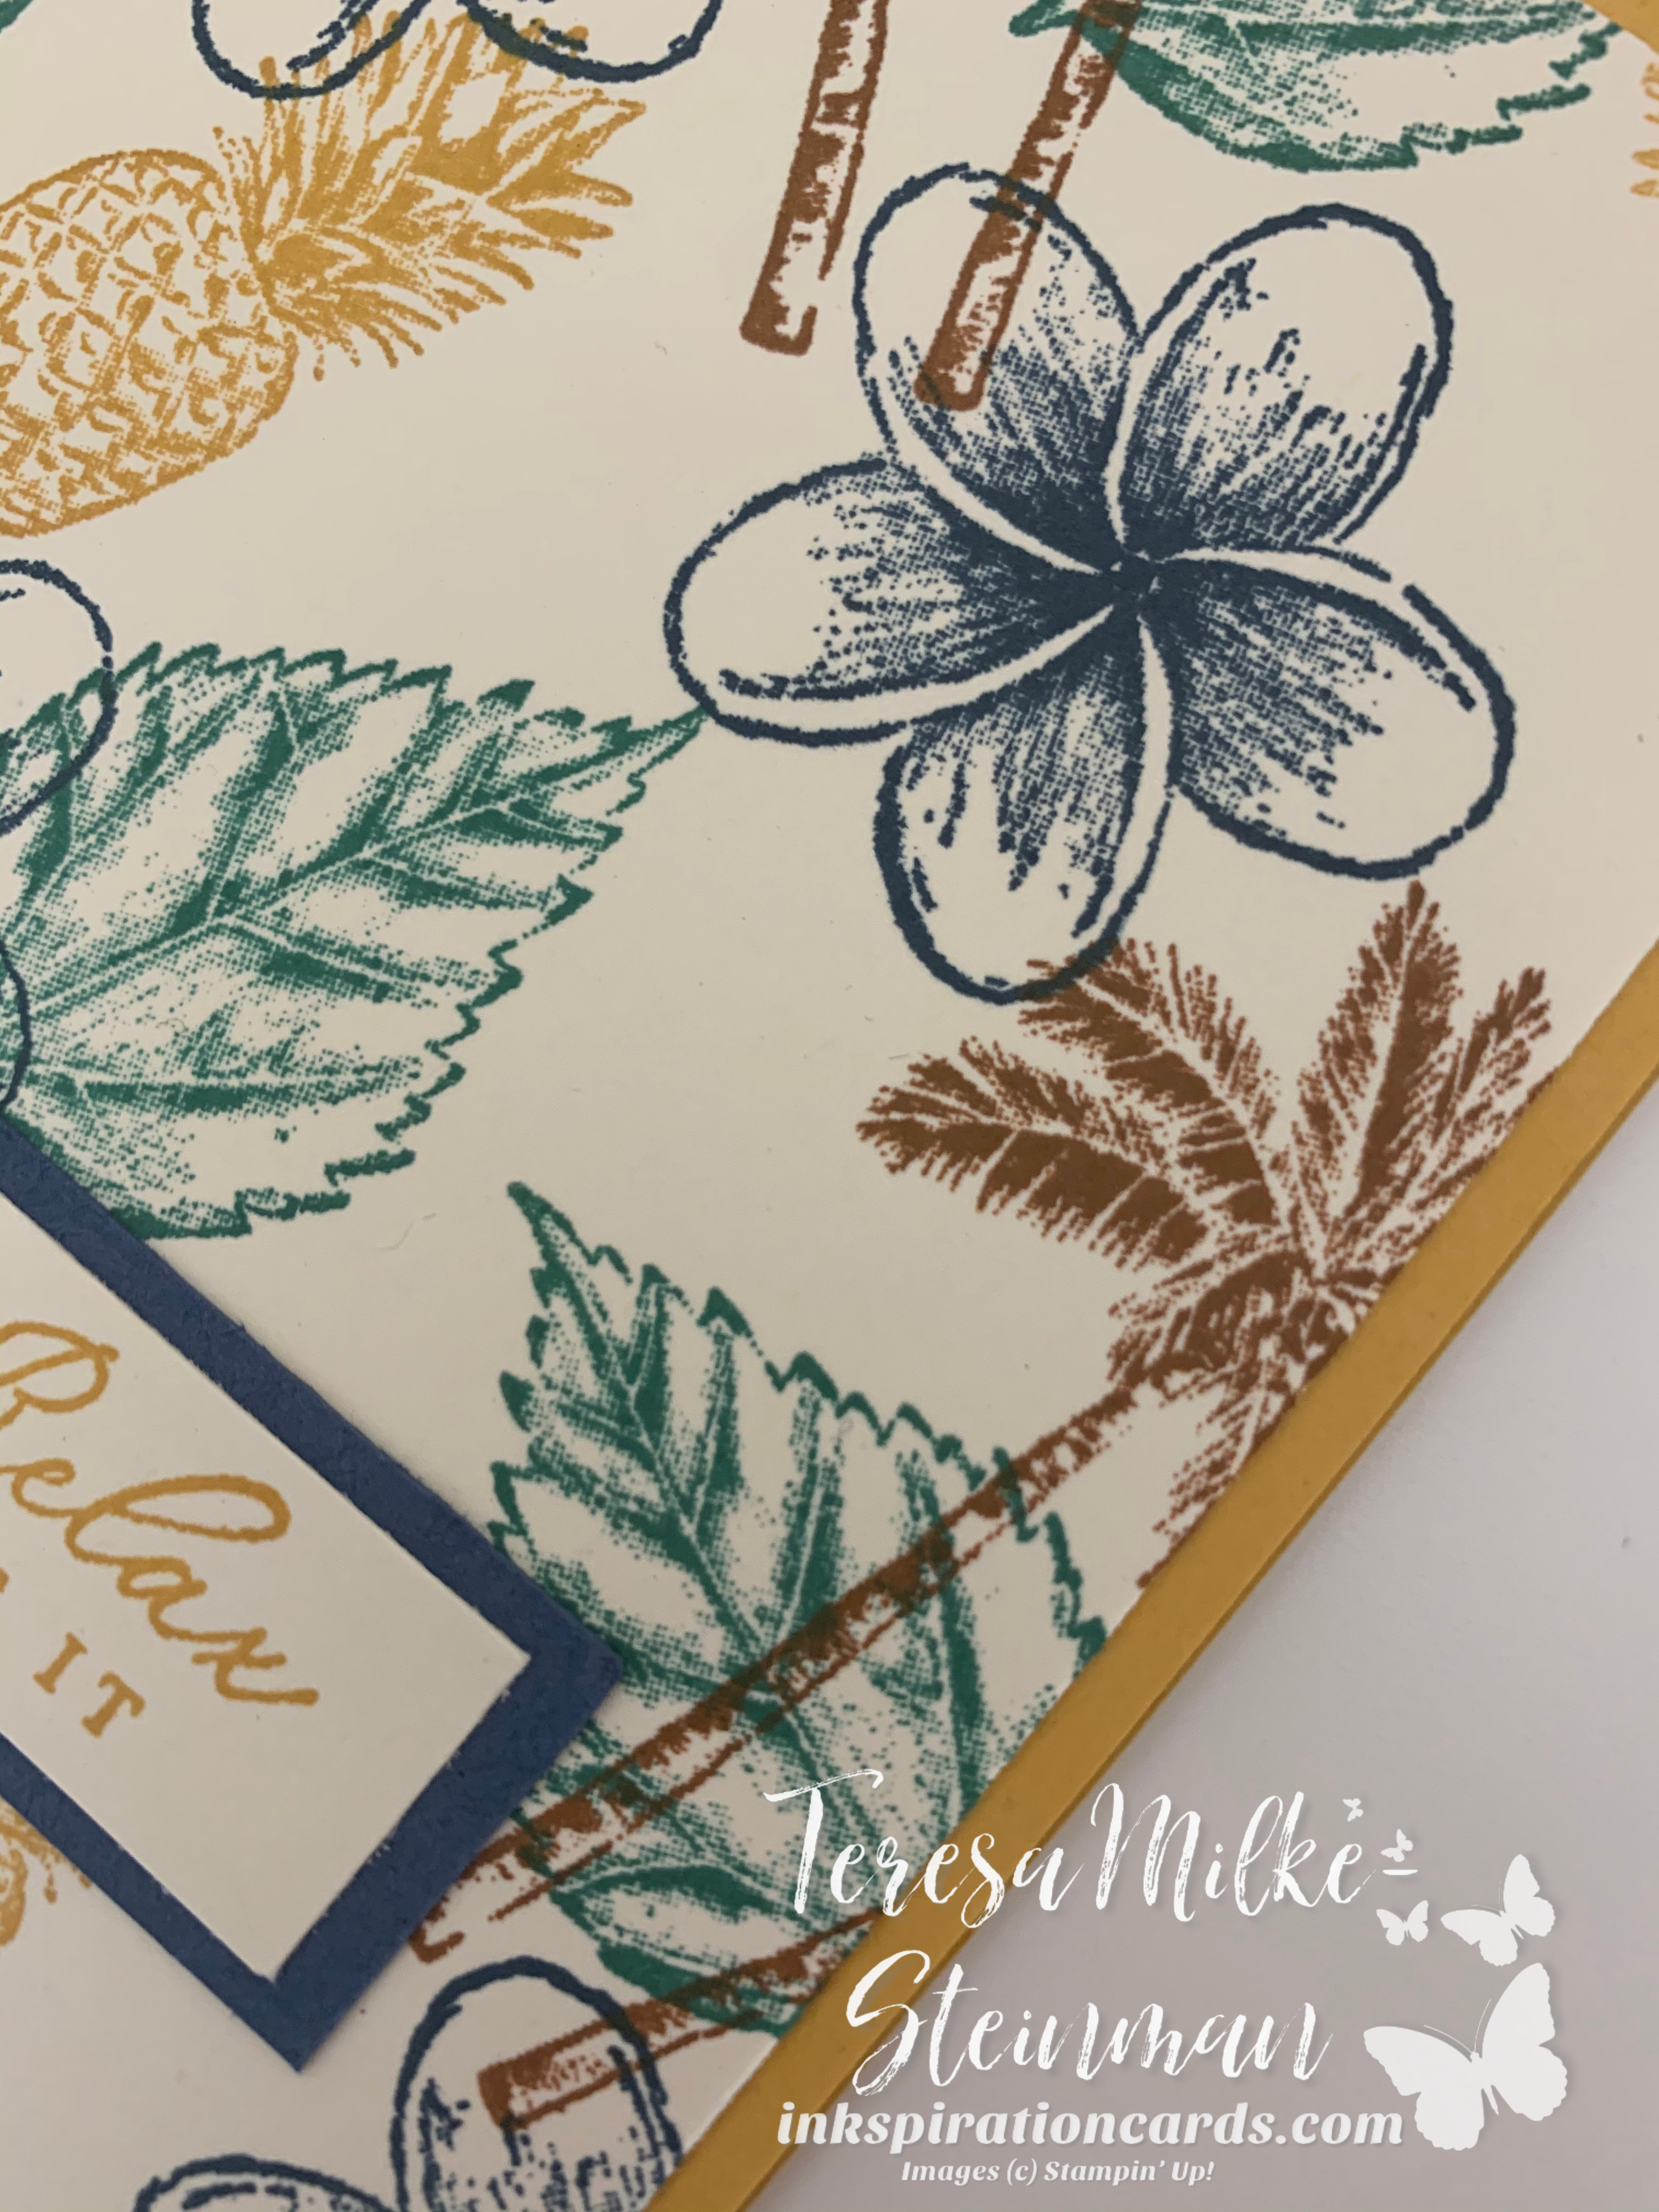
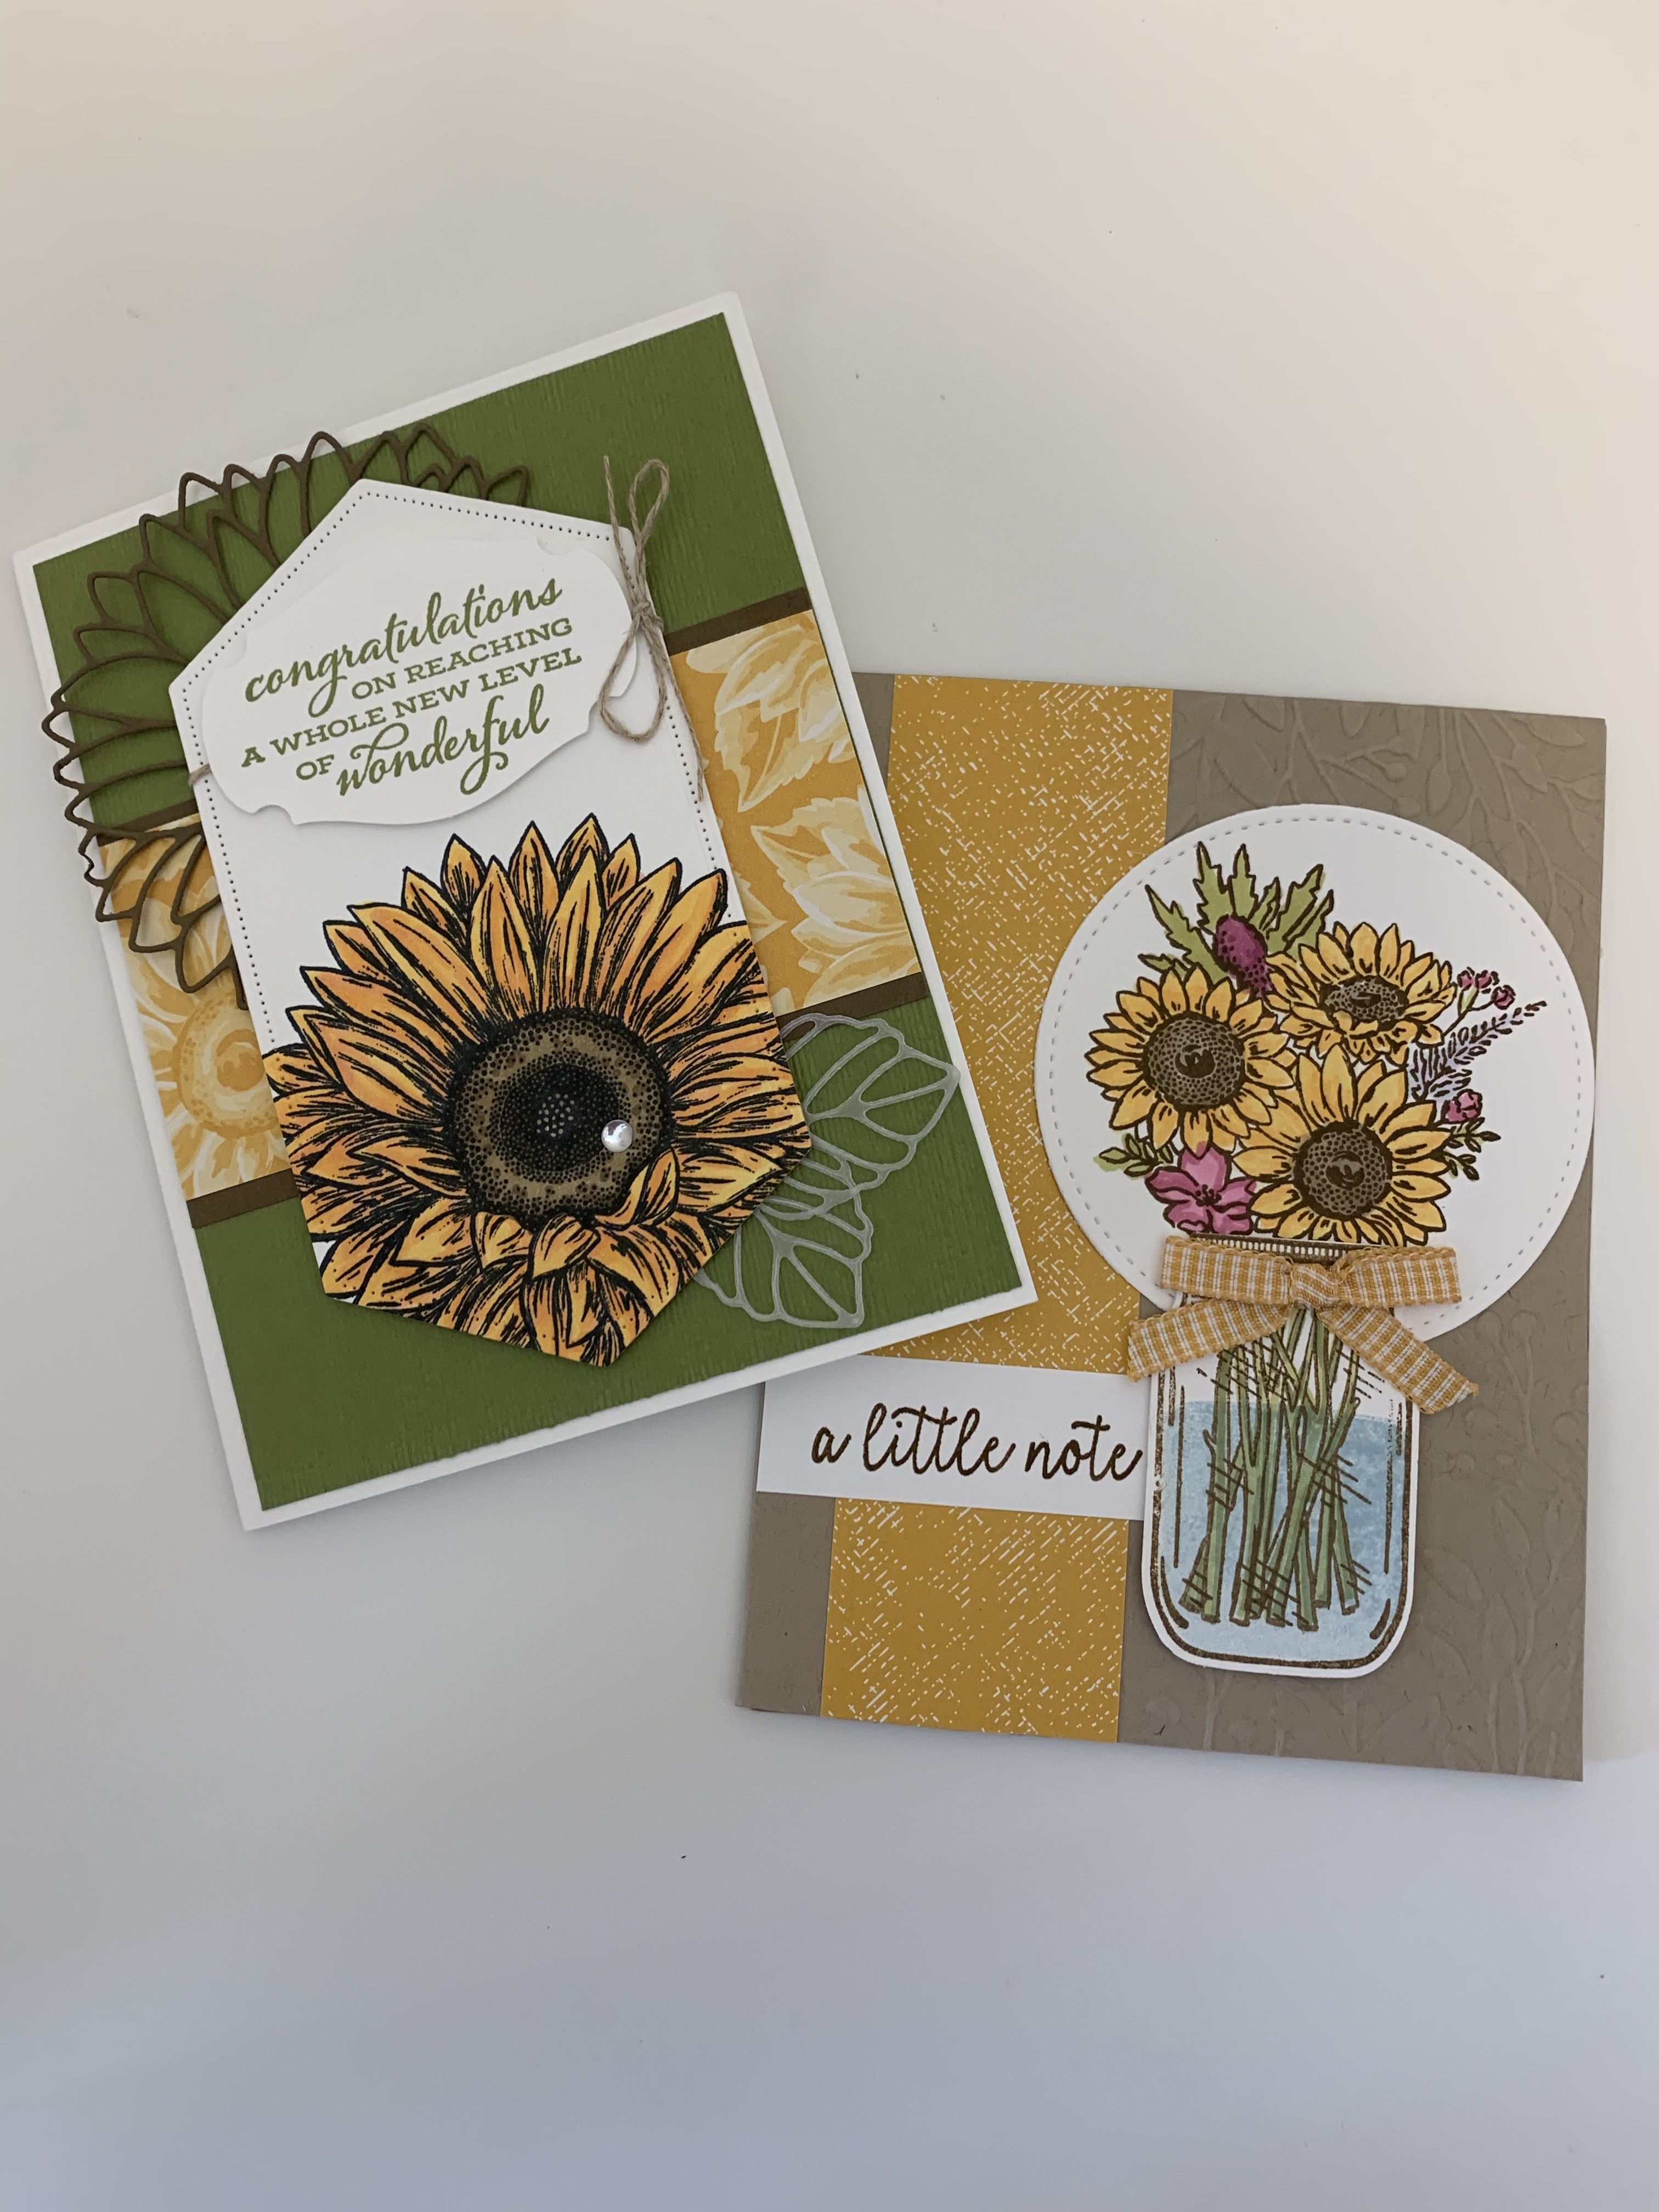
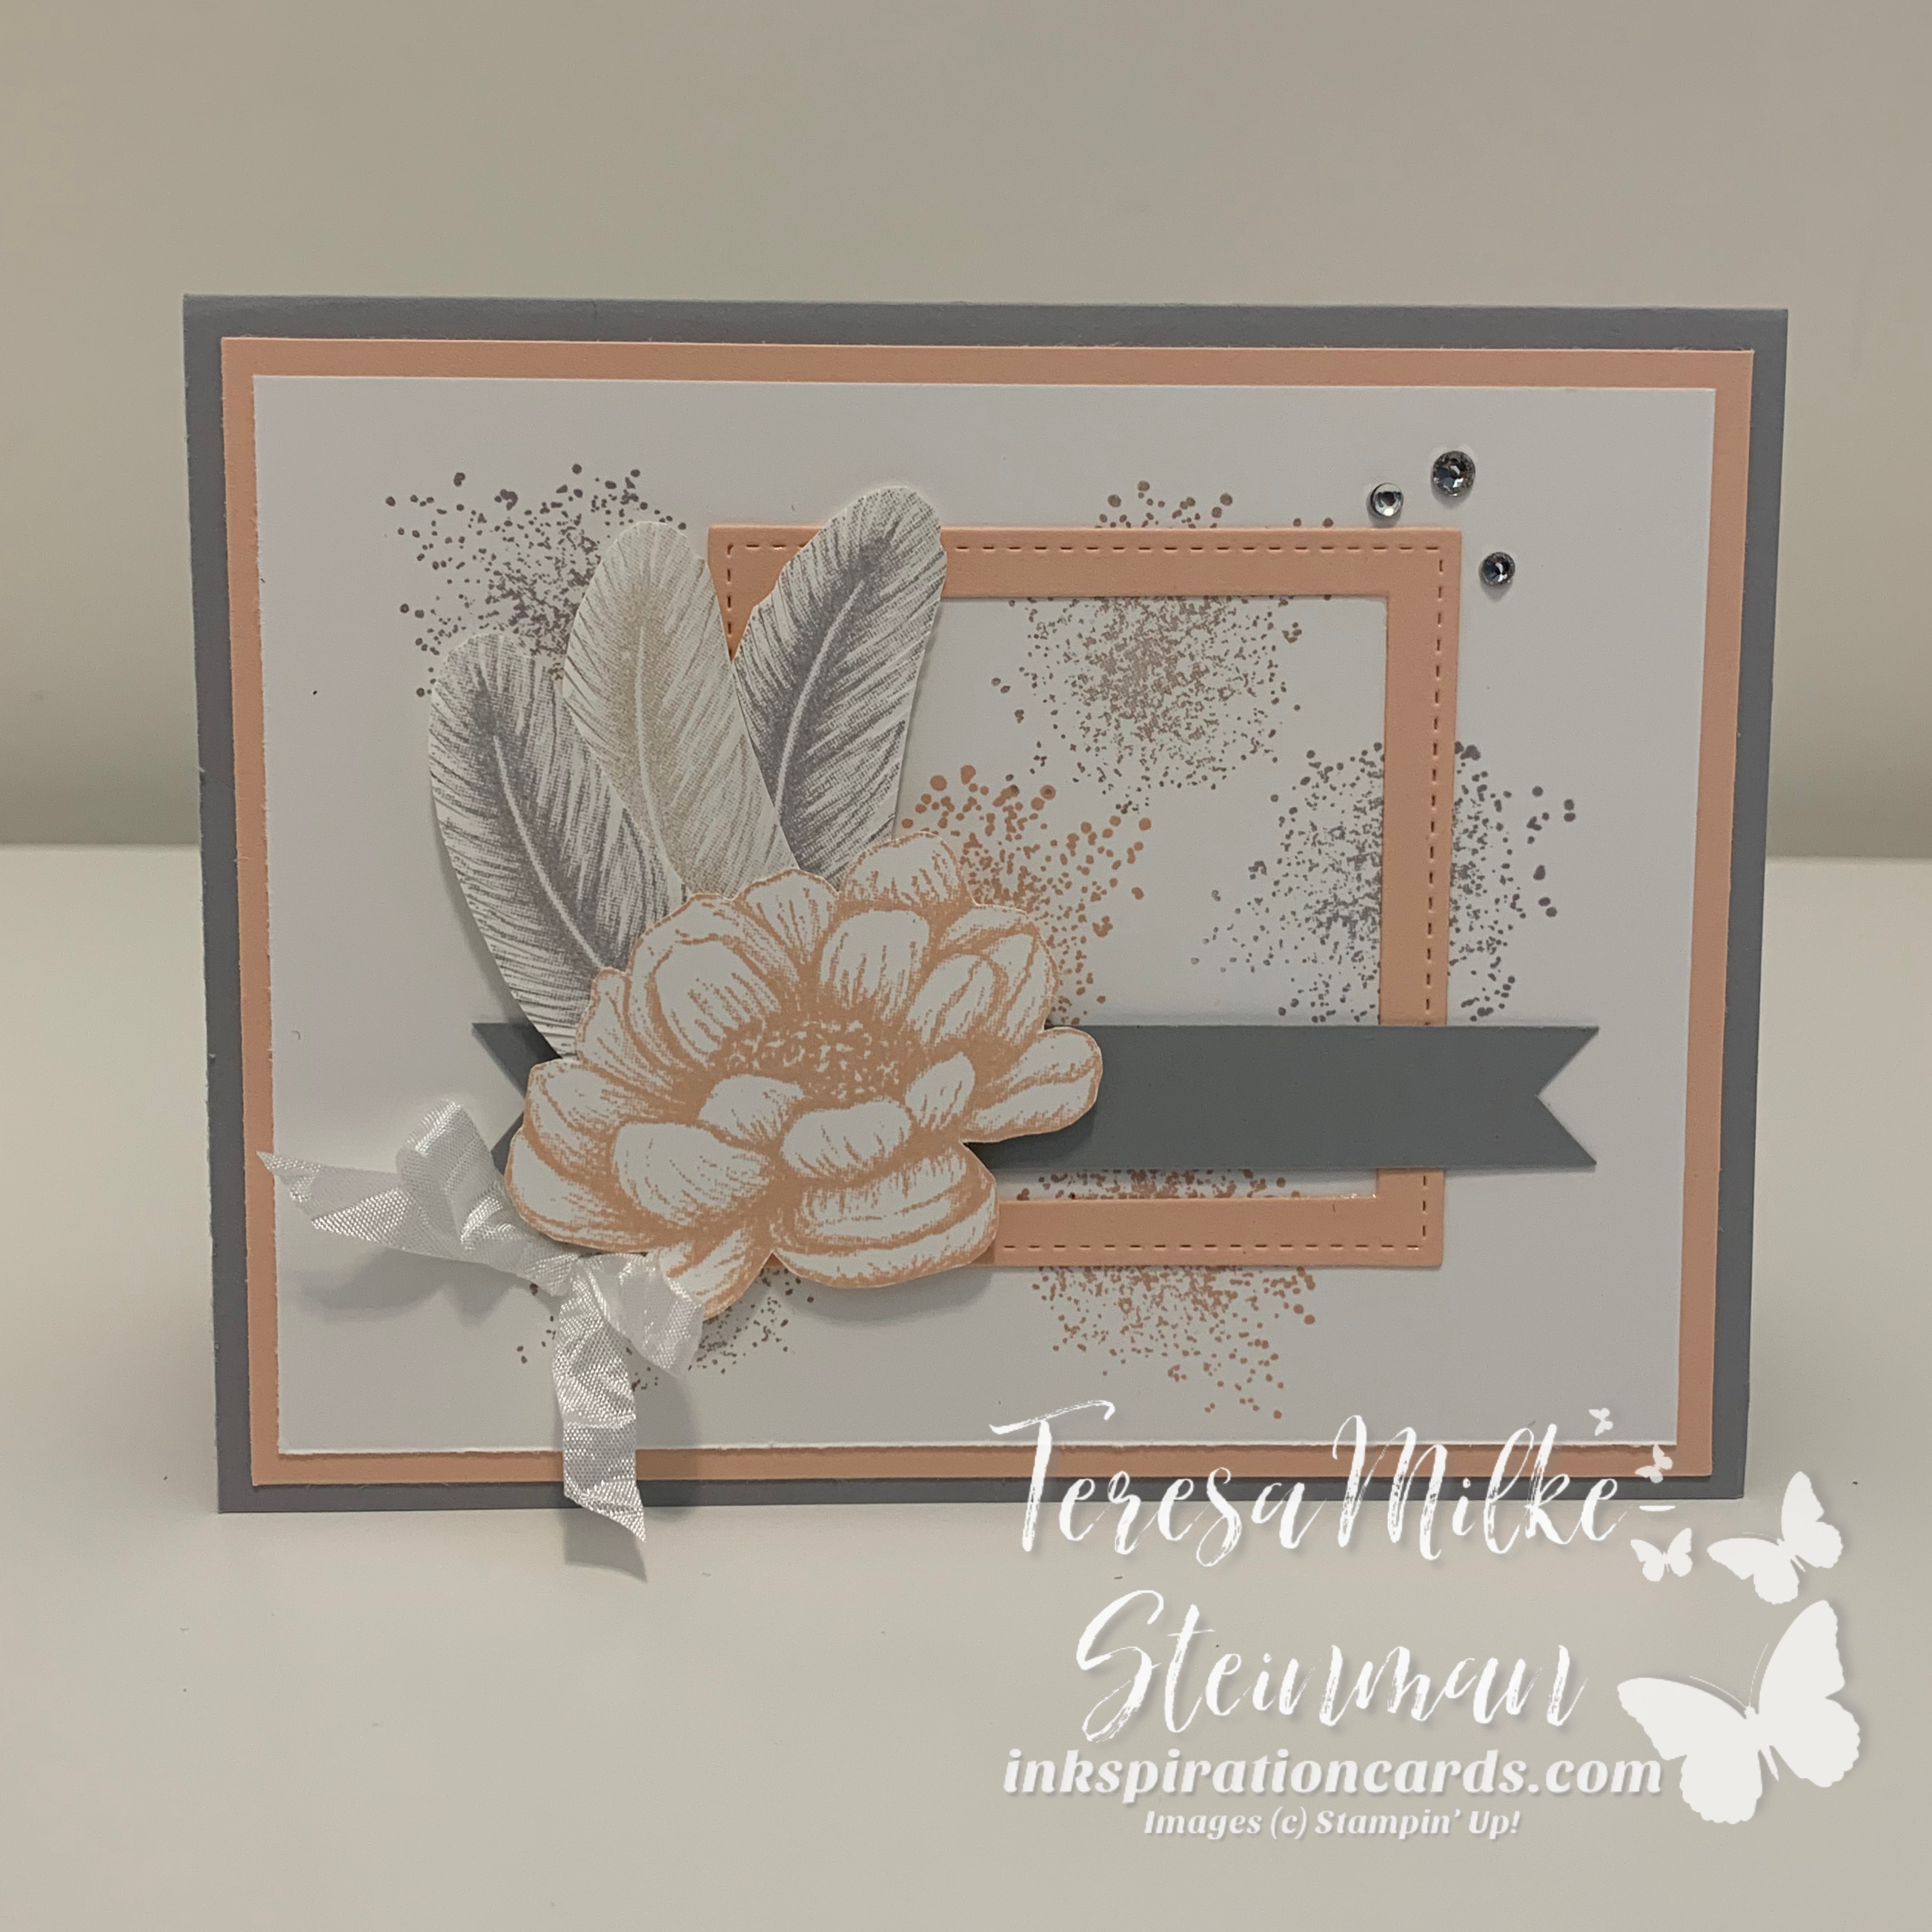
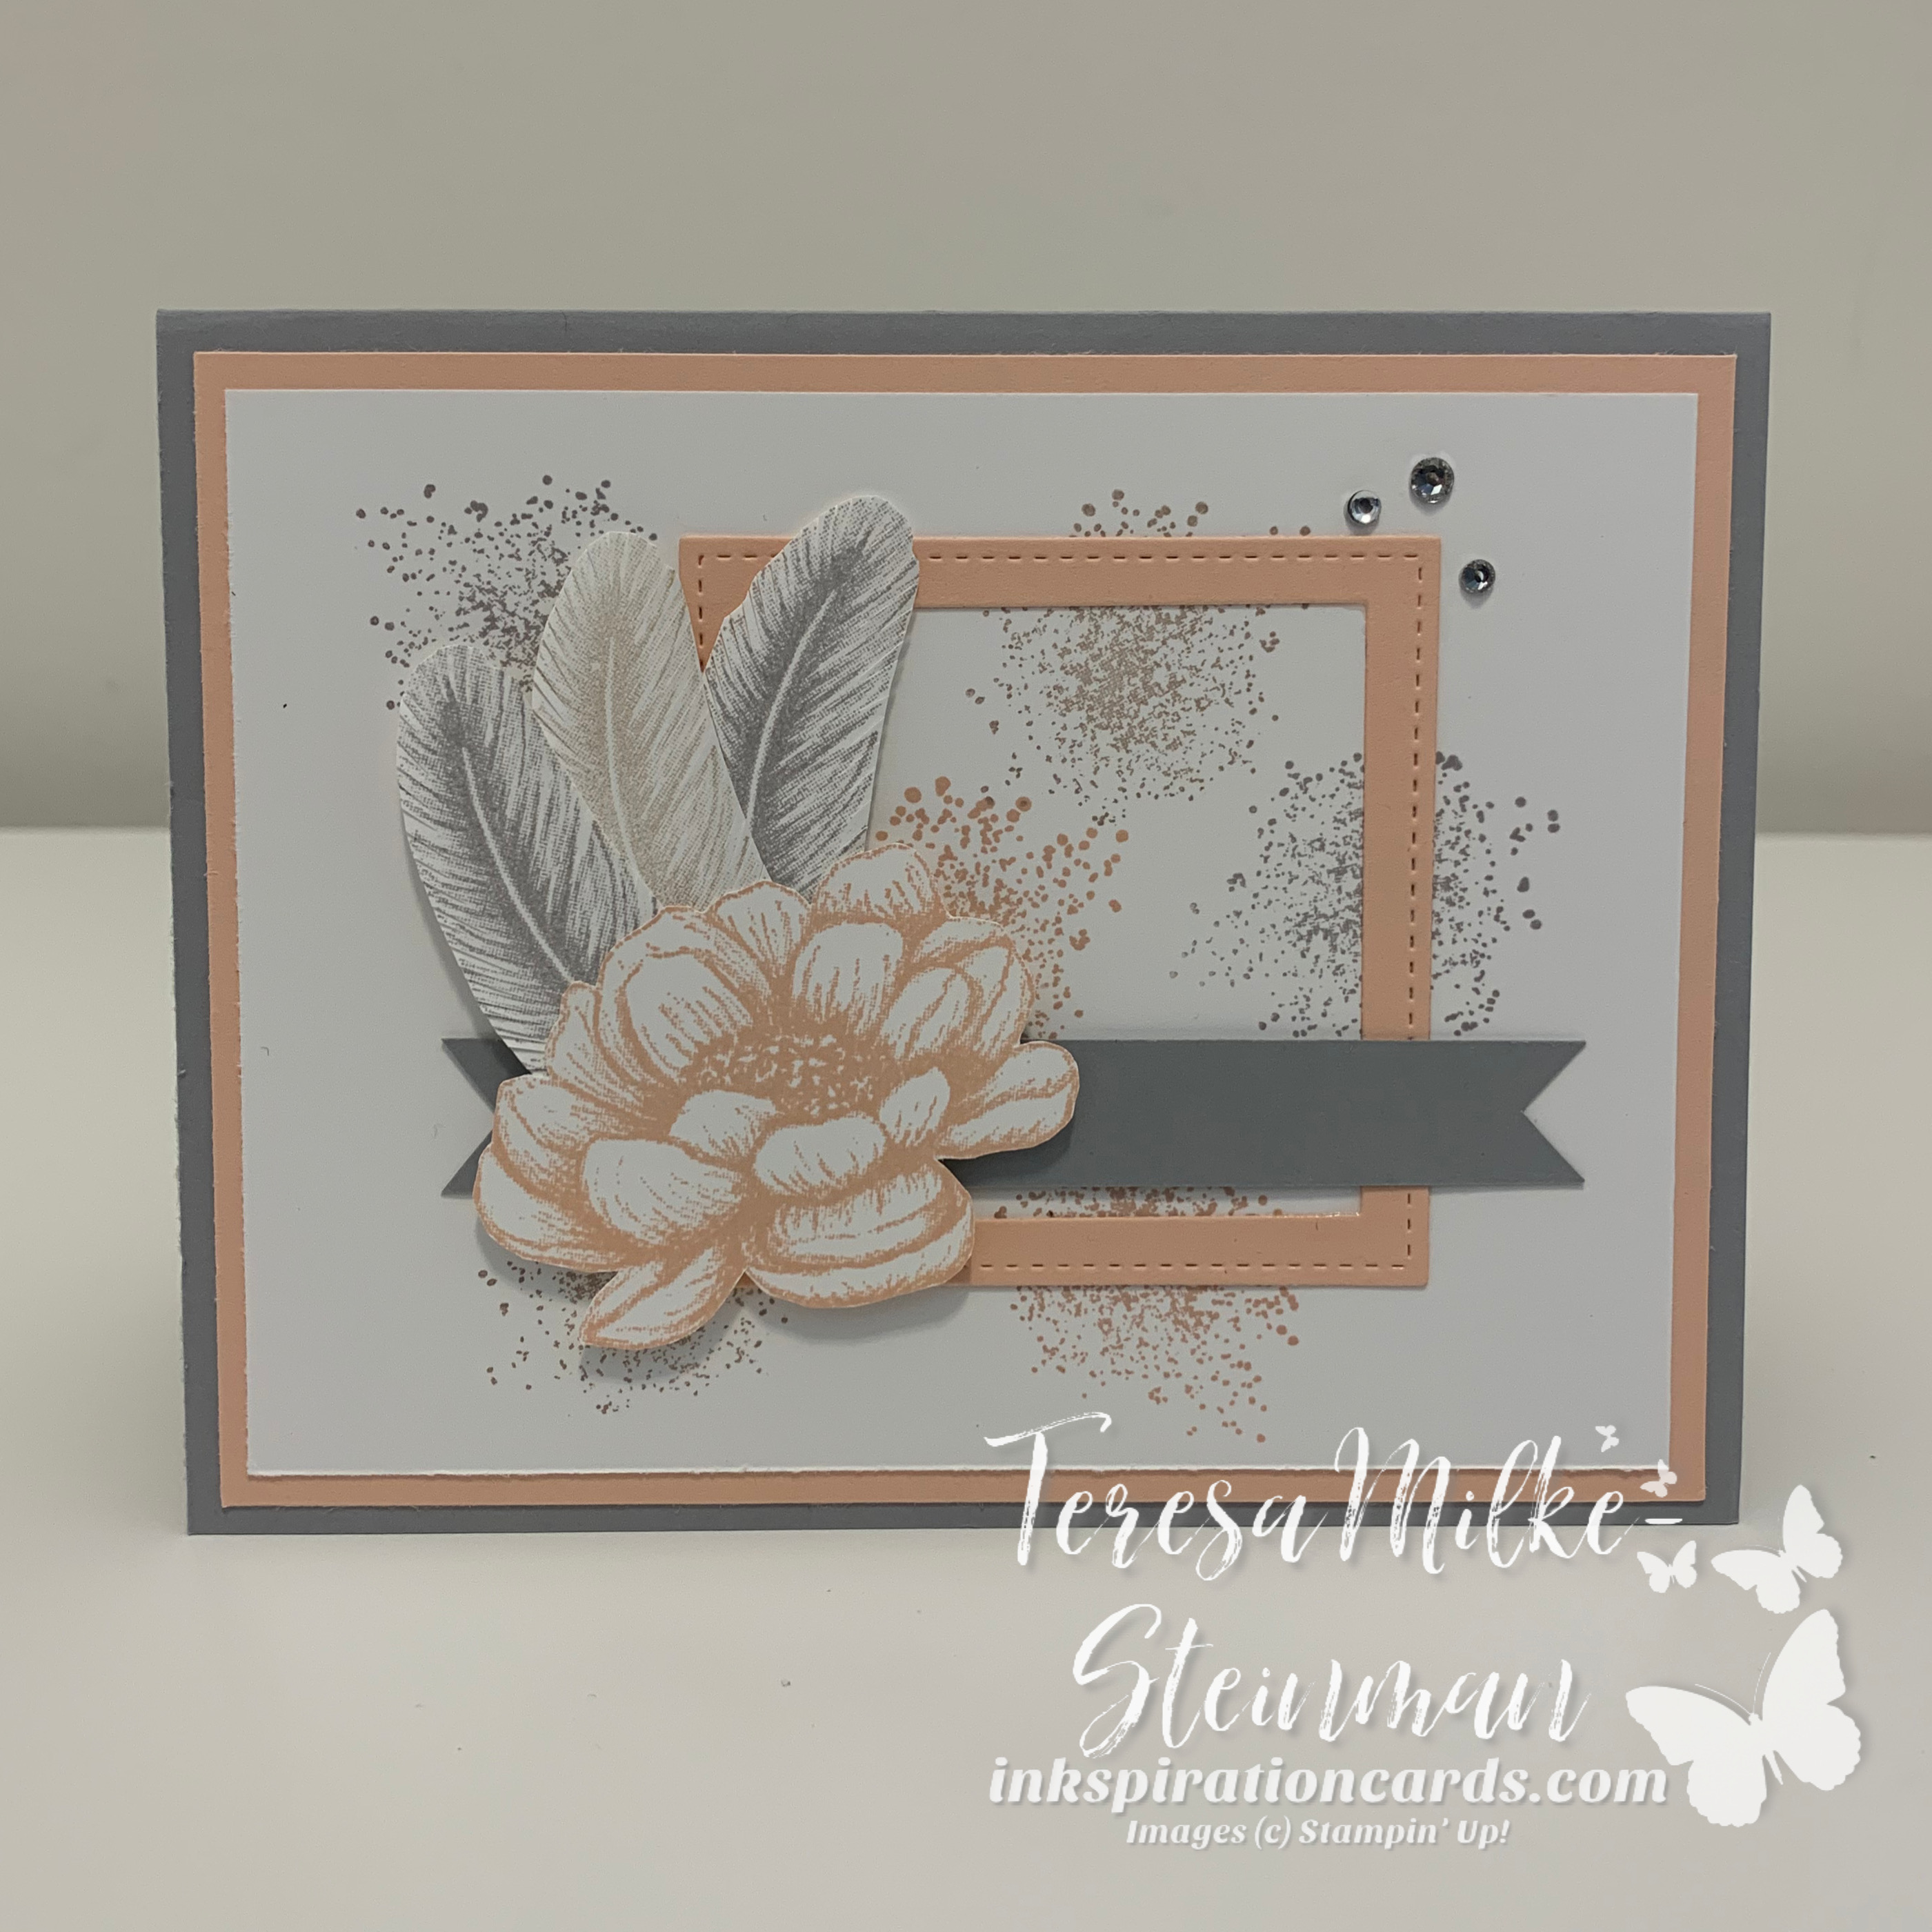
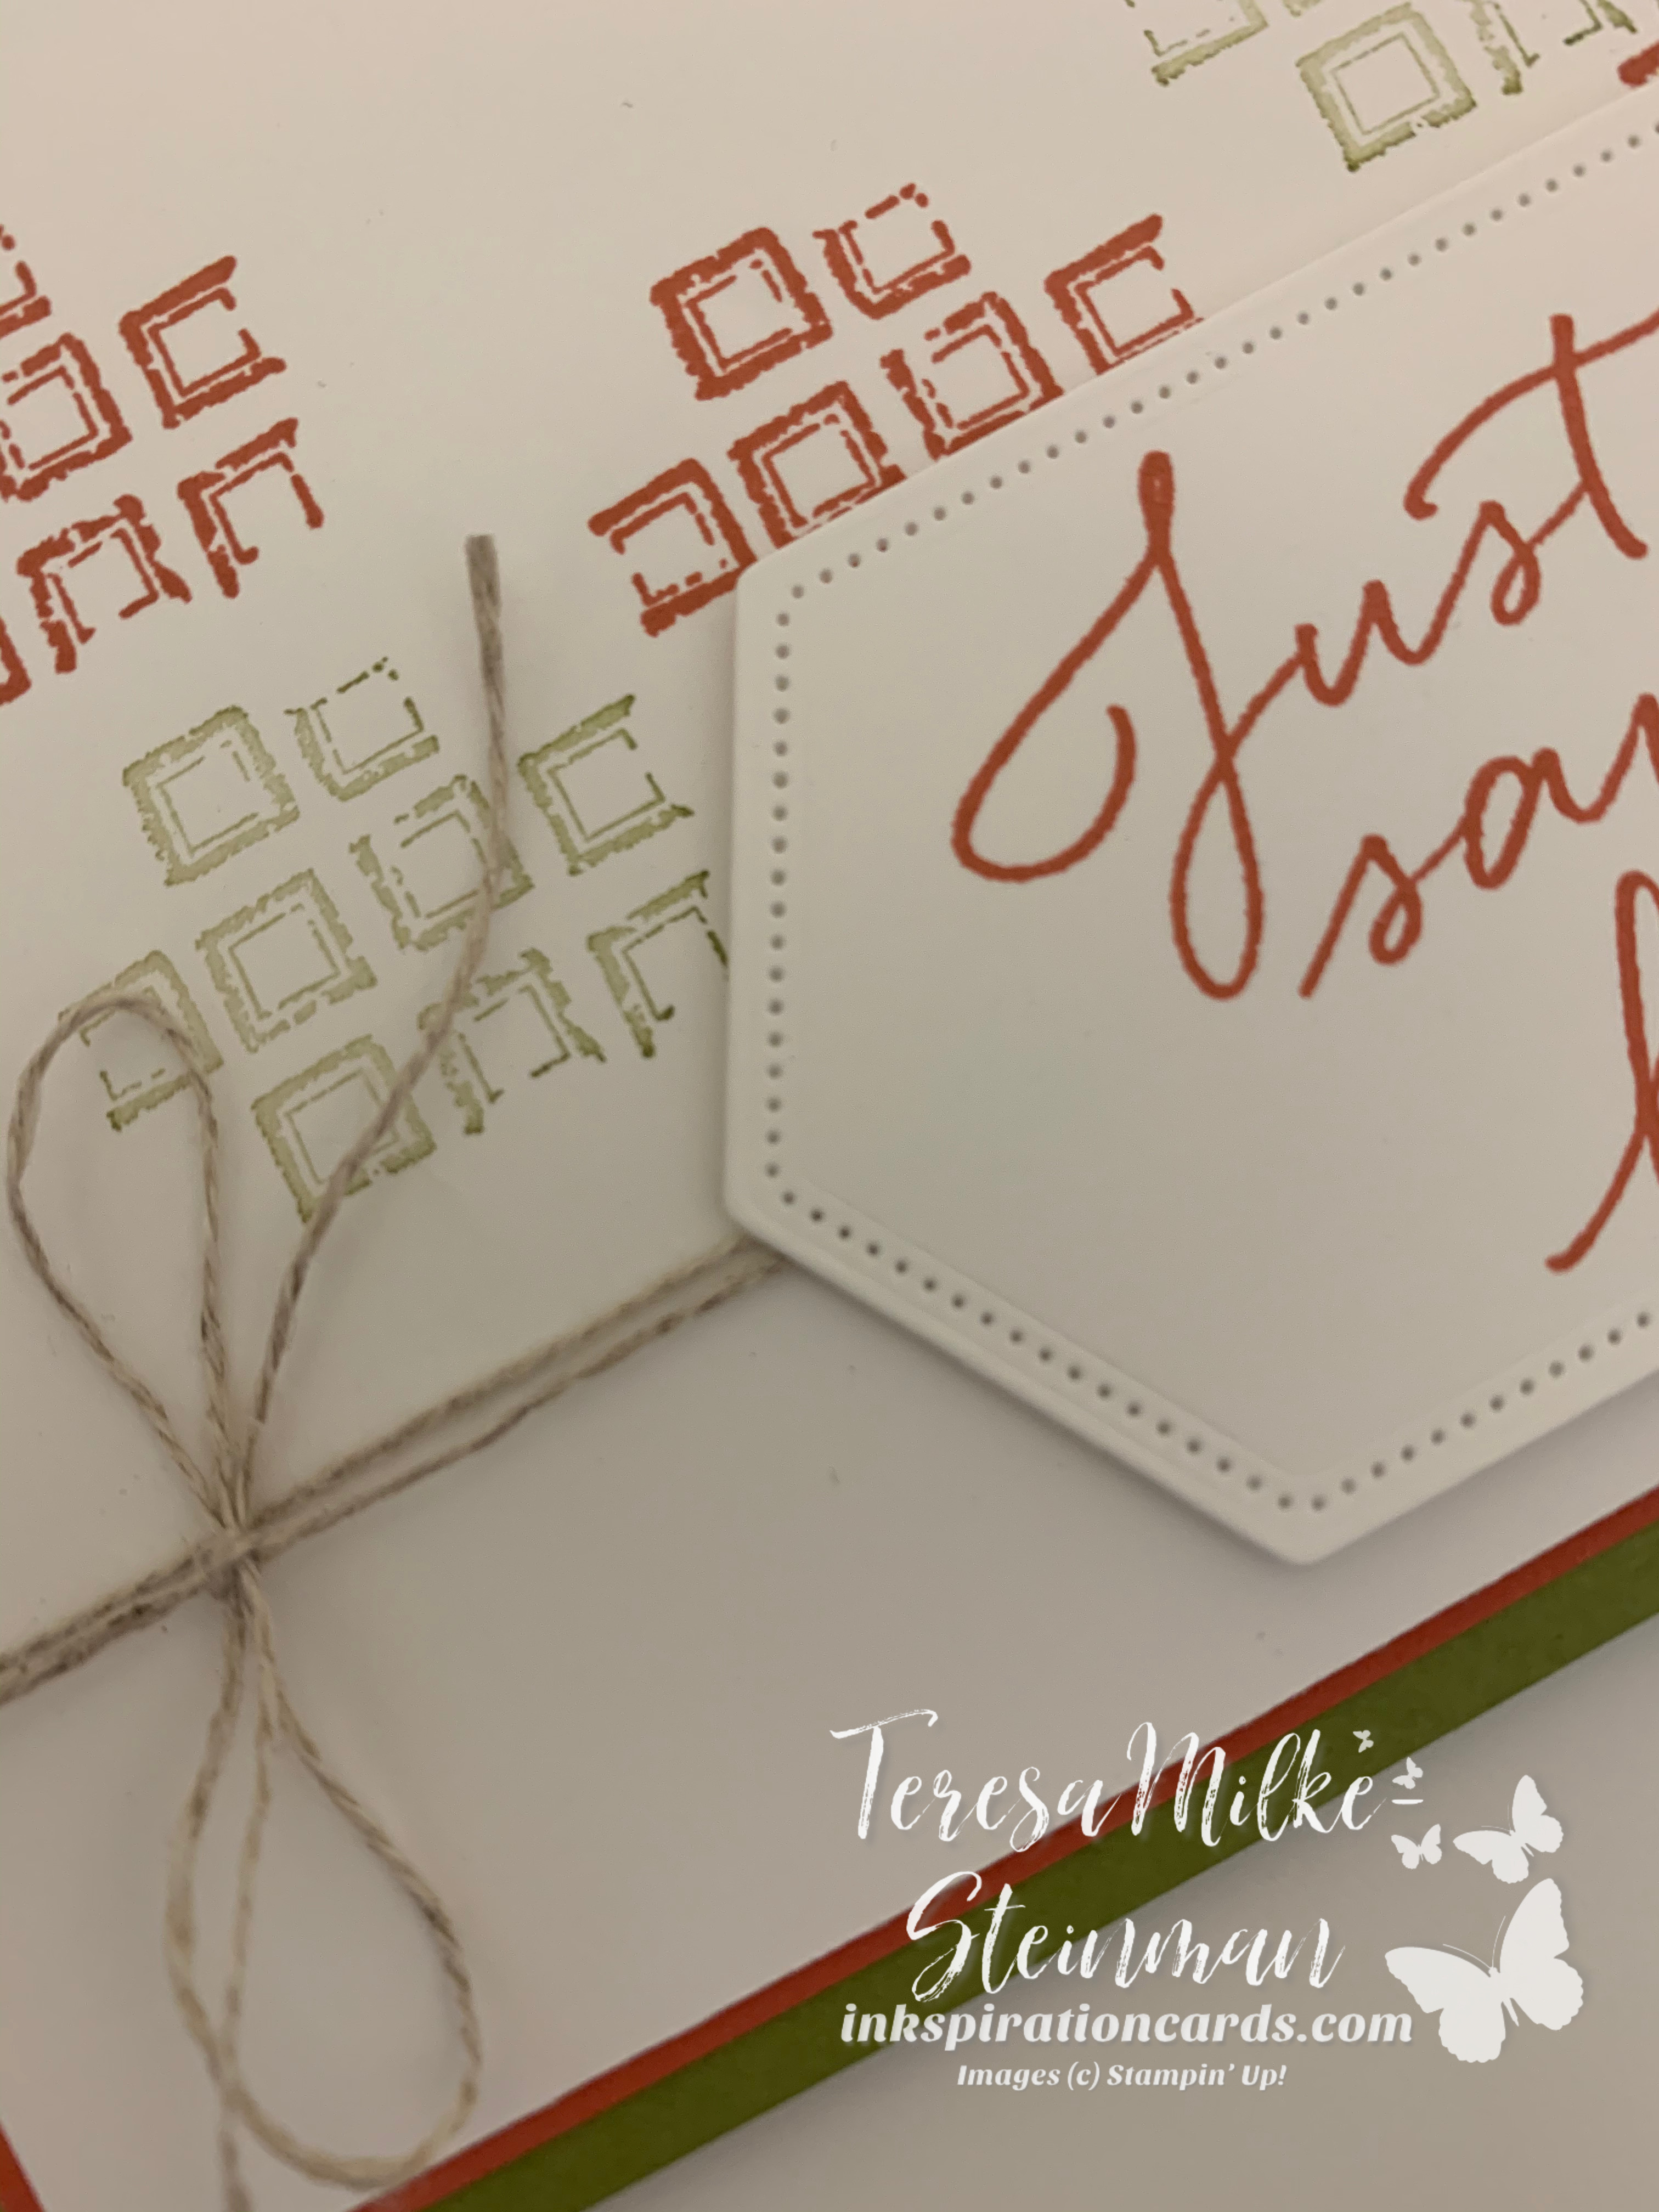
For the card base I went with Bumblebee cardstock and since I was using a number of different colours to do some collage stamping I decided against using another colour of cardstock for a large card mat. (To find out more about collage stamping check out my blog post)

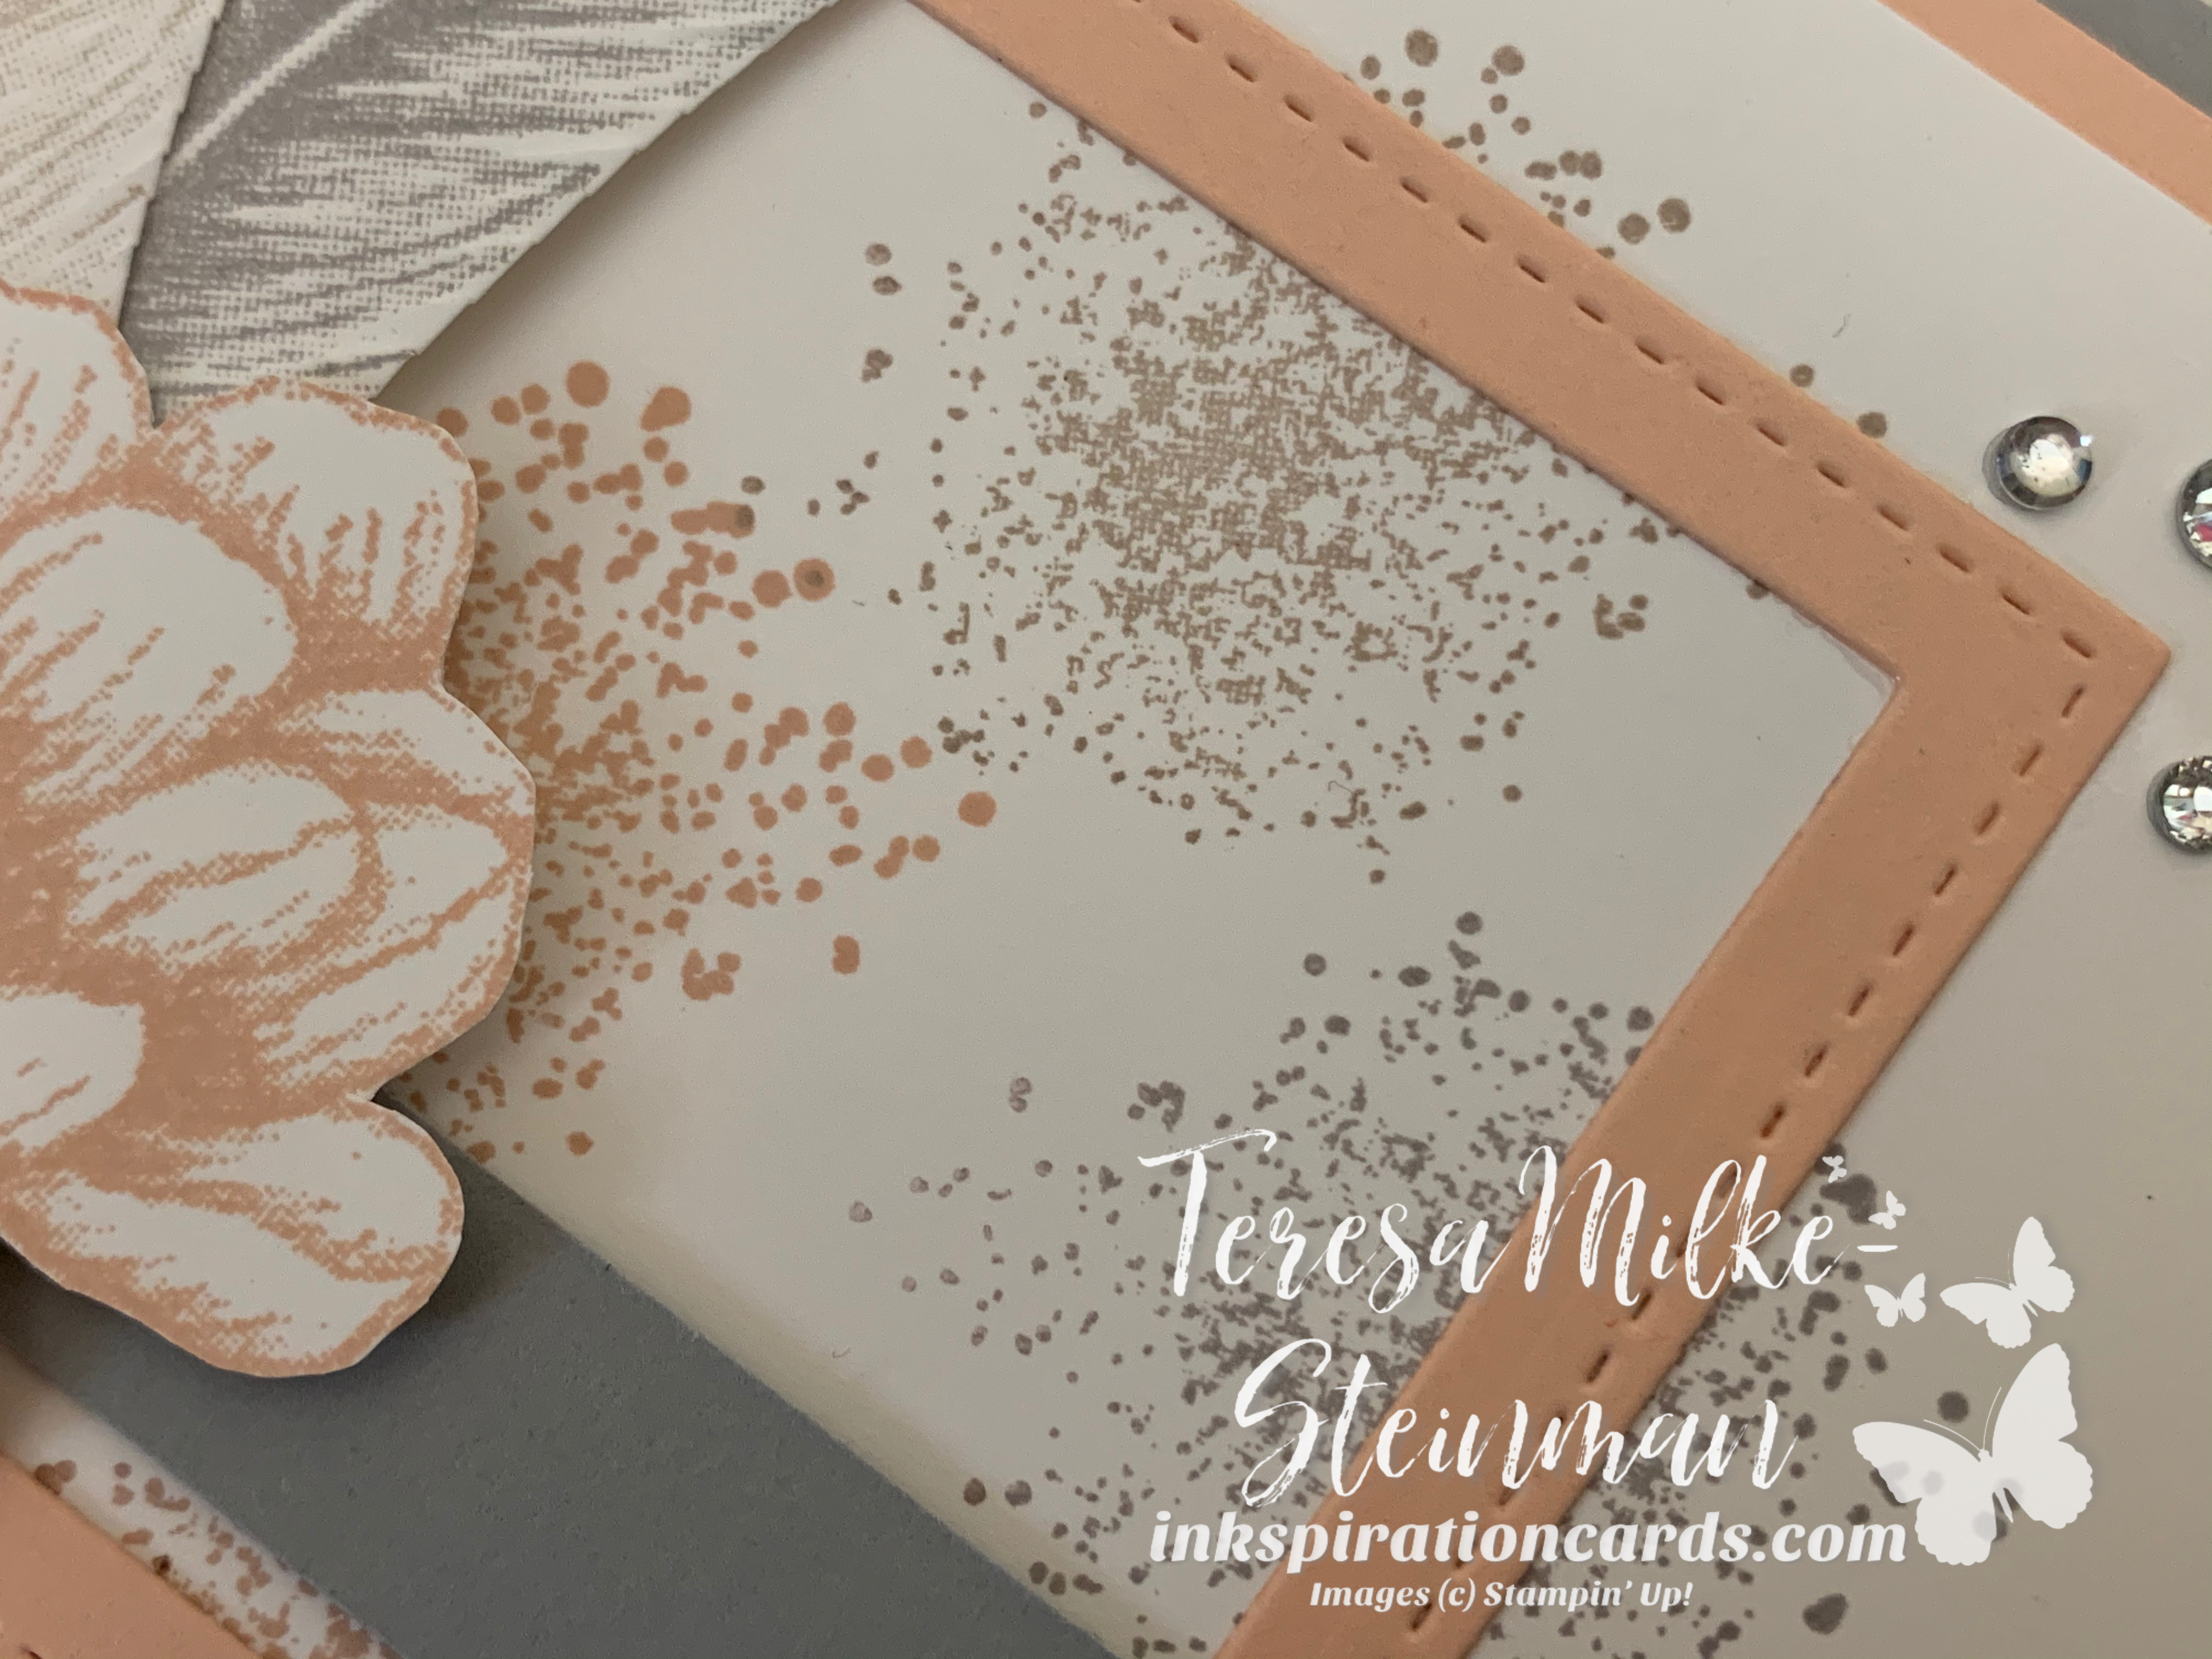
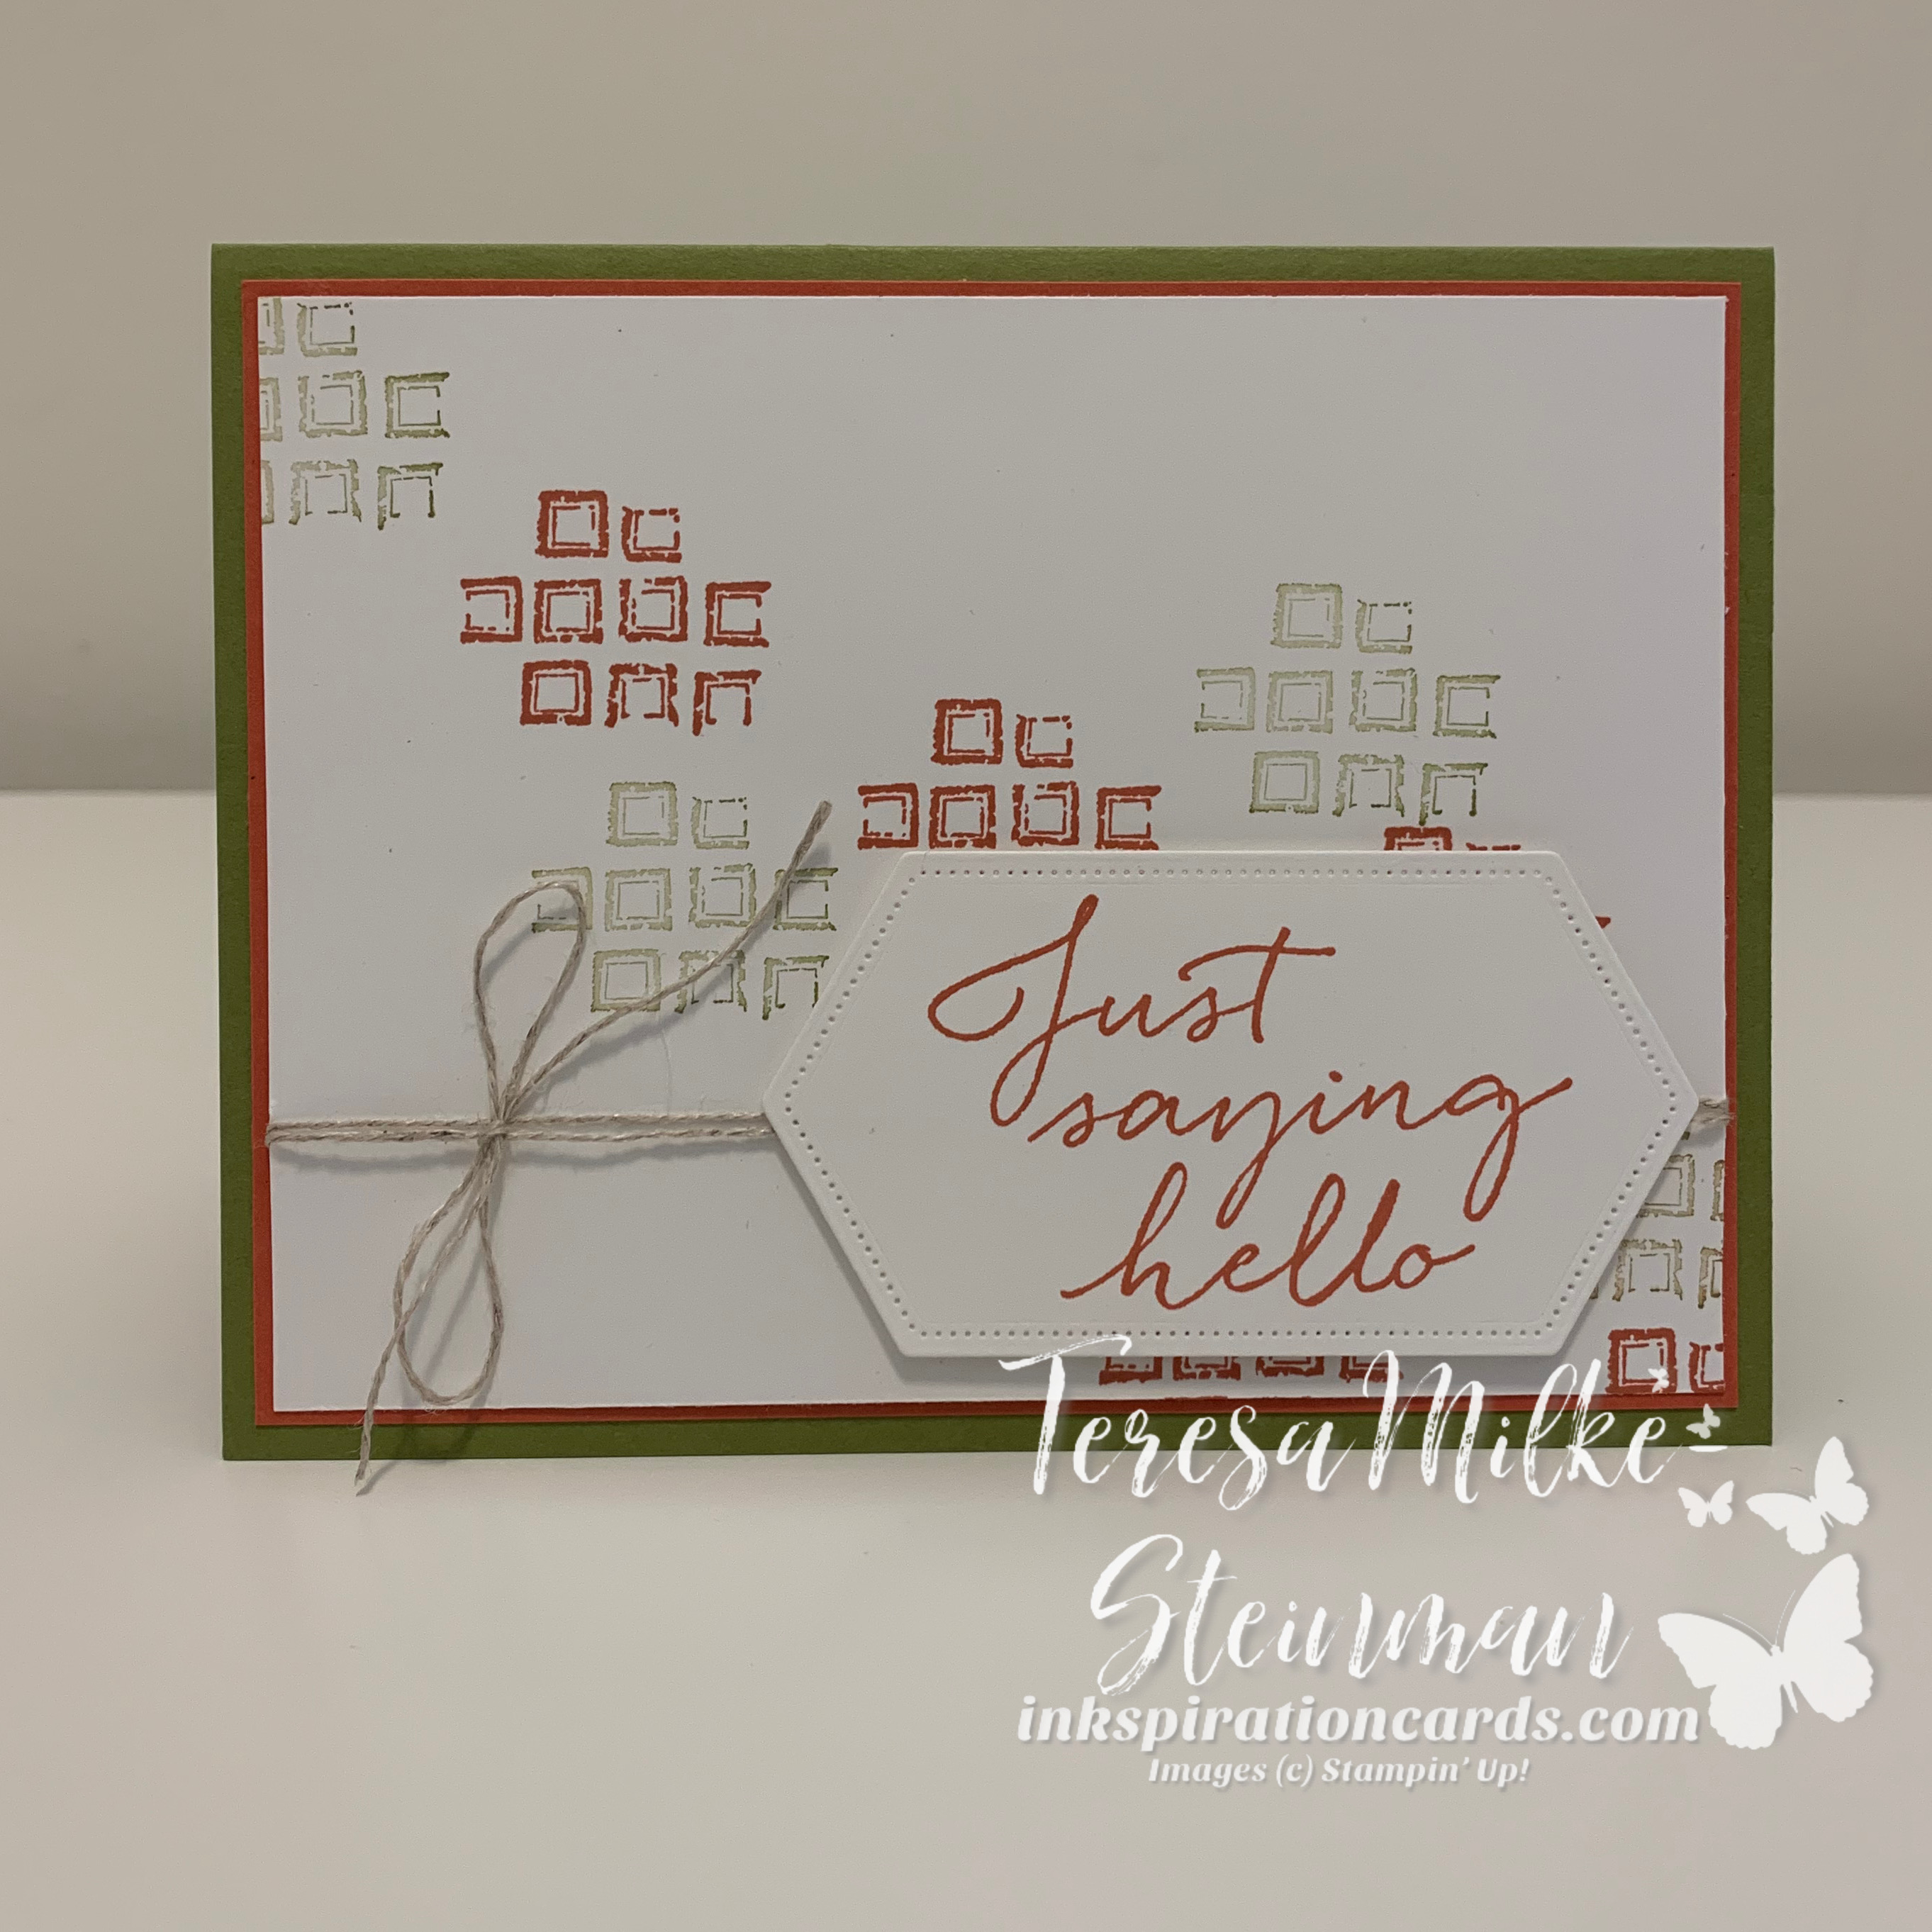
In terms of the images I went with Bumblebee ink to stamp the pineapples, Just Jade for the leaves, Cinnamon Cider for the palm trees and Misty Moonlight for the flowers. I also used Bumblebee to stamp the phrase and created a border behind it with some Misty Moonlight cardstock

Timeless Tropical wm

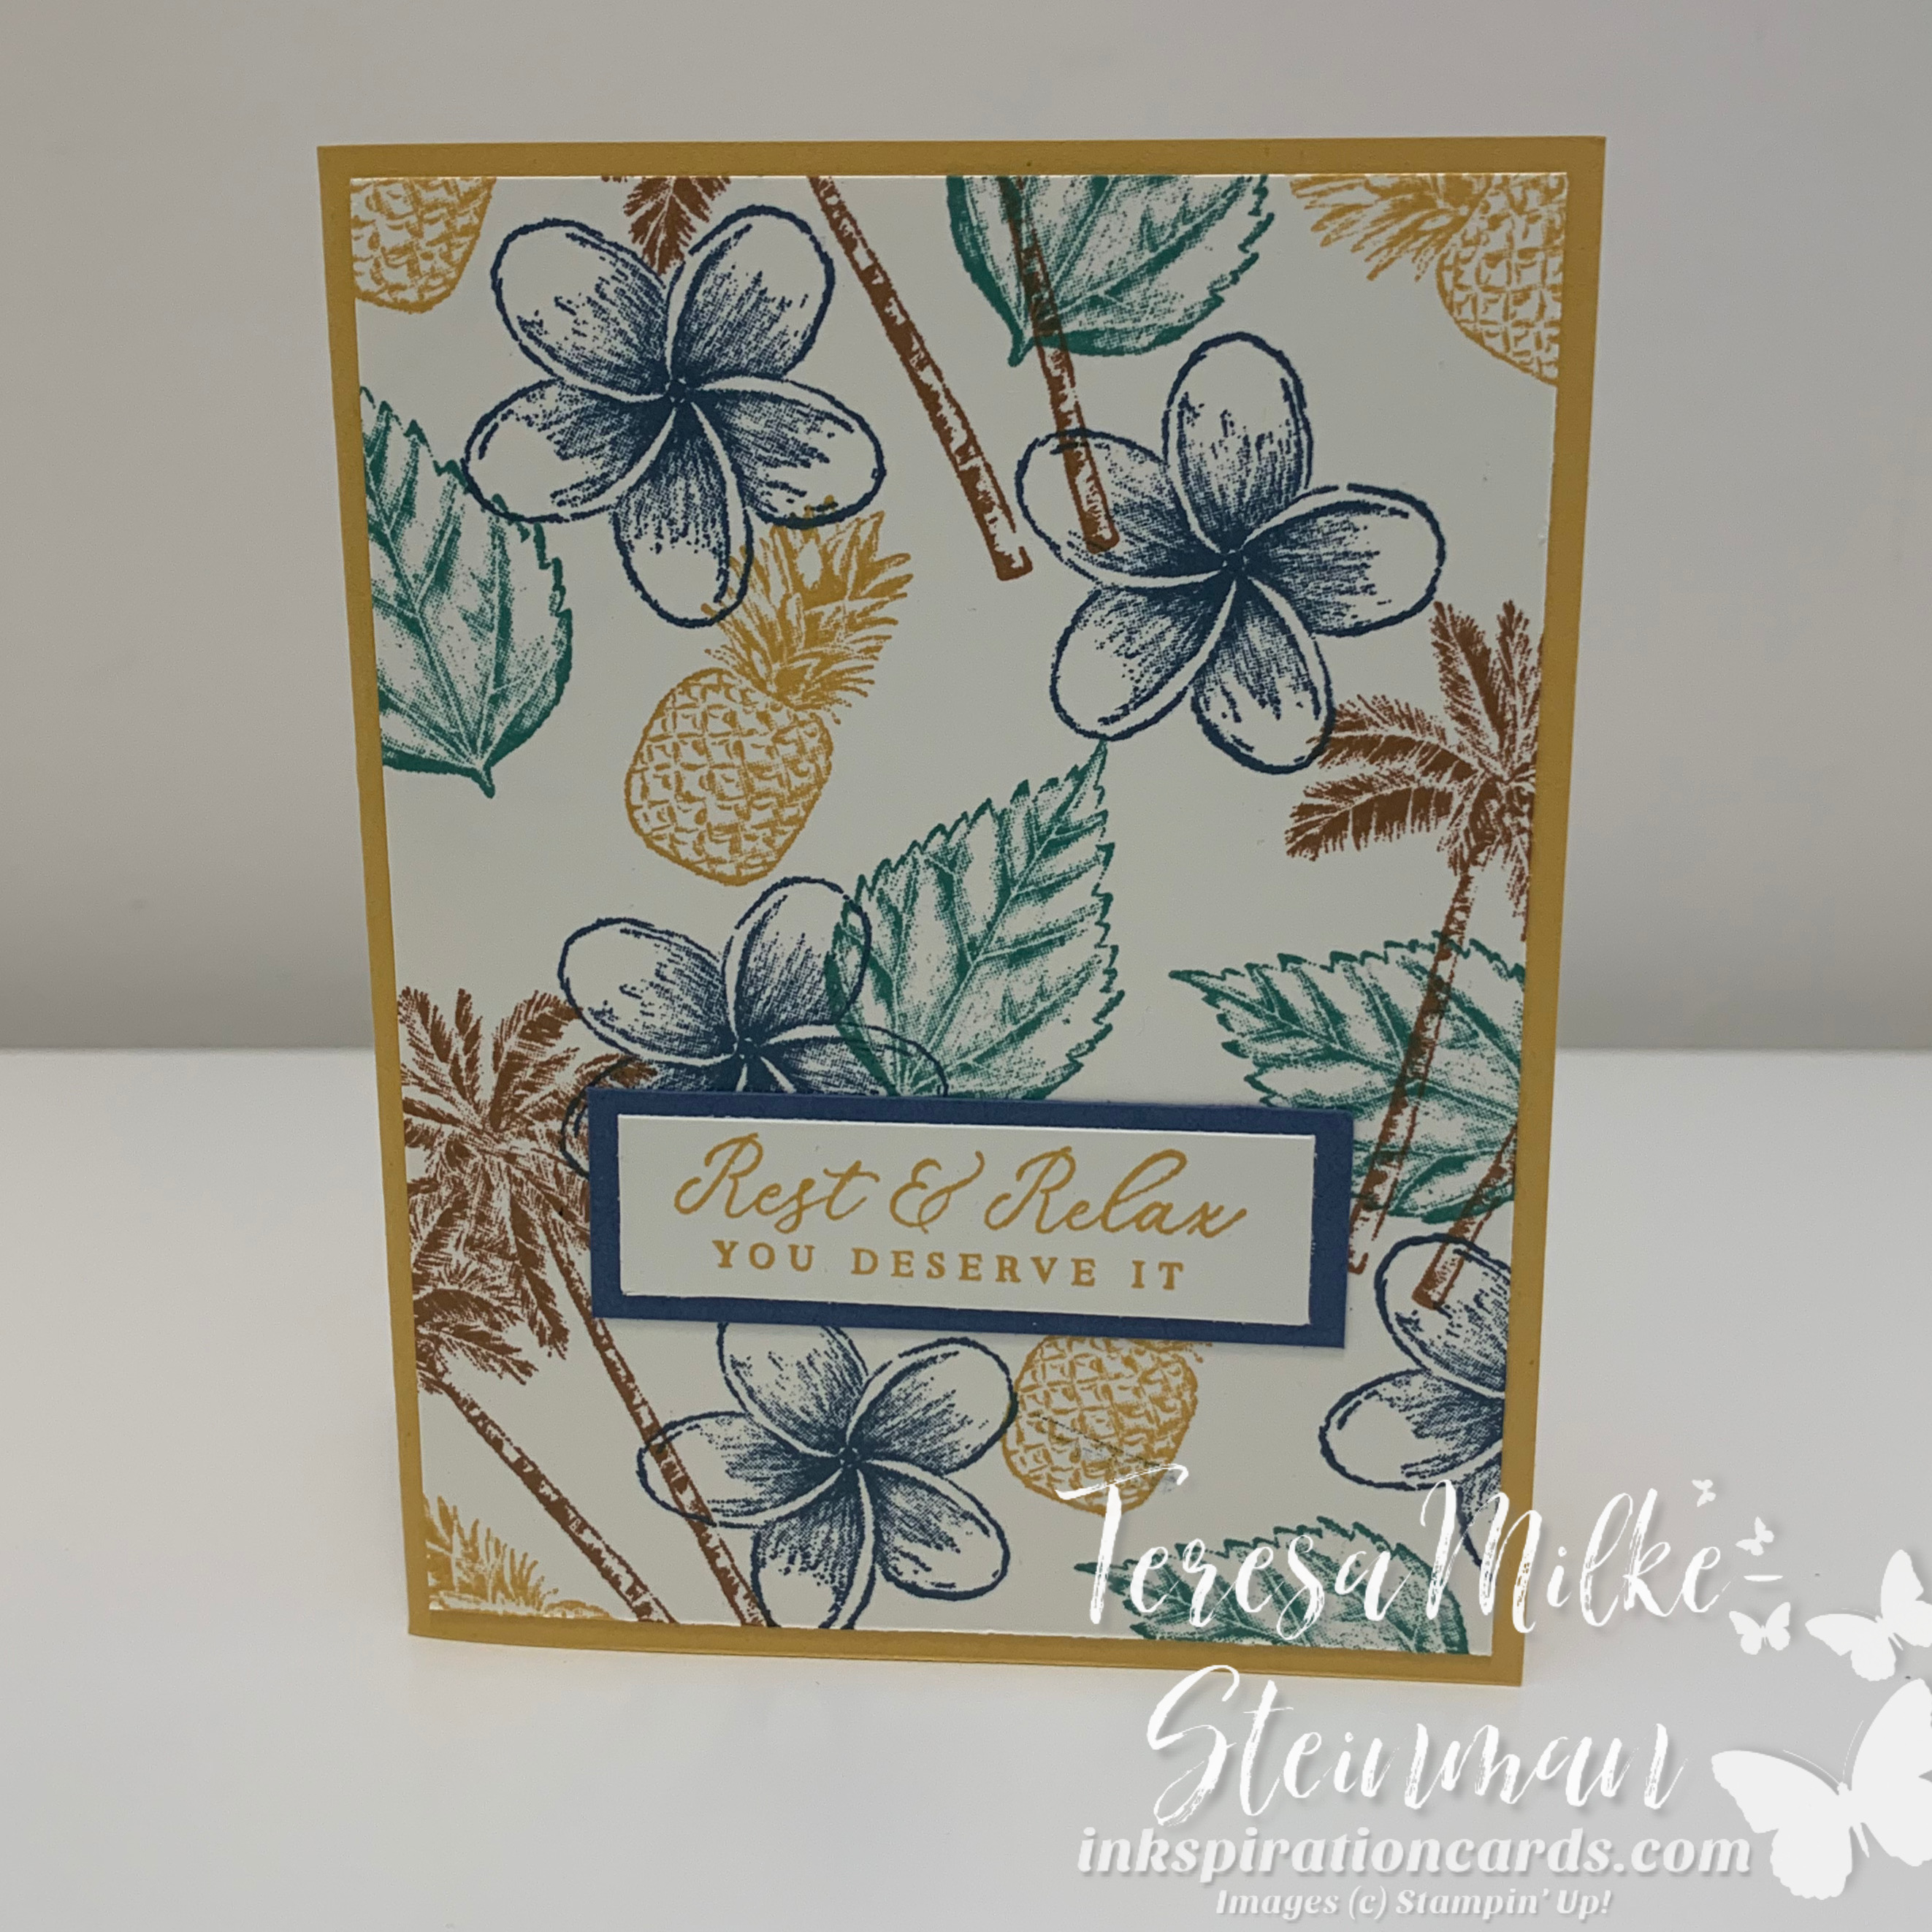
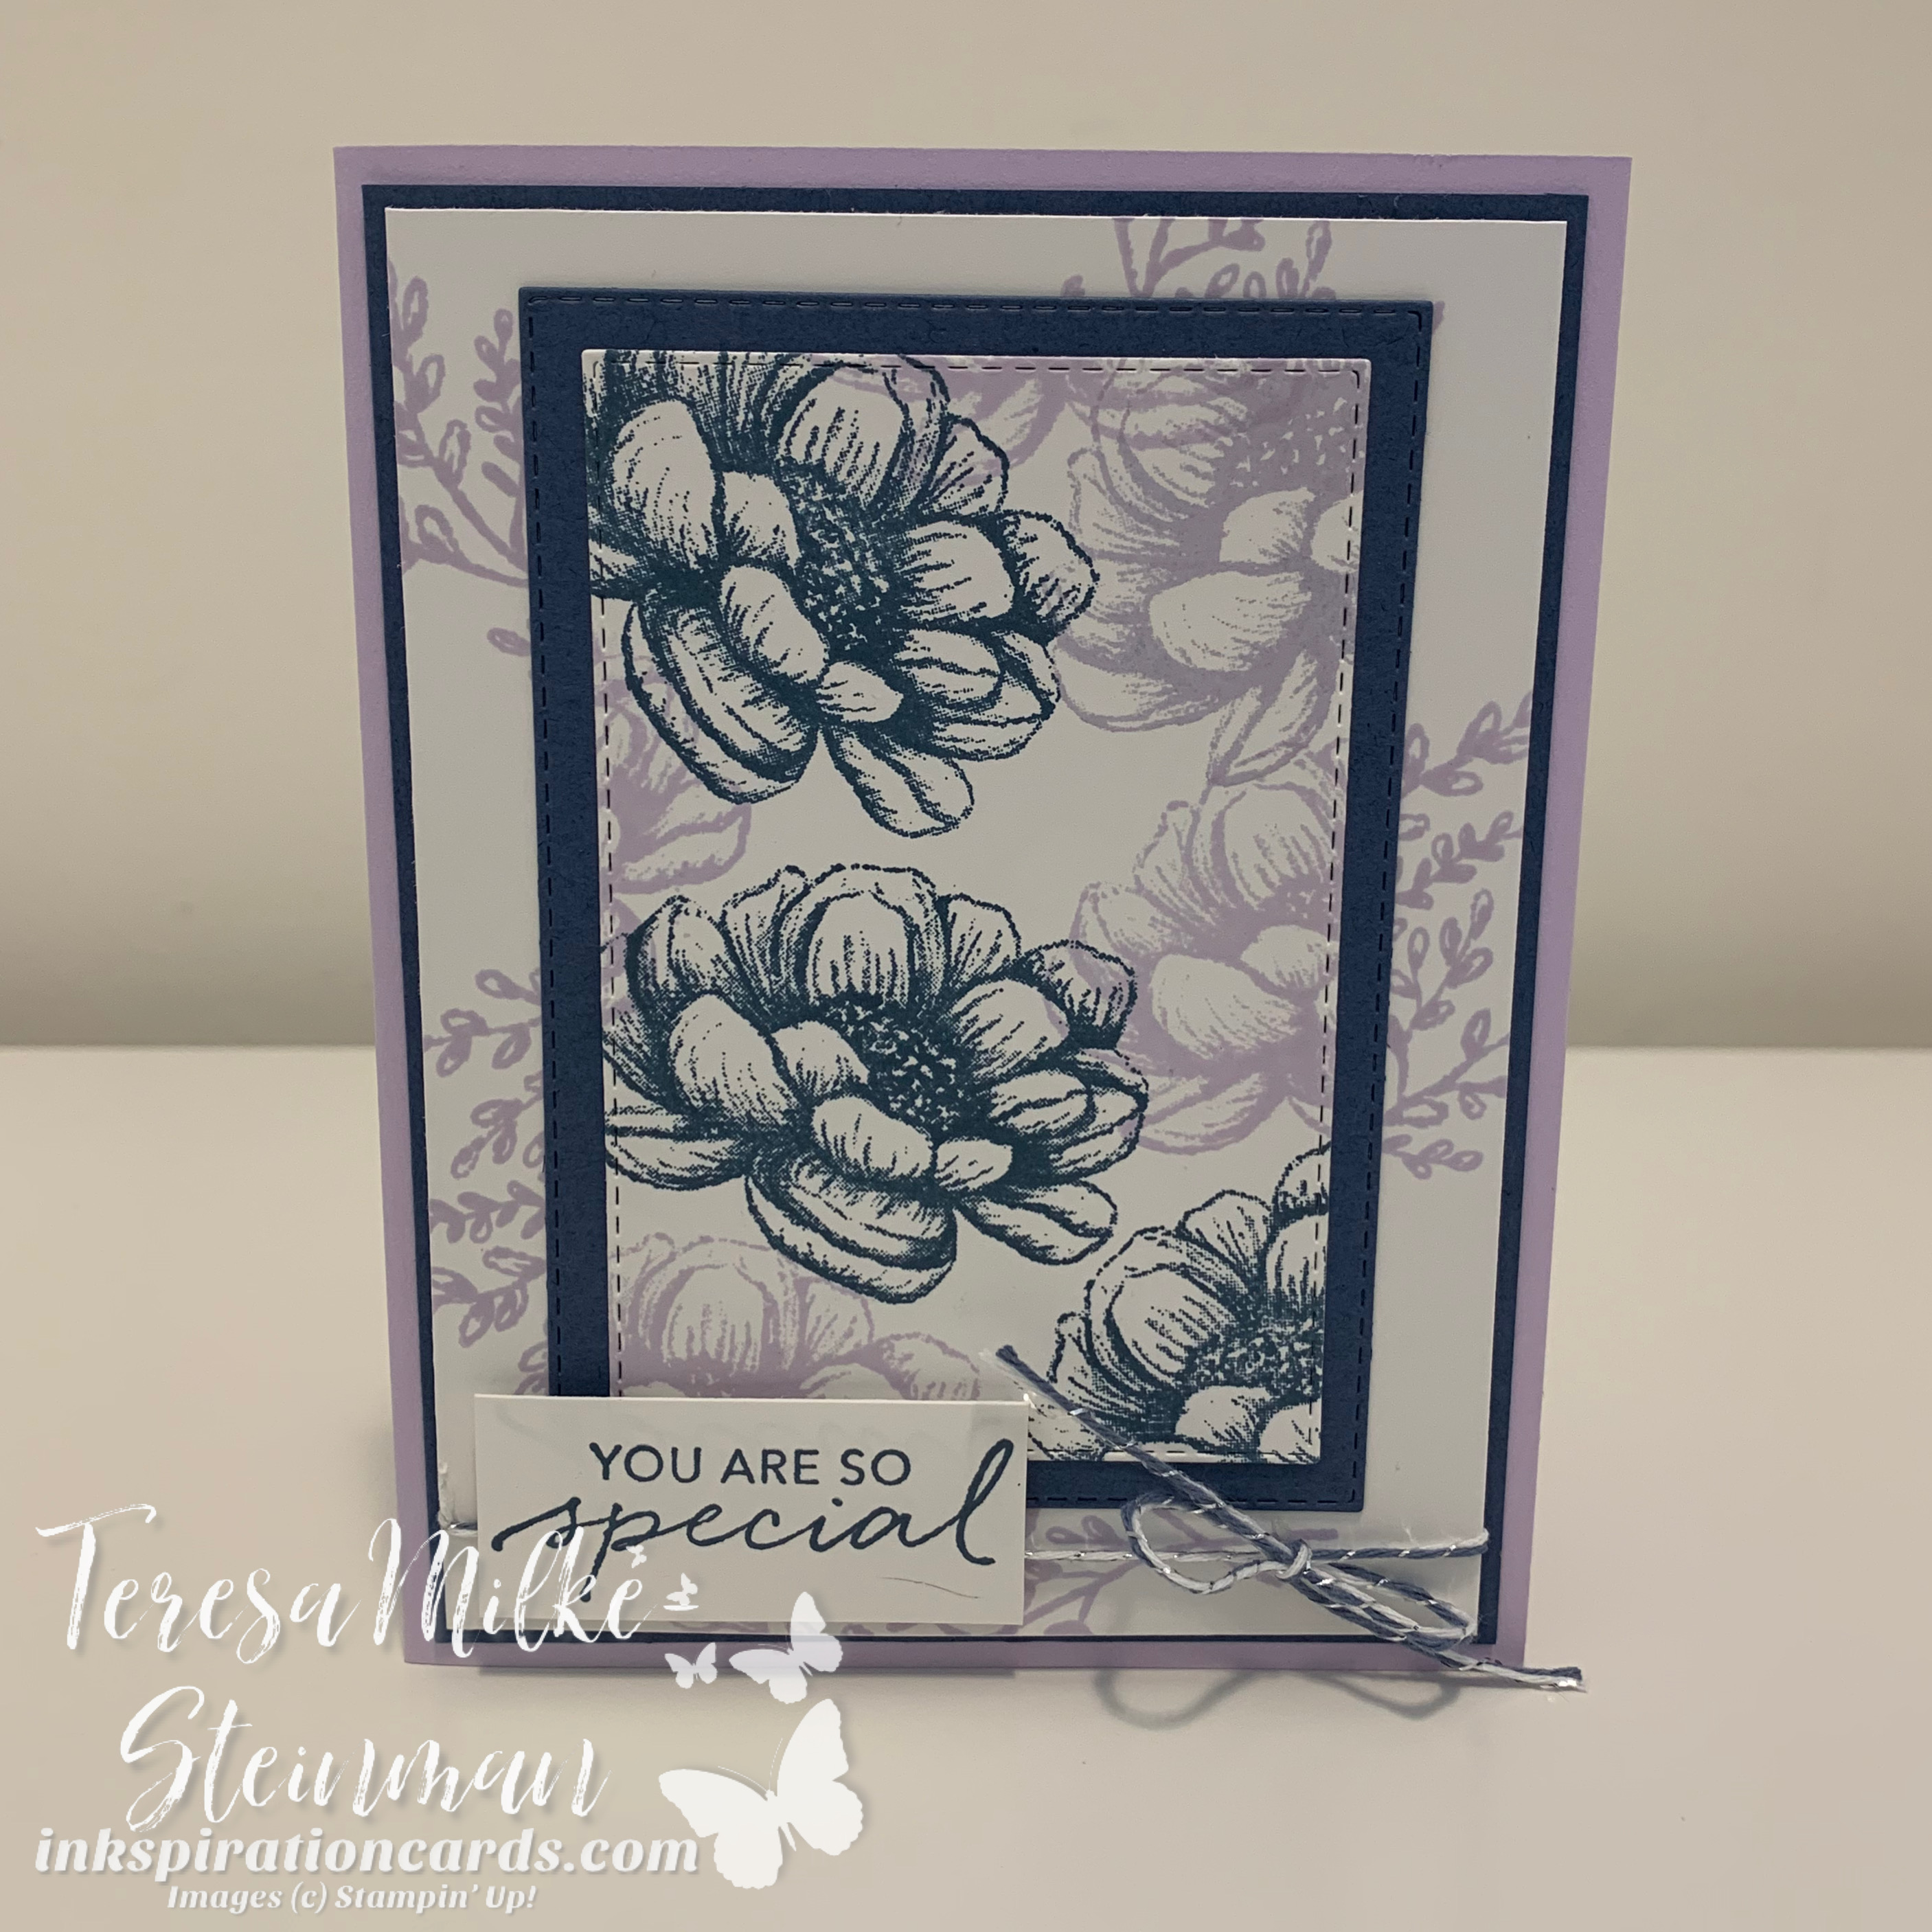
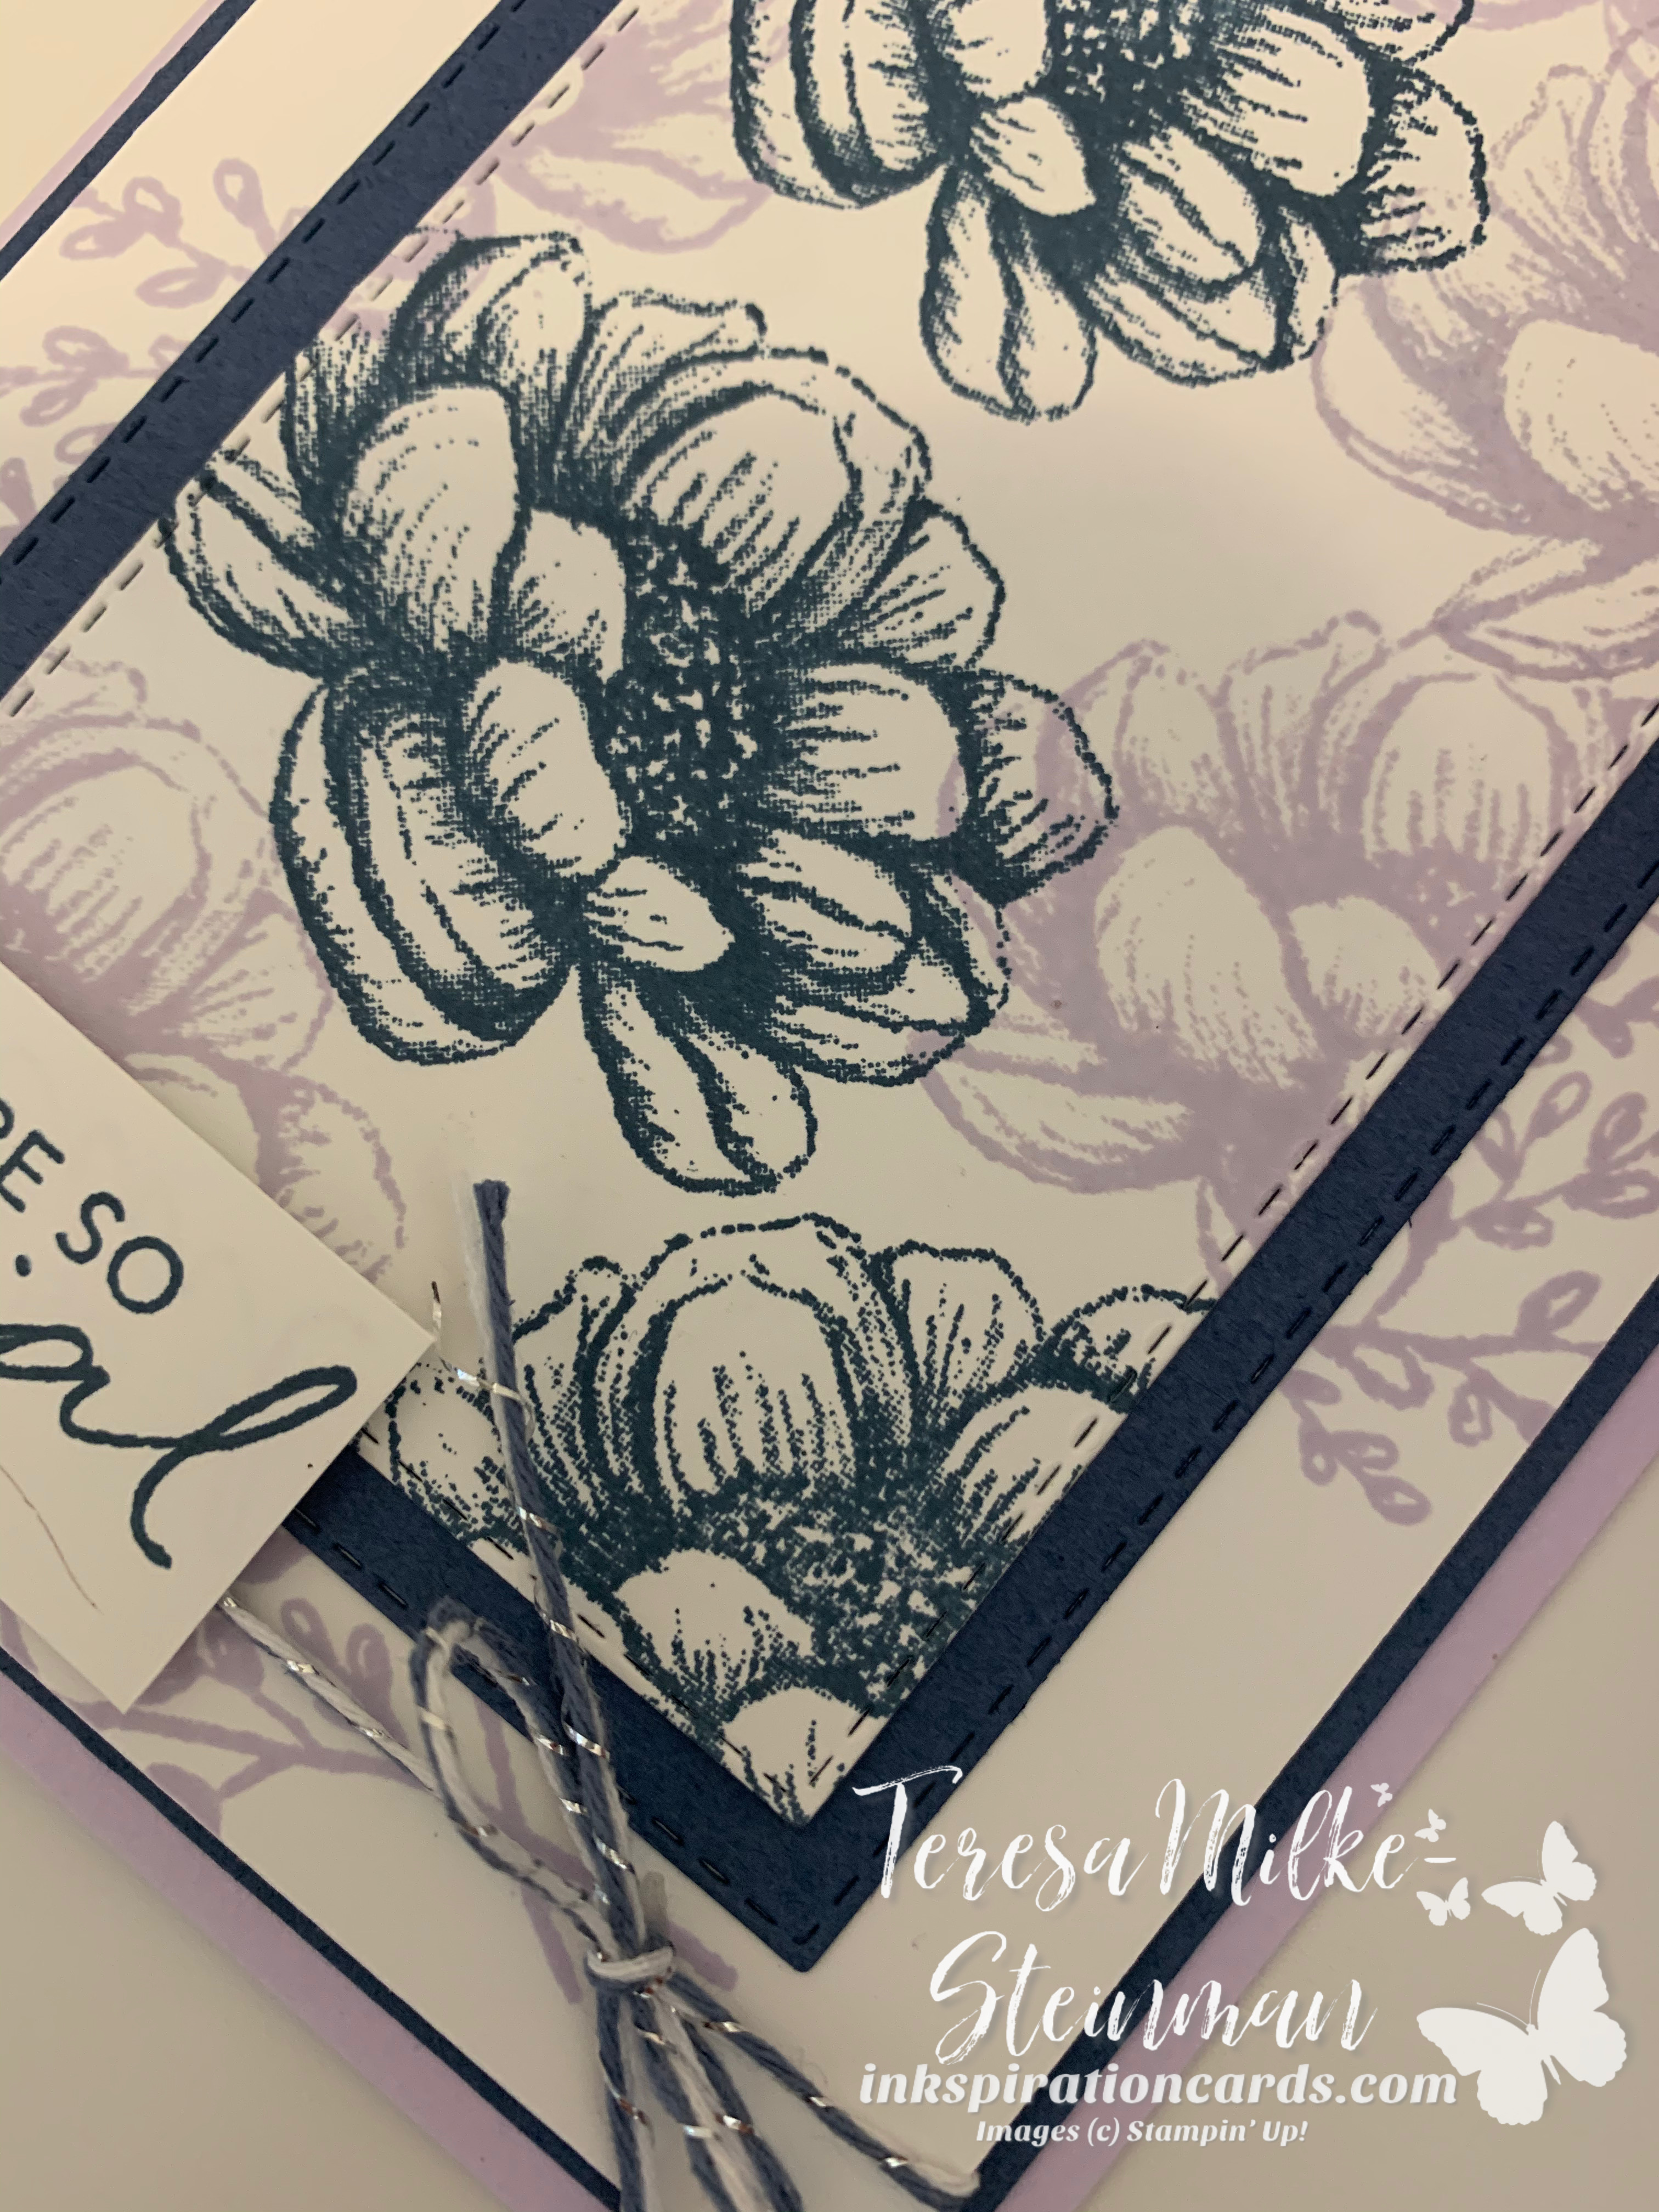
If you wanted to step this up a bit there are a few easy things that you could do… use another piece of cardstock to create a card mat behind the stamped card front, pop up the phrase with some Stampin’ Dimensionals, add some Linen Thread or even add a few of the 2020-2022 In Colour Enamel dots.

I love how cards don’t have to be super fancy to look beautiful and #simplestamping is a great way to remind yourself of this. If you’d like to check out some of my other #simplestamping projects check these out…

#simplestamping with Broadway Birthday

Celebrate with #simplestamping

#simplestamping congratulations

If you like this card make sure to follow my blog so you get an email to notify you whenever I post.

Celebrate Sunflowers

I love new Annual Catalogue time… not just for all the awesome new stamping products, but because my team always does a card swap! This is great because my budget never matches up with my wishlist, so it’s nice to see how other stamp sets, Designer Series Paper and other embellishments are used. In this swap I got 14 different cards and so I thought I would put together a couple of groups to share with you.

In this group I used sunflowers as a theme. I just love the Celebrate Sunflowers bundle, and there are also some sunflowers in the Jar of Flowers bundle. Both of these are definitely on my wishlist and seeing these cards just makes me what them more!

The card on the left shows off the Celebrate Sunflowers bundle with some vellumFlowers for Every Season 6×6 Designer Series paper and Stampin’ Blends. I love all the layers with this card and the Linen Thread adds a nice simple touch. (This card was made by Laurie Alexander)

On the right is the Jar of Flowers bundle along with some of the 2020-2022 In Colour 6×6 Designer Series paper and the Bumblebee Gingham Trim. I really like the colours for the flowers, not too bright or overpowering. (This one was made by Diane Kent)

img_2767

These other two cards both used the Celebrate Sunflowers bundle. On top it was paired with the Bumblebee Gingham Trim and the In Good Taste Designer Series paper for a nice, simple card with some country feel to it. (This card was made by my team leader Jenn Tinline)

The bottom card adds in some Misty Moonlight Ribbon and uses the Old World Paper 3D Embossing Folder. Misty Moonlight has quickly become a favourite of mine and I really like it on this card. (This one was made by Alison Mcaulay)

There are lots of reasons why I love my team and the inkspiration I get from these swaps is definitely one of them.

If you’d like to join my team now is a great time because you can choose an additional stamp/tool bundle of your choice from the catalogue on top of the $165 worth of Stampin’ Up! products. Check it out on my website and let me know if you have any questions; inkspirationwithteresa@gmail.com

Next Tuesday I’ll be showing off a few more cards so make sure to follow my blog to get notified whenever I post.

Fancy Fold Design Team: Corner Flip Card

It’s time for another Fancy Fold Design Team blog hop!! I’ve been having so much fun participating in these the last few months and this month is no exception. This month we’re doing the Corner Flip card which is a nice straight forward card, but do make sure you’re paying close attention when you’re cutting the corner to flip.

At the end of my post make sure to grab my simple instruction sheet for this fancy fold card and here’s a video by Dawn Griffith demonstrating the card.

For my version of the Corner Flip card I started with the idea of using the So Inviting stamp set, I liked that the images in this set are subtle because I really wanted the fold to be the feature. Initially I was thinking of creating an invitation with this fancy fold, but in the end I went with a thank you card. From there I chose Rich Razzleberry and  Highland Heather as my cardstock and ink colours.

Here’s my Corner Flip card…

So Inviting Corner Flip wm

This is the first time I used this colour combination and I really like how the Rich Razzleberry and Highland Heather go together. I used Rich Razzleberry ink for the “thank you” and Highland Heather ink for the images. On the outside of the card I also decided to do some tone on tone stamping and randomly stamped the little design with Rich Razzleberry ink on the Rich Razzleberry cardstock.

I really enjoyed making this card and love how it turned out. I debated about adding some Rhinestone Basic Jewels for some bling, but in the end decided to leave them off. Next time I make a Corner Flip card I think I’ll add some and see which I like better. What do you think? To bling or not to bling?

Don’t forget to grab my simple instruction sheet to make you’re very own Corner Flip card.

2020 Corner Flip Card Sheet

If you like this card make sure to follow my blog so you’ll get an email whenever I post. Here’s the next stop on the Fancy Fold Design Team Blog Hop… Nadine Schweda.  And if you’d like to check out some of the past Fancy Fold Design Team Blog Hops you can start here…

Double Corner Fold Card

Fancy Fold Design Team Double Easel Card

Fancy Fold Design Team Free Standing Pop Up Card

Teepee Fold

Paper Craft Crew Sketch Challenge #380

It has definitely been a while since I participated in a Paper Craft Crew Sketch Challenge and so I was glad that things have been relatively quiet lately so I could join this one. This week’s challenge is a horizontal sketch challenge (PCC380) and has a lot of elements to it. Here’s the sketch…

PCC380

It took me a while to come up with a design for this challenge. Even when I had decided to use the new Tasteful Touches cling stamp set it took me a little bit to decide on a colour combination. I can’t remember the last time I used this colour combination, or even if I have, but as soon as I thought of using Smoky Slate and Petal Pink it all just clicked.

For the images I used the feathers and bloom from the Tasteful Touches stamp set and then I wanted kind of a splash in the background which came from using the paint splatter image from the Beauty Abounds cling stamp set. As I was getting ready to stamp the feathers I thought it would add a nice touch by throwing in just a little bit of Crumb Cake ink instead of just having all 3 the same colour. I also put some in the background as well.

Tasteful Touches with Ribbon wm

I fussy cut the bloom and the feathers. I also decided to add some extra texture to the card and cut all up and down the feathers so that they looked a little more like feathers and not just stamped images.

The frame in the background came from using the two largest squares from the Stitched Shapes dies and I just layered the Smoky Slate banner on top. I used Stampin’ Dimensionals to pop up the feathers and bloom.

Tasteful Touches close up wm

I also added a few Rhinestone Basic Jewels for some bling. The sketch called for some ribbon/twine so I ended up adding a bow using some Whisper White Crinkled Seam Binding Ribbon.

I took a picture before and after I added the ribbon because I’m not sure which one I like better. I’d love to hear what you think.

Tasteful Touches wm

To check out the rest of the cards for this week’s sketch challenge here’s the link…

papercraftcrew.com/pcc380

And here are some of my other cards for the Paper Craft Crew Challenges…

Paper Craft Crew Challenge #372

Another Paper Craft Crew Challenge!

Paper Craft Crew Challenge #363

Paper Craft Crew Challenge #360

Paper Craft Crew Challenge #352

If you like this card make sure to follow my blog so you get an email every time I post!

Terracotta Tile & Tasteful Touches

Since it was launched with the new In Colours last year, I haven’t been a big fan of Terracotta Tile. I’ve loved crafting with the other colours, but I think I just haven’t been so sure what to coordinate with Terracotta Tile. So this week I decided to challenge myself and started my design with using this as one of my colours; for my other colour I went with Old Olive.

I took the “safe” route and decided to use Old Olive cardstock for the card base and then Terracotta Tile cardstock for my card mat. For stamping I really like how the Whisper White cardstock makes the other colours pop and so that’s what I used here.

Knowing that I was using Terracotta Tile as one of the colours for my card, the squares from the Tasteful Touches cling stamp set caught my eye. They reminded me of tiles and I thought that would work really well. I also really liked the idea of the “tiles” going across the cardstock.

Terracotta Tasteul Touches wm

I used both Terracotta Tile and Old Olive to stamp the squares a few times diagonally across my cardstock. It turned out nicely and it’s such a simple look.

Next I used a phrase from the Tasteful Touches stamp set, again with Terracotta Tile, and cut it out using the Stitched Nested Labels dies.

Terracotta Tasteful Touches close up wm

I felt like there was still something missing from the card and while one of my go tos are the Rhinestone Basic Jewels I didn’t feel like that would fit. So instead I went with some Linen Thread which has been another go to of mine in the past.

At first I wasn’t so sure about this card, but it came together nicely! I’m going to see if I can come up with some other projects using Terracotta Tile, after all it’s going to be around for another year.

If you like this project make sure to follow my blog so you’ll get an email every time I post.

Super Mario Birthday Card

This year for my littlest munchkin’s birthday he decided that he wanted a Super Mario birthday, which of course was sparked by his choice of birthday cake… a Mario Cart ice cream cake from Baskin-Robbins.

Now while we couldn’t have our usual birthday party I still wanted to make it special for him. Usually I would have all kinds of cool things for decorations and games/activities, so for this birthday I scaled back a bit.

In terms of decorations I found a Super Mario birthday banner and we picked up some Super Mario balloons. I also found some boxes that I printed and put together to made 3D cubes that look like some of the boxes from the game.

Mario Boxes

I was also able to organize a party on Zoom for him and a few of his friends. He loved showing off the presents he’d gotten so far and we also played a few games of BINGO using characters from different Nintendo games, including the Super Mario games. It was really nice to see him catching up and having fun with his friends. That’s something that both of my munchkins have been missing since this whole thing started.

We also did a celebration with just the four of us. My little guy said that he wanted to do a scavenger hunt for his presents and so my oldest and I put it together for him. He had a great time following the clues all around the house to find his presents and an even better time opening them all up!

So with this whole Super Mario theme I of course had to make a birthday card to match. I used Granny Apple Green (Luigi) and Real Red (Mario) for the colours. The leaves for the plants came from the Free as a Bird cling stamp set and for the plants themselves I used the Layering Circles and Layering Ovals dies. For the spots I used the now retired 1/2″ circle punch.

Super Mario Birthday wm

His face lit up when he opened his card and that made it all totally worth it!

If you like this card be sure to follow my blog so that you’ll get an email whenever I post. You can also check out some of the other parties I’ve put on for my munchkins…

A Harry Potter Birthday!

Pokemon Birthday Party

Unicorn & Mermaid Birthday

The New In Colours

I’m so excited that the new Annual Catalogue is here! I’m always eager to see what’s new… new stamp sets, new Designer Series Paper packs, ribbons, dies, etc. I might even be more excited about the new In Colours that were launched.

2020-2022 In Colours

This is my first card using some of the products from the new Annual Catalgoue. At first I wasn’t sure about the Tasteful Touches cling stamp set, but I kept getting pulled back to it. I love the variety of the images and the phrases are really nice too. I’m looking forward to creating more cards and projects with this stamp set.

For this card I really wanted the flowers to be the main focus and I knew that I wanted to use one of the new In Colours. Fortunately I have the Misty Moonlight Stampin’ Spot from the May Paper Pumpkin kit (I’m still waiting to get my In Colour inkpads) and so this was my jumping off point.

From there I chose Purple Posy, one of the In Colours launched with last year’s Annual Catalogue, as the other colour for this card. I love how these two colours go together! I will definitely be using this colour combination again.

Tasteful Touches Misty Moonlight wm

I stamped the flowers using Misty Moonlight and Purple Posy. The branches in the background were stamped with Purple Posy and the phrase using Misty Moonlight.

To step up the card a little bit more I used the Stitched Rectangles dies for the Whisper White cardstock that had the flowers on it and to create a border with another piece of Misty Moonlight cardstock. I debated about using the Stitched Rectangles for the phrase too, but in the end decided to leave it alone.

Tasteful Touches Misty Moonlight close up wm

I also decided not to pop up the flowers, but I did use Stampin’ Dimensionals to pop up the phrase. Then instead of adding a few Rhinestone Basic Jewels for my bling, cause you always have to add some bling to your cards, I went with the Misty Moonlight & Silver Baker’s Twine from the Flowers for Every Season Ribbon Combo Pack.

I can’t wait to get crafting with the rest of my new products from the new Annual Catalogue… so stay tuned for more!

If you like this card make sure to follow my blog so that you’ll get an email whenever I post and if you live in Canada and would like to get your hands on the new catalogue send me an email at inkspirationwithteresa@gmail.com