#sharesunshine

The idea to #sharesunshine has been a welcome one during these challenging times. I’ve seen tons of pictures of people sharing what someone dropped off on their doorstep and it’s really nice to see people trying to connect even though we can’t do it like we’re used to. This is probably why I jumped at the chance to send some cards to my family members who I usually only send Holiday cards to. I even found an article in Better Homes & Garden about this whole thing…

www.bhg.com/sunshineboxes

I also found a group of women that are spreading sunshine, or in their case fairy dust, across Ontario. So when I found this group on Facebook I offered cards for those who are sharing sunshine in and around my area. I love being able to donate my cards knowing that they’re going to helping bring a smile to someone’s face.

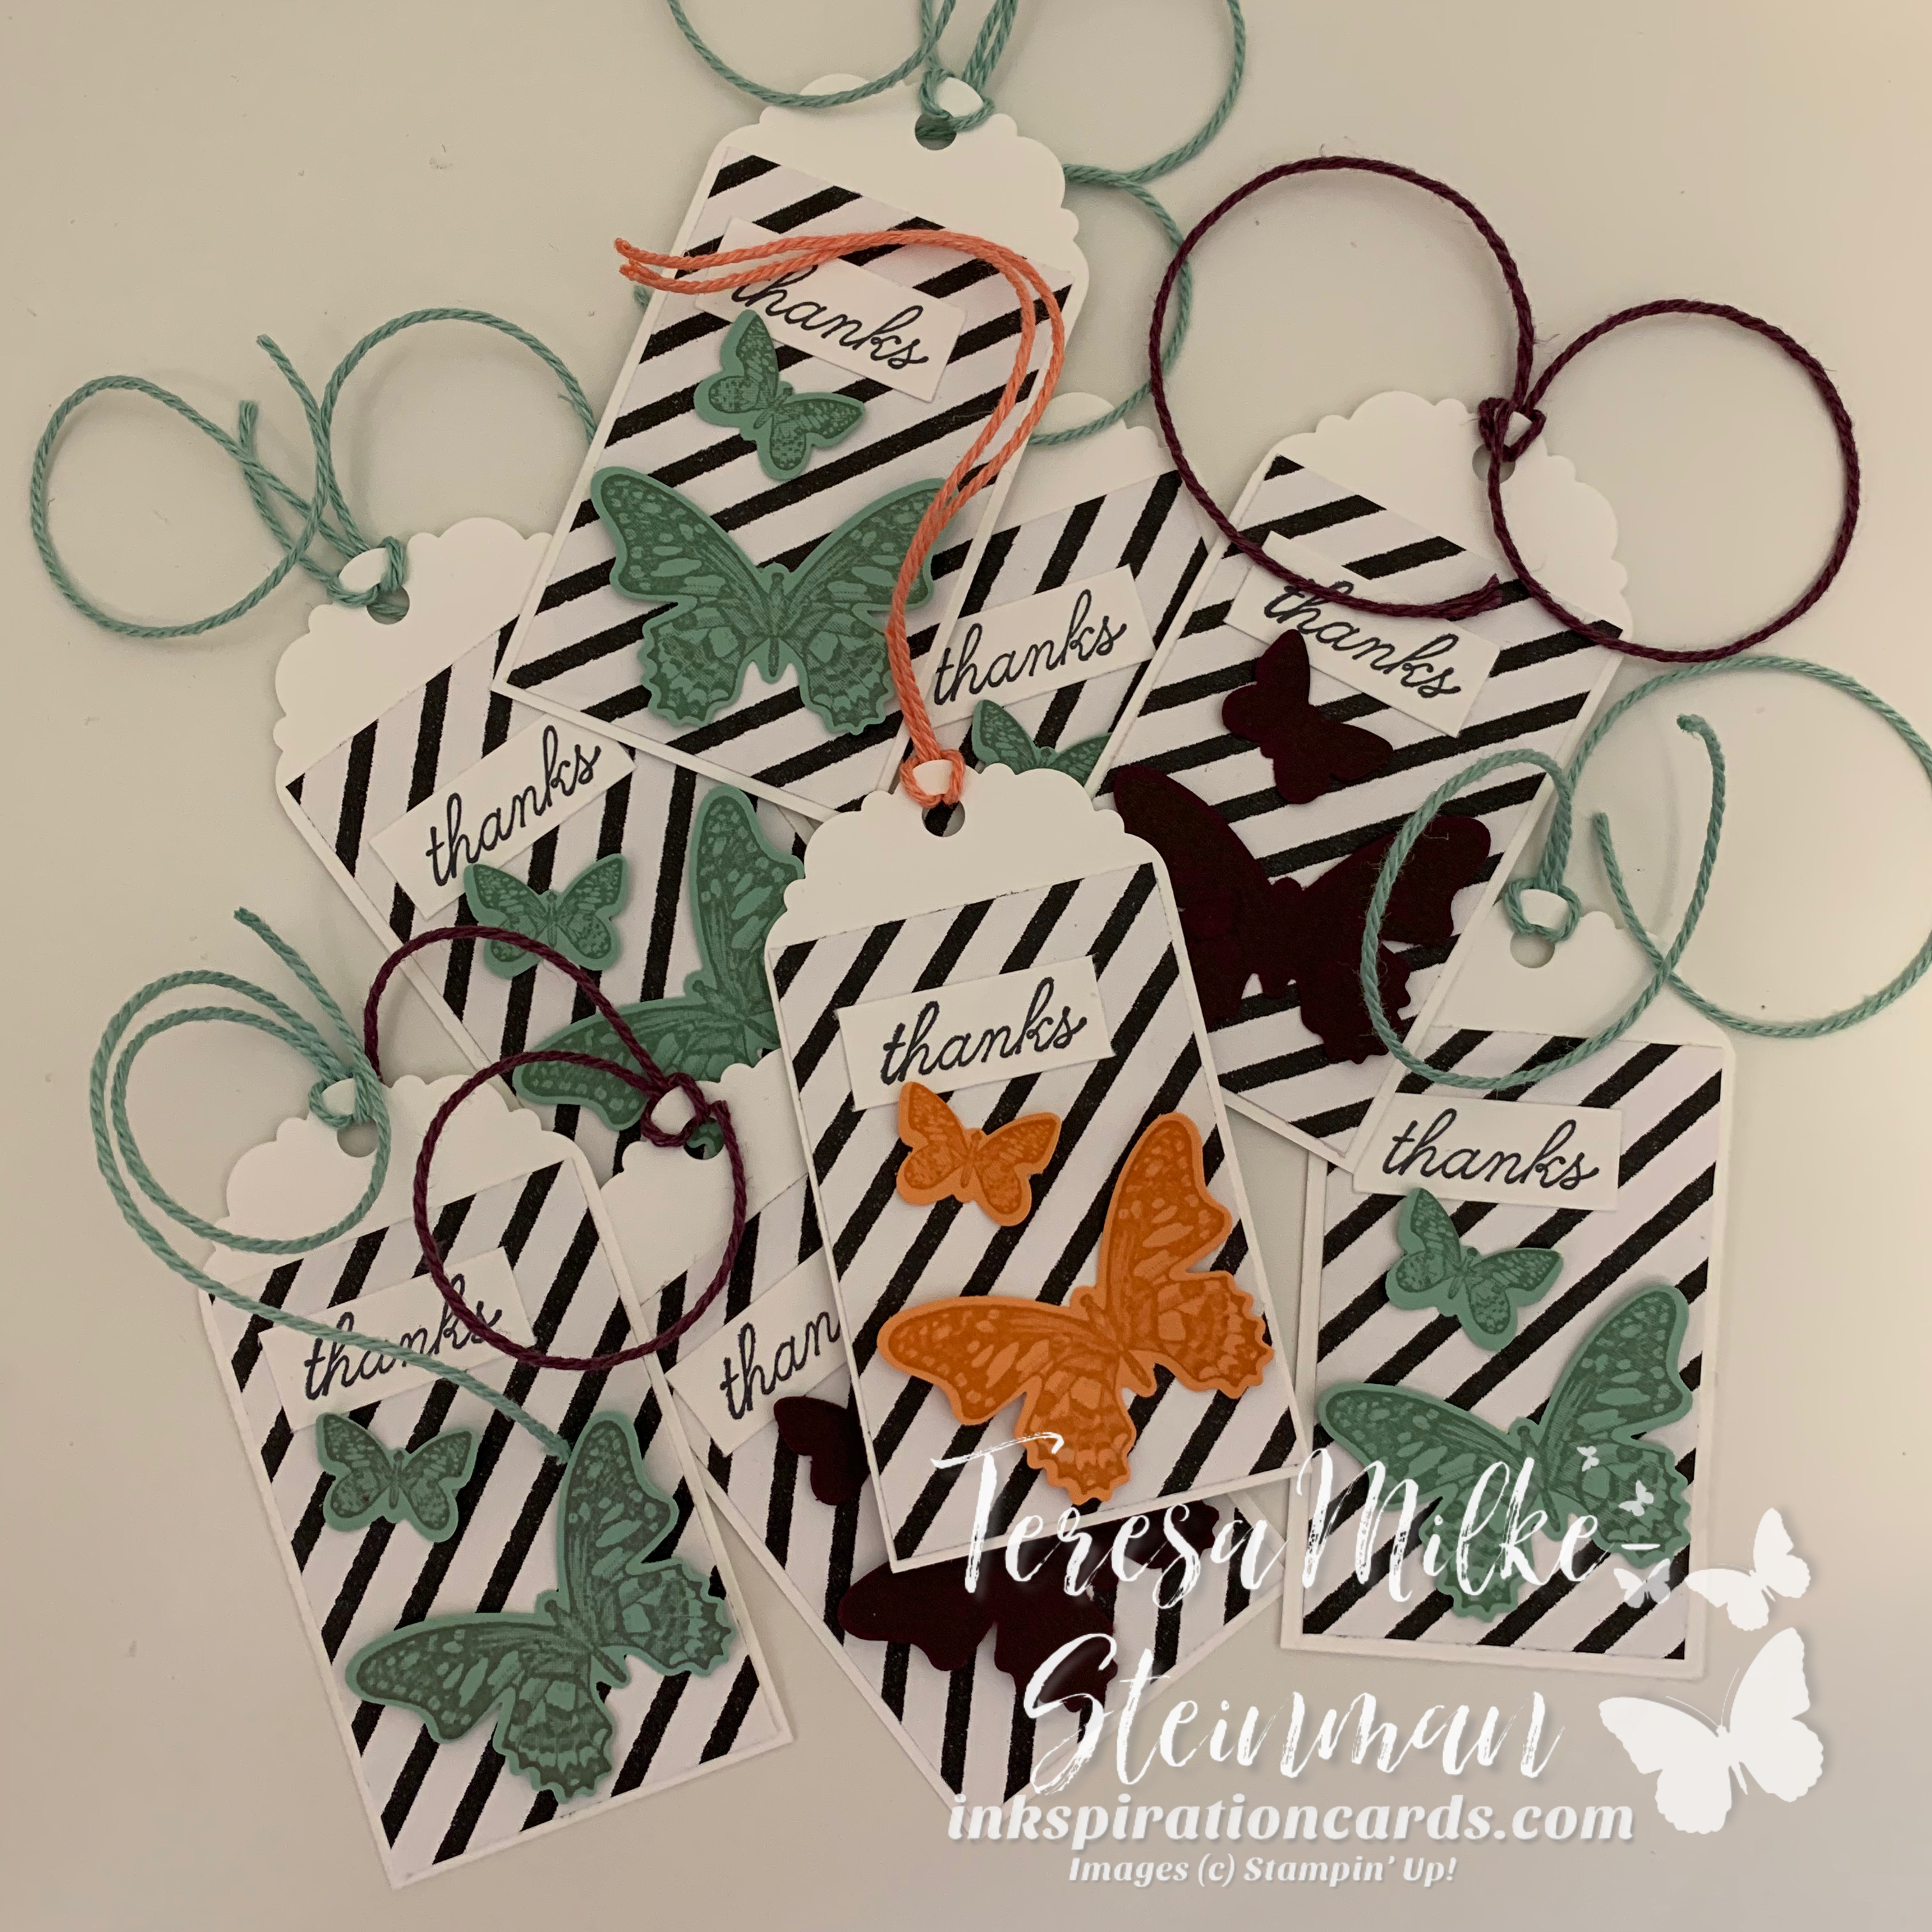
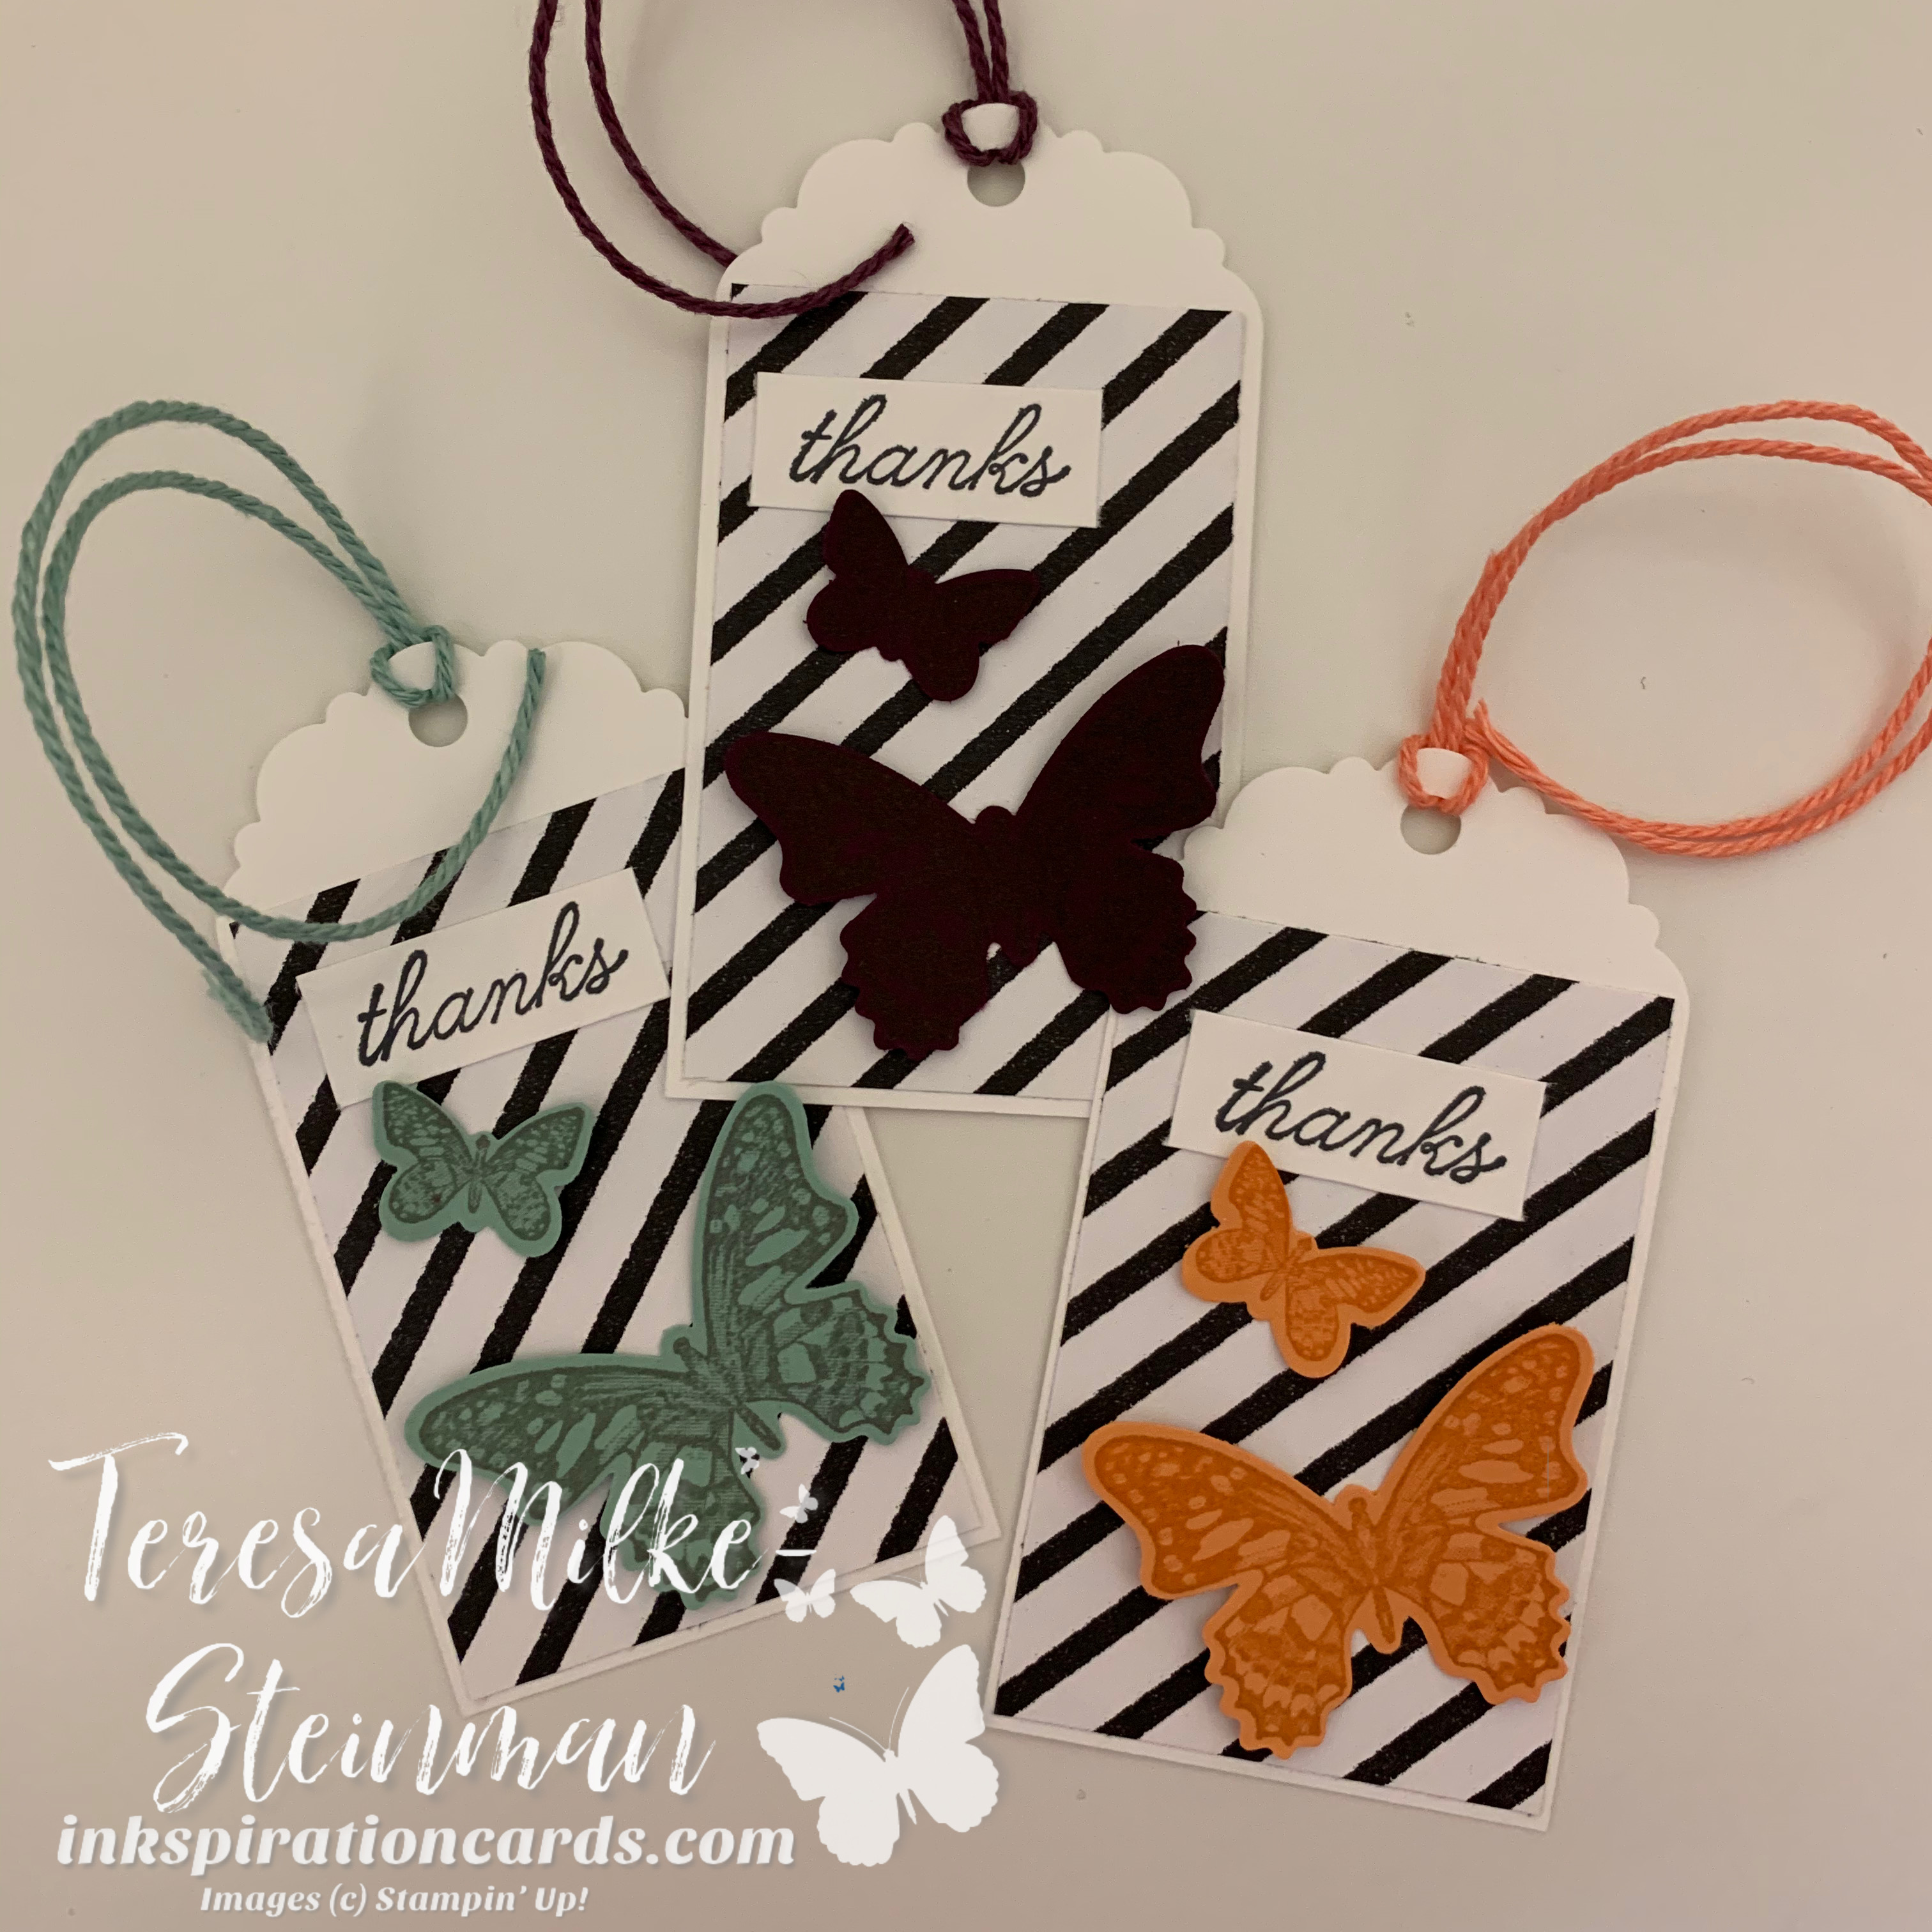
One woman asked if I could make some tags and so I thought I would share what I made for her.

Pile of See a Silhouette tags wm

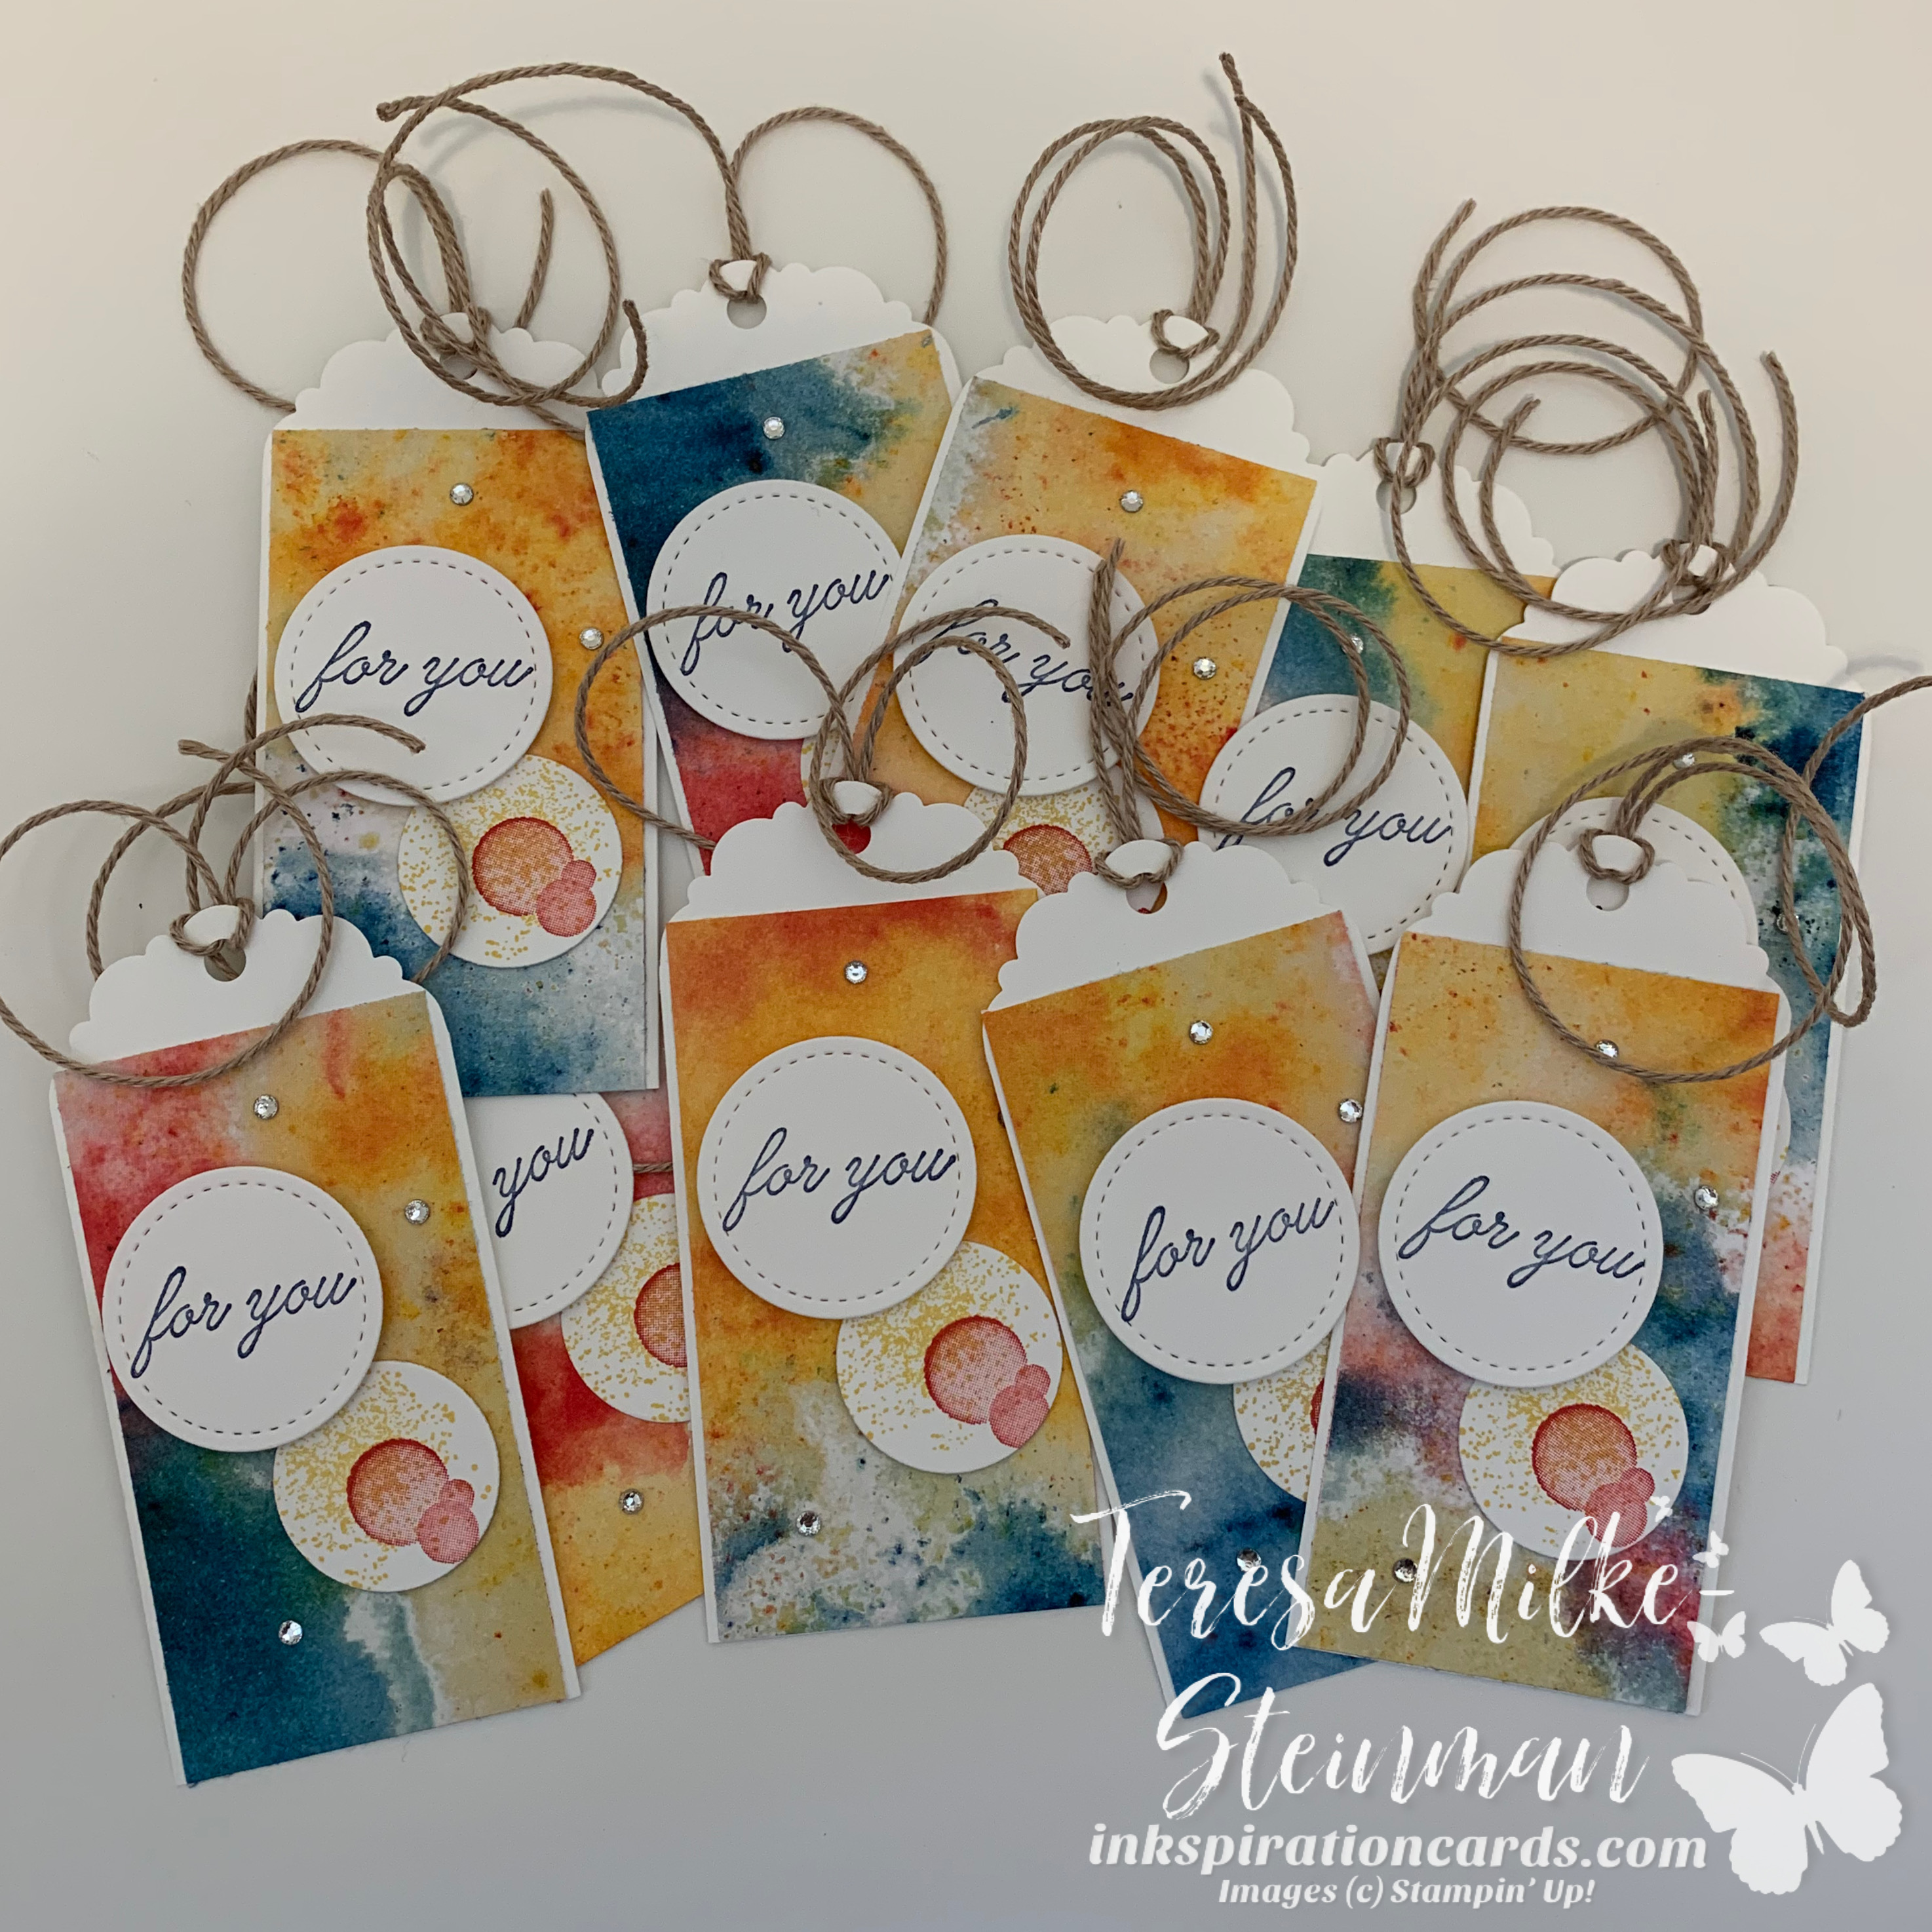
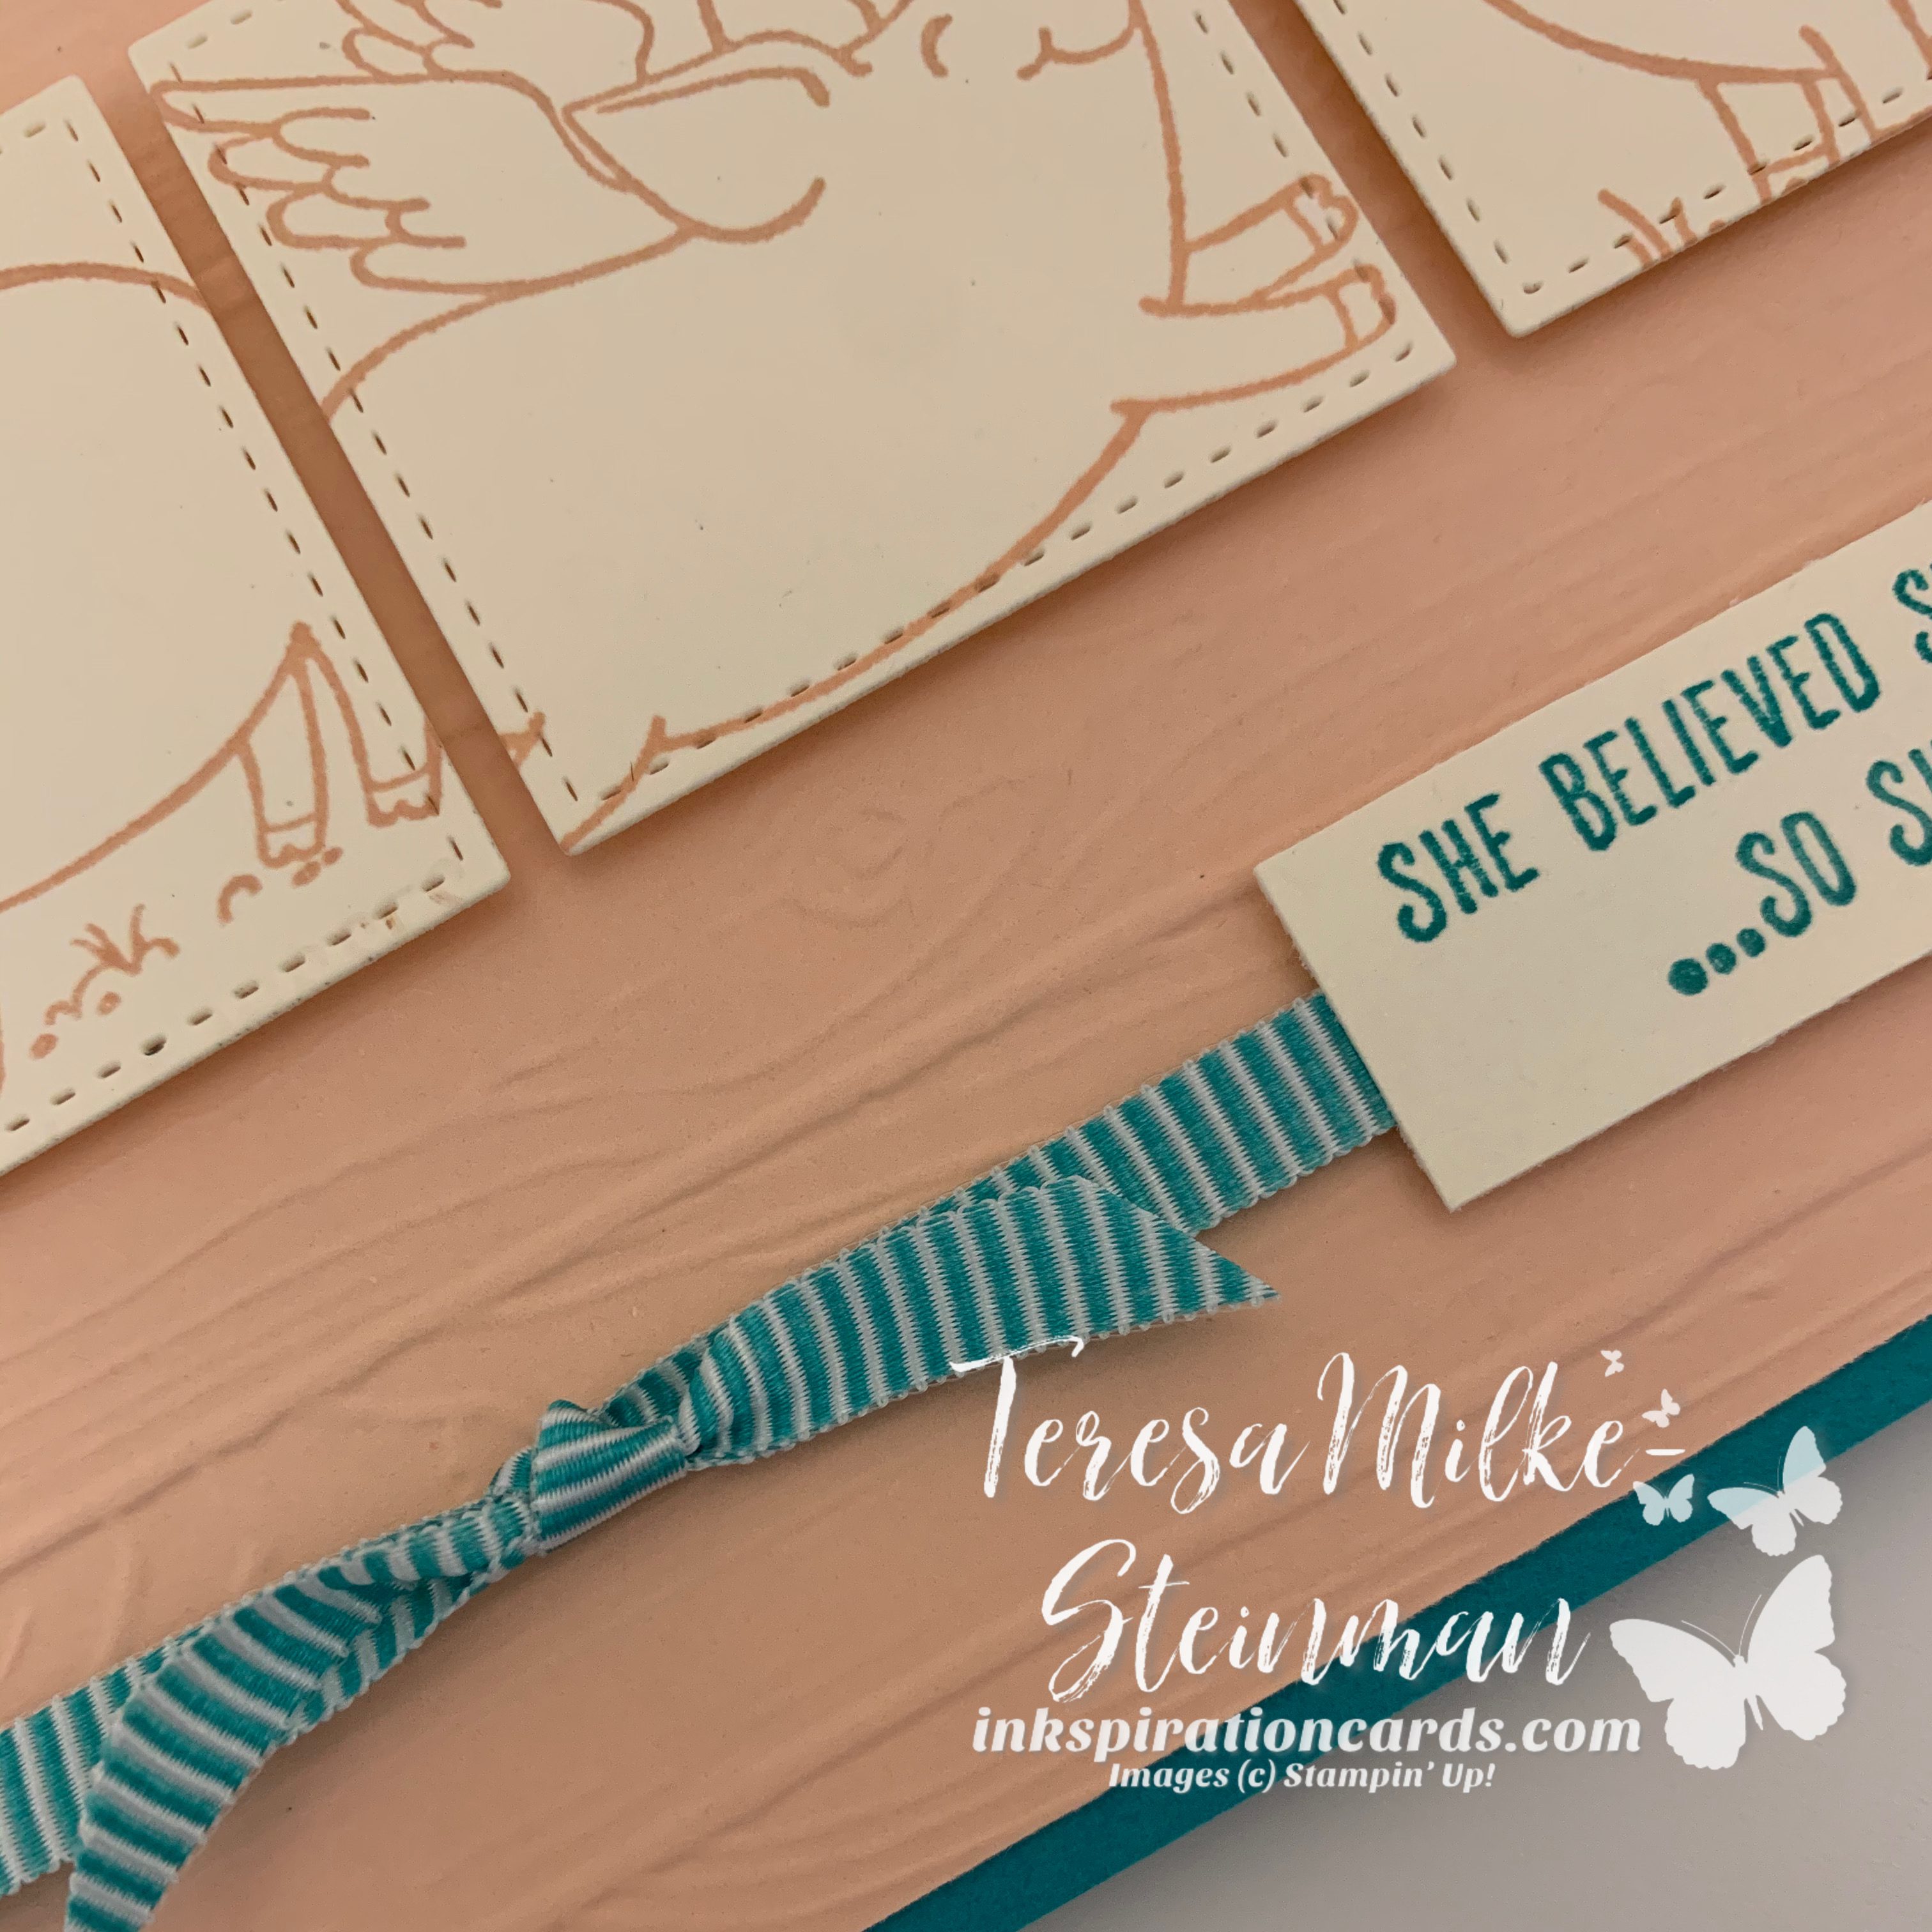
I’ve been loving crafting with the See a Silhouette Designer Series Paper lately and so of course I wanted to use it to create these tags. Next I grabbed my Delightful Tag Topper Punch to use on my Whisper White cardstock and the Crumb Cake twine from the Nature’s Twine pack…I’m so sad this is retiring 🙁

The “for you” came from the Beauty Abounds cling stamp set which I stamped in Night of Navy to pull from the colours in the DSP. I also used the bubbles and paint splatter images from the Beauty Abounds stamp set and again using the colours from the DSP I stamped with Daffodil Delight and Real Red.

See a Silhouette tags wm

I cut out the phrase and images using the Stitched Shaped dies and the Layering Circles dies. Then I popped up the phrase with some Stampin’ Dimensionals and added a few of the small Rhinestone Basic Jewels. I always need to add a bit of bling to my designs.

I hope that the women who receive these with their #sunshineboxes enjoy them as I definitely enjoyed making them.

If you like this project be sure to follow my blog so that you are notified whenever I post and if you would like to do something during these challenging times check out my post about Stamping for COVID-19.

Stamping for COVID-19

To help support the World Health Organization and United Way, Stampin’ Up! created some digital stamps that can be used to create cards just for this challenging time we are all experiencing right now. I got mine pretty quickly, but I needed to wait for a printer toner to arrive, grrr! I guess I could have printed them in black in white, but I really liked the colours and so I just had to wait.

With 15 pages of images and phrases to choose from it took me a couple times going through them all to figure out which ones I wanted to start with. I still have a bunch of images to use, but I wanted to share a few of the cards that I’ve made so far.

Stampin’ Up! used a couple of my favourite colours, Rich Razzleberry and Petal Pink, and so that’s where I started. I also used the Heartfelt and Beauty Abounds stamp sets and popped up the other images and phrases using Stampin’ Dimensionals for these cards.

And of course I had to create some cards using the martini/”quaran-tini”. For that one I used Old Olive cardstock for the base (I honestly don’t know what other colour I would have used). I used the Beauty Abounds stamp set for these cards too.

After that I thought I’d just do some simple ones… I put some of the See a Silhouette Designer Series Paper on a few of the Whisper White Note Cards. The other DSP was some leftovers I have from the Lily Impressions DSP from this past Sale-a-bration. I also added some Whisper White Solid Bakers Twine, a few Pearl Basic Jewels and of course some Stampin’ Dimensionals.

I only printed a few pages and I still have lots to create with so it was definitely $12 USD well spent, plus 100% of sales goes to support the World Health Organization and the United Way.

There’s still a few more days to get your own PDF full of these great images and phrases and they’re offered in different languages, so make sure to check out the link before June 2nd!

https://covid19.stampinup.com/

A Scrappy Father’s Day Card

A few weeks ago I created a card using the #scrappystriptechnique and I just loved it so much that I had to create another using a different pack of Designer Series Paper! So with Father’s Day around the corner I thought it would be fun to use the Country Club Designer Series Paper. My dad loved golfing so this made me think of him when I was making it.

For my card base I used Night of Navy cardstock to coordinate with and make the colours from the DSP stand out. I added a piece of Whisper White to adhere the DSP to because I wanted something other than Night of Navy popping through between each strip. Plus that also made it easier to wrap the Linen Thread around.

Scrappy Celebrate wm

Somehow I don’t have a stamp saying “Happy Father’s Day” (I’ll have to fix that soon!), so I chose a phrase from the Itty Bitty Birthdays cling stamp set that I thought would work and stamped it with Night of Navy ink. Then I cut out the phrase using the Stitched Rectangle dies and popped it up using some Stampin’ Dimensionals.

Scrappy Celebrate close up wm

I love how easy and fun this card was and how well it turned out and I can’t wait to use this technique with the Designer Series Paper from the upcoming new catalogue!

If you live in Canada and would like to get your hands on the new catalogue that launches on June 3rd send me an email at inkspirationwithteresa@gmail.com and I’d be happy to send one to you.

And if you like this card be sure to follow my blog to that you’ll get notified whenever I post.

Fancy Fold Design Team Double Easel Card

For this month’s Fancy Fold we were given the Double Easel card. I wasn’t quite sure what to expect when I went to look it up, but this card is very straight forward and looks really neat. I’ve created a basic instruction sheet that you can download, so keep scrolling, and here’s Sharon Armstrong’s video if you want to see another version.

As soon as I saw the video my mind went straight to the Magnolia Lane Designer Series Paper (I’m sad to see this DSP retiring). From there I decided to use Whisper White and Mossy Meadow cardstock for my card bases.

Double Easel front wm

I went with the images from the Magnolia Blooms stamp set to really play up the images from the DSP, the phrase also came from this set. For the phrase I stamped with Mossy Meadow ink and for the blooms I decided to heat emboss them with Gold Stampin’ Emboss Powder.

Double Easel close up wm

After that I cut out the large bloom and popped it up on top of some Petal Pink Metallic-Edge Ribbon using some Stampin’ Dimensionals. I framed the phrase and other bloom using the Stitched Nested Labels Dies and of course I added a few Rhinestone Basic Jewels to add some bling.

Here’s the view from the side to give you an idea of how the card bases overlap and create the double easel effect.

Double Easel side wm

This was such a fun and easy card to make. I’m definitely going to be using this fold again!

To keep going on this month’s blog hop check out Aude Barbara’s blog next and make sure to download this simple project sheet.

2020 Double Easel Card Sheet

Thank you Tags

I make thank you cards to give my customers whenever they order from me and sometimes I’ve added some images, etc. to the bags I put their orders in. Recently I had the idea to make tags to attach to the bags instead and was inspired by another demonstrator’s design.

For my tags since I love butterflies I went with the Butterfly Wishes cling stamp set which coordinates with the Butterfly Duet Punch and for the top of the tag I used the Delightful Tag Topper Punch.

Thank You Tags wm

I put some Designer Series Paper from last year’s Sale-a-bration onto the Whisper White cardstock tag and chose the colour of my butterflies using some of the colours from the Nature’s TwineMint MacaronGrapefruit Grove and Blackberry Bliss. “Thanks” came from the Beauty Abounds cling stamp set.

Thank You Tags 3 wm

I’m wondering if the Blackberry Bliss is a little dark, so while I love it I may look at another shade of purple for my next batch. Otherwise I really like how they turned out and hope that my customers like them too!

If you like this project please follow my blog so you’ll be notified whenever I post!

This Little Piggy is saying “good-bye”

Since the list of retiring products came out I’ve been trying to create with the stamp sets, etc. that soon will be gone to keep me busy while I wait for my pre-order from the upcoming Annual Catalogue to arrive. This week I pulled out the This Little Piggy cling stamp set. I actually haven’t used this set very much, but it’s so cute… I’m wondering now how come I didn’t stamp with it more often.

For this card I also wanted to use some of the Bermuda Bay 1/4″ Mini Striped Ribbon before it’s gone as well, so that’s what sparked my colour combination. I used Bermuda Bay cardstock for the card base and Petal Pink cardstock for the card mat. I really like how these colours compliment each other, plus the Petal Pink ink worked perfectly for the pigs.

So she did wm

To frame my pigs I used the Stitched Shapes dies and popped them up with Stampin’ Dimensionals. I also used the Pinewood Planks 3D Embossing folder to add a sort of farm feel to the card.

So she did close up wm

When my daughter saw this card this morning she commented that it was “the cutest card ever” and I do agree with her, this card is super cute!

If you like this card make sure to follow my blog so that you’re notified whenever I post a project!

Also for those of you who live in Canada who haven’t had a chance to look at this year’s list of retiring products here it is. And let me know if you have any questions, especially regarding what is still available, I’m happy to help! (inkspirationwithteresa@gmail.com)

Retiring List 2020

Double Corner Fold Card

For Mother’s Day this year I wanted to create a different kind of card, so when I saw a Double Corner Fold card created by a demonstrator from the UK I knew that was what I wanted to make.

For my design I started by deciding to use the Timeless Tulips bundle. From there I choose Old Olive for the card base, stems and leaves and Daffodil Delight for the card mat and some of the tulips. I also used Calypso Coral ink for the other tulips and went with Very Vanilla cardstock for a softer white to stamp my images on.

Using the Tulip Builder Punch made it really easy to add some tulips and leaves to the inside of the card.

DC Fold inside wm

For the phrase on the inside of the card I used one from the Strong & Beautiful cling stamp set.

On the outside I used the Stitched Rectangle dies to frame “Happy Mother’s Day”, which came from Timeless Tulips. I also added some Linen Thread and one Rhinestone Basic Jewel.

DC Fold outside wm

This was a fun and relatively easy card to make. I hope my mom likes it! Here are the measurements, etc. I used if you’d like to try this for yourself…

  • card base: 8 1/2″ x 5 1/2″ and fold in half
  • measure 2″ from each top corner along the top/fold as well as down the side, mark each point with a pencil on both sides of the card base
  • score between the pencils marks on both sides of the card base
  • push the corners in towards the inside of the card

If you like this card be sure to follow my blog so you’ll be notified whenever I post and if you make your own Double Corner Fold card I’d love to see a pic!