#SimpleStamping Thank You Card

This month’s #SimpleStamping challenge from Stampin’ Up! is to make a #SimpleStamping thank you card. And we can use stamps, ink, paper and our favourite retiring product. This was actually a tough choice for me. There are a few things that I’m sad to see retiring. In the end I decided to use the Circle Sayings stamp set as my favourite retiring product.

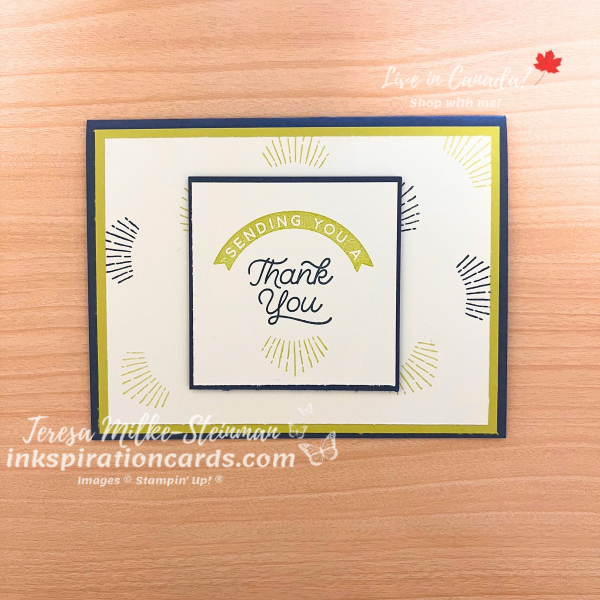
For my colour combination I went with one I haven’t used before. I’m using Misty Moonlight and Lemon Lime Twist. The card base is Misty Moonlight and I used Lemon Lime Twist for my card mat. Then I stamped a simple background using the rays image with both Misty Moonlight and Lemon Lime Twist ink.

On top of this I layered a Misty Moonlight square that framed a piece of Basic White cardstock that I stamped my sentiment on. I was so tempted to use the coordinating punch. It’s a great and simple way to step up your projects! I stamped the “thank you” in Misty Moonlight ink. Then I framed it with an extra sentiment and some more rays with Lemon Lime Twist. To finish off the #SimpleStamping thank you card, I popped these squares up with a few Stampin’ Dimensionals.
#SimpleStamping Thank You Card

If you want to step it up a little bit more, add a few Rhinestone Basic Jewels.

Check out another card I made using the Circle Sayings stamp set here. There’s less than two weeks left to grab this great bundle. Don’t miss out!

Product List
Crafting with You

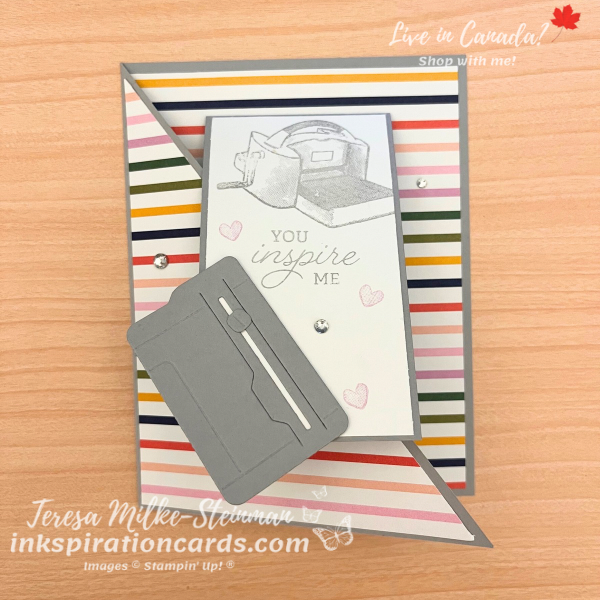
This year for my ScrapFest Make & Take I’m using a very themed stamp set… Crafting with You. If you’ve seen the stamp set and dies then you’ll know why I couldn’t resist. I mean just the paper trimmer and emboss machine that’s part of this set make it a great addition to any paper crafter’s craft stash!

I’m pairing it with the Delightfully Eclectic Designer Series Paper pack that’ll soon be retired. It’s nice and colourful! And I cut up a couple of different designs to give some options with this fun fold card. I wanted to do something a bit different, but still easy enough to copy from the sample. And because I have a couple of different designs of patterned paper, I’m using a nice neutral card base; Smoky Slate. Plus this is the perfect colour for the paper trimmer and scissors I die cut in advance.

To make the base, you’ll start with a standard 5 1/2″ x 8 1/2″ card base. I highly recommend that you score it in half (at 4 1/4″) before you diagonally cut half of the front of the card base off. It definitely makes it easier! Then I added another piece of Smoky Slate cardstock which I folded in half and added some Basic White to the inside and outside.

From here I simply stamped a sentiment and an emboss machine of the outside piece of Basic White cardstock using Smoky Slate ink. Then to pull a little colour from the DSP, I stamped a few little hearts with Fresh Freesia ink. Next I added a die cut paper trimmer. And to finish it off a few Rhinestone Basic Jewels for some bling.

Crafting with You

I hope that everyone at ScrapFest enjoys crafting with Crafting with You as much as I have been! I’m so glad to see that it’s sticking around for a while longer.

Sadly the Delightfully Eclectic DSP pack is not. Check out a masculine themed card I made with this great pack of patterned paper here.

And don’t forget the last chance sale is only for a little while longer!

Product List

Delightfully Eclectic

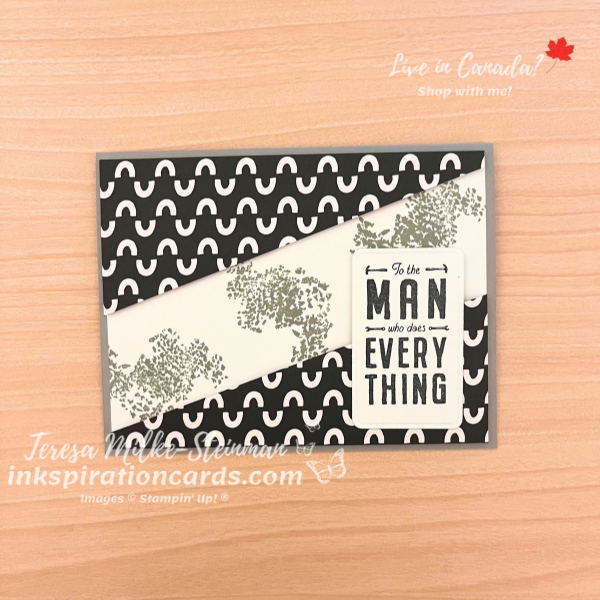
This week I’m sharing a project using a few different retiring products. Sadly, the He’s All That stamp set and dies are retiring. And so is the Delightfully Eclectic Designer Series Paper pack. Now you may not immediately think of using this pack of patterned paper for a masculine themed card. But there are a couple of designs in this pack of DSP that do work well.

So that’s where I started for this card design… with the patterned paper design. Once I had that I chose my colour combo, which in this case is pretty simple because they’re all neutral colours. My card base is Gray Granite. And then I layered a couple pieces of the black and white DSP on top using some Stampin’ Dimensionals. To make these two pieces, I started with a 4″ x 5 1/4″ piece of the DSP. Then I lined up one corner at the 2″ mark and cut across on a diagonal to about the 1.4″ mark. To get the other piece I just flipped it around and repeated the same thing.

Behind the pieces of the Delightfully Eclectic DSP, I stamped one of the images from the Season of Chic stamp set in Gray Granite ink. Then I stamped a sentiment from the He’s All That stamp set in Tuxedo Black Memento ink and die cut it with one of the coordinating dies. And I layered this on top of the bottom piece of DSP.

Delightfully Eclectic

I’m hoping to do a couple more projects with the Delightfully Eclectic DSP before it retires. But in the meantime, check out another project I made using He’s All That here.

As I write this, the He’s All That stamps and dies and the Delightfully Eclectic DSP are still available. You have until April 30, or maybe sooner, to get these before they’re gone. Don’t wait!

Product List

Handmade Thinking of You Card

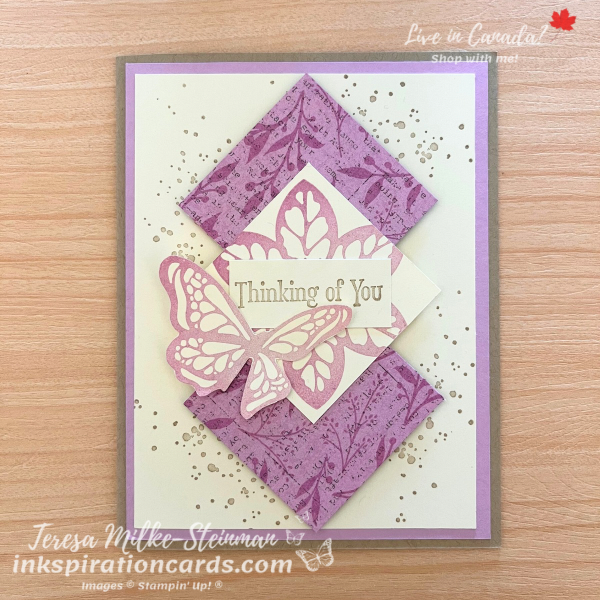
Over the next few weeks I’m going to be sharing projects using some of the products that are retiring very soon. This week I’m using the Quiet Meadow stamp set and Masterfully Made Designer Series Paper to make a handmade thinking of you card. This is also the theme for this month’s #SimpleStamping challenge from Stampin’ Up! For this challenge we can use some DSP along with the usual stamps, ink and paper.

I used my patterned paper design choice to lead to my ink and cardstock colours. The Fresh Freesia design in the Masterfully Made DSP pack has been my favourite, so I’m using some of my last pieces for this design. I’m also using some Crumb Cake to tone down the brightness of the Fresh Freesia to keep with the more subdued theme of the thinking of you card.

So the card base is Crumb Cake cardstock with some Fresh Freesia layered on top for the card mat. Then I stamped some Crumb Cake ink splatter to create a simple background. On top of that are two pieces of the Masterfully Made DSP Fresh Freesia design. I thought it’d be fun to layer some diamonds on top of the background. The centre diamond is a Fresh Freesia flower from the Enchanted Butterfly stamp set… which sadly is also retiring. I popped up all three diamonds with some Stampin’ Dimensionals. Then to finish it off I added the “thinking of you” from the Quiet Meadow stamp set in Crumb Cake ink. I added that right on top of the flower. And then I fussy cut a Fresh Freesia butterfly, also from the Enchanted Butterfly stamp set.

Handmade Thinking of You Card

To step up this #SimpleStamping handmade thinking of you card, you can simply add a few Brushed Brass Butterflies. Or maybe a couple of die cut butterflies from the coordinating Meadow dies.

Keep checking back for more projects featuring some of the soon to be retired products. And as soon as I can, I’ll share some projects with some things from the upcoming new Annual catalogue.

In the meantime, check out this fun slimline card I made using the Enchanted Butterfly stamp set.

Product List

Spring Sampler

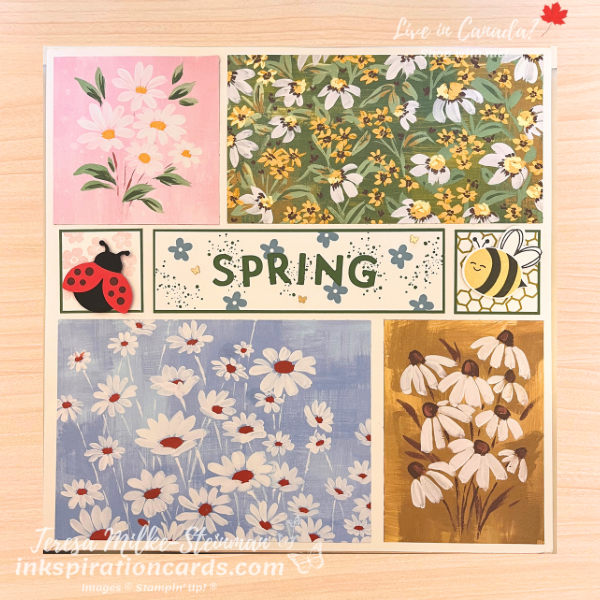
For some reason I’ve never made a Spring sampler. I’ve made a few different ones over the years… for summer, Christmas, Valentine’s Day even. And so I’ve been itching to make one recently. I’m using the Fresh like a Daisy Designer Series Paper pack as my feature. It’s so bright and has lots of floral designs. So it’s perfect for something like this! And I love one of the design especially because one side looks like it was designed to be cut up into panels. I’m using a couple of these designs on the top and bottom of my Spring sampler. And then I’ve got a couple other designs to fill in the top and bottom.

In the middle are three Basic White panels that are framed with Garden Green cardstock. The centre panel has images from the Notes of Nature and Bee My Valentine stamp sets. And the word “Spring” was made using the Garden Green cardstock and the Playful Alphabet dies. These dies are already retired, but you can easily swap in a different set. Then on either side of this panel are 2 small squares. The one on the left has a ladybug I made using the Ladybug Builder punch on top of some Bubble Bath flowers from the Hello Ladybug stamp set. And on the right is a bumblebee I made using the Bee My Valentine stamps and coordinating punch on top of some Wild Wheat honeycombs.

All these pieces are on a 12″ x 12″ piece of Basic White cardstock. And the only elements I popped up with Stampin’ Dimensionals are the ladybug and bumblebee. But I did add a few Brushed Brass Butterflies in the centre panel to add a little bit of bling.

Spring Sampler

This was such a fun and simple Spring Sampler to make!

Sadly the Fresh like a Daisy Designer Series Paper is retiring soon. Along with Hello Ladybug and it’s coordinating punch. Check out a card I made using this paper pack and another retiring stamp set, Season of Chic, here.

Product List

Handmade Easter Treat Boxes

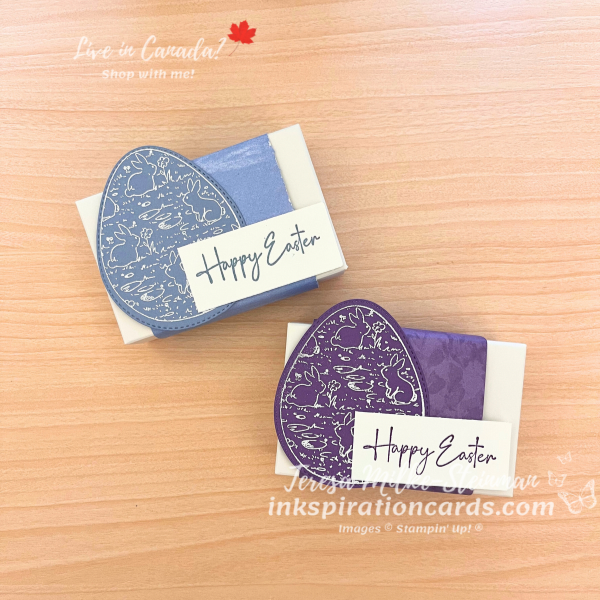
Handmade Easter treat boxes are definitely more my thing than Easter cards. My munchkins always get a little something from the Easter bunny. And so of course the Easter Bunny (aka me, lol) likes to make something pretty to put them in.

For these cute boxes I’m using my favourite image from the Excellent Eggs stamp set from the January-April Mini catalogue. Although I do love the bunny too, he’s super cute! Anyway… instead of making them all just one colour I thought I’d use 2. And to pick my colours I needed to pick my patterned paper first. I wanted a simple design to show off the detail in the egg. So I used a Boho Blue design from the Fresh like a Daisy Designer Series Paper pack. And a Gorgeous Grape design from the Perennial Lavender Designer Series Paper pack.

From here, I heat embossed the bunny egg design on the coordinating cardstock using white embossing powder. Then I die cut the eggs with the coordinating die. Next I stamped “Happy Easter” in the same ink colours (Boho Blue and Gorgeous Grape) on some Basic White cardstock.

To put it all together I wrapped the strips of Designer Series Paper around the Envelope Treat Boxes to make a belly band. Then I added on the white embossed eggs and stamped sentiment. Just make sure to be careful where you put your adhesive! Otherwise you might end of with the pieces sticking to the box which would make it hard to slide the belly band off.

Handmade Easter Treat Boxes

I’ll be posting a video on my YouTube channel showing off these cute handmade Easter treat boxes in about a week. So check out my channel or watch here for an update.

In the meantime, check out a cute card I made using the Excellent Eggs bundle here.

Product List

Handmade Easter Cards

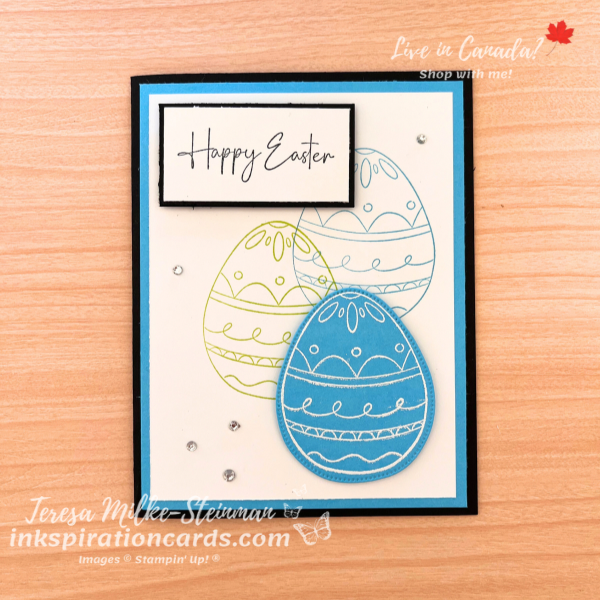
While I don’t do as much crafting for Waster as I used to, I still enjoy this time of year. And when I saw the Excellent Eggs bundle in the January-April Mini catalogue I got excited. It’s super cute! Perfect for some handmade Easter cards!

And for this card I’m using some not so traditional Easter colours. But I am sticking with bright colours for the most part. I’m using 2 In Colours, Tahitian Tide and Parakeet Party. Then for the card base I’m using Basic Black to really help those colours pop.

To start I stamped a couple eggs in the background using Tahitian Tide and Parakeet Party. Then I heat embossed another egg with white embossing powder on a piece of Tahitian Tide cardstock. I die cut it with the coordinating die and then popped it up with a couple of Stampin’ Dimensionals. Next I stamped my “Happy Easter” with Tuxedo Black Memento ink. Then I framed it with a little bit more Basic Black cardstock and popped it up with a few more dimensionals. And to finish it off I added a few Rhinestone Basic Jewels.

Handmade Easter Cards

I actually have a few more handmade Easter cards to make because I’ll be at a Spring craft show next weekend in Milton. If you’re in the area come by and say “hi!”

Handmade Easter Cards

In the meantime if you want some more Spring inkspiration, check out this cute spring basket I made a few years ago here.

Product List
Fun Card with Hooray for Surprises

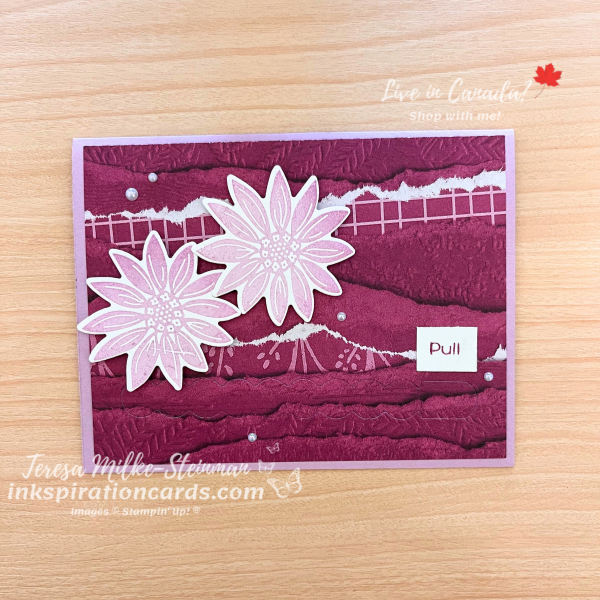
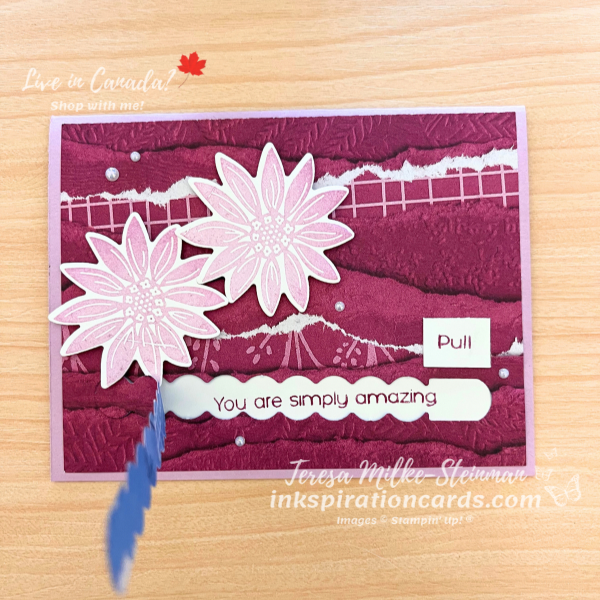
I finally tracked down my Hooray for Surprises dies! And so I’m excited to use all the different dies in the set. There are some more typical dies in this set. But there’s also some that will make a different kind of card. Here’s my first fun card with Hooray for Surprises… the dies AND stamps.

For this first card I’m using the die that makes a “pull me” kind of card. It’s kind of like when you pull a tab to open a box or envelope… except way more fun! And so with that idea in mind, I thought I’d use one of the designs from the Masterfully Made Designer Series Paper pack that looks like it’s torn. This one is Berry Burst, one of the retired colours that came back in last year’s Colour Refresh. I die cut the “pull me” tab towards the bottom of the design. And I stamped my sentiment in Berry Burst ink on a piece of Basic White cardstock to put behind it.

The card base is Fresh Freesia. Which is also my other ink colour. I used it to stamp two flowers. Then I die cut them and popped them up with some Stampin’ Dimensionals. To finish it off I added a few Iridescent Pearl Basic Jewels.

Check out another fun card with Hooray for Surprises that I made here.

Product List

Double Z-Fold Card

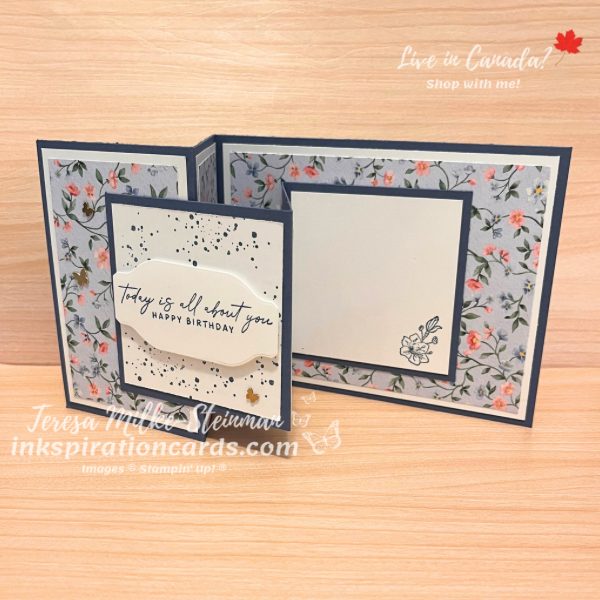
The Z-fold card is one of my favourite cards when I want to craft something a little different without too much fuss. So I’m excited to share this double Z-fold card with you. It’s also fairly simple and straight forward. I also like it because it’s a nice way to show off some patterned paper.

For my card design I’m using the Flight and Airy Designer Series Paper from the Sale-a-bration catalogue. This is such a pretty pack of patterned paper. I just love all the birds… they’re so cute! But this time I’m using one of the floral designs. From there I decided to use Misty Moonlight for my ink and cardstock.

The main card base is 4 1/4″ x 11″ and scored at 2 3/4″ and 5 1/2″. Then the smaller piece that makes it a double Z-fold is 3″ x 9″ and scored at 3″ and 6″. The best tip I can give you when putting yours together is to adhere the smaller piece to the centre of the largest piece of the main card base first. Then close the card base to adhere the other end to the outside of the card base.

I used the Notes of Nature stamp set for the images and sentiment. And I popped up the sentiment after die cutting it with one of the Something Fancy dies. Then to finish it all off, I added a few Brushed Brass Butterflies.

Double Z-Fold Card

There really isn’t anything tricky about the double Z-fold card. I hope you’ll give it a try and share it here if you do.

And if you’d like to see another somewhat simple fun fold card, you can check out the book fold card I made here.

Product List

Handmade Masculine Cards

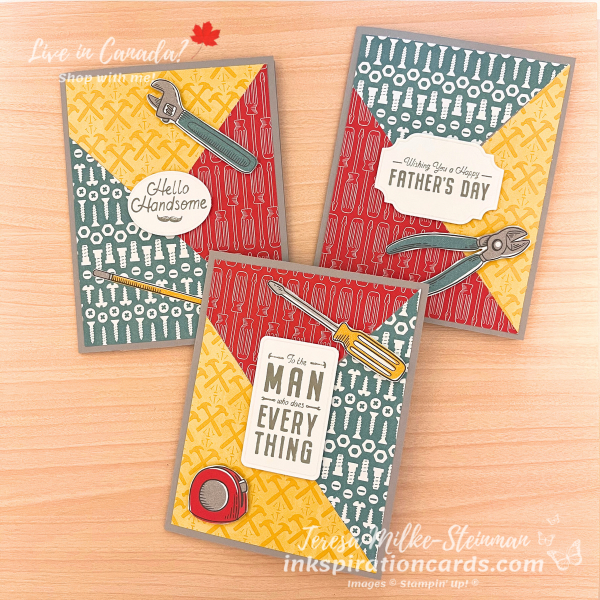
Handmade masculine cards are the ones I hear people struggle with the most. And I put myself in that group too! I’m always looking for a good masculine themed stamp set and fun patterned paper. So I was excited when I saw the Trusty Toolbox Designer Series Paper in the Sale-a-bration catalogue. And with this card design I’m able to make 3 cards at once!

To make it I pulled 3 different designs and cut them each into 4″ x 5 1/4″ pieces. Then I cut each design into 3 pieces. I didn’t measure exactly, but you don’t really need to. You just need to get close. Then I mixed and matched the 3 different designs so that each card has a Real Red, Crushed Curry and Lost Lagoon design.

Once I stuck them to the Gray Granite card bases, I fussy cut a few of the tools. Thankfully they’re pretty easy to do that with. But you can use the Trusty Tools dies for some of them instead if that’s easier.

Then to build up my stash of handmade masculine cards I used 3 different sentiments from the He’s All That stamp set. I stamped them with Gray Granite ink. And then I die cut them with the coordinating dies and popped them up with a mix of Stampin’ Dimensionals and the minis.

Handmade Masculine Cards

I totally forgot about the Brushed Metallic Dots. Those would look great if you like to add a little bling to your handmade masculine cards!

Check out another card I made using the He’s All That stamp set here.

Product List

Hooray for Surprises

It’s time for another team card swap! And even though there’s two catalogues right now, for this swap we’re focusing on the January-April Mini Catalogue. So for my card design I’m suing the Hooray for Surprises bundle. I’m excited to make some fun cards with these dies. But for the swap I’m keeping it simple!

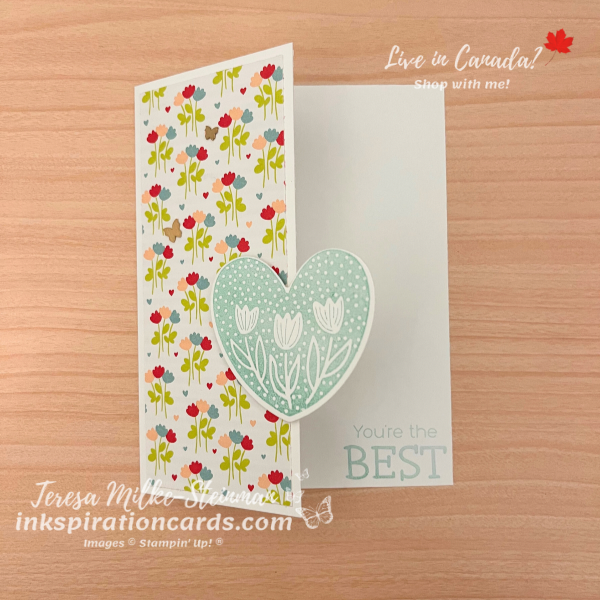
I’m using Basic White cardstock for my card base. But this card base is a little different. I cut the cardstock so that the front panel doesn’t line up with the back panel. Then for my colours, I pulled from the Bee Mine Designer Series Paper pack. I like the design with the small flowers because it matches one of the images in the stamp set. So from this design I decided to use Pool Party as my ink colour.

Next I stamped a sentiment in the bottom right hand corner of the “inside” of the card. This way no matter whether the card is open or closed you can see it. Then I stamped the heart with the flowers in it and die cut it. To attach it to the front/outside panel, I added a couple of Stampin’ Dimensionals to one side of the heart. Just make sure you double check which side you put them on. You don’t want to accidentally get it stuck to the inside of the card. Then to finish it off I added a couple Brushed Brass Butterflies.

Hooray for Surprises

I’ll share some of the cards I got from m team here and on my socials (Facebook and Instagram). So stay tuned!

In the meantime, check out a simpke birthday card I made using the Hooray for Surprises stamp set here.

Product List

Lovely Lavender Paper Pumpkin

Purple is one of my favourite colours. And I love to plant lavender in my garden. So it won’t surprise you when I say that I love the Lovely Lavender Paper Pumpkin kit. The card designs are so pretty! And you can use these cards for a number of different occasions… Valentine’s Day, weddings, anniversaries or even just because.

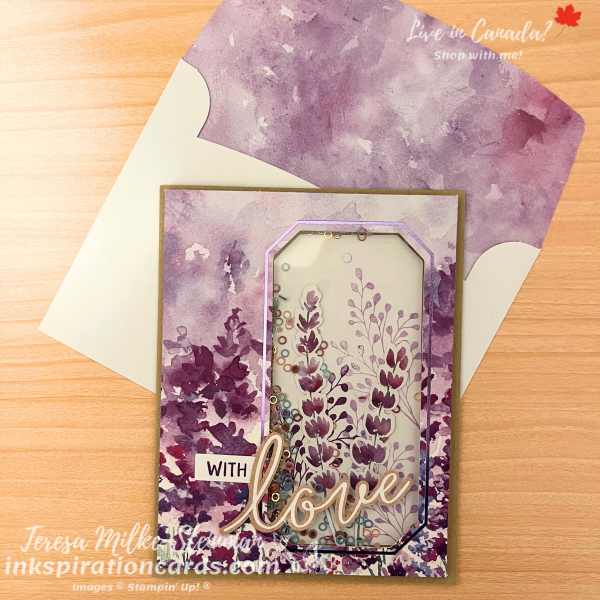
So far I’ve made two alternative card designs. The first is a shaker card, I love making shaker cards! And it was pretty easy to do. I used some Crumb Cake cardstock for my card base along with one of the kit card fronts. Then I just added a piece of Window Sheet and a bunch of the Iridescent Shaker Circles.

Lovely Lavender Paper Pumpkin

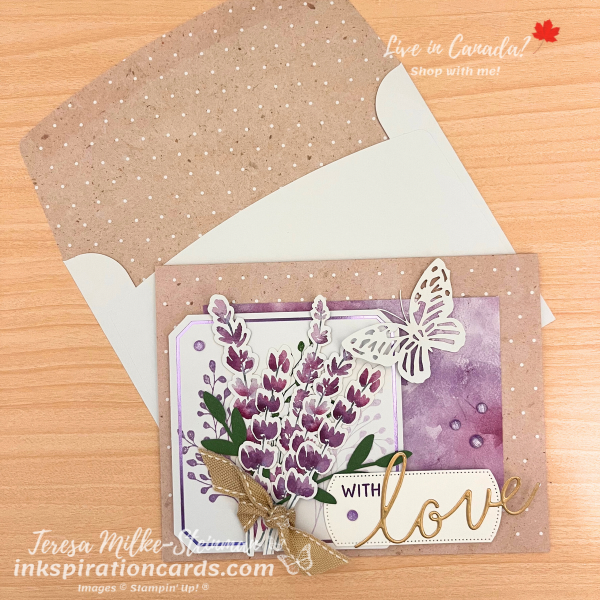
For my other design, I took some inkspiration from a couple of the alternative projects on the back of the instructions. I used one of the brown card bases along with the Gorgeous Grape half of another to start. Then I layered a square die cut with purple foil and created a bouquet of lavender that I tied with a little bit of burlap ribbon. I also added one of the Paper Butterfly Accents from the January-April Mini catalogue and a couple of pieces I die cut using the add-on dies. Then to finish it off I added a few of the Purple Fine Shimmer Gems which are also from the mini catalogue.

Lovely Lavender Paper Pumpkin

This one is my favourite I think. Check out my Facebook page to see how I made both of these cards.

And if you missed out on the Lovely Lavender Paper Pumpkin kit, don’t worry. You can still get this month’s kit Sweet Springtime. Just sign up before February 10th. Once you’re signed up you can get past kits and refills.

pp kit

You can also check out the alternate projects I made using the All the Best Paper Pumpkin kit from December 2023 here.

Valentine’s Day Card with Hello Ladybug

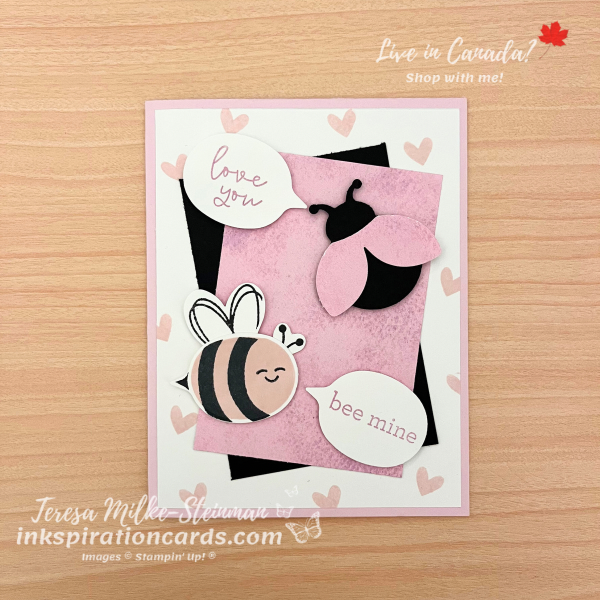
I think I might be almost done with my Valentine’s Day crafting for this year. And part of me is kind of sad about it because I’ve been having so much fun! But before I’m done I need to share a cute Valentine’s Day card with Hello Ladybug. And while this isn’t necessarily a Valentine’s Day stamp set per se, it’s easy enough to add a “Happy Valentine’s Day” to these cute ladybugs.

For my colours I’m pulling from one of the designs of the Sale-a-bration Flight & Airy Designer Series Paper… Fresh Freesia and Bubble Bath. Not exactly traditional Valentine’s Day colours, but I love the combination and I think this patterned paper will make pretty wings.

My card base is Bubble Bath. And then I used a little bit of both for my ink colours. The little hearts around the edges are Bubble Bath. Next I layered a piece of Basic Black cardstock and a piece of the DSP. I made my bumblebee with Bubble Bath and Tuxedo Black Memento ink. And for my ladybug, I used some Basic Black cardstock and some of the DSP.

When I first say the bumblebee builder punch, I saw speech bubbles instead of the body. So I used that idea to add a cute sentiment for each bug. And then I popped them all up with some Stampin’ Dimensionals.

Valentine's Day Card with Hello Ladybug

I’m so glad I remember to make a Valentine’s Day card with Hello Ladybug. These bugs are just too cute!

Check out another Valentine’s Day card I made using the Bee My Valentine bundle here.

Product List

Favourite Valentine’s Day Stamp Sets

I can’t believe that February starts in just a couple days! Can you?! I’ve been busy with all kinds of Valentine’s Day crafting lately. Have you started yours yet? If you haven’t then you’ll want to keep reading. Today I’m sharing my favourite Valentine’s Day stamp sets.
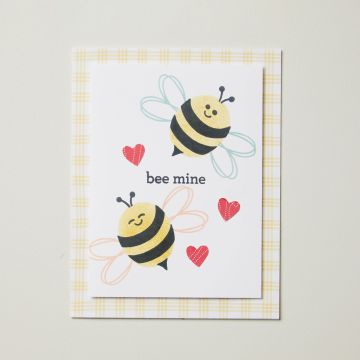
The January-April Mini catalogue definitely has a few stamp sets that’ll work great for Valentine’s Day. But my favourite has to be the Bee My Valentine stamp set. The obvious reason why I love this stamp set is the super cute Bumblebee and different expressions that you can give it! Aside from that, there’s a number of different Valentine’s Day sentiments using different fonts. I love a stamp set that has lots of images and sentiments like this one. So versatile too… it doesn’t have to be just for Valentine’s Day.

Favourite Valentine's Day Stamp Sets

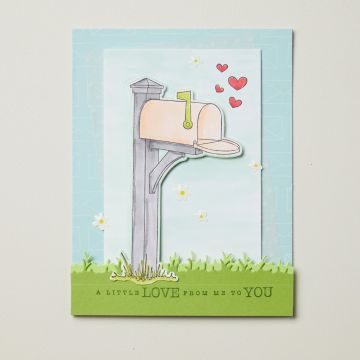
The Sending Love stamp set is also really nice for Valentine’s Day. A lot of great sentiments in this one too. I think my favourite are the circular ones. And the mailbox is a really fun image to use!

Favourite Valentine's Day Stamp Sets

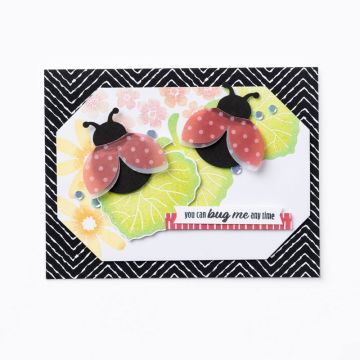
There aren’t as many Valentine’s Day stamp sets in the Annual catalogue. But there is one that would make some fun Valentine’s Day cards… Hello Ladybug. Ladybug… love bug… am I right?! Now it maybe doesn’t have a “Happy Valentine’s Day”, but it does have other sentiments that could be used (“you can bug me anytime”) if you don’t have one already in your craft stash. And the ladybug is pretty cute!

Favourite Valentine's Day Stamp Sets

Thanks Stampin’ Up! for these super cute projects!

Do you have any favourite Valentine’s Day stamp sets? I’d love to know if you do! In the meantime, check out one of the Valentine’s Day cards I made using the Bee My Valentine stamp set here. And you can find all of these stamp sets, along with everything else you need for your Valentine’s Day crafting, in my online shop.

#SimpleStamping Birthday Card

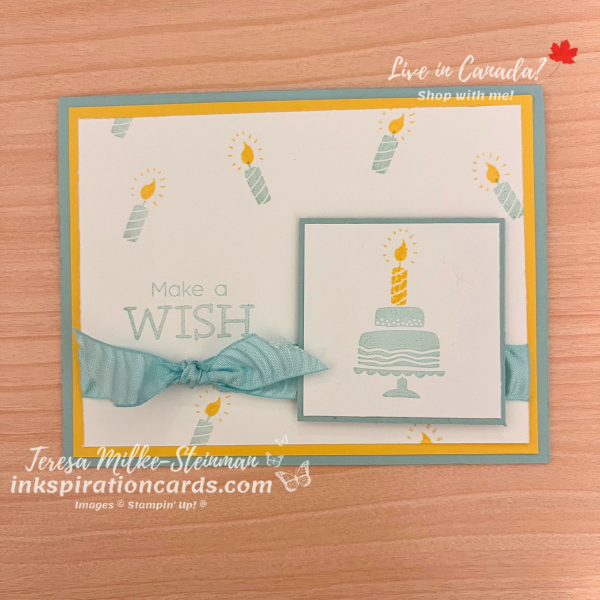
I’m getting back to some #SimpleStamping with this card. As much as I like using patterned paper, die cuts and embellishments, pretty cards don’t have to be complicated! This month’s challenge from Stampin’ Up! is to make a #SimpleStamping birthday card with a Sale-a-bration item. I had a hard time choosing because there are so many great products to choose from right now. But for this card I’m excited to stamp with one of the new stamp sets from the January-April Mini catalogue… Hooray for Surprises. And so I’m using the Pool Party Crinkled ribbon as my Sale-a-bration item.

For my card base I’m using Pool Party cardstock of course! I’m pairing it with Daffodil Delight to keep the colour combination nice and bright. Plus it’s a great colour for all the candle flames.

To make my background, I stamped a bunch of candles, using Pool Party and Daffodil Delight ink, around my sentiment… which is in Pool Party ink. Then I stamped a birthday cake on a smaller piece of Basic White cardstock using more Pool Party. The candle and flame are in Daffodil Delight. I framed that with another piece of Pool Party cardstock and then popped it up with a few Stampin’ Dimensionals on top of my Sale-a-bration ribbon. To finish it off, I added a little bit more of the ribbon with a simple know.

#SimpleStamping Birthday Card

I’m so tempted to add some Wink of Stella to this #SimpleStamping birthday card. Or maybe even a few Rhinestone Basic Jewels. Heat embossing the flames would be another great way to level up this card design.

Check out another one of my #SimpleStamping cards here.

Product List