Lovely Lavender Paper Pumpkin

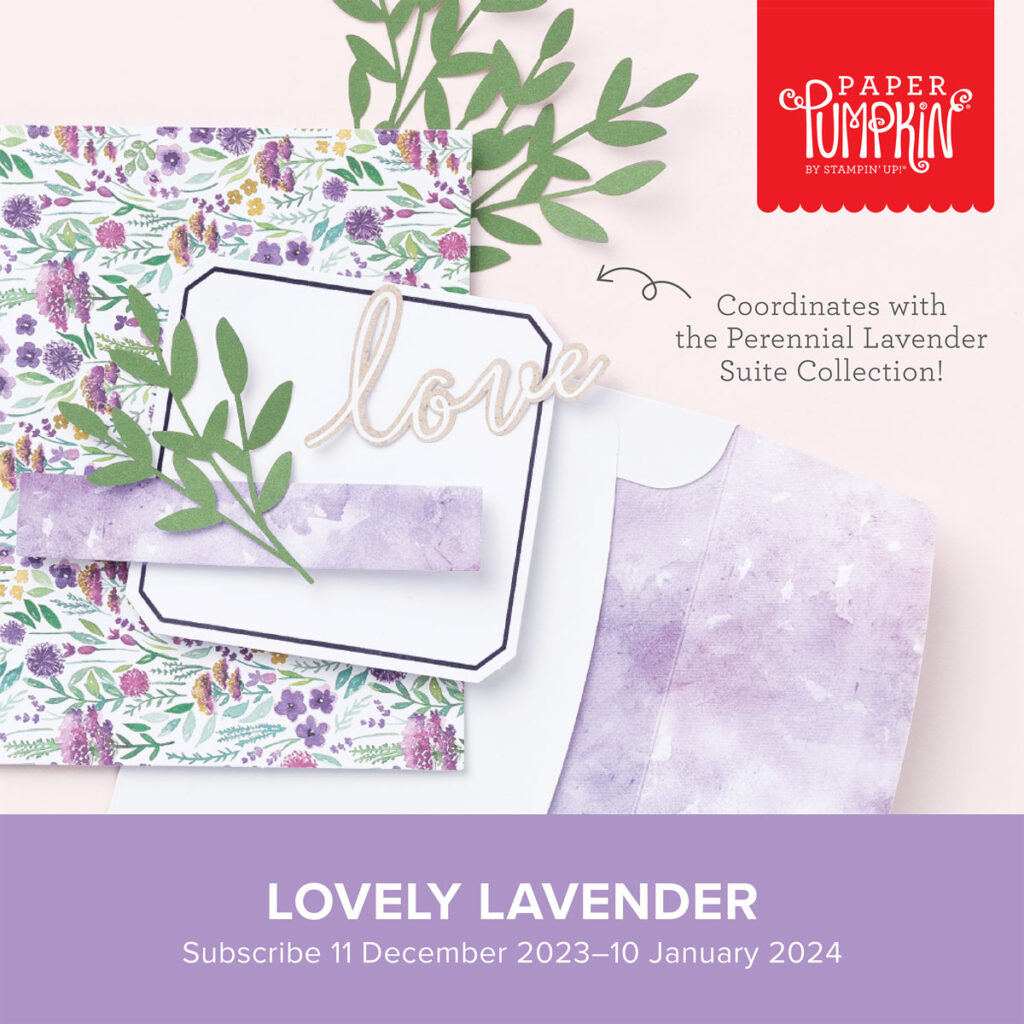
Purple is one of my favourite colours. And I love to plant lavender in my garden. So it won’t surprise you when I say that I love the Lovely Lavender Paper Pumpkin kit. The card designs are so pretty! And you can use these cards for a number of different occasions… Valentine’s Day, weddings, anniversaries or even just because.

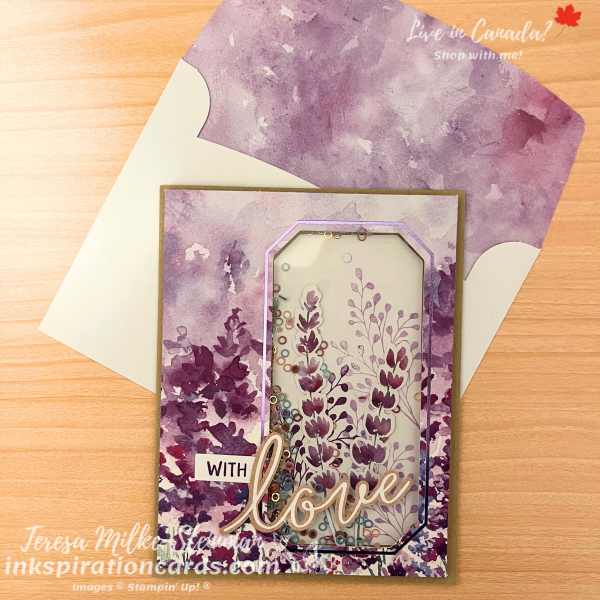
So far I’ve made two alternative card designs. The first is a shaker card, I love making shaker cards! And it was pretty easy to do. I used some Crumb Cake cardstock for my card base along with one of the kit card fronts. Then I just added a piece of Window Sheet and a bunch of the Iridescent Shaker Circles.
Lovely Lavender Paper Pumpkin

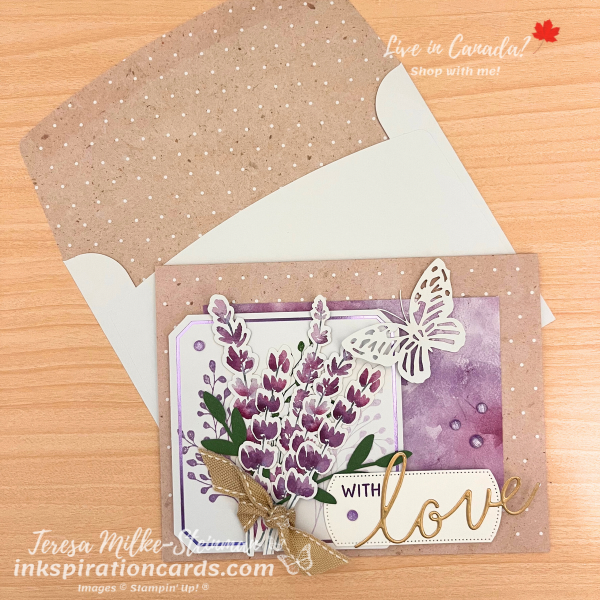
For my other design, I took some inkspiration from a couple of the alternative projects on the back of the instructions. I used one of the brown card bases along with the Gorgeous Grape half of another to start. Then I layered a square die cut with purple foil and created a bouquet of lavender that I tied with a little bit of burlap ribbon. I also added one of the Paper Butterfly Accents from the January-April Mini catalogue and a couple of pieces I die cut using the add-on dies. Then to finish it off I added a few of the Purple Fine Shimmer Gems which are also from the mini catalogue.
Lovely Lavender Paper Pumpkin

This one is my favourite I think. Check out my Facebook page to see how I made both of these cards.

And if you missed out on the Lovely Lavender Paper Pumpkin kit, don’t worry. You can still get this month’s kit Sweet Springtime. Just sign up before February 10th. Once you’re signed up you can get past kits and refills.

pp kit

You can also check out the alternate projects I made using the All the Best Paper Pumpkin kit from December 2023 here.
All the Best Paper Pumpkin

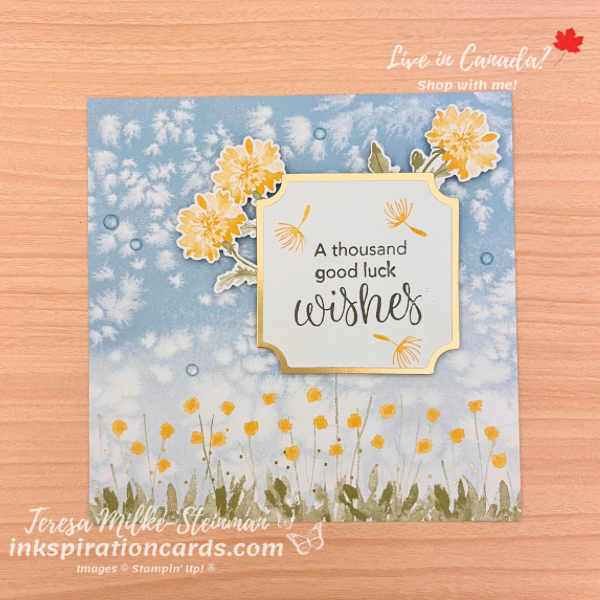
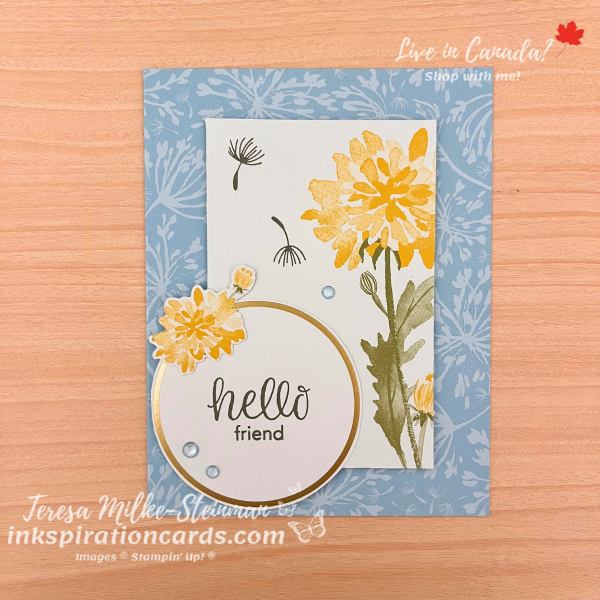
Stampin’ Up! definitely ended 2023 on a high note. The All the Best Paper Pumpkin kit is gorgeous! This is probably my favourite kit of 2023. The colours are nice and bright and the sentiments are lovely. Plus I love the gold foil and dandelion images! It totally reminds me of a stamp set from a couple of years ago, Dandelion Wishes. That is one set that didn’t make it into my craft stash, so I’m definitely holding on to this one.

I didn’t make too many alternative projects with this kit because I love the original designs so much. But I did make a few. For my first alternative card project I just mixed and matched what was in the kit. I used one of the Balmy Blue card bases and cut up one of the envelopes for my main image. Then I trimmed one of the gold foil circles and added a dandelion I fussy cut as part of another alternative project.

All the Best Paper Pumpkin

The other dandelions I fussy cut went to make a different kind of project. This could be a framed piece or the focal point of a scrapbook page. To make it, I trimmed one of the other Balmy Blue card bases and popped up the gold foil square with a few Stampin’ Dimensionals, with the dandelions just behind it.

All the Best Paper Pumpkin

I made one other alternative card project with the All the Best Paper Pumpkin kit. Catch the replay over on my Facebook page where I made it last night.

And check out one of the other super popular Paper Pumpkin kits of 2023 here.

Want to get in on all the crafty fun?! Paper Pumpkin kits arrive at your door with everything you need to make the projects inside. The January kit looks like it’ll be really pretty! Plus it coordinates with one of the suites from the new January-April Mini catalogue. Sign up for the Lovely Lavender kit by January 10th! That’s tomorrow.

Paper Pumpkin

Paper Pumpkin With Love & Gratitude

I quite like this month’s Paper Pumpkin “With Love & Gratitude”. The colours are so pretty. Totally not your typical Fall colours! And I have fallen in love with Lost Lagoon since Stampin’ Up! brought it back. But I also love that it’s a card AND bag kit… not just one or the other. These will be great to bring to any Thanksgiving celebrations next weekend!

I always make at least one of all of the original designs. And then it’s alternative projects with the rest of my supplies. It’s just a question of how quickly I go through all my supplies. Some months the inkspiration flows a lot faster than others! So far with this month’s kit I’ve made two alternatives.

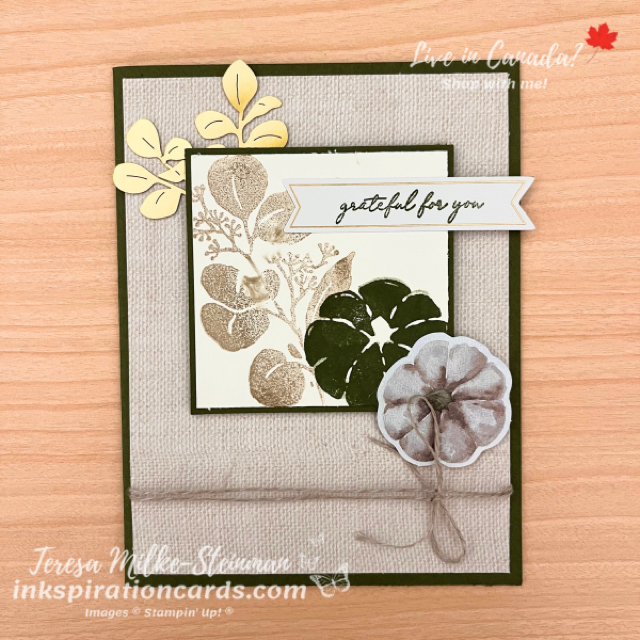
The first one uses a Mossy Meadow card base. Next I cut up one of the bags to create a Designer Series Paper background. And then I layered on some more Mossy Meadow cardstock and a bit of Basic White that I stamped with Crumb Cake ink (foliage) and Mossy Meadow (pumpkin). To finish it off I added a few of the die cut pieces and some Linen Thread. The best part of this month’s kit is definitely the die cuts!

Paper Pumpkin With Love & Gratitude

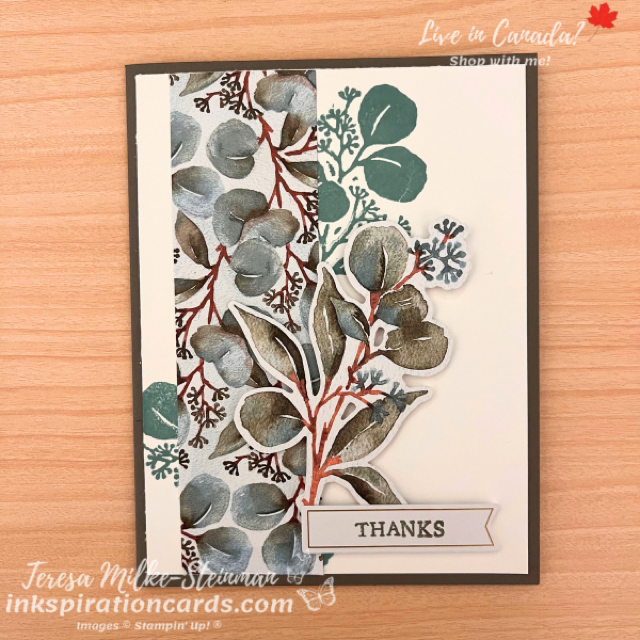
For the second card I used Pebbled Path for my card base. Then I layered lots of foliage on top. I stamped some with Lost Lagoon ink. I cut up one of the envelopes to create a strip of patterned paper. And then I popped up one of the die cut pieces with some Stampin’ Dimensionals.

Paper Pumpkin With Love & Gratitude

I’ve seen some great alternatives with the Paper Pumpkin “With Love & Gratitude” kit! It’s definitely sparked some more ideas. I hope my designs have sparked some inkspiration for you. Post your alternative projects in the comments. I’d love to see them!

Check out the original designs that I made live over on my Facebook page here. And you can sign up for next month’s Christmas themed Paper Pumpkin kit here. This one comes with glitter glue!!!

If you want to see some of the other designs you can check out my post about the “Welcome Inn” Paper Pumpkin kit here.

Good Things Come in Small Packages

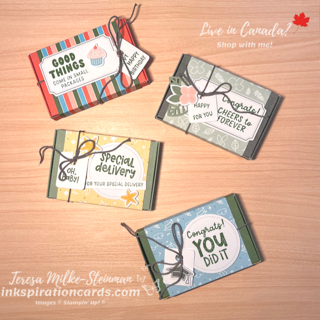
Over the years I’ve come to love Stampin’ Up!s Paper Pumpkin kits. I always liked the idea of everything you need being sent right to your door and all I have to do is stamp and stick. And in the last couple of years the kit designs have really leveled up! This includes December’s kit Good Things Come in Small Packages. I was hoping to take this kit with us on our trip to Disney, but unfortunately it didn’t arrive in time. So instead I get to craft with it now that we’re back!

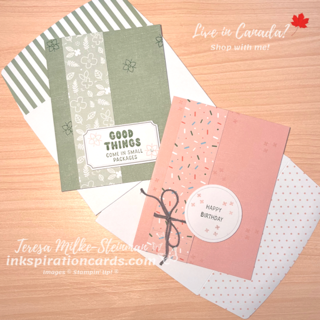
This kit was a bit different because instead of cards you get to make cute little boxes. And these boxes are perfect as gift card holders. So I’ll totally be storing these away for when I need them! There were also coordinating notecards and envelopes as an add on. Such a great idea and I was able to get mine early (and on sale) because I attended OnStage back in November. I love making alternative projects with my Paper Pumpkin kits. This time I cut up some of the belly bands for the boxes to create some patterned paper for my notecards. You can see how I made them over on my Facebook page here.

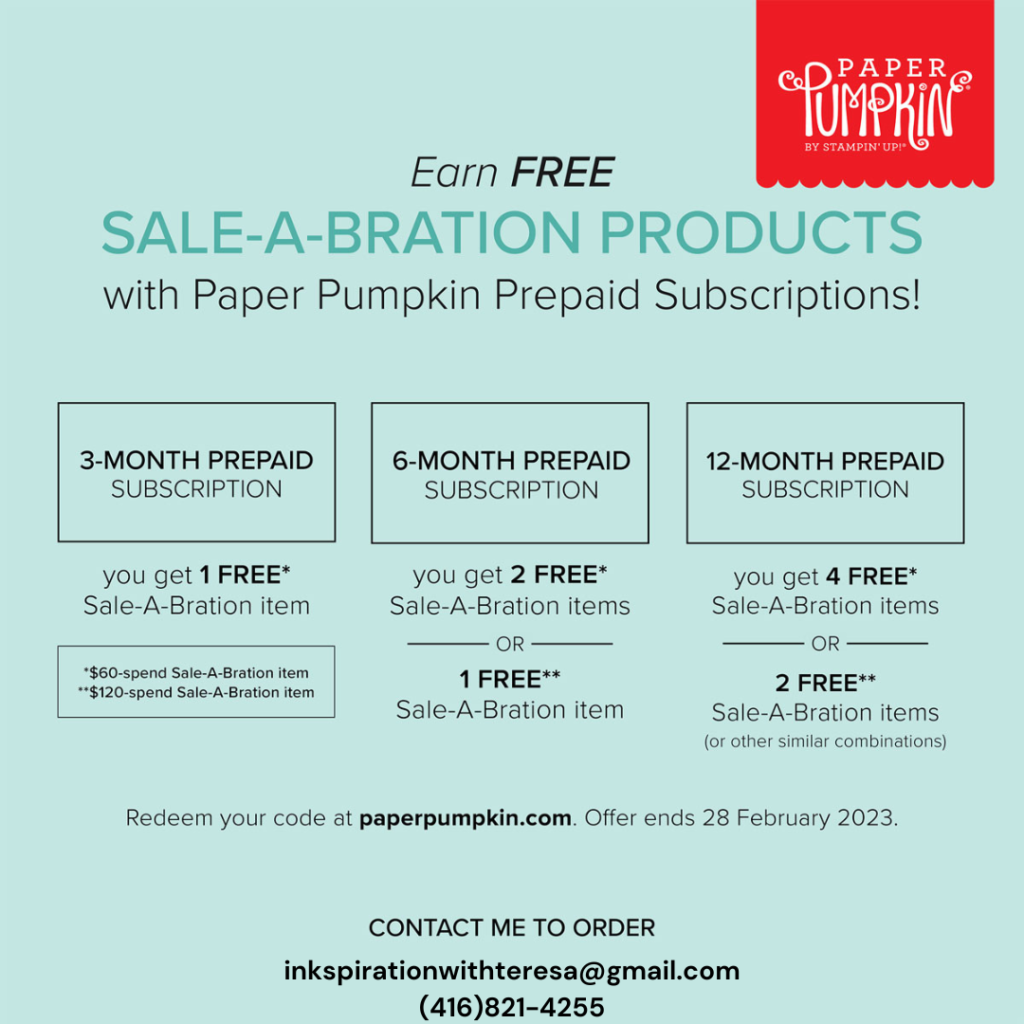
The other thing I love about Paper Pumpkin is that during Sale-a-bration you can get free Sale-a-bration products when you buy a pre-paid subscription. Plus when you buy a pre-paid subscription you’re saving money. Here’s a simple break down for you. And if you want more info on how Sale-a-bration works, check out my post from earlier this week here.

Good Things Come in Small Packages

Good things come in small packages for sure… especially when it says Stampin’ Up! on the box!

Paper Pumpkin Ho Ho Ho

I’m excited to join the Paper Pumpkin blog hop again this month! Probably because I’m loving this month’s Paper Pumpkin Ho Ho Ho. This is definitely my favourite holiday themed Paper Pumpkin ever! The stamp set has so many great images and phrases. And the envelopes and dies cut pieces are great too.

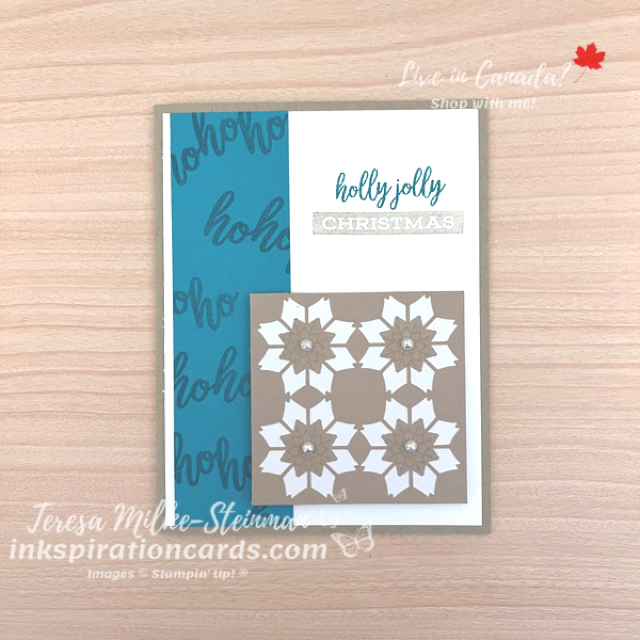
For this alternative project I’m making a card and I’m using some non-traditional colours; Bermuda Bay and Crumb Cake. It all started with me wanting to use Bermuda Bay to stamp some snowflakes. Then when I was looking at the pieces in the kit and I had the idea to cut up one of the intricate die cut pieces. I layered that on top of one of the pieces left over from the frame and popped it up with Stampin’ Dimensionals. But not before I did some tone on tone stamping and added a snowflake to the centre of each of the die cut snowflakes.

Underneath that layer I took a strip of Bermuda Bay cardstock and did some more tone on tone stamping using the “ho ho ho” stamp. For my other phrase I combined “holly jolly” and “Christmas”. It’s one of my favourite holiday songs! I used both Bermuda Bay and Crumb Cake ink to stamp this phrase. Then to finish it off I added an Iridescent Pearl Basic Jewels to the centre of each of the “snowflakes”.

Paper Pumpkin Ho Ho Ho

I just LOVE the October Paper Pumpkin Ho Ho Ho kit! Don’t you?!

Check out the other projects on this month’s hop with the link below. And to check out last month’s hop with the September Paper Pumpkin kit, start with my alternative project here.

<!-- start Blog Carousel script -->
<script src="https://blogcarousel.com/?11Y9=embed&mode=js" type="text/javascript"></script>
<noscript><p><a href = "https://blogcarousel.com/?11Y9&showBloghop" title = "View all blog hop posts">Blog Hop Index</a></p></noscript>
<!-- end Blog Carousel script -->

Paper Pumpkin Spooky Treats

We love Hallowe’en in our house! My two munchkins have already been talking about pumpkins and decorations for a couple of weeks now. And just earlier this week they were doing some crafting with the Paper Pumpkin Spooky Treats kit. As soon as they saw it they were bugging me to make treat boxes of their own!

I already made my original treat boxes, so I’m on to making alternative projects. As much as I love crafting the original project, I love adding a few other things to see what else I can make with my Paper Pumpkin kits. So I’m excited to join the Paper Pumpkin blog hop. The whole idea with this hop is to make alternative projects using the kit or even something that was inspired by it.

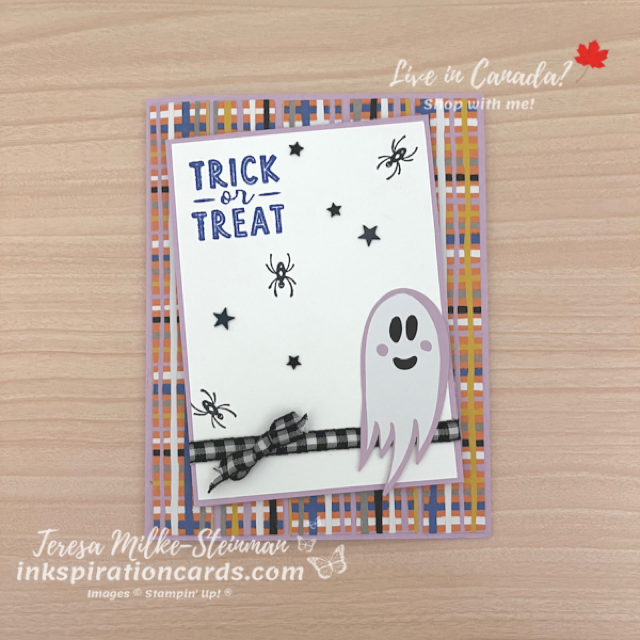
For my alternative design I’m using Fresh Freesia as my card base. Then I cut up a couple of my wraps to create some “Designer Series Paper” strips. On top of that I added another smaller layer of Fresh Freesia and Basic White cardstock. I stamped a few spiders using Tuxedo Black Memento ink and the “Trick or Treat” I stamped with Orchid Oasis, which is the ink colour that came with this month’s kit.

Before I added these pieces to my card I wrapped some of the Black and White 1/4″ Gingham ribbon from the Annual catalogue. I popped it all up with a few Stampin’ Dimensionals and then added a gingham ribbon bow. To finish it off I added one of the cute little ghost die cuts from the kit along with a few of the stars.

Paper Pumpkin Spooky Treats

Super cute right?! I just love the Paper Pumpkin Spooky Treats kit!

Never tried a Paper Pumpkin kit before? Check out my post about why I love stamping kits here. And to check out the other cards on this hop use the link below!

<!-- start Blog Carousel script -->
<script src="https://blogcarousel.com/?11to=embed&mode=js" type="text/javascript"></script>
<noscript><p><a href = "https://blogcarousel.com/?11to&showBloghop" title = "View all blog hop posts">Blog Hop Index</a></p></noscript>
<!-- end Blog Carousel script -->