Hooray for Surprises

It’s time for another team card swap! And even though there’s two catalogues right now, for this swap we’re focusing on the January-April Mini Catalogue. So for my card design I’m suing the Hooray for Surprises bundle. I’m excited to make some fun cards with these dies. But for the swap I’m keeping it simple!

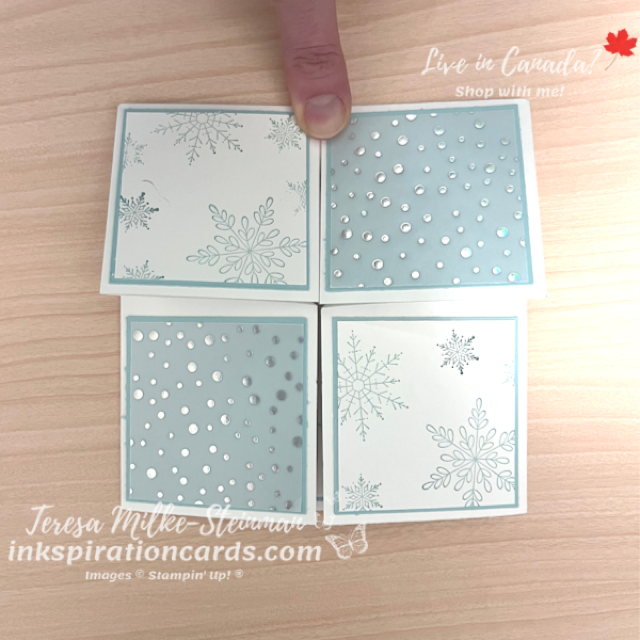
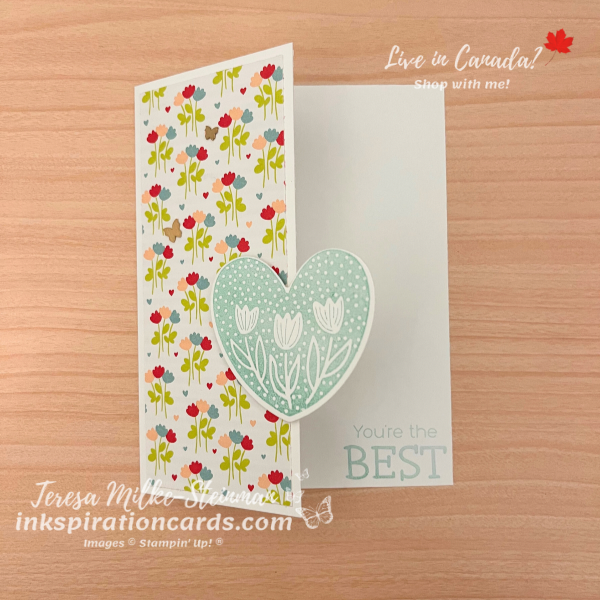
I’m using Basic White cardstock for my card base. But this card base is a little different. I cut the cardstock so that the front panel doesn’t line up with the back panel. Then for my colours, I pulled from the Bee Mine Designer Series Paper pack. I like the design with the small flowers because it matches one of the images in the stamp set. So from this design I decided to use Pool Party as my ink colour.

Next I stamped a sentiment in the bottom right hand corner of the “inside” of the card. This way no matter whether the card is open or closed you can see it. Then I stamped the heart with the flowers in it and die cut it. To attach it to the front/outside panel, I added a couple of Stampin’ Dimensionals to one side of the heart. Just make sure you double check which side you put them on. You don’t want to accidentally get it stuck to the inside of the card. Then to finish it off I added a couple Brushed Brass Butterflies.
Hooray for Surprises

I’ll share some of the cards I got from m team here and on my socials (Facebook and Instagram). So stay tuned!

In the meantime, check out a simpke birthday card I made using the Hooray for Surprises stamp set here.

Product List
#SimpleStamping Birthday Card

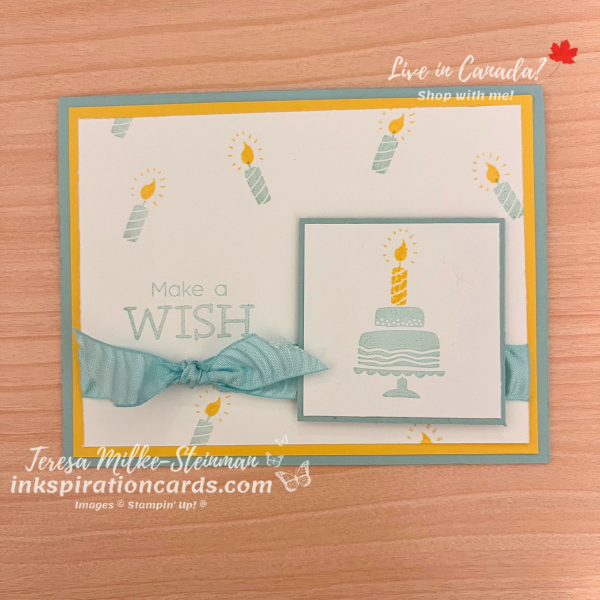
I’m getting back to some #SimpleStamping with this card. As much as I like using patterned paper, die cuts and embellishments, pretty cards don’t have to be complicated! This month’s challenge from Stampin’ Up! is to make a #SimpleStamping birthday card with a Sale-a-bration item. I had a hard time choosing because there are so many great products to choose from right now. But for this card I’m excited to stamp with one of the new stamp sets from the January-April Mini catalogue… Hooray for Surprises. And so I’m using the Pool Party Crinkled ribbon as my Sale-a-bration item.

For my card base I’m using Pool Party cardstock of course! I’m pairing it with Daffodil Delight to keep the colour combination nice and bright. Plus it’s a great colour for all the candle flames.

To make my background, I stamped a bunch of candles, using Pool Party and Daffodil Delight ink, around my sentiment… which is in Pool Party ink. Then I stamped a birthday cake on a smaller piece of Basic White cardstock using more Pool Party. The candle and flame are in Daffodil Delight. I framed that with another piece of Pool Party cardstock and then popped it up with a few Stampin’ Dimensionals on top of my Sale-a-bration ribbon. To finish it off, I added a little bit more of the ribbon with a simple know.

#SimpleStamping Birthday Card

I’m so tempted to add some Wink of Stella to this #SimpleStamping birthday card. Or maybe even a few Rhinestone Basic Jewels. Heat embossing the flames would be another great way to level up this card design.

Check out another one of my #SimpleStamping cards here.

Product List

Heartfelt Hellos

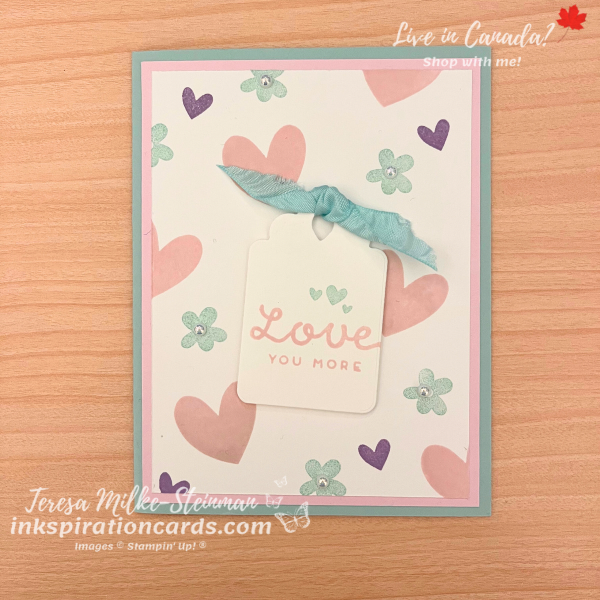
After Christmas this is the most wonderful time of year! At least for crafters anyway… because it’s Sale-a-bration time. This is Stampin’ Up!s biggest promotion of the year. It’s such a great time to stock up on crafting essentials like cardstock and adhesive because it leads to FREE crafting supplies like the Heartfelt Hellos stamp set.

This stamp set is full of great sentiment, so I decided to pair it with the Bee My Valentine stamp set to make a cute Valentine’s day card. But the only traditional Valentine’s day colour I used on this card is pink. Well Bubble Bath actually. For this design I made my own background full of different images. I stamped the larger hearts in Bubble Bath ink. Then I stamped some flowers with Pool Party ink. And to fill in some of the gaps I stamped some little hearts in Highland Heather ink.

I used Pool Party for my card base so that I could also use the Pool Party ribbon that’s also part of Sale-a-bration. The sentiment from the Heartfelt Hellos stamp set is in Bubble Bath. And I added a few more little hearts in Pool Party. Next I die cut it with one of the Something Fancy dies to create a cute tag. Then I popped it up with some Stampin’ Dimensionals. And to finish it off I added some Iridescent Pearl Basic Jewels to the centres of the flowers. What girl doesn’t like a little sparkle for Valentine’s Day?! lol

Heartfelt Hellos

Other than the die cut tag, this is a nice simple Valentine’s Day card. And as much fun as I’ve been having with the bumblebee from the Bee My Valentine stamp set, it was nice to use a few of the other images.

Check out another card I made with the Bee Mine suite here.

I’ll be sharing all there is to know about Sale-a-bration in my next post so stay tuned! Or if you can’t wait until then, head over to my online shop.

Product List
#SimpleStamping for New Years

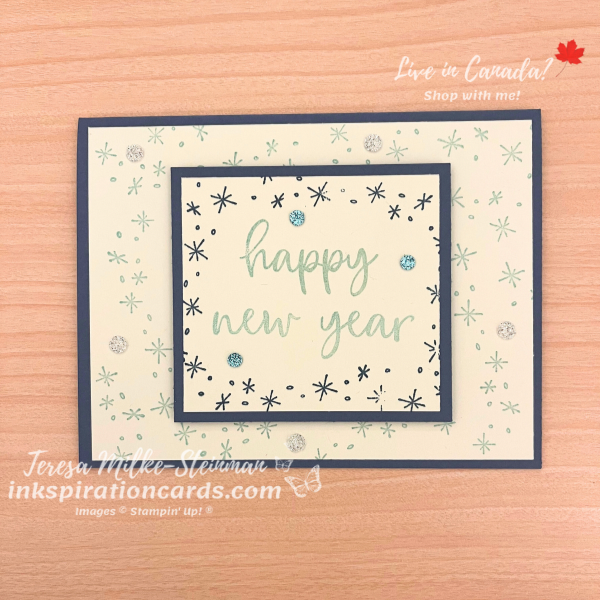
It’s been a while since I did a #SimpleStamping challenge. And so I thought it’d be fun to join in on this month’s challenge. This month Stampin’ Up! is looking for a congratulations or celebration theme using stamps, ink, paper AND an embellishment. I’m not sure why, but I immediately thought of doing some #SimpleStamping for New Years. Usually my New Years crafts are more along the lines of cute favours. But New Years is all about celebration, so why not?!

For my card base I’m using Misty Moonlight. And for my ink colours I’m using Misty Moonlight and Pool Party. I created the background using an image from the Gift of Giving stamp set and Pool Party ink. And for the “happy new year”, I paired two stamp sets. Biggest Wish from the Annual Catalogue and More Wishes from the September to December Mini catalogue. I stamped the sentiment with Pool Party and then stamped some more ‘sparkles’ around it with Misty Moonlight.

I framed all that with some more Misty Moonlight cardstock. And then I popped it up with some Stampin’ Dimensionals. Finally for my embellishment, I used the Adhesive-Backed Glitter Sequins. I put a few white ones in the background with the Pool Party sparkles and a few blue ones around the sentiment.

#SimpleStamping for New Years

While I do like how this #SimpleStamping for New Years card turned out, I’m not sure I’ll do many New Years cards in the future. What do you think? Cards for New Years, yes or no?

Check out another card I made for one of Stampin’ Up!s #SimpleStamping challenges here.

And you can get both of these stamp sets in my online shop… by the way More Wishes will be around after January 4th!

Bee Mine

On Saturday I got a peek at some of the new products from the upcoming new catalogues. OnStage is always a lot of fun! As a demonstrator you get to see some of the new products, you get to see project demonstrations AND you get to do some crafting. With this being a virtual event we were given the chance to order the Bee Mine suite in advance. That way we could craft along on Saturday. Now usually I don’t order an entire suite, I prefer to pick and choose from different suites of products. But I love this suite so much that I couldn’t not.

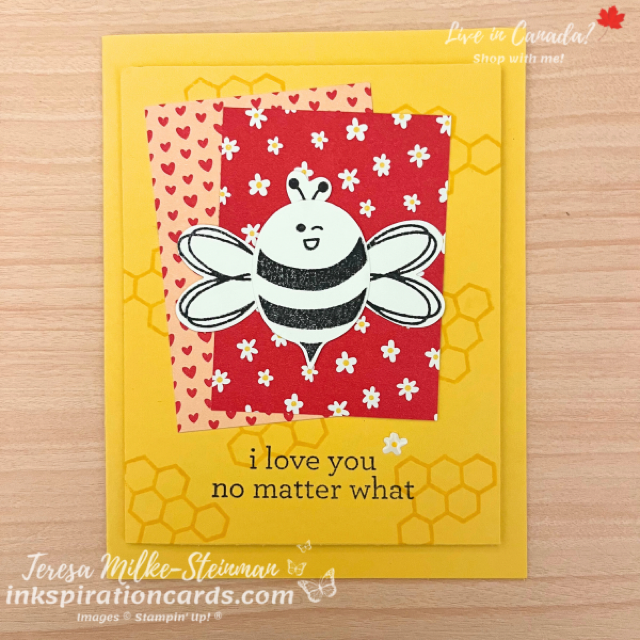
Shannon West shared two cards for us to craft at OnStage and walked us through them step by step. The first card uses Daffodil Delight for the card base with another piece of Daffodil Delight cardstock that I stamped using Daffodil Delight ink. Then we layered on a couple of the different designs from the Bee Mine Designer Series Paper pack on top. And of course we added a bee using the Bee builder punch. To finish it off I decided to add one of the adhesive back flowers that also comes with this suite.

Bee Mine

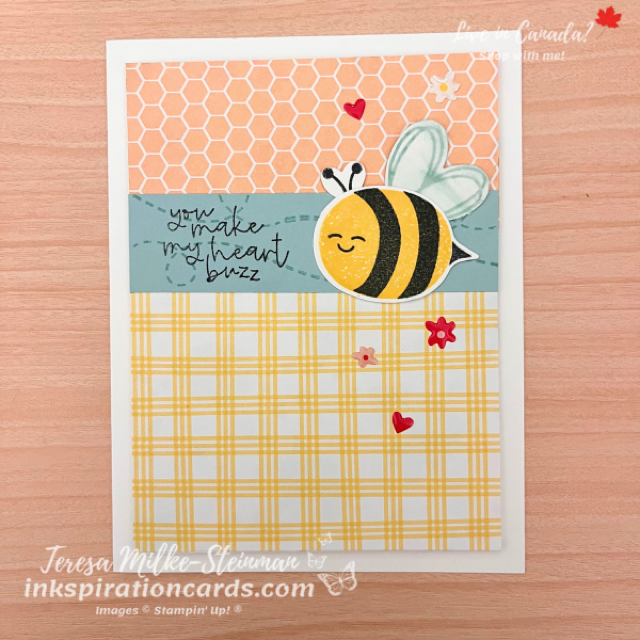
Then for the second card we used a Basic White card base. This worked really well to show off two different designs from the DSP pack. And we did a little more tone on tone stamping with Pool Party to create a flight path for our bee. My favourite thing about this card was the watercolouring we did on the bee’s wings. It really gives a nice effect! I’m going to have to remember this when I get back to using this suite again in a few weeks.

Bee Mine

I hope you love these cute cards using the Bee Mine suite as much as I do! I can’t wait to get to some of the other products that come with this suite… we didn’t even use the Sweet Sorbet ribbon or the square pillow boxes.

To learn more about OnStage and what it’s all about you can check out this post I shared about the 2018 OnStage.

Want to see more sneak peeks? Or add your name to my list of people to send catalogues to? Then you’ll want to sign up for my weekly newsletter! You can do that here.
Colouring with Circle Sayings

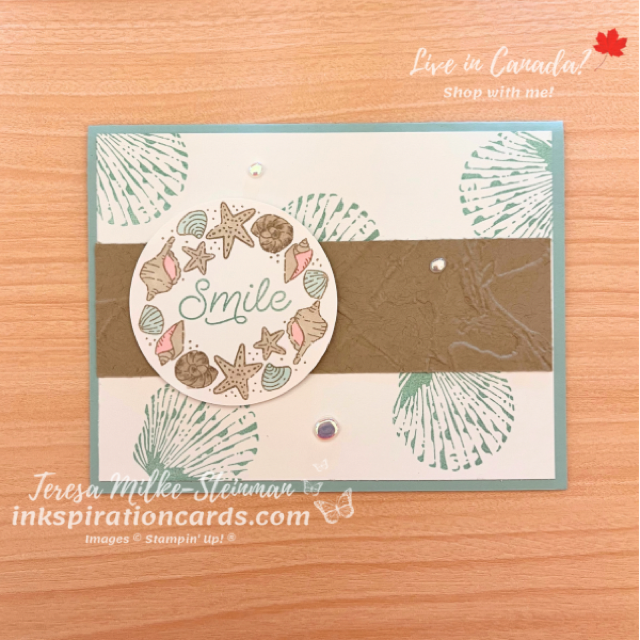
With all the hustle of working mom life I don’t colour as often as I’d like to. It’s definitely been way too long since I did some colouring for a project. And one of the reasons I love the Circle Sayings bundle is because the images are great for colouring. So this week I decided to finally get around to some colouring with Circle Sayings. And since it’s still July I’m going with a summer themed card.

So that’s where I started with my design. With the seashell image as my jumping off point, I went with Pool Party and Crumb Cake as my colour combination. I just love these colours for a summer/beach themed card. So I have Pool Party for my card base and then I added a strip of Crumb Cake across the centre. But not before I embossed it with the 3D Painted Texture embossing folder.
Behind the strip of embossed Crumb Cake cardstock are a few seashells. These ones are from the Season of Chic stamp set. Then on top of these layers I have my little seashells from Circle Sayings. I stamped it twice with Crumb Cake ink to create a ring. Usually when I’m colouring with my Stampin’ Blends I stamp with Tuxedo Black Memento ink. Fortunately it worked out for me. I used mostly the light Crumb Cake blend. But there’s also some light Pool Party, light Petal Pink and a little bit of the dark Crumb Cake.

Once that dried I punched it out and popped it up with some Stampin’ Dimensionals. Then to finish it off I added a few of the Flat Adhesive Backed Pearls.

Colouring with Circle Sayings

I definitely need to do some more colouring with Circle Sayings! Maybe next time I’ll use the Watercolour Pencils.

Check out another card I made using the Circle Sayings bundle here. And you can find the bundle in my online shop here.

Mystery Fun Fold

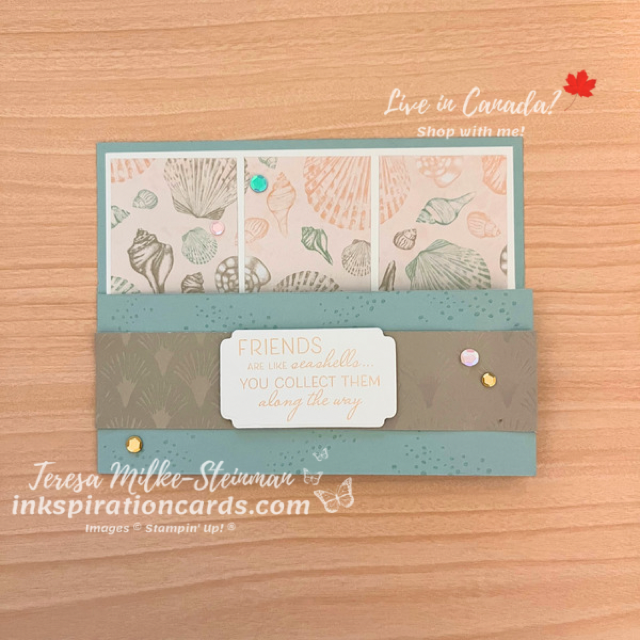
I found a picture of this mystery fun fold on Pinterest. It’s nice and simple! And I haven’t tried it before so I thought I’d give it a go. Plus it’s a fun way to show off some of the By the Bay Specialty Designer Series Paper that’s retiring very soon.

To figure out my colour combination I started with picking my DSP design. I love the main design I used for this card because it has a few different colours and I love all the seashells. When I was younger I loved exploring beaches looking for seashells.

For the card base I used Pool Party. I also used Pool Party ink for some tone on tone stamping. I wanted a little something behind the strip of Sahara Sand DSP. On top of the strip of DSP I stamped a sentiment from Friends are like Seashells in Petal Pink. Then I die cut the sentiment with one of the Something Fancy dies and popped it up with some Stampin’ Dimensionals. To finish it off I added a few of the Pastel Adhesive Backed Gems.

Mystery Fun Fold

If anyone knows the name of this mystery fun fold please let me know. And I’d love to see your versions if you give it a try.

Sadly the By the Bay DSP and Friends are like Seashells stamp set are retiring. To find out more about how the last chance sale works check out my post here. And the best place to see what’s still available is my online shop. Don’t wait! Things have been selling out fast! It’s been hard to keep up this time around.

Sale-a-bration #SimpleStamping

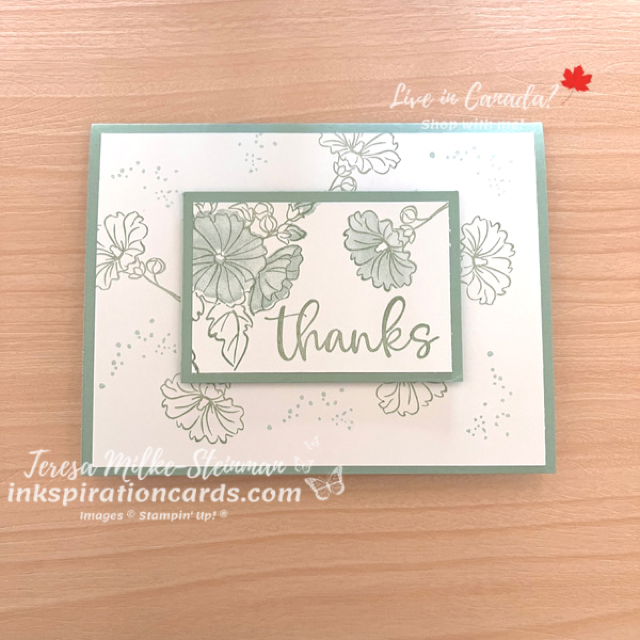
After a little break last month, Stampin’ Up!s back with another #SimpleStamping challenge. And this time it’s some Sale-a-bration #SimpleStamping! So just stamps, ink, paper and a Sale-a-bration item. Nothing fancy like ribbon or embellishments this time. We can make any kind of card we want, so I’m taking advantage and making a few thank you cards to give to my customers.

For my Sale-a-bration item I’m using the Beautifully Happy stamp set. I thought about using one of the Designer Series Paper packs from the catalogue, but thought I’d stick with very simple stamping. My main colour is Mint Macaron. I used it for the cardstock and one of my ink colours. The other ink colour is Pool Party.

In the background I stamped the single flower image a few times in Mint Macaron. Then I filled in the spaces with some Pool Party paint splatter. In the centre I stamped “thanks” from the Biggest Wish stamp set and framed it with the larger floral image in Mint Macaron. I also added another single flower with the same colour. Then I “filled in” the flowers with Pool Party and popped it up with Stampin’ Dimensionals.

Sale-a-bration #SimpleStamping

Looking at it now I’m tempted to add some Wink of Stella or a few Rhinestone Basic Jewels.

I hope you enjoyed this Sale-a-bration #SimpleStamping project! Check out another card I made with the Beautifully Happy stamp set here.

Sale-a-bration’s only on for 2 more weeks! Don’t miss out on getting these great products for FREE! Fill up your cart in my online shop before February 28th!

Shaded Gatefold Card

Fancy Folds Design Team

It’s time for the last Fancy Folds Design team blog hop of 2022! I really enjoy these hops and can’t wait to make even more fun and fancy folds next year! For this month’s hop we’re making a Shaded Gatefold Card. This one works out to be a different size than my usual cards, so I’ll just have to make a special envelope for it with some pretty patterned paper. Jan B, a demonstrator from the UK, has a great video to help you through all the steps. I highly suggest taking it slow once you’ve scored and folded the card base. The folding in of it took me a couple of tries. You can find her video here.

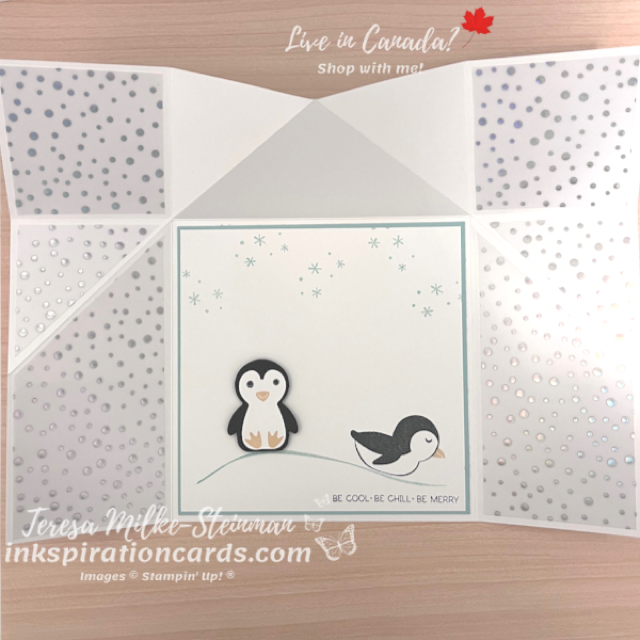
For my card design I stuck with a Basic White card base. Keeps it simple and helps with the snowy winter theme. I wanted to create a cute little scene inside the card using the Penguin Place bundle. The snowflakes and hill are stamped with Pool Party ink. And for the penguins I used Tuxedo Black Memento ink and Pale Papaya. The coordinating punch makes it really easy to create more friends. These penguins are super cute! I’m sad to see these guys retiring.

To go with my penguin friends I used the Snowflake Specialty Vellum. And on the outside I used some of the snowflakes from the Joyful Flurry stamp set. To adhere the vellum I was very strategic with my Multi-Purpose Liquid Glue. I definitely didn’t want any glue peeking out from behind these iridescent dots!

The Shaded Gatefold card was definitely a fun one to make! My littlest munchkin is already asking me if he can have it, lol!

Keep hopping to see the other’s designs! Up next is Mette Nordling Shaw. You can see her design here.

You can also check out last month’s hop where we made a Dual Pop-Up card.

Blue Handmade Christmas Cards

Although I’m a little behind schedule, I’m still doing better than previous years with my cards for friends and family! At least I have one of my two designs all cut and ready to assemble. The other design is almost there. I always do two different designs for the different sides of the family. This year for my husband’s side of the family they will be getting blue handmade Christmas cards. Actually the sentiment for these cards is a little more generic because while a lot of them celebrate Christmas, they’re Jewish and celebrate Hannukah. I often love using blues in my holiday crafting, but I chose blue for this card because of this.

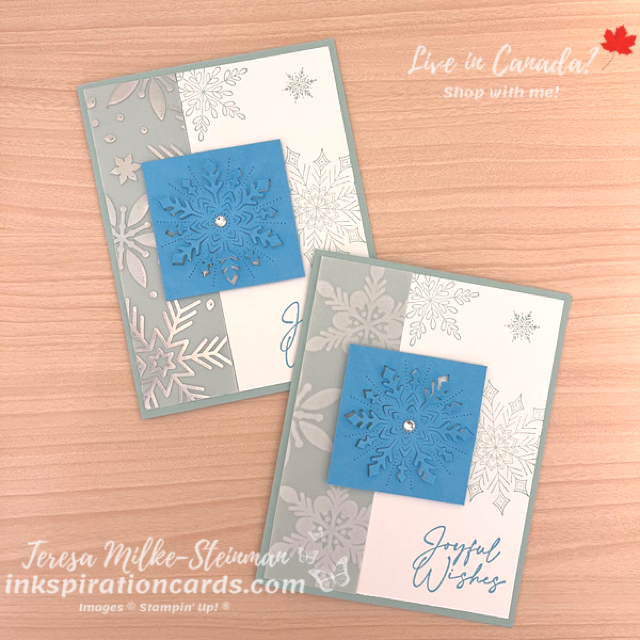
For the card base and main colour of I’m using Pool Party. It’s such a pretty blue and works great with snowflakes… which I love to use this time of year! These snowflakes come from the Joyful Flurry stamp set. The designs on these snowflakes are so pretty and the variety in sizes is great. I also used one of the special coordinating dies for the central snowflake with Tahitian Tide cardstock. This gives the card an extra bit of pop without overpowering it.

I popped up the special snowflake with some Stampin’ Dimensionals. And behind it I have a strip of Snowflake Specialty Vellum along side the stamped snowflakes. The fuzzy designs are so soft and I love the effect you get with the iridescent designs! The sentiment is in Tahitian Tide to go with my special snowflake. And to finish it off I added a Rhinestone Basic Jewel to the centre of the it.

Handmade Blue Christmas Cards

Check out some other blue handmade Christmas cards I made previously here.

And sadly I have to report that the Joyful Flurry bundle is retiring! Along with the Snowflake Specialty Vellum. To get them while you still can head to my online shop before January 4th… retiring products are only available while supplies last!

Joyful Flurry Christmas Card

I’ve had this bundle on my wishlist for a while now! So I’m excited to finally have it and get crafting with it. This Joyful Flurry Christmas card is just the first of many to come! I’m definitely a big fan of snowflakes with my holiday crafting and cardmaking. So of course this is one of my favourites from the July-December mini catalogue. And since my main image is snowflakes I’m using blues for my first card.

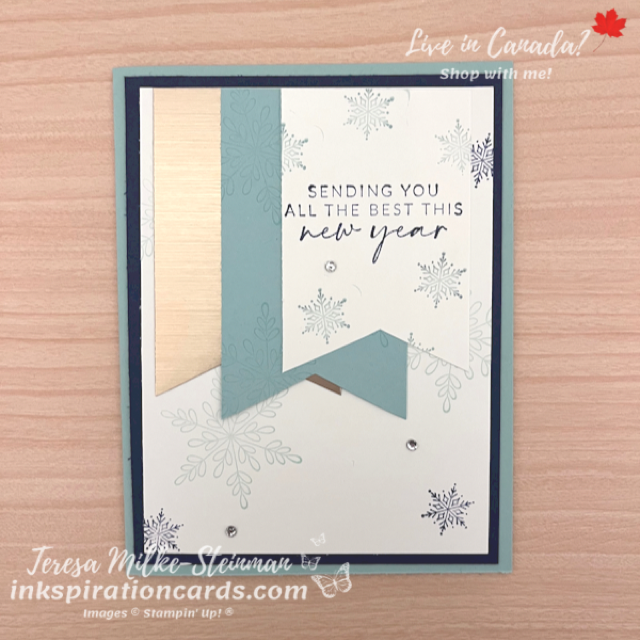
For this card design I went with Pool Party and Night of Navy. Two nice shades of blue that contrast each other really well. And with just a little bit of Night of Navy, the Pool Party really stands out. I used Pool Party for the card base and Night of Navy for the card mat. And even with the stamping I stuck with Pool Party as my main colour. Stamping the larger snowflakes in Pool Party for the background and then surrounding the sentiment with Pool Party snowflakes.

For the banners I layered some Brushed Metallic cardstock with a piece of Pool Party cardstock that I stamped with Pool Party snowflakes. Then there’s the banner with the sentiment on top. No Stampin’ Dimensionals this time. Although that would look really nice too. Instead I kept it simple and just added a few of the small Rhinestone Basic Jewels to finish it off.

Joyful Flurry Christmas Card

I just love this Joyful Flurry Christmas card! And I can’t wait to see what I can really do with the coordinating dies!

Check out some other samples from a recent team card swap using this same bundle here. And if you’re looking to get this in time for some holiday crafting, then head over to my online store.

Christmas #SimpleStamping

November is here and there’s only 6 1/2 weeks until Christmas! Can you believe it?! I’m finally taking the full deep dive into my holiday crafting. I’d like to try and get my holiday cards out at the beginning of December this year. Fingers crossed! So when I saw this month’s #SimpleStamping challenge from Stampin’ Up! I was all in! This month the challenge is to do some Christmas #SimpleStamping, or something for the New Year. And this time we can add some embellishments to the usual stamps, ink and paper.

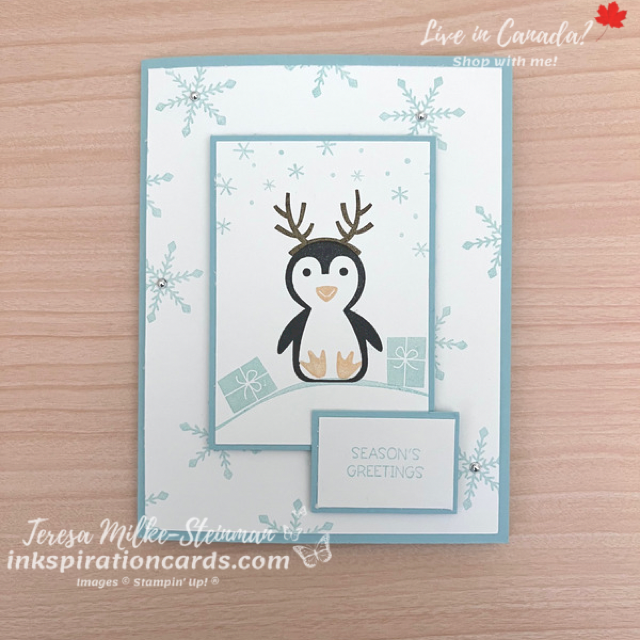
I haven’t done any crafting with the Penguin Place stamp set in a while so I decided to use that as my main stamp set. And to keep with the christmas/winter theme I’m using Pool Party as my main colour. The snowflakes I stamped in the background come from the Spruced Up stamp set. And I used Tuxedo Black Memento ink, Pale Papaya, Soft Suede and Pool Party to create the scene in the centre.

I framed the scene with a bit of Pool Party cardstock. Then popped up the scene with some Stampin’ Dimensionals and layered the phrase on top. The phrase comes from the Penguin Place stamp set. Then to finish it off I added a few of the silver Festive Pearls to the centres of the snowflakes in the background. I love this pack of pearls!

Christmas #SimpleStamping

Check out my Facebook live where I crafted this Christmas #SimpleStamping card here. I do live crafting there every Monday night, so be sure to like my page while you’re there so you don’t miss out!

And you can check out last month’s #SimpleStamping challenge here.

Summer Themed Birthday Card

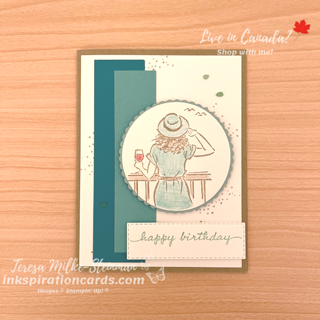
Yes September is here. And yes Fall is less than two weeks away. But I’m still enjoying the warm summer weather. I think that’s where the inkspiration came from for today’s card. Plus I wanted to do some colouring! So that’s where I started… with the stamped image I wanted to colour. The In the Moment works great for this summer themed birthday card. I love all the images in this stamp set, but to keep with a summer theme there was only one choice.

Then I picked my colour combination. I love blues and browns together and they’re a great combo for summer too! I used Crumb Cake as my base colour; the card base and the specs of sand behind all the other elements. Then I have 3 different blues. The blues are Bermuda Bay, Coastal Cabana and Pool Party. I liked the idea of the shades going from dark to light and so I simply used some strips of the different shades.

The image in the centre is stamped with Crumb Cake and then coloured with the Watercolour Pencils. I used Early Espresso from the first assortment. And Coastal Cabana and Cherry Cobbler from the second. I added a Pool Party scalloped circle behind it (using the Layering Circles dies) and popped them up with Stampin’ Dimensionals. The phrase is from the Happiness Abounds stamp set and I stamped in with Pool Party ink. Before I popped it up I die cut it using the Stitched Rectangles dies. And to finish it off I added a few of the blue-green Faux Sea Glass Shapes.

Summer Themed Birthday Card

I really like how this summer themed birthday card turned out! And I might need to add to my cardstock stash so I can do something similar with some Fall colours.

Check out one of the first cards I made with the In the Moment stamp set here. And you can find it here in my online shop.

Fun Fold Card

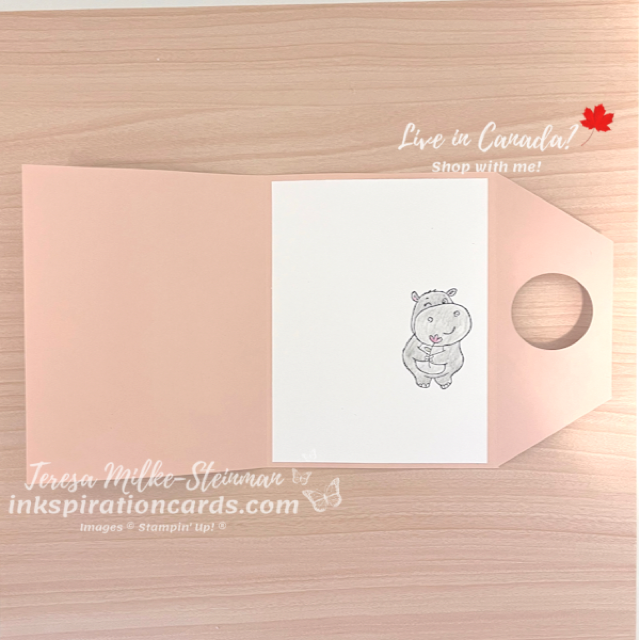
I saw a post from Jo Blackman a couple of weeks ago showing this cute fun fold card and I knew that I wanted to give it a try. My first thought was to use the Penguin Place stamp set for my design. For the other design that I used for my YouTube channel, I picked the Sale-a-bration stamp set Hippest Hippos. Check out my video here.

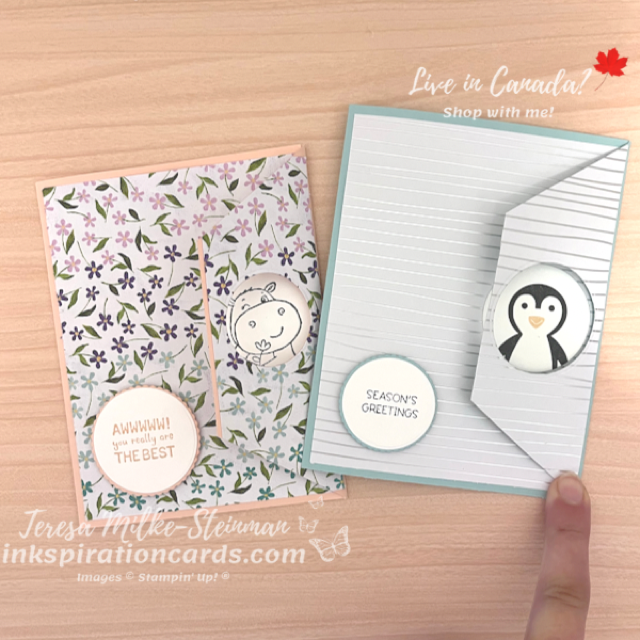
From here I needed to pick the Designer Series Paper I was using so I could get my colour combination. For the Penguin Place card design I paired it with the Sale-a-bration Silver & Gold Designer Series Paper, so I used a Pool Party card base. And for the Hippest Hippos card I used one of the designs from the Hues of Happiness pack of Designer Series Paper with a Petal Pink card base. This piece of patterned paper also helped me pick the hippo for my card!

On the inside of the card I stamped the full versions of my cute critters. Adding some of the cute accessories for my penguin and the Watercolour Pencils to colour my hippo. My critters and phrases were all die cut using the Layering Circles dies, even the scalloped cardstock. Then I popped up the framed phrases using Stampin’ Dimensionals. But my plain critters I kept on the same level as the DSP.

Fun Fold Card

I kept the outside of the cards simple. If you want you can add some Rhinestone Basic Jewels or Brushed Brass Butterflies. That would add a little something more to this fun fold card.

Fun Fold Card

You can check out another of my recent fun fold cards here. Each month I join the Fancy Folds Design team for a blog hop and earlier this month we made a Mirror Fold card.

Watercolouring with Happiness Abounds

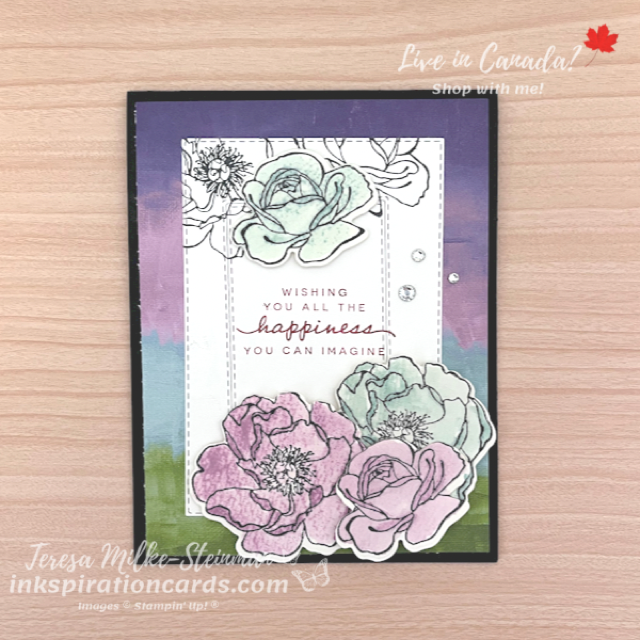
I’m really enjoying all this watercolouring for World Watercolouring month! It’s something I love to do, I just don’t always think of it when I’m designing my cards. Hopefully that’ll change after this month. In the meantime I’m enjoying myself and watercolouring with Happiness Abounds is so much fun. The images in this stamp set make it so easy! Plus the Hues of Happiness Designer Series Paper makes for a nice background. And that’s exactly where I started for this card.

To pull my design together I started with choosing the piece of DSP. All these designs are so colourful, but I wanted to choose a design that wasn’t too busy. I wanted the watercolouring to be the main focus. The piece I chose was nice and simple, plus I love purples and blues. Then to really help the colours pop I used a Basic Black card base.

Layered on top of my patterned paper I stamped some flowers on a piece of Basic White cardstock using Tuxedo Black Memento ink. Next I used 2 different Stitched Rectangles dies to add a little something more to the stamped cardstock.

For the other flowers I stamped them using the same ink but on some of the Fluid 100 Watercolour paper. Just to be sure I gave them lots of time to dry. Then I used my Water Painters to add Pool Party and Rich Razzleberry ink to them. To get the darker colours I added the ink straight onto the stamped watercolour paper. And for the lighter shades I brushed off a little bit of ink onto the side of the ink pad lid before colouring. Once these dried I cut them out using the Blossoming Happiness dies and popped them up with some Stampin’ Dimensionals. Then to finish it off I added a few Rhinestone Basic Jewels. Gotta add some bling!

Watercolouring with Happiness Abounds

So pretty! I just love how this card turned out. Watercolouring with Happiness Abounds is super easy. This suite has become a fast favourite of mine… if you haven’t noticed yet, lol! Check out another card I created using Happiness Abounds here. And you can check out the entire Hues of Happiness suite in my online shop.

Don’t forget about Sale-a-bration too! Products are starting to sell out and we’re not even half way done. Remember to use this month’s host code when you shop with me online. When you do and your order is $49 or more you’ll receive a FREE card making tutorital complete with a list of supplies and step by step instructions.