Delightfully Eclectic

This week I’m sharing a project using a few different retiring products. Sadly, the He’s All That stamp set and dies are retiring. And so is the Delightfully Eclectic Designer Series Paper pack. Now you may not immediately think of using this pack of patterned paper for a masculine themed card. But there are a couple of designs in this pack of DSP that do work well.

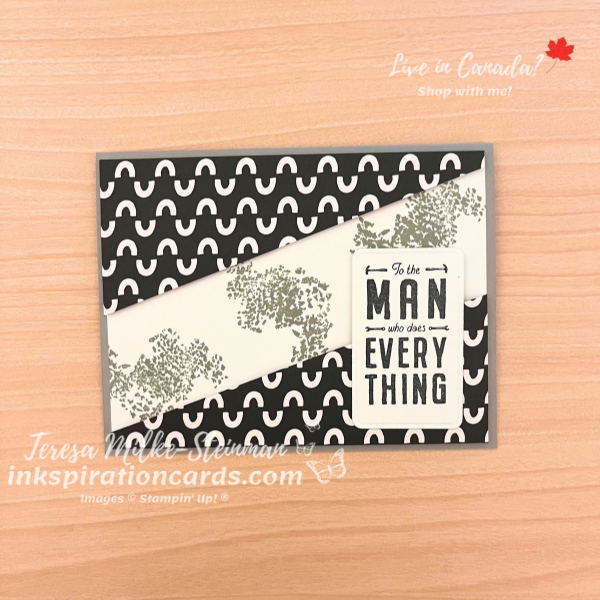
So that’s where I started for this card design… with the patterned paper design. Once I had that I chose my colour combo, which in this case is pretty simple because they’re all neutral colours. My card base is Gray Granite. And then I layered a couple pieces of the black and white DSP on top using some Stampin’ Dimensionals. To make these two pieces, I started with a 4″ x 5 1/4″ piece of the DSP. Then I lined up one corner at the 2″ mark and cut across on a diagonal to about the 1.4″ mark. To get the other piece I just flipped it around and repeated the same thing.

Behind the pieces of the Delightfully Eclectic DSP, I stamped one of the images from the Season of Chic stamp set in Gray Granite ink. Then I stamped a sentiment from the He’s All That stamp set in Tuxedo Black Memento ink and die cut it with one of the coordinating dies. And I layered this on top of the bottom piece of DSP.
Delightfully Eclectic

I’m hoping to do a couple more projects with the Delightfully Eclectic DSP before it retires. But in the meantime, check out another project I made using He’s All That here.

As I write this, the He’s All That stamps and dies and the Delightfully Eclectic DSP are still available. You have until April 30, or maybe sooner, to get these before they’re gone. Don’t wait!

Product List
Handmade Masculine Cards

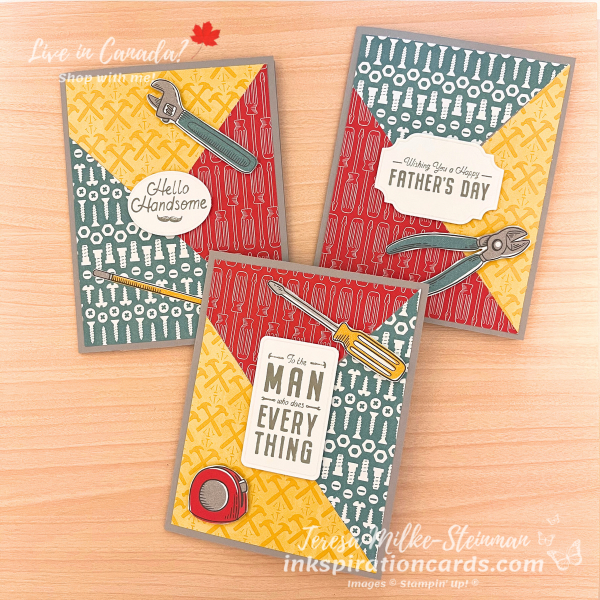
Handmade masculine cards are the ones I hear people struggle with the most. And I put myself in that group too! I’m always looking for a good masculine themed stamp set and fun patterned paper. So I was excited when I saw the Trusty Toolbox Designer Series Paper in the Sale-a-bration catalogue. And with this card design I’m able to make 3 cards at once!

To make it I pulled 3 different designs and cut them each into 4″ x 5 1/4″ pieces. Then I cut each design into 3 pieces. I didn’t measure exactly, but you don’t really need to. You just need to get close. Then I mixed and matched the 3 different designs so that each card has a Real Red, Crushed Curry and Lost Lagoon design.

Once I stuck them to the Gray Granite card bases, I fussy cut a few of the tools. Thankfully they’re pretty easy to do that with. But you can use the Trusty Tools dies for some of them instead if that’s easier.

Then to build up my stash of handmade masculine cards I used 3 different sentiments from the He’s All That stamp set. I stamped them with Gray Granite ink. And then I die cut them with the coordinating dies and popped them up with a mix of Stampin’ Dimensionals and the minis.

Handmade Masculine Cards

I totally forgot about the Brushed Metallic Dots. Those would look great if you like to add a little bling to your handmade masculine cards!

Check out another card I made using the He’s All That stamp set here.

Product List

OnStage Card Swap

As you read this I’ll be on my way to Montreal! This weekend is the first OnStage event I’ve been able to attend in person since the pandemic started. I’m really excited to go and knew I wanted to join in the unofficial OnStage card swap! This is one of my many favourite things about OnStage. There’s also the sneak peeks, the free products and meeting demonstrators from all over! To name just a few.

At just about every Stampin’ Up! event there are demonstrators that make cards and other projects just to swap with one another. Card swaps are a great way to get inkspiration and to see how other demonstrators design their cards. I enjoy doing card swaps with my team and so it’s really nice to get cards from people outside of my team! Plus it gives me the chance to meet other demonstrators that I wouldn’t see otherwise.

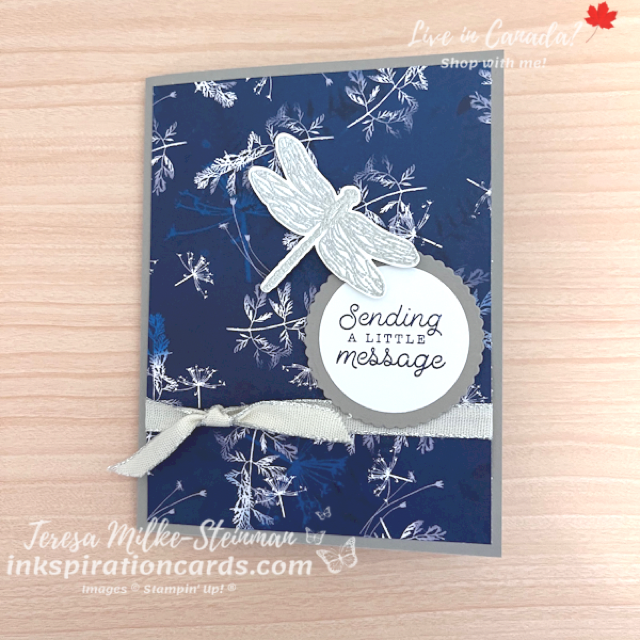
For my card design I kept it simple. I used some of the Sunprints Designer Series Paper for my card mat on a Gray Granite card base. Then I layered a few things on top. Running across the bottom is a piece of Silver Metallic Edge Cotton ribbon. On top of that is a phrase from the Bottled Happiness stamp set that I framed using the Layering Circles dies and popped up with Stampin’ Dimensionals. And last but not least, I silver heat embossed a dragonfly from the Dragonfly Garden stamp set and punched it out with the coordinating punch.

OnStage Card Swap

I hope the other demonstrators like my OnStage card swap! I’ll post some of my favourites here next week so stay tuned. In the meantime you can check out the card I made for my team’s most recent card swap here.

And you can always stock up on stamping supplies in my online shop!