Tips for Beginner Stampers

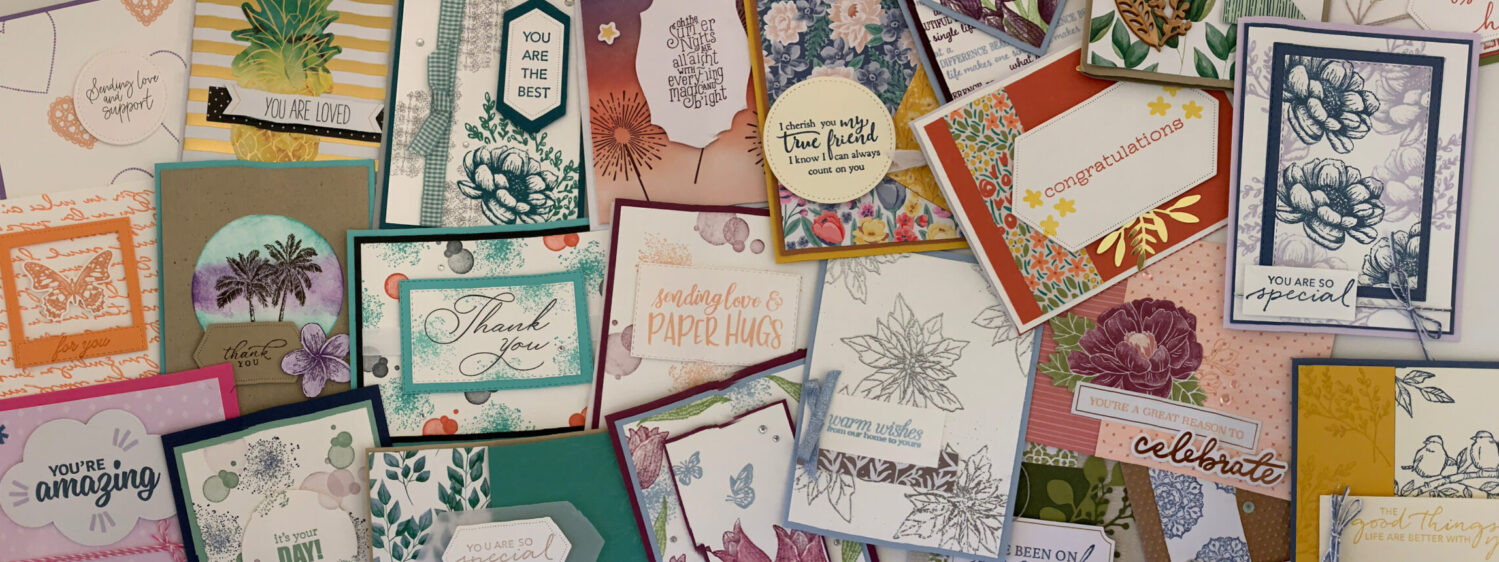
I can’t wait! In just one week the new Annual Catalogue will be here. Full of lots of great ideas and lots of great projects to help you create whatever you want. It can be pretty overwhelming if you’re just starting out though. There’s just so much in there, it’s hard to know where to start. And so I thought I’d share a few tips for beginner stampers.

My first tip is to keep it simple! Even after almost 9 years as a Stampin’ Up! demonstrator I still get caught up in ALL the things. So if you’re just starting out stick with the basics. And the basics are stamps, ink and paper or SIP.

Tips for Beginner Stampers

In terms of your stamps you’ll want to keep 2 things in mind. First is to make sure that you LOVE the stamp set’s images, etc. If you don’t even like the images then you’re not going to feel like crafting with them which will put a definite damper on your creative juices! The other thing that you’ll want to remember is to look for a stamp set that has some versatility to it. So is it a stamp set that can be used for more than one event or occasion?!

Once you’ve got your stamps the next piece is the ink. Think of some of your favourite colours and what colours would work well with the stamp set’s images. You’ll also probably need at least one neutral ink colour. And the nice thing with neutrals is that you have more than just black and white to choose from! Here are the inks from the Neutrals collection…

Tips for Beginner Stampers

And last but not least is your paper! Stampin’ Up! makes this part pretty easy. All of Stampin’ Up!s cardstock and inks coordinate. Which means that if you get the Misty Moonlight ink pad you don’t have to worry about matching it. There’s cardstock, ink pads/markers and even ribbon/embellishments in that same colour. You’ll also want to grab some Basic White cardstock, or some Very Vanilla if you want something a little more subtle.

The other tip I want to mention is that tools are your friend. And there are some simple tools that can help you get started. The 3 tools that I highly recommend for all beginner stampers are a paper trimmer, adhesive (tape runner and liquid glue seem to be the most popular choices) and something to clean your stamps.

Stamping and paper crafting is a LOT of fun! But it can be hard to know where to start. I hope these tips for beginner stampers have been helpful. If you have any questions I’d be happy to answer them, so send me an email; inkspirationwithteresa@gmail.com. I also share tips and project ideas in my weekly email newsletter that you can sign up for here. And if you’re ready to just dive right in check out my online shop to stock up with SIP.

Interactive Wiper Card

Fancy Folds Design Team

I’ve got another fancy fold for you guys! This month the Fancy Folds design team is making an Interactive Wiper card. I wasn’t quite sure how this card would go. Cards with moving parts aren’t exactly my thing. This video from France Martin, a demonstrator from France, was pretty helpful though.

For my card I decided to use the Ice Cream Corner suite. I’ve been having a lot of fun crafting with this month’s Paper Pumpkin kit, So Cool, which coordinates with this suite. It’s such a bright and fun kit/suite and I thought those would be nice elements for this card. I started by looking at the colours from the Designer Series Paper and pulled my colour combination from there. Bermuda Bay for my card base and ink and Blackberry Bliss for my other ink colour. Even with that though I love the rainbow of colours from the different designs of DSP that I chose.

The phrases came from the Sweet Ice Cream stamp set. And I let the images from the DSP speak for themselves. Although of course I used a combination of DSP and the coordinating stamp set and punch for my pop up. The waffle DSP design made the cone super easy. And for the scoop I used Bermuda Bay for the ice cream and Blackberry Bliss for the sprinkles.

Interactive Wiper Card

It took a little bit of fidgeting to get the cone to pop up the way I wanted it too. But it worked out nicely! I also added a little something on the front. I stamped another phrase with Blackberry Bliss and some sprinkles with Bermuda Bay. Then cut it out with the Stitched Shapes dies. To finish it off I popped it up with some Stampin’ Dimensionals and added a few Pastel Pearls.

Interactive Wiper Card

This Interactive Wiper card was a fun one to make! Make sure to keep going on this month’s blog hop and check out Fiona Carson’s card here. And you can check out my card from last month’s blog hop here.

Sketch Challenge with Butterfly Bijou

This week’s horizontal sketch challenge from the Paper Craft Crew (PCC422) looked really interesting so I decided to join in the fun. And I decided I’d join in the sketch challenge with Butterfly Bijou DSP as one of my elements. I really love this paper and totally see how it sold out before May 3rd. I’m sad that it’s not carrying over into the new Annual catalogue, but am still going to enjoy crafting with it while I can. Here’s the sketch that started it all..

Sketch with Butterfly Bijou

From here I pulled out my Butterfly Bijou DSP and decided to go with a monochromatic look. So the colour of course came from the DSP design I chose… Calypso Coral. For the card base I went with Basic White to help the Calypso Coral pop.

Part of why I love the Butterfly Bijou DSP is because I LOVE butterflies. And so I used one of the butterflies from the coordinating Brilliant Wings dies for my “any shape”. This also sparked the idea to use the other side of the Calypso Coral DSP design for my circle on the sketch. I used the 2 1/4″ Circle Punch to punch out the area of the DSP that I wanted to use. I know it breaks up the monochromatic look I was going for a bit, but the paper is just so pretty.

The stamped images came from one of my favourite go to stamp sets; Beauty Abounds. (I’m so sad that this set is retiring) I debated about what image I wanted for this card. At first I thought of using the paint splatter image. But I ended up going with the flower and leaf image. This was a fun card to make! I really liked this sketch challenge with Butterfly Bijou. Here’s my card…

Sketch with Butterfly Bijou

To check out all the cards for this week’s Paper Craft Crew Challenge, you should head over to their website. And if you want to check out one of my previous sketch challenges for the Paper Craft Crew, you can check that out here.

Spotlight Technique

I just LOVE butterflies! So I keep getting pulled back to craft with the Butterfly Bouquet products. And that’s how this card design started… I just wanted to create something with the Brilliant Butterflies and coordinating dies. From there it evolved into a card using the spotlight technique. This technique is a simple one gives a really beautiful effect. The basic idea is to choose an image that you stamp in a neutral colour and then you “spotlight” part of the image. And how you do that is by stamping the same image in a colour that coordinates with your project, cut that image out and then add it right on top of the neutral image with a piece of coordinating cardstock. Amanda Fowler, a demonstrator from the UK, has a great video that shows off how to do it.

For my card design I knew what stamps and dies I wanted to use and so the next step was to pick my colour combination. With Spring here I went with one of my favourites, purple and green. In this case I chose Highland Heather and Mossy Meadow. I haven’t used this combination before and really like how they work together. For my butterflies though I used Highland Heather and Tuxedo Black Memento ink. I used Mossy Meadow for my card mat and as an embellishment with a bit of the Braided Linen Trim.

Spotlight Technique

For my spotlight I used the Brilliant Wings dies, instead of die cutting a circle around one of the butterflies and then layering it with another piece of cardstock. Using the dies made this technique even easier. And I popped up the Highland Heather butterfly with some Stampin’ Dimensionals. I also added some Wink of Stella to this butterfly.

The phrase for this card comes from the Free as a Bird stamp set. Which I cut out using one of the smallest Stitched Rectangles dies and a couple of the medium sized Rhinestone Basic Jewels on either side. I also popped the phrase up with some Dimensionals.

Spotlight Technique

I love how this card turned out. And I especially love how easy it was to make. I’m definitely going to have to use the spotlight technique more often! I hope you like this card too. And if you like butterflies as much as I do you should check out one of my recent projects using these products. In this post I shared a 4 Panel card that I made using the stamps, dies and (unfortunately sold out) Butterfly Bijou DSP.

Weekly Inkspiration

I don’t know about you, but I’m always on the look out for new ideas. Even though I’ve been stamping and scrapbooking for a long time I still get excited for new folds, layouts and techniques. Which is what I try to do each week with my email newsletter… send some weekly inkspiration! There’s a lot in store when you sign up for my weekly email newsletter.

Each week I include an exclusive PDF tutorial complete with everything you need. Including a list of supplies, measurements and step by step instructions. You won’t find these projects anywhere else! I also share projects from my blog where I show different fancy folds, stamping techniques and other projects. This is also where I share my DIY home decor projects and my craft storage and organization solutions. But that’s not all!

This is also where I share sneak peeks about Paper Pumpkin and what’s going on with Stampin’ Up! Including special promotions and sales, like right now the list of retiring products from the Annual catalogue is out! (You can check that out in my online shop) Plus I also share stamping tips, feature products that I think are helpful to us crafters and answer any of your stamping/scrapbooking questions.

And if you live in Canada and want to get your hands on copies of the catalogues before they launch, then this is the place. I also offer extras to my customers! Like free gifts with qualifying orders and contests. You can also get all the info about my upcoming classes and events here. Right now all my classes are online, but I’m hoping in the not too distant future that I’ll be able to offer in-person events again.

There’s just so much to share! And I’m glad to be able to share it with you. Sign up for you dose of weekly inkspiration here and you’ll get a free PDF tutorial just for signing up!

Contact Me

How to Sponge your Projects

I’ve been having a lot of fun creating with the March Paper Pumpkin kit Here’s to You! To celebrate Paper Pumpkin’s birthday everyone who subscribed in March also received four 4×4 stencils and a Stampin’ Sponge. So I’ve been doing a lot of sponging with my stencils. And so I thought I’d share a project here to show you how to sponge your projects. It’s really easy, but there are a few tips to help make it even easier.

To help with this I shared a video on my YouTube channel on just how to do it. There are two important things to remember when you’re sponging. The first is to use circular motions with your sponge. This will help spread the ink more smoothly and evenly. And the other important thing to remember is to always start off the cardstock, or whatever it is that you’re sponging. You don’t want to end up with a blob of ink on your project!

In my video I sponged a piece of Basic White cardstock with Pool Party ink. So from there I picked a darker colour of cardstock that would help the sponged piece stand out. In this case I went with Misty Moonlight for the card mat and of course Pool Party for my card base. And the piece of Basic White in the centre of the card also helps show off the sponged piece of cardstock.

The phrase and images all came from the Tasteful Touches stamp set. Which is thankfully carrying over to the new Annual Catalogue. I stamped the phrase and feathers with Pool Party. And the blooms with Misty Moonlight. I cut out the phrase with the Stitched Nested Labels dies, which sadly are retiring soon. I also wrapped some of the Misty Moonlight/Silver Baker’s Twine from the Flowers for Every Season ribbon combo pack around the sponged cardstock. And to finish it off I add a few Rhinestone Basic Jewels. Here’s the finished card…

How to Sponge your projects

It’s been a while since I’ve done any sponging. And so it’s been nice to get back into it. I hope you found these how to sponge your projects tips helpful. And I’d love it if you’d share your sponging projects in the comments.

One last important thing… the Stampin’ Sponges are also on the list of products retiring May 3rd, if they last til then. So if you want to check out the full list of what’s retiring to see what else you want to grab before it’s gone, then check out my last chance post.

Another #simplestamping Challenge

It’s time for another #simplestamping challenge from Stampin’ Up! This time we’ve been asked to make a thank you card using stamps, ink, paper and our favourite retiring product. The list of retiring products was released a couple of weeks ago. And there are definitely a few that I’m sad to see going. It was hard to pick a favourite, but I ended up picking something that wasn’t too fancy. I still wanted to keep with the #simplestamping theme.

For my card I decided to use the Butterfly Duet punch as my favourite retiring products. So for my stamps I used the Butterfly Wishes stamp set that coordinates with it. From there I picked my colour combination. I went with Blushing Bride and Crumb Cake for both my cardstock and ink colours.

I used Crumb Cake to stamp the blossom branches and the phrase. This “thank you” comes from the Free as a Bird stamp set. Then I used Blushing Bride for the flowers and butterflies. To adhere the butterflies I used Stampin’ Dimensionals. But you can just as easily use Glue Dots or even Multi-Purpose Liquid Glue. Here’s the card…

Another #simplestamping challenge

To step this up I didn’t do a lot. All I added was some Wink of Stella to the butterflies and a couple of Rhinestone Basic Jewels. I love to add bling to just about all my cards. It’s such an easy way to level up any #simplestamping project! I debated about adding some of the Blushing Bride Metallic ribbon from the January-June Mini catalogue. But I really liked keeping this card fairly simple. Here’s my stepped up version…

Another #simplestamping challenge

I really like this card. And can’t wait to do another #simplestamping challenge! Check out my #simplestamping card from last month’s challenge here. And if you want to get your hands on this great stamp set and punch before it’s gone, head over to my online shop!

Easter Bunny Boxes

The Easter long weekend is here! And even though we’re not able to celebrate like we usually do, I still have some surprises for my munchkins. They’ve seen a few of them, but they haven’t seen these yet. I saw these Easter Bunny boxes on Facebook and just had to make them! Emma Fawcett, a demonstrator from Ireland, posted them and I checked out her YouTube video for all the steps and measurements. It was pretty straight forward to make. And these will be one of the reasons I hold onto my Layering Ovals dies even though they’re retiring.

I decided to make one bunny with Basic White and the other with Crumb Cake. Along with that I used some Petal Pink for the ears and nose. And some Daffodil Delight for the flowers and a piece of window sheet.

Easter Bunny Boxes

For the ears and paws I used the Layering Ovals dies. This also made the window in it’s tummy. To make the flowers I used the Poinsettia dies. The stem is in Crumb Cake and the “flowers” are in Daffodil Delight. For the flowers I needed to cut them into singles and then used Glue Dots to attach them to the stem.

To secure the box I used Tear & Tape Adhesive. I also used that to adhere the piece of window sheet on the inside of the box. For the ears and paws I used a combination of Stampin’ SEAL and Dimensionals.

To make the nose I pulled out a retired heart punch and used a couple of Glue Dots to adhere it. And for the whiskers and on the paws I used an Early Espresso Stampin’ Write Marker. The eyes in this case are some retired dots that I had. Or you can use the Matte Black Dots.

Here they are…

Easter Bunny Boxes

These Easter Bunny Boxes turned out so cute! I hope my munchkins love them too. I’m going to be filling them with jelly beans (one of their favourites). Last year I made some cute little baskets with the Timeless Tulip stamp set and punch. You can check those out here!

Last Chance

It’s a little earlier than usual, but it’s almost time for the new Annual Catalogue from Stampin’ Up! And so they’re making room for new products. Which means it’s our last chance to get those products that are retiring. Every year Stampin’ Up! releases a list of all the products that won’t be available in the new catalogue. And sometimes there’s even some discounts on some of these products. This year’s no different.

And just like other years I have mixed feelings about the list. Although this year there are a few retiring products that hit me harder than usual. Like the Stitched Shapes dies and the Stitiched Nested Labels dies. These are two of my go-to sets of dies when I’m crafting. There are also some of my favourite stamp sets retiring too. Fortunately I’ve had a sneak peek at the upcoming new catalogue and there’s a lot that I’m excited about.

The most important things to remember are that even though the catalogue is around til May 3rd, the retiring products are only available while supplies last. And the 2019-2021 In Colour products are part of the list. And these will definitely not last! These products are always the first to sell out and some of these are already starting to run low.

If you live in Canada and want a copy of the new catalogue just send me an email. In the meantime, here’s the list of retiring products for those of us in Canada…

After May 3rd these products will be gone… if they last that long. So don’t miss out on your last chance to get your favourites! Head over to my online shop before they’re gone.

Last Chance

Goodbye Purple Posy

The new Annual catalogue is coming in just a few short weeks. Which means that a number of the products from the current Annual catalogue will be retiring including the 2019-2022 In Colours. And so I’ve been featuring one of the 2019-2022 In Colours here each week. You can go back and see my posts featuring Terracotta Tile, Pretty Peacock, Rococo Rose and Seaside Spray. But this week it’s time to say goodbye Purple Posy.

I really love this colour. And I wish that Stampin’ Up! would have been able to figure out the issues with the ink pads. So for this card I had to focus on mainly using Purple Posy cardstock. The Brilliant Wings dies made this pretty easy.

To help make the Purple Posy pop I used Blackberry Bliss for my card base and some of my stamped images. The stamped images for this card came from the Beauty Abounds stamp set. This is one of my favourite stamps sets and I’m so sad that it’s being retired. I was able to stamp a few images using a Purple Posy Stampin’ Write Marker to contrast the Blackberry Bliss stamped images for my background.

Goodbye Purple Posy

The “thank you” came from the Free as a Bird stamp set. And I die cut 3 Purple Posy butterflies using the Brilliant Wings dies to be the focal point for this card. To adhere the butterflies I added some Multi-Purpose Liquid Glue in the centre of them. That way I could pull the wings up a little bit to add a bit of dimension to the card. Then to finish it off I of course had to add some bling. So I added one small Rhinestone Basic Jewel on either side of my “thank you”.

Goodbye Purple Posy

I’m sad that it’s time to say goodbye Purple Posy and the other 2019-2022 In Colours. But I’m also excited about the upcoming new Annual catalogue.

If you live in Canada and want your very own copy of the new catalogue, contact me. I’d be happy to send you a copy. And make sure to head over to my online shop to get your favourites before they’re gone! All the retiring products are only available while supplies last. And the In Colour products always sell out quickly so don’t wait too long!

Four Panel Card

I found this card a couple of weeks ago and just loved it! It’s from Jess B, a US demonstrator, and is called a Four Panel card. Here’s her link which comes complete with measurements. I love how it shows off Designer Series Paper. It’s a great way to show off different designs on one card! Lately I’ve been loving crafting with the Butterfly Bijou DSP so of course I immediately thought of this paper pack.

So that’s where I started for my design. I looked at the colours in the DSP pack and pulled my cardstock from there. I chose Misty Moonlight for my card base. And Just Jade for the card mats. Then it took some back and forth for which DSP designs I wanted to highlight. In the end I went with 3 designs I haven’t used yet. Then I had to decide what images and phrases I wanted to use on the Basic White pieces.

Four Panel Card

For this card I ended up using 4 different stamp sets. Usually I only use 1 or two, but once I figured out what kind of card I wanted this to be the number jumped. I’m going to be giving this to my mom for Mother’s Day. So on top of the Butterfly Brilliance stamp set, I used the “Happy Mother’s Day” from the Timeless Tulips stamp set. The additional phrase for the card came from the Strong & Beautiful stamp set. And instead of more butterflies I stamped some flowers from the Free as a Bird stamp set around it.

I also added some Just Jade Gingham ribbon from the Flowers for Every Season ribbon combo pack. And I added some Wink of Stella to the butterfly on the front for my bling. The butterflies on the front and inside came from the Butterfly Brilliance stamp set and some of them I cut out with the coordinating dies.

Four Panel Card

I love how this card turned out! And I hope that my mom loves it too. At least I know that my littlest munchkins loves it… he wants me to make him one now. Check out another fancy fold I made recently with this same pack of DSP here. And for the measurements to make your own Four Panel card make sure to check out Jess B’s link at the top of the post.

Pop Up Card

Fancy Fold Design Team

It’s time for another Fancy Folds Design Team blog hop! This month we’re making a Pop Up card. It’s a fun card that really does pop, lol. Here’s a video highlighting this card and make sure you grab my simple project sheet at the end of this post. And of course make sure to keep going on this month’s blog hop with the next link at the bottom.

For my card design I just had to use the new Butterfly Bouquet! I’ve been loving crafting with these products. So keep checking back here for more projects. In the meantime, for this card I used it all. I used the stamp set, the dies AND both Designer Series Papers. So of course I used Basic White for my card base. That way it would help the colours pop even more.

I used the Natural Touch Specialty Paper to frame the outside and inside of my card. And then I used the dies to cut out some butterflies from one of the designs from the Butterfly Bijou 6×6 DSP pack. I just love how I don’t have to fussy cut the butterflies! I’ve done that before and while it could have been worse it was still a pain.

Pop Up Card

On the inside I embossed the Basic White “box” with one of the Greenery Embossing folders. I thought it fit nicely with the butterflies. I also stamped some butterflies using Just Jade ink. And then cut them out with the dies so I had a bunch to pick from for the card. Plus I knew that I wanted to used the Just Jade Gingham ribbon from the Flowers for Every Season combo pack. So it was a nice way to bring out that colour.

I didn’t pop up any of the butterflies or use any Rhinestone Basic Jewels. Instead I added some Wink of Sotella to a couple of the butterflies. I also stamped a couple of smaller butterflies from Butterfly Wishes in Misty Moonlight and Blushing Bride. And my phrase came from the Timeless Tropical stamp set.

Pop Up Card

This was such a fun card to make! Make sure to grab my simple project sheet with measurements and instructions.

And be sure to keep going with the Pop Up card for this month’s Fancy Folds Design Team blog hop. Aude Barbara’s post is next right here!

Fancy Folds Design Team Blog Hop

Goodbye to Seaside Spray

It’s time to say goodbye to Seaside Spray! (I’m posting this week’s In Colour tribute a little early since I’m participating in the Fancy Fold Design Team blog hop later this week.) This is a colour I’m definitely going to miss. It was my favourite I think from all the 2019-2021 In Colours. I loved using it for just about any kind of card… birthday cards, thank you cards and even my holiday cards.

I also love pairing blues and browns together. So for this week’s tribute I paired Seaside Spray with Crumb Cake as my main colour combination. I also threw in a little bit of Pear Pizzazz because I wanted to make a card with a bit of a Spring feel to it. And so I used the Free as a Bird stamp set. There’s a nice variety of images and the blooms and birds are very “Spring”.

I mixed up the images and colours to create a background for this card. With the Crumb Cake leaves and Pear Pizzazz being a little more subtle, the Seaside Spray flowers stand out a little bit better.

Goodbye to Seaside Spray

I’ve also been having a lot of fun with my new Blending Brushes and thought it would be cool to use them for this card. I decided to blend the Seaside Spray around the birds on a branch to make it look like the sky in the background. I stamped the birds in Crumb Cake and then did some colouring with a Blender Pen. For the leaves I used Pear Pizzazz, Crumb Cake for the branch and Seaside Spray to add a some highlights to the birds.

I cut out the birds with one of the Stitched Nested Labels dies. Then I popped it up with some Stampin’ Dimensionals. But I still felt like the card needed something. At first I thought about using the Seaside Spray Metallic Ribbon. But I ended up going with a few Rhinestone Basic Jewels.

Goodbye to Seaside Spray

I’m very sad that we have to say goodbye to Seaside Spray. Hopefully when Stampin’ Up! does their next colour refresh they bring this colour back. That’s what happened with Blackberry Bliss, so I’m keeping my fingers crossed. If you want to check out my other tributes here they are. Pretty Peacock, Terracotta Tile and Rococo Rose. And remember that the In Colour products will sell out quickly! Once they’re gone that’s it. So fill up your cart here.

Goodbye to Rococo Rose

There’s less than two weeks to go until the list of products retiring from the Annual Catalogue is announced! I never know what they’re going to do, but I do know that the 2019-2021 In Colours are going. So each week I’m picking one of the retiring In Colours to feature on my blog. This week I thought I would say goodbye to Rococo Rose. If you want you can check out my other “tributes” so far; Terracotta Tile and Pretty Peacock.

For this card I decided to feature Rococo Rose with a Spring theme since it’s just around the corner. And the Timeless Tulips stamp set is perfect for that. So that’s where I got the images and phrase. To compliment the Rococo Rose and tie in with the Spring theme, I also used Pear Pizzazz.

Goodbye to Rococo Rose

I also wanted to do something a little different in terms of the layout. So I have a smaller piece of Basic White for the images and another small piece for the phrase. Behind that is some Pear Pizzazz that I embossed with the Painted Texture 3D embossing folder. It gives a nice texture to the cardstock instead of just leaving it plain or stamping a background.

I popped up the tulips with some Stampin’ Dimensionals and wrapped some Linen Thread around the cardstock. The phrase I framed with a piece of Rococo Rose and popped that up so it was on the same level as the tulips. Then I stamped a couple extra large tulips and used the coordinating punch to pop those up and add another layer to the card. And of course I needed to add some bling. So I added some Wink of Stella to the two large punched tulips.

Goodbye to Rococo Rose

I really like this layout… and the card, so I’m sad that we have to say goodbye to Rococo Rose. If you don’t want to miss out on the opportunity to stock on Rococo Rose or any of the other retiring In Colours, then make sure to head over to my online shop. The ink pads are already starting to run low and once they’re gone that’s it!

#simplestamping with Butterfly Bouquet

This month’s #simplestamping challenge from Stampin’ Up! is to create any card using stamps, ink and paper. And as an added bonus we can also use Designer Series Paper this month! I’ve been having a lot of fun creating with the new Butterfly Bouquet products. I just LOVE butterflies so I fell in love with it all… the stamps, the dies and especially the DSP. So I jumped at the chance to do some #simplestamping with Butterfly Bouquet.

To start my design I looked through the Butterfly Bijou DSP pack to see what jumped out at me. I had a couple of different reasons for the design I picked. The first was the colours and images on the paper. And the second was that I liked the design on the other side of that same sheet. I thought I would keep with the simple theme and not have to use multiple sheets of DSP.

From here I picked my cardstock and ink colours. For my card base I used Bermuda Bay and for my ink I went with Tuxedo Black Memento ink. The Bermuda Bay of course comes from the DSP design. And I wanted black ink on Basic White cardstock to really help the colours and images from the DSP to pop.

#simplestamping with Butterfly Bouquet

The stamped images for my card came from the Forever Blossoms stamp set. I felt like the blossoms really complimented the butterfly DSP. And the phrase came from the Dragonfly Garden stamp set. I layered the other side of the DSP behind the phrase and just popped it up with a couple of Stampin’ Dimensionals.

#simplestamping with Butterfly Bouquet

To step this card up I actually wouldn’t do too much. I would add a few Rhinestone Basic Jewels or maybe some Opal Rounds. And I would add some Wink of Stella to the stamped Blossoms. If you want to kick this up even another knotch you could used the Stitched dies for the stamped images and phrase.

These #simplestamping challenges are fun. And I hope you like this card. I definitely enjoyed doing some #simplestamping with Butterfly Bouquet. If you want you can also check out one of my more recent #simplestamping cards. This one is with just stamps, ink and paper… no bonuses.

If you love the Butterfly Bijou DSP that I used for this card make sure to check out my online store. This pack of paper is only available until May 3rd!