Halloween Sampler with Them Bones

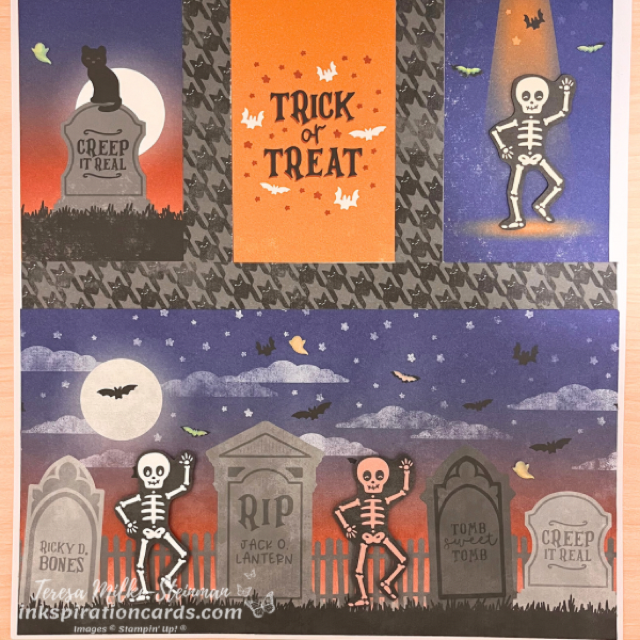
Now I’m getting to what I usually do for my Halloween crafting… home decor. The Them Bones suite is such a great one for any Halloween project! This time I’m making a Halloween sampler with Them Bones Designer Series Paper.

I started with an 11″ x 11″ piece of Basic White cardstock. Then I cut up a few different sheets from the patterned paper pack. These designs are so great! You don’t really need to add a lot else. I used almost half a sheet just along the bottom. Then I chose 3 smaller designs from another sheet for up top.

Usually when I make a sampler I add some coordinating cardstock to frame each of the boxes. But instead I used another design in between all the boxes. Then to add another layer I fussy cut some of the skeletons and popped them up with some Stampin’ Dimensionals. And to finish it off I added a few Glow in the Dark Bats & Ghosts.
Halloween Sampler Them Bones

I’ve made a few other samples with lots of stamping and die cut pieces. This Halloween sampler with Them Bones DSP is very simple!

Check out the matching Halloween cards and treat boxes I made using some different designs from the same pack of patterned paper here.

And you can check out the whole Them Bones suite over in my online shop!
Why I Love Craft Kits

My craft stash has a lot of different things in it. Stamps and ink make up a big part along with cardstock and patterned paper of course. But I also have wood, beads and other crafting supplies. I even have a few craft kits in my craft stash. These are great for a lot of different reasons. So here are a few reasons why I love craft kits.

Great for Beginners

If you’ve never crafted before or if you’re new to this kind of crafting, kits are a great place to start. They come complete with everything you need to make the kit’s project including instructions and adhesives. And the projects are simple and straight forward. Stamping and crafting can feel overwhelming sometimes, so it’s nice to not have to come up with your own ideas or designs! It’s also a great way to start your own craft stash.

Lots of Variety

There are so many kits to choose from! You can choose to stamp or not. There’s the choice of birthday, Christmas, thank you cards and more. If you don’t want to make cards, there’s kits to make tags. There’s even kits to craft home decor pieces and to help you keep all the birthdays, etc. that you need to send cards for organized! One of my munchkins’ favourites is the scrapbooking kit. There’s definitely not a shortage of craft kits to choose from and Stampin’ Up! adds new kits pretty regularly.

Great Quality

One of the other reasons why I love craft kits, is that the Stampin’ Up! kits are great quality. It’s hard to find stamps, ink and paper that’s better any where else. And their kits are the same! While I love shopping at my local dollar and craft store, there’s just certain things I won’t buy there.

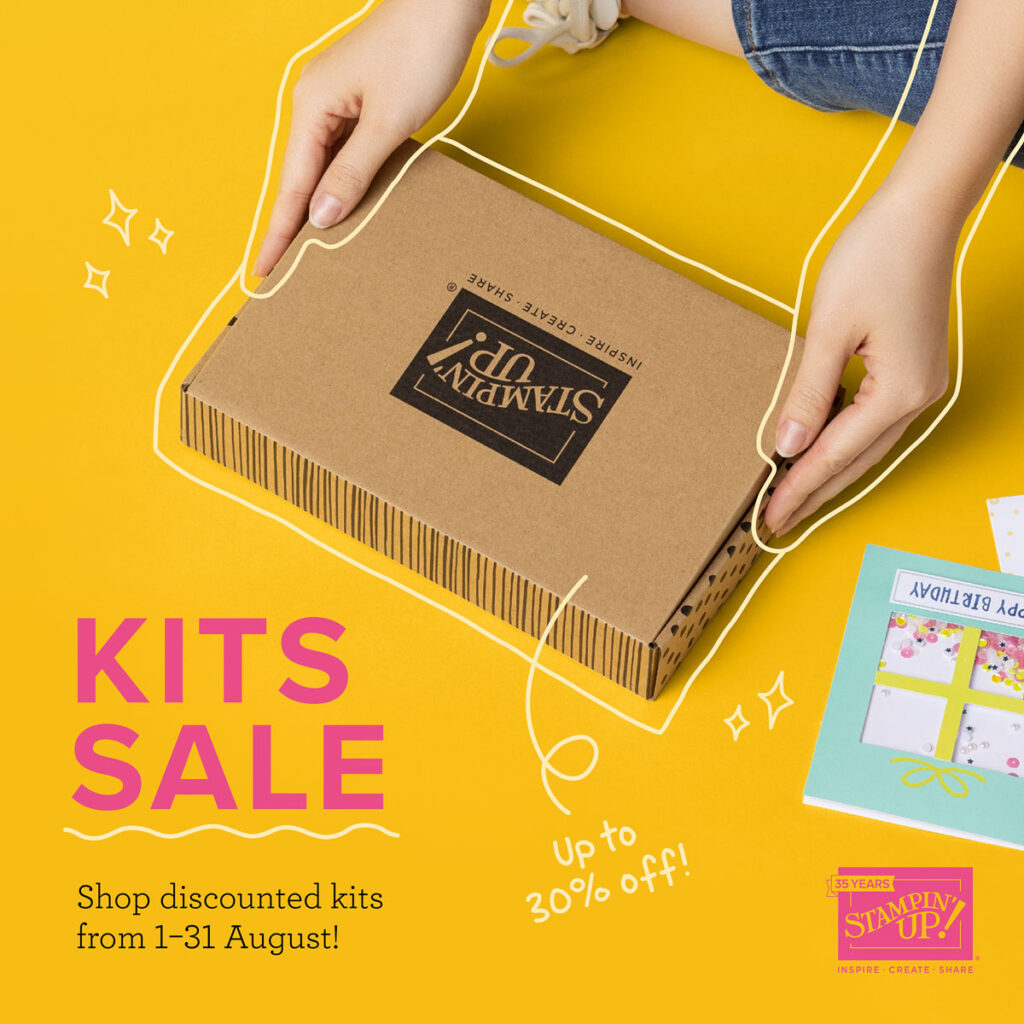
There are so many other reasons why I love craft kits, but I’m only going to mention one more. And that’s that all this month (August) you can buy any of Stampin’ Up!s kits for up to 30% off! So get a head start on your Christmas crafting or grab a kit or two for yourself or the crafter in your life. See all the kits in my online shop.

And if you have any questions don’t hesitate to contact me!

Why I love craft kits

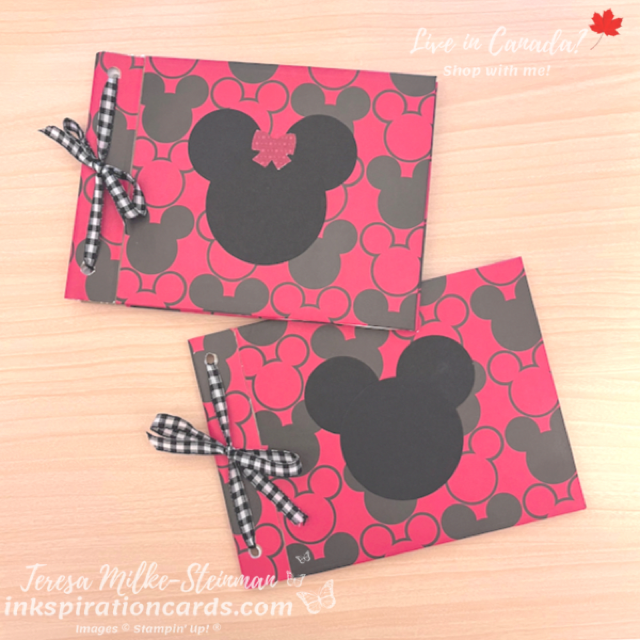
DIY Disney Autograph Books

Only a couple more days and then we’ll be on our way to Orlando, Florida! I haven’t gotten to packing yet. The past few weeks has been all about getting everything we need for our trip. And no trip to Disney is complete without DIY Disney Autograph books!

To make it I pulled out some of the chipboard I saved from some of my Paper Pumpkin kits. I cut two pieces in half and punched holes in them. Then I covered them with some more Disney patterned paper I picked up at Scrapfest. I cut it strategically so that when the chipboard bent to open the book the patterned paper didn’t get in the way.

On the inside I simply cut down printer paper to fit inside. Then I used my corner rounder on the edges and punched holes in the sheets to line up with the back and front covers. To hold it all together I looped some of the Black and White 1/4″ Gingham ribbon through and tied as tight a bow as I could.

Then to finish them off… and because I didn’t want to have my two munchkins arguing over who gets which one… I added a Mickey and Minnie to the fronts of the books. To make them I just used the Layering Circles dies with Basic Black cardstock. And for Minnie’s bow, I used the Scottie Dog punch with some of the Lights Aglow Designer Series Paper.

DIY Disney Autograph Books

Too cute right?!

They love their DIY Disney Autograph books and I hope they’re able to get all the autographs they want!

Check out the countdown calendar I created for our trip here. And you can see some of my other projects and glimpses from our trip over on my social media! Follow me on Facebook and Instagram.

12 Weeks of Christmas 2022

Fall is here! And that means we’re heading into the holiday season. Starting with Thanksgiving, then Hallowe’en, Hanukkah and of course Christmas. We also have a bunch of birthdays sprinkled in there too. So it’s a busy time of year! And to help make having a handmade Christmas easier I’m kicking off my 12 Weeks of Christmas 2022 later this week!

Each week I send out a newsletter filled with project ideas, stamping tip and first chance at my upcoming classes and events. And one of the perks of being on my mailing list is that you’ll automatically get my 12 Weeks of Christmas emails.

Every week from September 30th til December 16th you’ll get a Christmas project idea complete with pictures, measurements, step by step instructions and of course a list of everything you’ll need to make them. I’ll be starting off with cards to make sure you’ve got plenty of time to mail them no matter where they need to get to. Next up is gifts and then I’ll wrap it up (lol) with tags, bags and wraps. I love adding a little something special to my gifts!

You won’t find these projects anywhere else! So make sure to sign up for my 12 Weeks of Christmas 2022 before Friday! And if you know anyone who might enjoy these projects, please share this post with them.

Here’s the link to sign up for my mailing list. And here’s one of the projects I shared as part of one of my previous 12 Weeks of Christmas…

Contact Me - 12 Weeks of Christmas

Want more info? You can find that here. The countdown to Christmas is on! It’s less than 3 months away, so let me help you with your holiday crafting.

Handmade Placecards

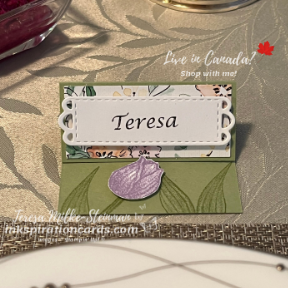
I hope everyone enjoyed this past long weekend! And I hope you were able to spend at least some of it with loved ones. For us it was a busy weekend seeing both mine and my husband’s family. And even busier because we hosted dinner one of the nights. Since it’s been over 2 years since the last family dinner I wanted to make it even more special. So I decided to make handmade placecards.

For the design I wanted nice bright colours for Spring. I thought that the soon to be retired Hand Penned Designer Series Paper would be perfect. Lots of colours and flowers! I used Pear Pizzazz cardstock to create an easel style base. A nice green for the DSP to pop off from. And for the names I simply printed them on Basic White cardstock and cut them out using one of the Meadows dies.

Along the bottom of the place card I stamped some leaves and a stem from the Timeless Tulips stamp set (also retiring soon) using Pear Pizzazz ink. Stampin’ Up! makes tone on tone stamping so easy! Then to hold the easel in place so we could see the names I used a tulip bloom. I stamped the smallest tulip image in a few different colours; Pale Papaya, Fresh Freesia, Daffodil Delight and Calypso Coral. Then I fussy cut them and popped them up with a Stampin’ Dimensional. (I also popped up the names using Stampin Dimensionals)

These handmade placecards turned out really nicely!…

Handmade Placecards

I’m really going to miss this stamp set. It’s so versatile and I often used it with the masking technique. I actually shared a project recently here doing just that.

There’s only 2 weeks left til the new Annual Catalogue launches and the retiring products will be gone forever… if they aren’t sold out already. Don’t miss out! Head over to my online shop and grab your favourites before they’re gone.

Friendly Hello

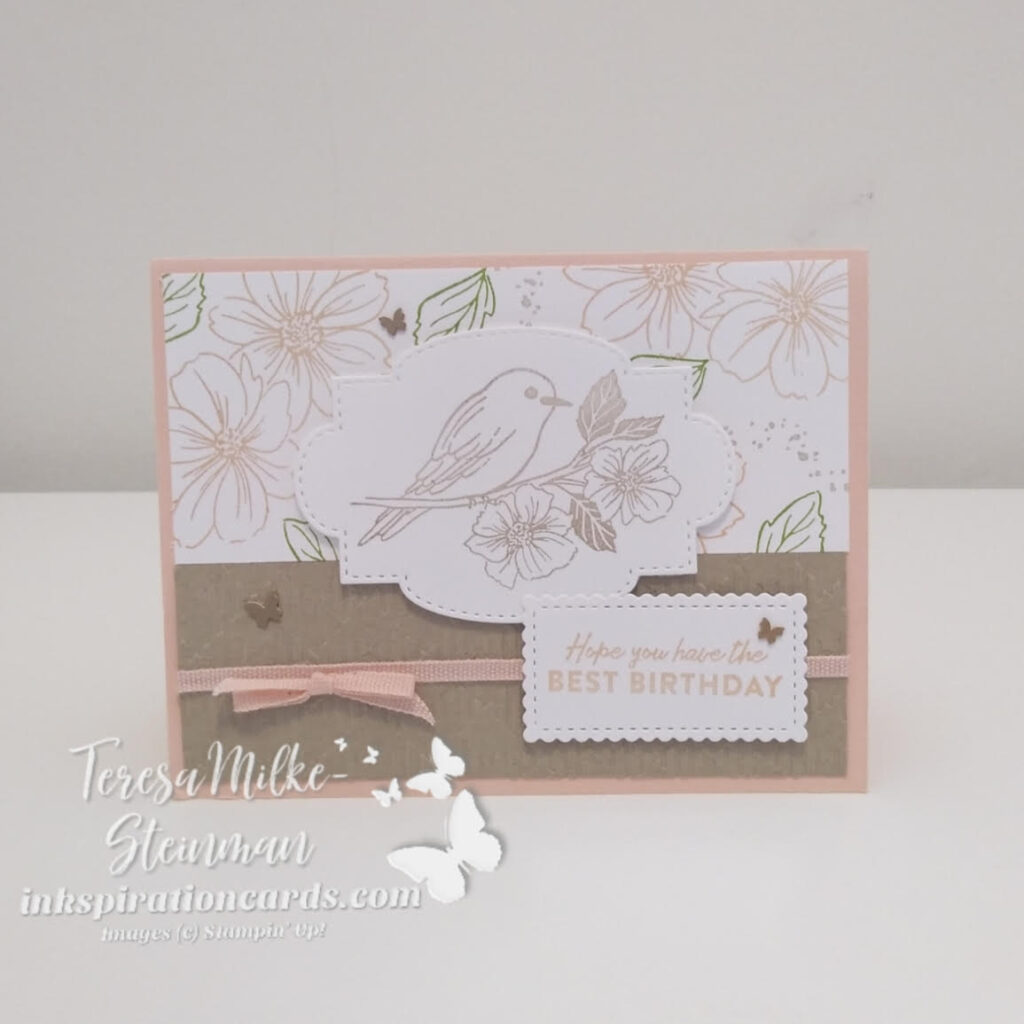
This past weekend I had an online catalogue launch party on my Facebook page to celebrate the new catalogues. There was a lot going on! Games, prizes and the chance to check out some of the products from the January-June Mini and Sale-a-bration catalgoues. And of course what stamping party would be complete without some stamping! So I had a live crafting session. And for my customers who registered, they received some supplies to stamp along… and some treats too! I used the Friendly Hello stamp set from the Sale-a-bration catalogue. Partly because I love it and partly because I thought most stampers would have some stamp sets with flowers and birds to substitute.

I thought about using the Designer Series Paper that comes with the free stamp set, but decided not to. I did pull my colour combination from the DSP though and used Petal Pink, Granny Apple Green and Crumb Cake. With these colours I made my own stamped DSP. I love doing this and this one turned out nice!

Underneath I added a piece of Crumb Cake cardstock that I embossed using the new Gingham Embossing Folder. It really adds a little something to plain cardstock! And I think this may be my new favourite embossing folder. I also wrapped some Petal Pink cotton ribbon around it and tied a bow. This ribbon comes from the new Cotton Ribbon Combo pack. It comes with Petal Pink and Misty Moonlight.

From there I added the bird on a branch image and a phrase. Both were cut out using the Stitched So Sweetly dies and popped up with some Stampin’ Dimensionals. Then to finish it off I added a bit of bling with a few of the new Brushed Brass Butterflies. I love crafting with these sssooo much! I’ve already used over half a pack! Check out one of my other cards using these butterflies and some of the other great Sale-a-bration products here. Here’s the card from my party…

Friendly Hello

I’m sad that the Friendly Hello stamp set and DSP are only around until February 28th. But I’m definitely going to make the most of it! I hope you like this card as much as my customers and party attendees do!

For more information on how to earn this stamp set and DSP for free, check out my post all about Sale-a-bration here. And then you can fill up your cart in my online shop here. Remember to use this month’s host code when you do to get a free pack of Polished Dots from me for your order of $49 or more!

Friendly Hello

Retiring List

It’s that time of year! Everyone is rushing around trying to get their holiday shopping done. Or in my case my holiday cards crafted and sent. It’s also the time of year when Stampin’ Up! releases their retiring list of products. A new catalogue is on the way and so a bunch of products from the July-December Mini catalogue are in their final days. Some products will make a comeback in next year’s holiday mini and some will still be available after January 3rd. But everything else is only here for a limited time and while supplies last.

Retiring List

There are 2 important things to remember. The first, I’ve already said, is that these products are only available until January 3rd if supplies last that long. And the other is the discounts! Some of the retiring products are up to 50% off!! Some embellishments are 10-15% off and it’s mostly dies that are 50% off. And of course there’s lots in between.

Check out two projects I created using the retiring Time of Giving bundle here. If you want to know if one of your favourites is on the retiring list of products send me an email (inkspirationwithteresa@gmail.com). I’d be happy to email it to you! Then you can fill up your cart in my online shop. Plus if you wait til tomorrow, December 8th, you’ll get FREE shipping on orders of $65 or more. And when you do that you’ll also receive a free pack of Elegant Faceted Gems from me as a thank you! Just make sure to use this code…

Retiring List

Pinwheel Tower Card

Fancy Folds Design Team

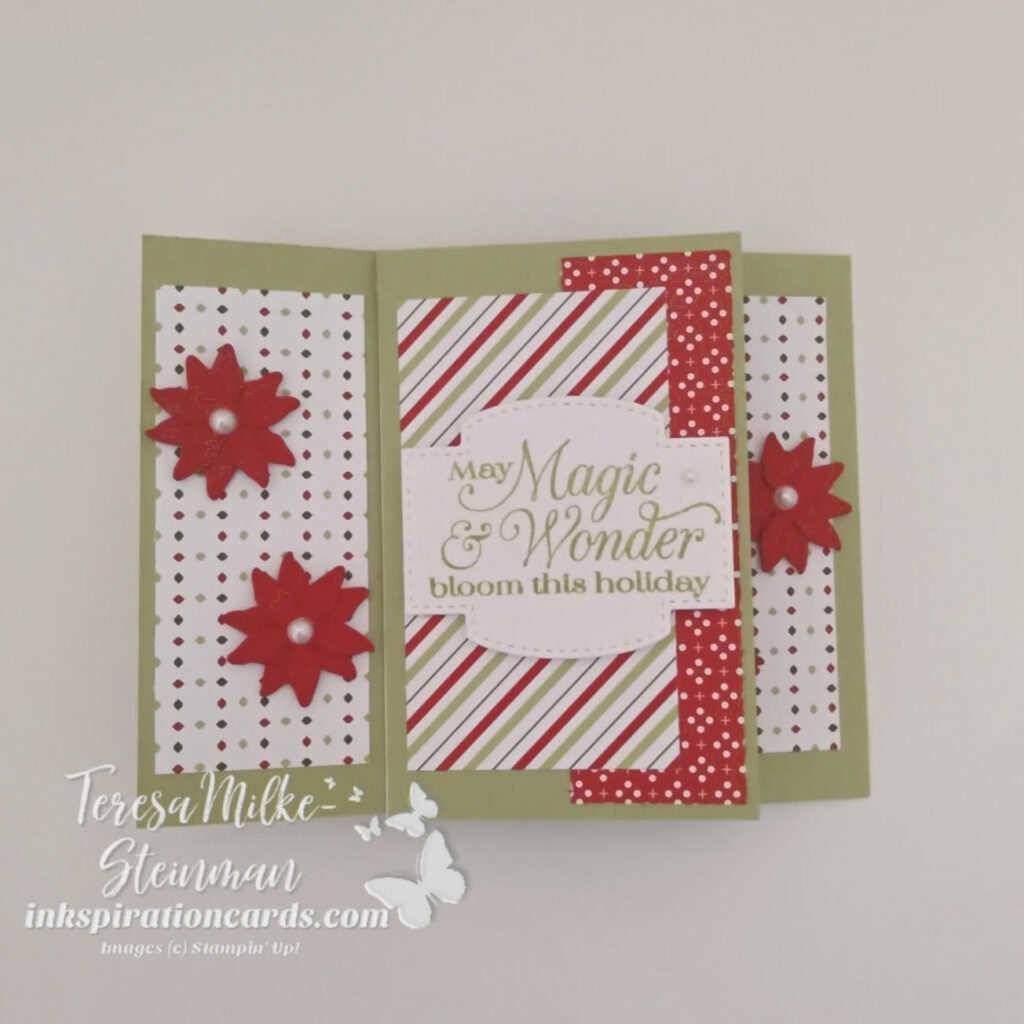
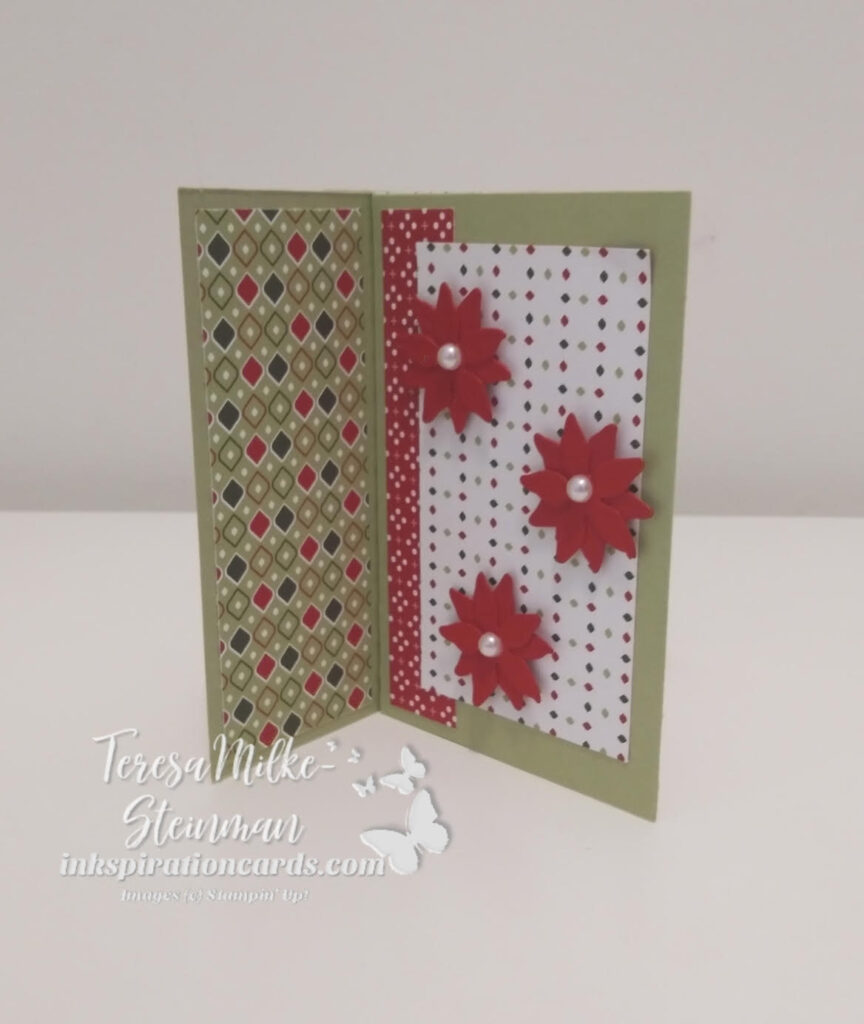
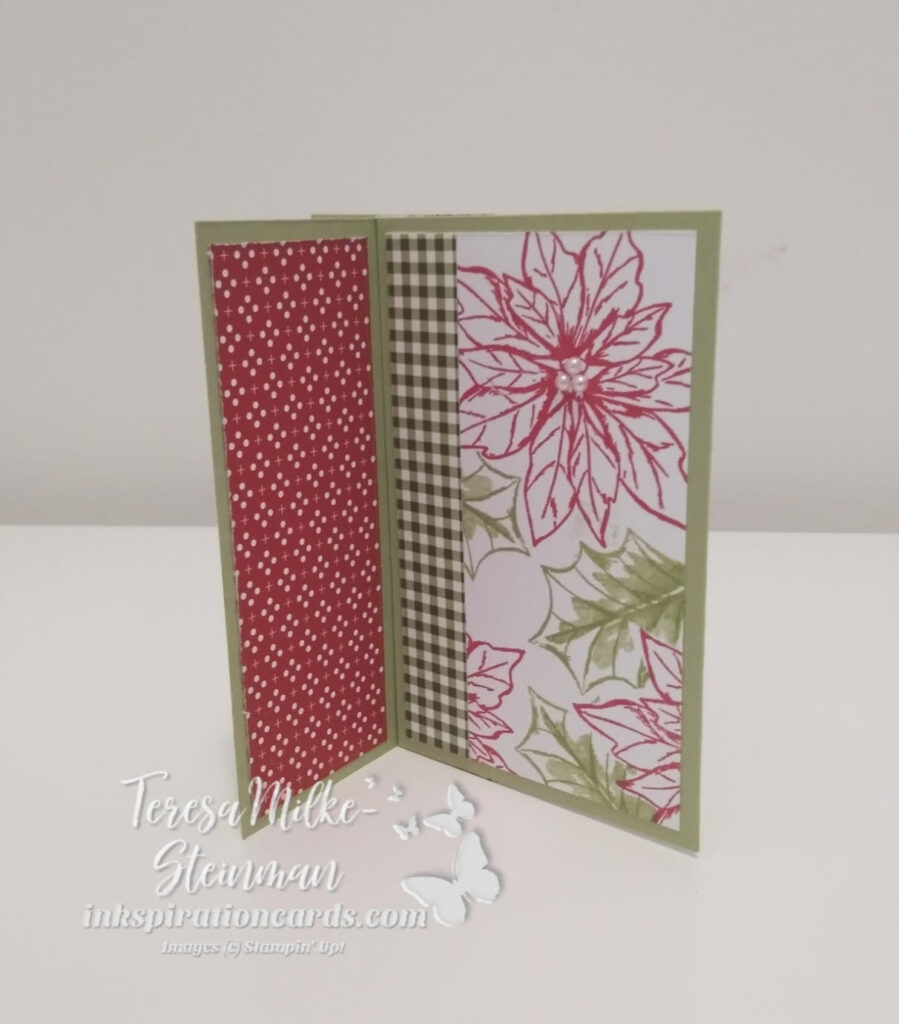
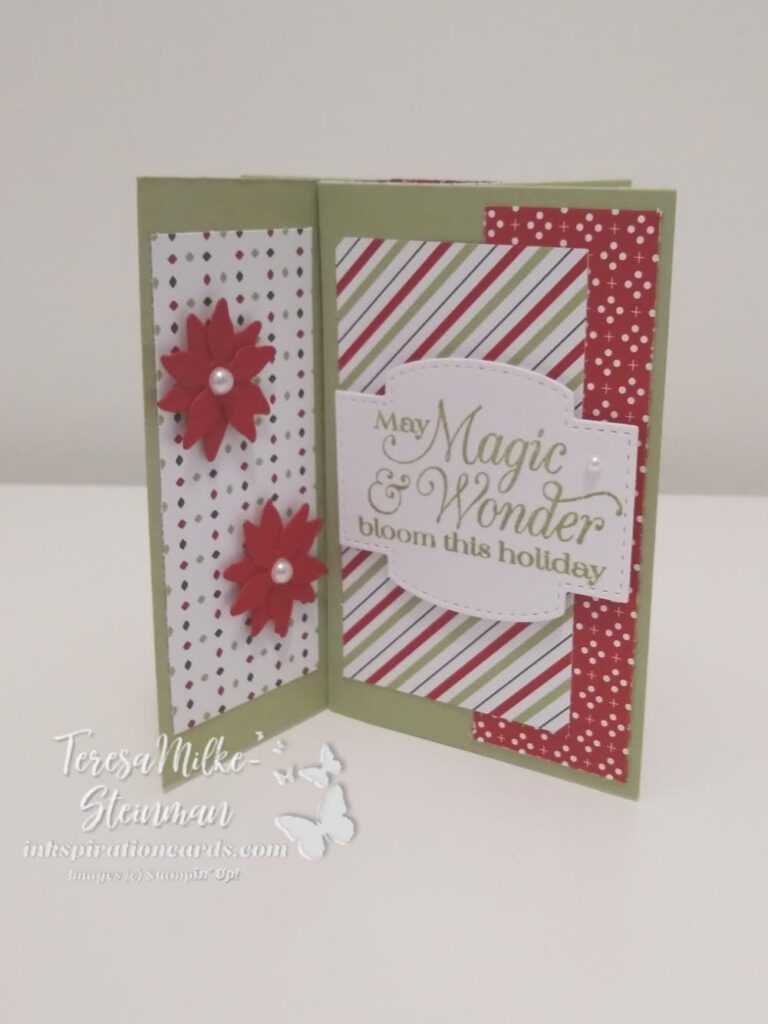
The Fancy Folds Design Team is back with another blog hop! And this month we’re making a Pinwheel Tower card. I love the look of this card! And I love that it fits in one of my usual invitation envelopes! LeeAnn Greff has a good video with measurements that you can check out here.

For my design I decided to make a holiday card. I’m definitely getting into the holiday season. And for this card I decided to use some returning products. I started with the Heartwarming Hugs Designer Series Paper and used it to pull my colour combination; Pear Pizzazz and Real Red. Pear Pizzazz is such a nice shade of green. Plus I love just about all the designs in this paper pack so it didn’t take much to coordinate the different designs. I even made sure to match up the designs when the card is flat. Check it out…

To go with the Heartwarming Hugs DSP I decided to use the Poinsettia Petals stamp set and coordinating dies. I’m so glad that these are still in the Annual Catalogue! These were a go to for me last year when they first came out. And I love going back to it every once in a while. To add a little something more to my card I layered two of the small poinsettias to create a fuller one. Then I added a Pearl Basic Jewels to the centre of them as well as a few to one of the larger stamped poinsettias.

The phrase and blank piece of cardstock were cut out using the Stitched So Sweetly dies. These dies are a new favourite of mine and I love the different designs.

I had a lot of fun designing my Pinwheel Tower card. And as usual it turned out to be easier to make than I initially thought! Make sure to keep going on this month’s blog hop and check out Gina Connor’s design here.

And if you want to check out last month’s blog hop where we made a Triangle Gatefold card you can start that here.

Make Handmade Holidays Easy

November is here! And there are only 53 more days until Christmas! Have you started getting ready yet? I’m almost there. I’ve got a couple of birthdays first before I really start thinking about the upcoming holidays. In the meantime I’ve got a couple of ideas floating around in my head. I make a lot of cards for the holidays and so I tend to keep my designs for these cards fairly simple. Making beautiful cards doesn’t have to be hard or involve all kinds of layers. I’d love to help you make handmade holidays easy!

Just a few weeks ago I launched my 12 Weeks of Christmas newsletters for 2021. Not sure what that is… Each week I send out an exclusive holiday themed PDF tutuorial, complete with a list of supplies and step by step instructions. You won’t find these projects anywhere else! Right now I’m sharing card ideas. I always like to start with these so you have lots of time to make your cards and get them in the mail, especially given current shipping/mailing delays. Coming up soon will be tags, gift bags and favours.

This is ONLY for my email newsletter subscribers. But there’s still lots of time to sign up. So if you, or someone you know, would like to make handmade holidays easy make sure to sign up for my mailing list. You can do that here. And then once you’ve got your inkspiration and are ready to go you can head over to my online shop.

Contact Me

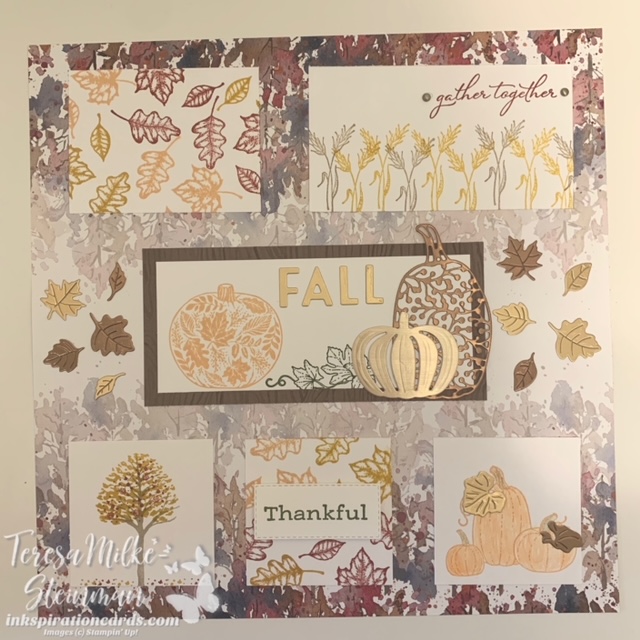
Fall Themed Sampler

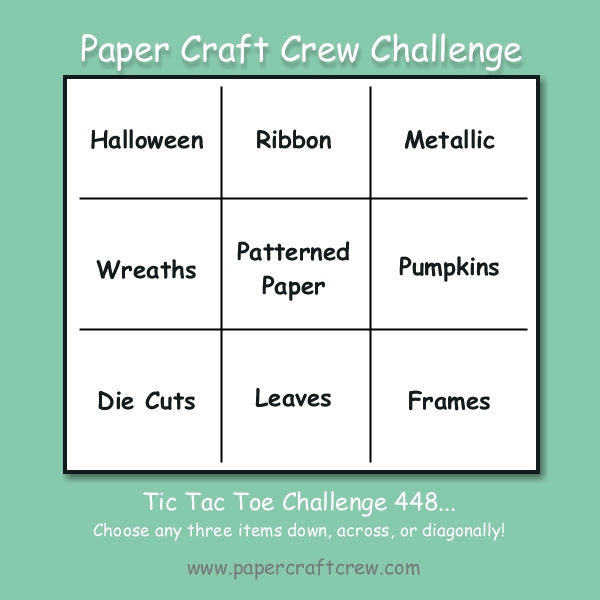
I’ve been thinking about making a Fall themed sampler for a while now. (If you’re not sure what that is, it’s similar in size to a scrapbook page and is meant as a home decor piece) I already had a couple of ideas of what I wanted to do, but just hadn’t had the chance to get to it. So when I saw this week’s Tic Tac Toe challenge from the Paper Craft Crew (PCC448) I was inkspired to get it done. For my row I went diagonal and chose Metallic, Patterned Paper and Die Cuts. Here are all the options…

Tic Tac Toe Challenge

I started my design with my patterned paper. I used one of the designs from the Beauty of the Earth Designer Series Paper pack as my base. Then I added a little bit of the wood grain design in the centre. For the die cuts I used the Detailed Pumpkins dies. I knew that one of the stamp sets I was going to use was the Pretty Pumpkins stamp set. So it made total sense to use those. Then for the metallic square I used some of the Brushed Metallic cardstock. I also added a couple of the Brushed Metallic Adhesive Backed Dots.

I love all the colours of fall! So it was nice to use a bunch of different colours for this piece. I used a combination of Cajun Craze, Bumblebee and Mossy Meadow from the DSP. And I also used some Crumb Cake and Pale Papaya. In terms of stamp sets I used a few different ones as well. Pretty Pumpkins of course, as well as Time of Giving and Beauty of Friendship.

I really like how this Fall themed sampler turned out! You can check out the other entries for this Tic Tac Toe challenge here. And you can check out one of my previous entries into the Paper Craft Crew Challenges here.

End of Summer #SimpleStamping

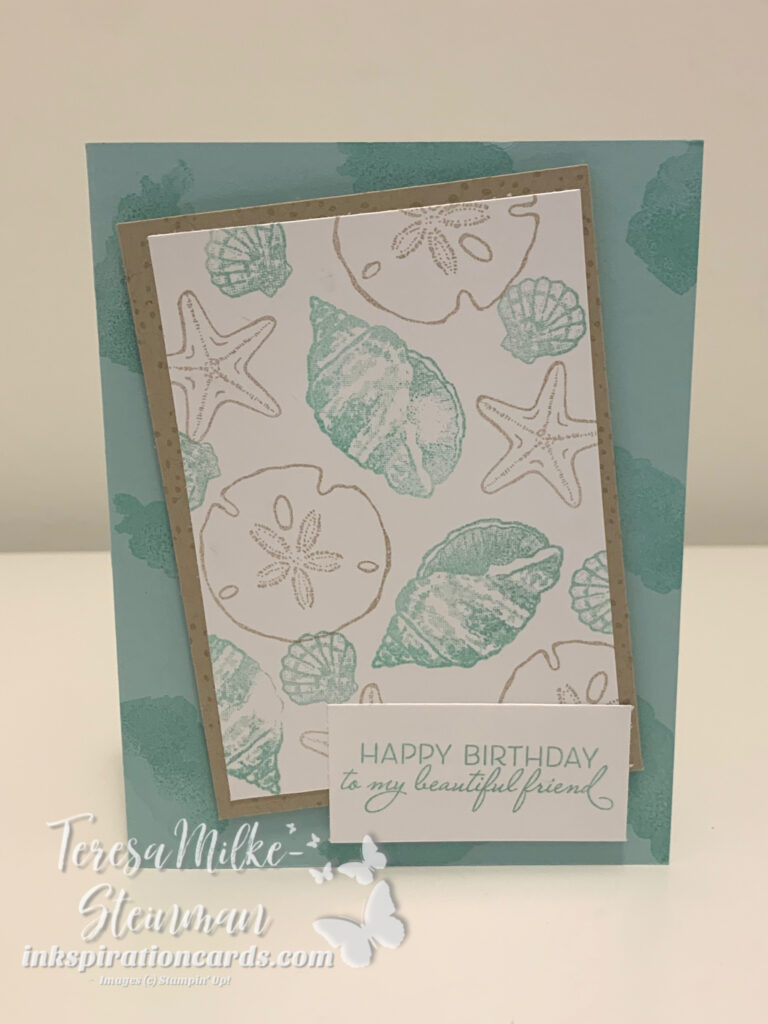
September is here and Fall is just around the corner! I’m looking forward to the leaves changing colour, but I do love the warmer Summer weather and will be a little sad when that’s gone. So when I saw this month’s #SimpleStamping challenge I thought I’d do some end of summer #SimpleStamping. This month’s challenge from Stampin’ Up! is to create a birthday card with just stamps, ink and paper. No extras this month.

The first stamp set that I thought of for this card was the Friends are like Seashells stamp set. I love this stamp set! The phrases and fonts are so versatile. And the images are so pretty. Plus you can potentially do some 2-step stamping with this set. With that decided I needed my colour combination. This is one I’ve used before. But I just love these colours with this stamp set; Pool Party and Crumb Cake. I actually like putting blues and browns together. It’s one of my favourite colour combinations.

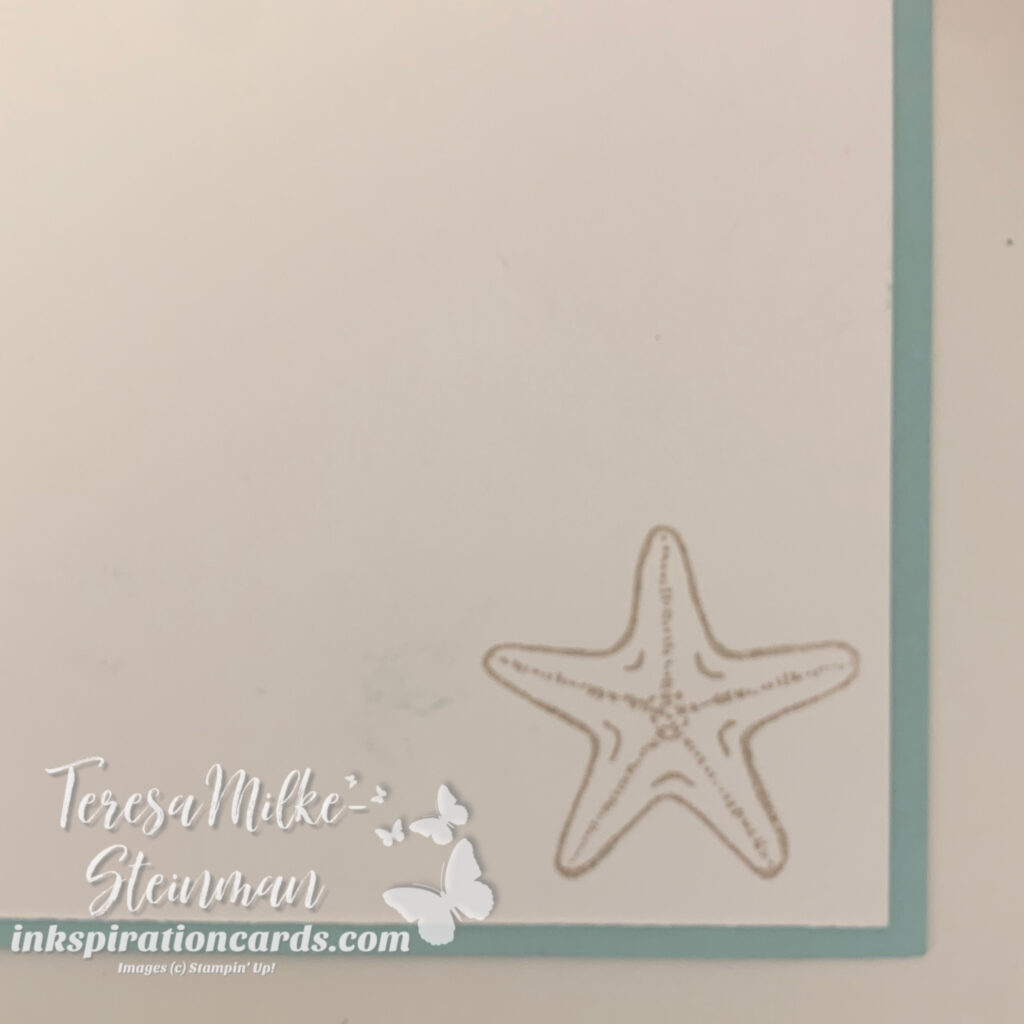
On the outside I did some tone on tone stamping. I created a background with one of the images on the Pool Party card base with Pool Party ink. And so I made my other pieces of cardstock smaller than I usually do. Then I stamped the specs of sand image on the Crumb Cake card mat with Crumb Cake ink. I made a kind of seashell collage with both ink colours on the card front. And to top it all off I stamped a Crumb Cake starfish on the inside of the card.

To kick this card up a knotch, I would add either some Wink of Stella or a few Opal Rounds. Or maybe a bit of both, lol! I hope you enjoyed my end of summer #SimpleStamping. You can check out one of my more recent #SimpleStamping cards here. And if you want to get yourself some stamps, ink and paper to get your craft on, you can stock up in my online shop.

United through Creativity

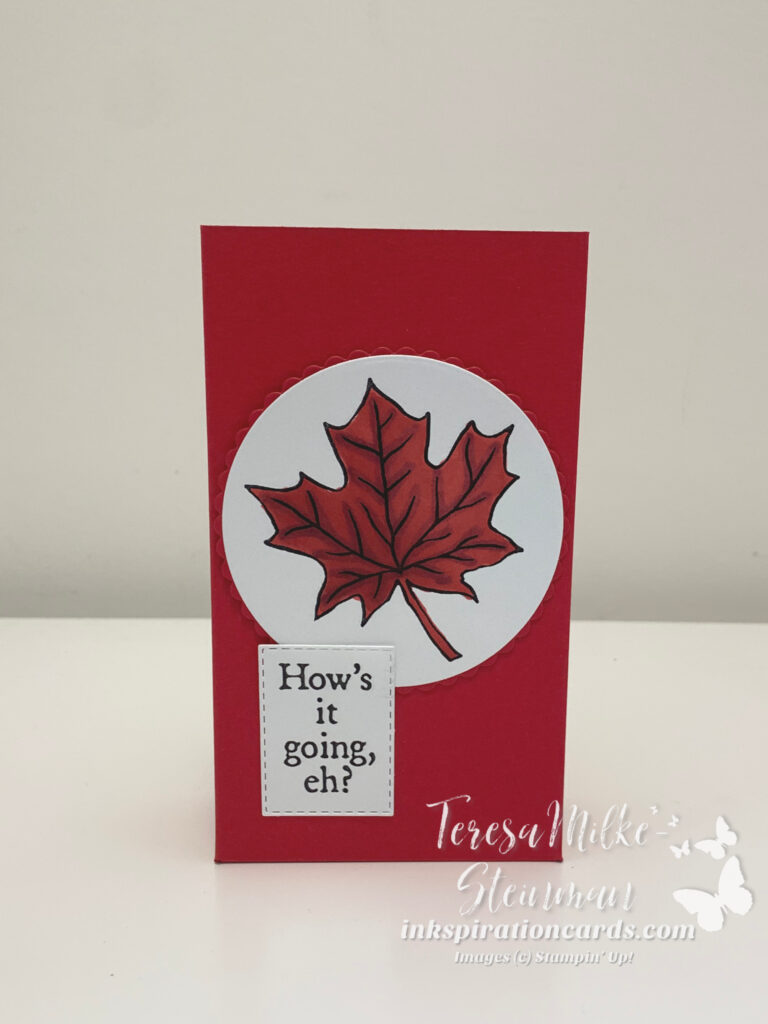
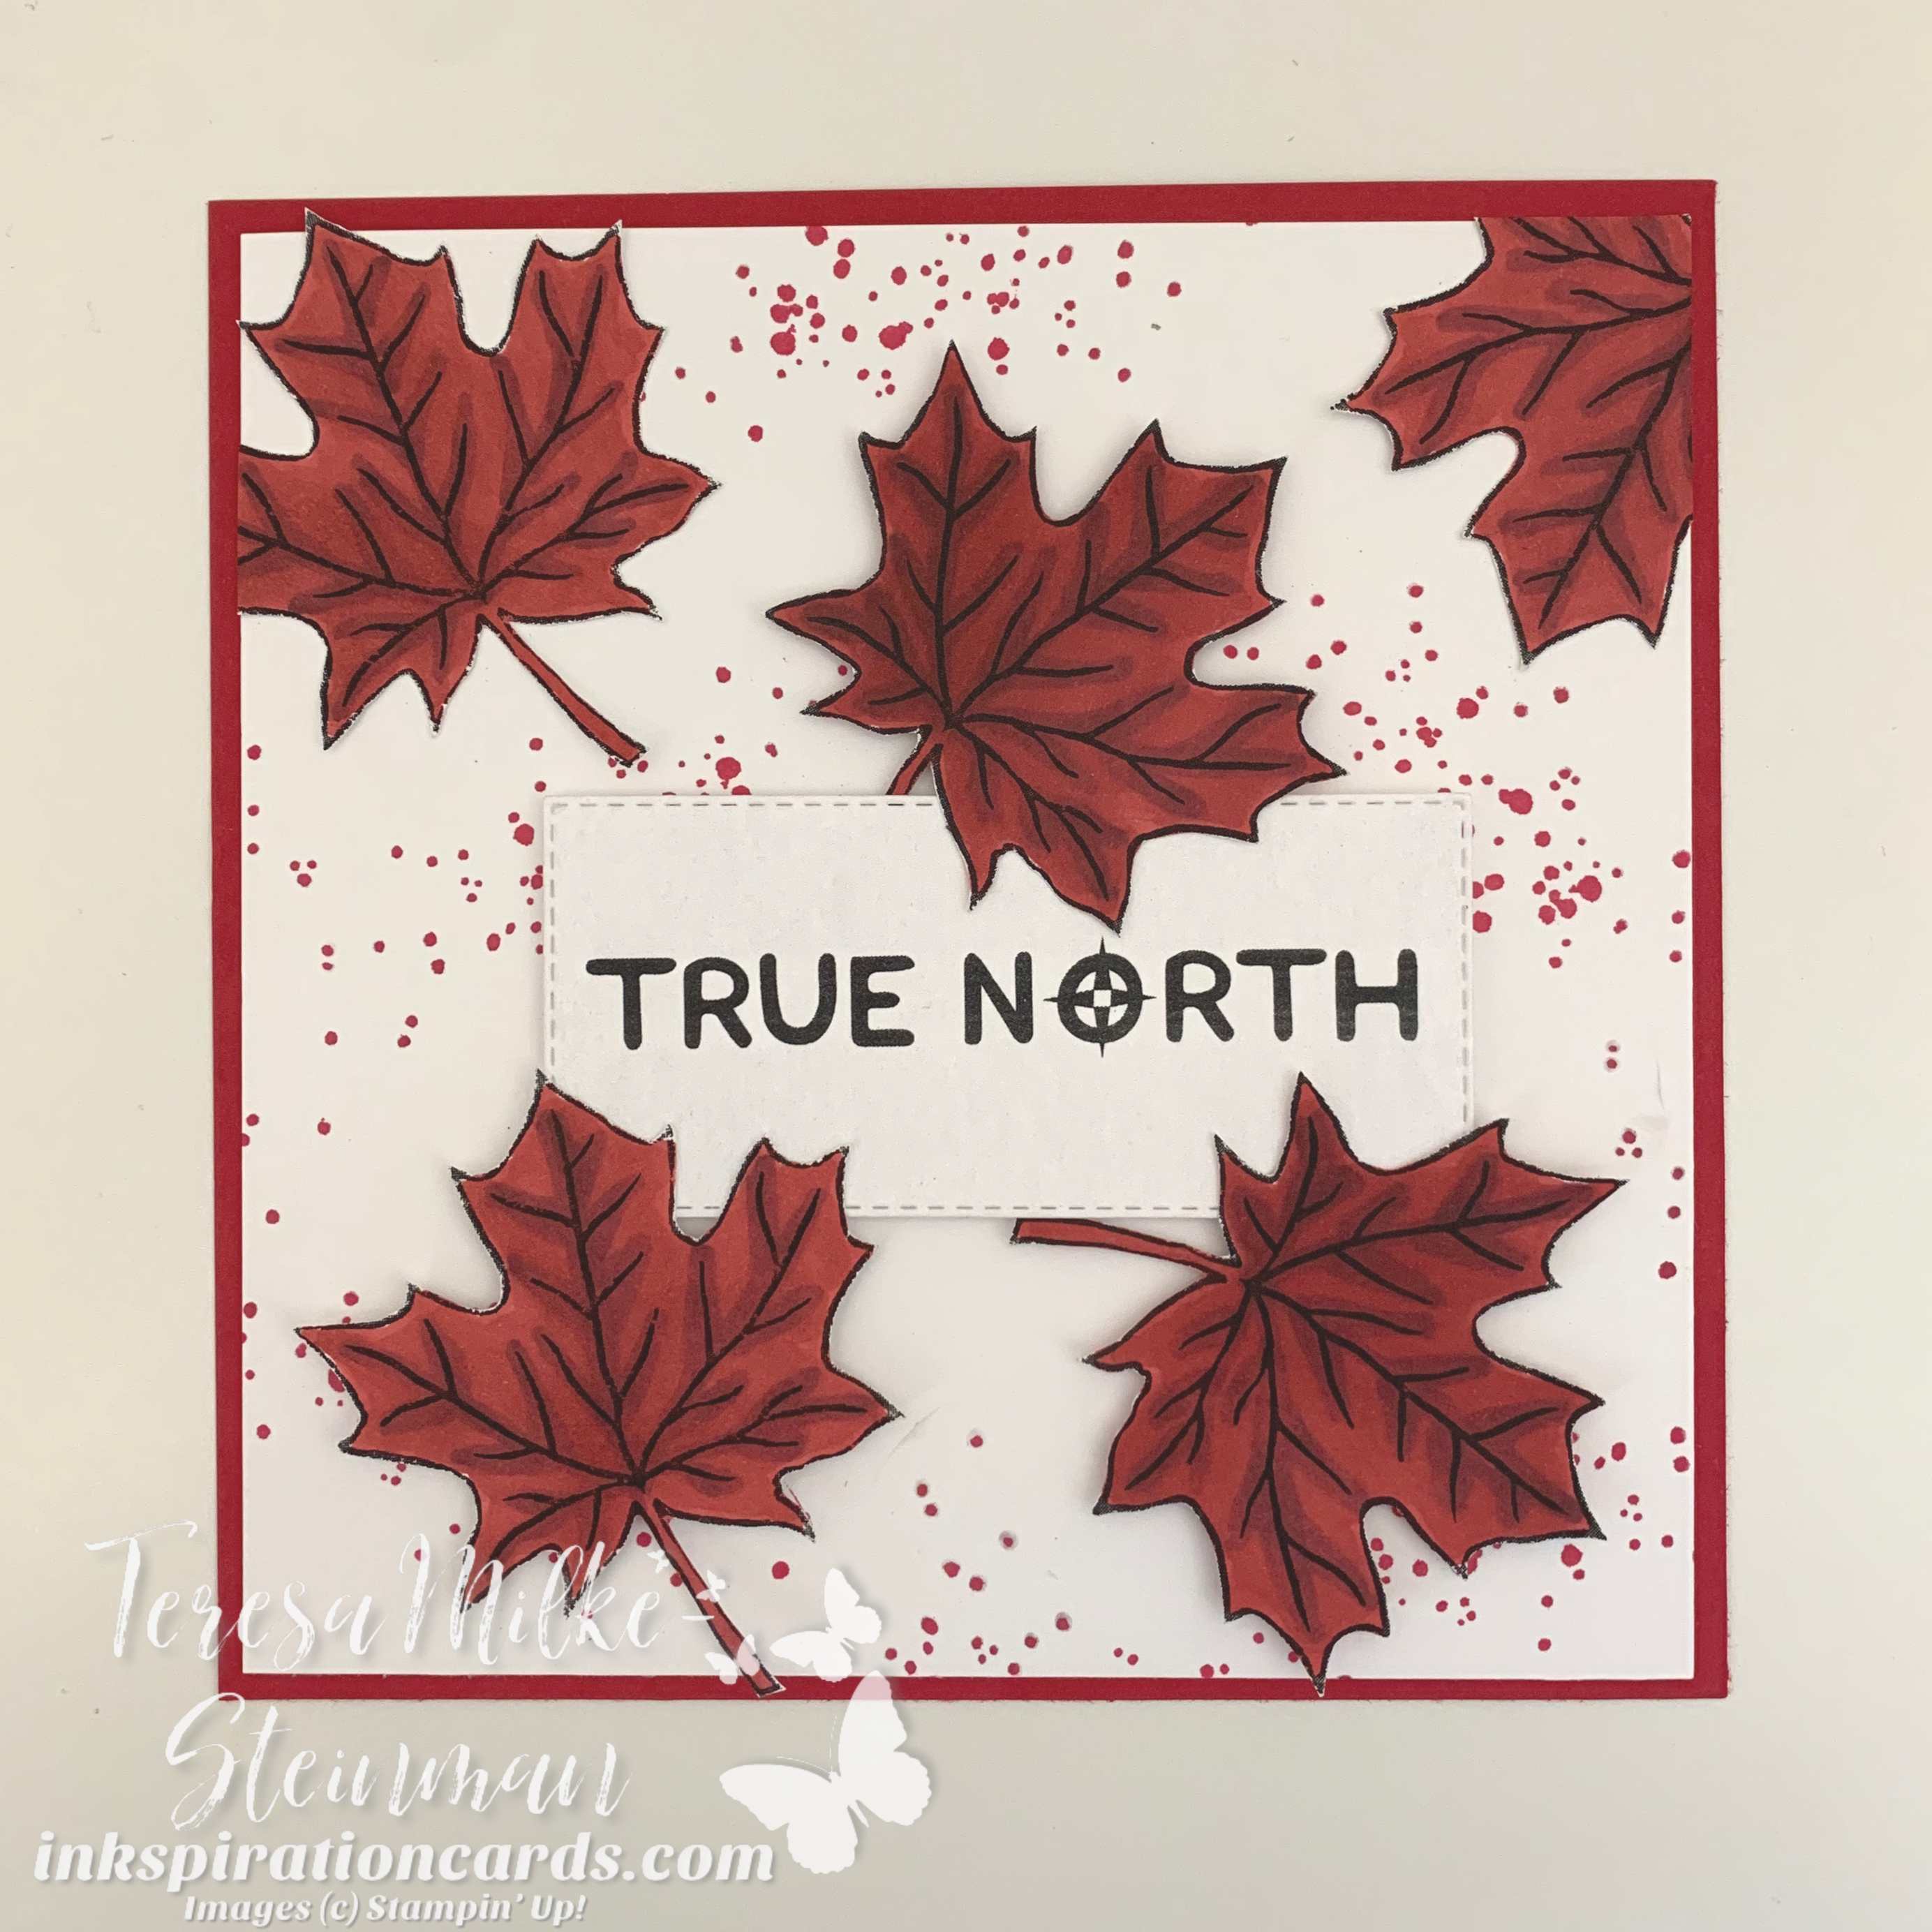
I love colouring! But I don’t get to do it as often as I’d like with a full time job and two munchkins. So this last week I decided it was time to get back to it. I’ve been meaning to get creative with Stampin’ Up!s free digital stamps, United through Creativity, and with Canada coming up (yesterday) I thought it would be the perfect time. There’s a lot of different images and phrases to choose from, but for Canada Day the maple leaf image and those coordinating phrase were ideal!

Once I printed all the maple leaves I needed I pulled out my Real Red Stampin’ Blends and got to some colouring. I wanted to make a couple of different projects so I needed to print a bunch of them. Since I wasn’t able to isolate the maple leaf image I just did some double-sided printing. I knew I only wanted the maple leaf so I didn’t mind the overlap.

The first project I had in mind was to create two treat bags for my two munchkins. Since there still aren’t any big celebrations going on I wanted to do something special. To make the treat box I just cut and scored some Real Red cardstock. Then I adhered it with some Tear & Tape adhesive. I cut out the coloured maple leaves and phrases using the Layering Circles and Stitched Rectangles dies. We had some candy leftover from the teacher gifts we had put together, so I used that and added a couple other treats to fill the bags.

United through Creativity

The other project I wanted to make was a framed home decor piece. I grab the 6×6 Shadowboxes from Michael’s whenever I get the chance so that’s the measurement I used for this. Now to keep my eyes peeled for a sale and some white ones!

I created the background with some Real Red and Basic White cardstock. And I stamped the Basic White cardstock using the ink splatter image from the Quiet Meadow stamp set and some Real Red ink. I fussy cut the rest of my coloured maple leaves. This is not something I do often, but it was a necessary evil for this project. I adhered a couple of the maple leaves right to the stamped cardstock. The others I adhered parts of the leaves directly to the cut out phrase, then adhered the phrase and other leaves to the stamped cardstock with some dimensionals.

United through Creativity

I LOVE how these turned out! And my munchkins loved their treat boxes. I’m excited to do some more colouring with the United through Creativity digital stamps. You can download yours here. And you can check out another colouring project I did here. Enjoy!

Make Your Own Designer Series Paper

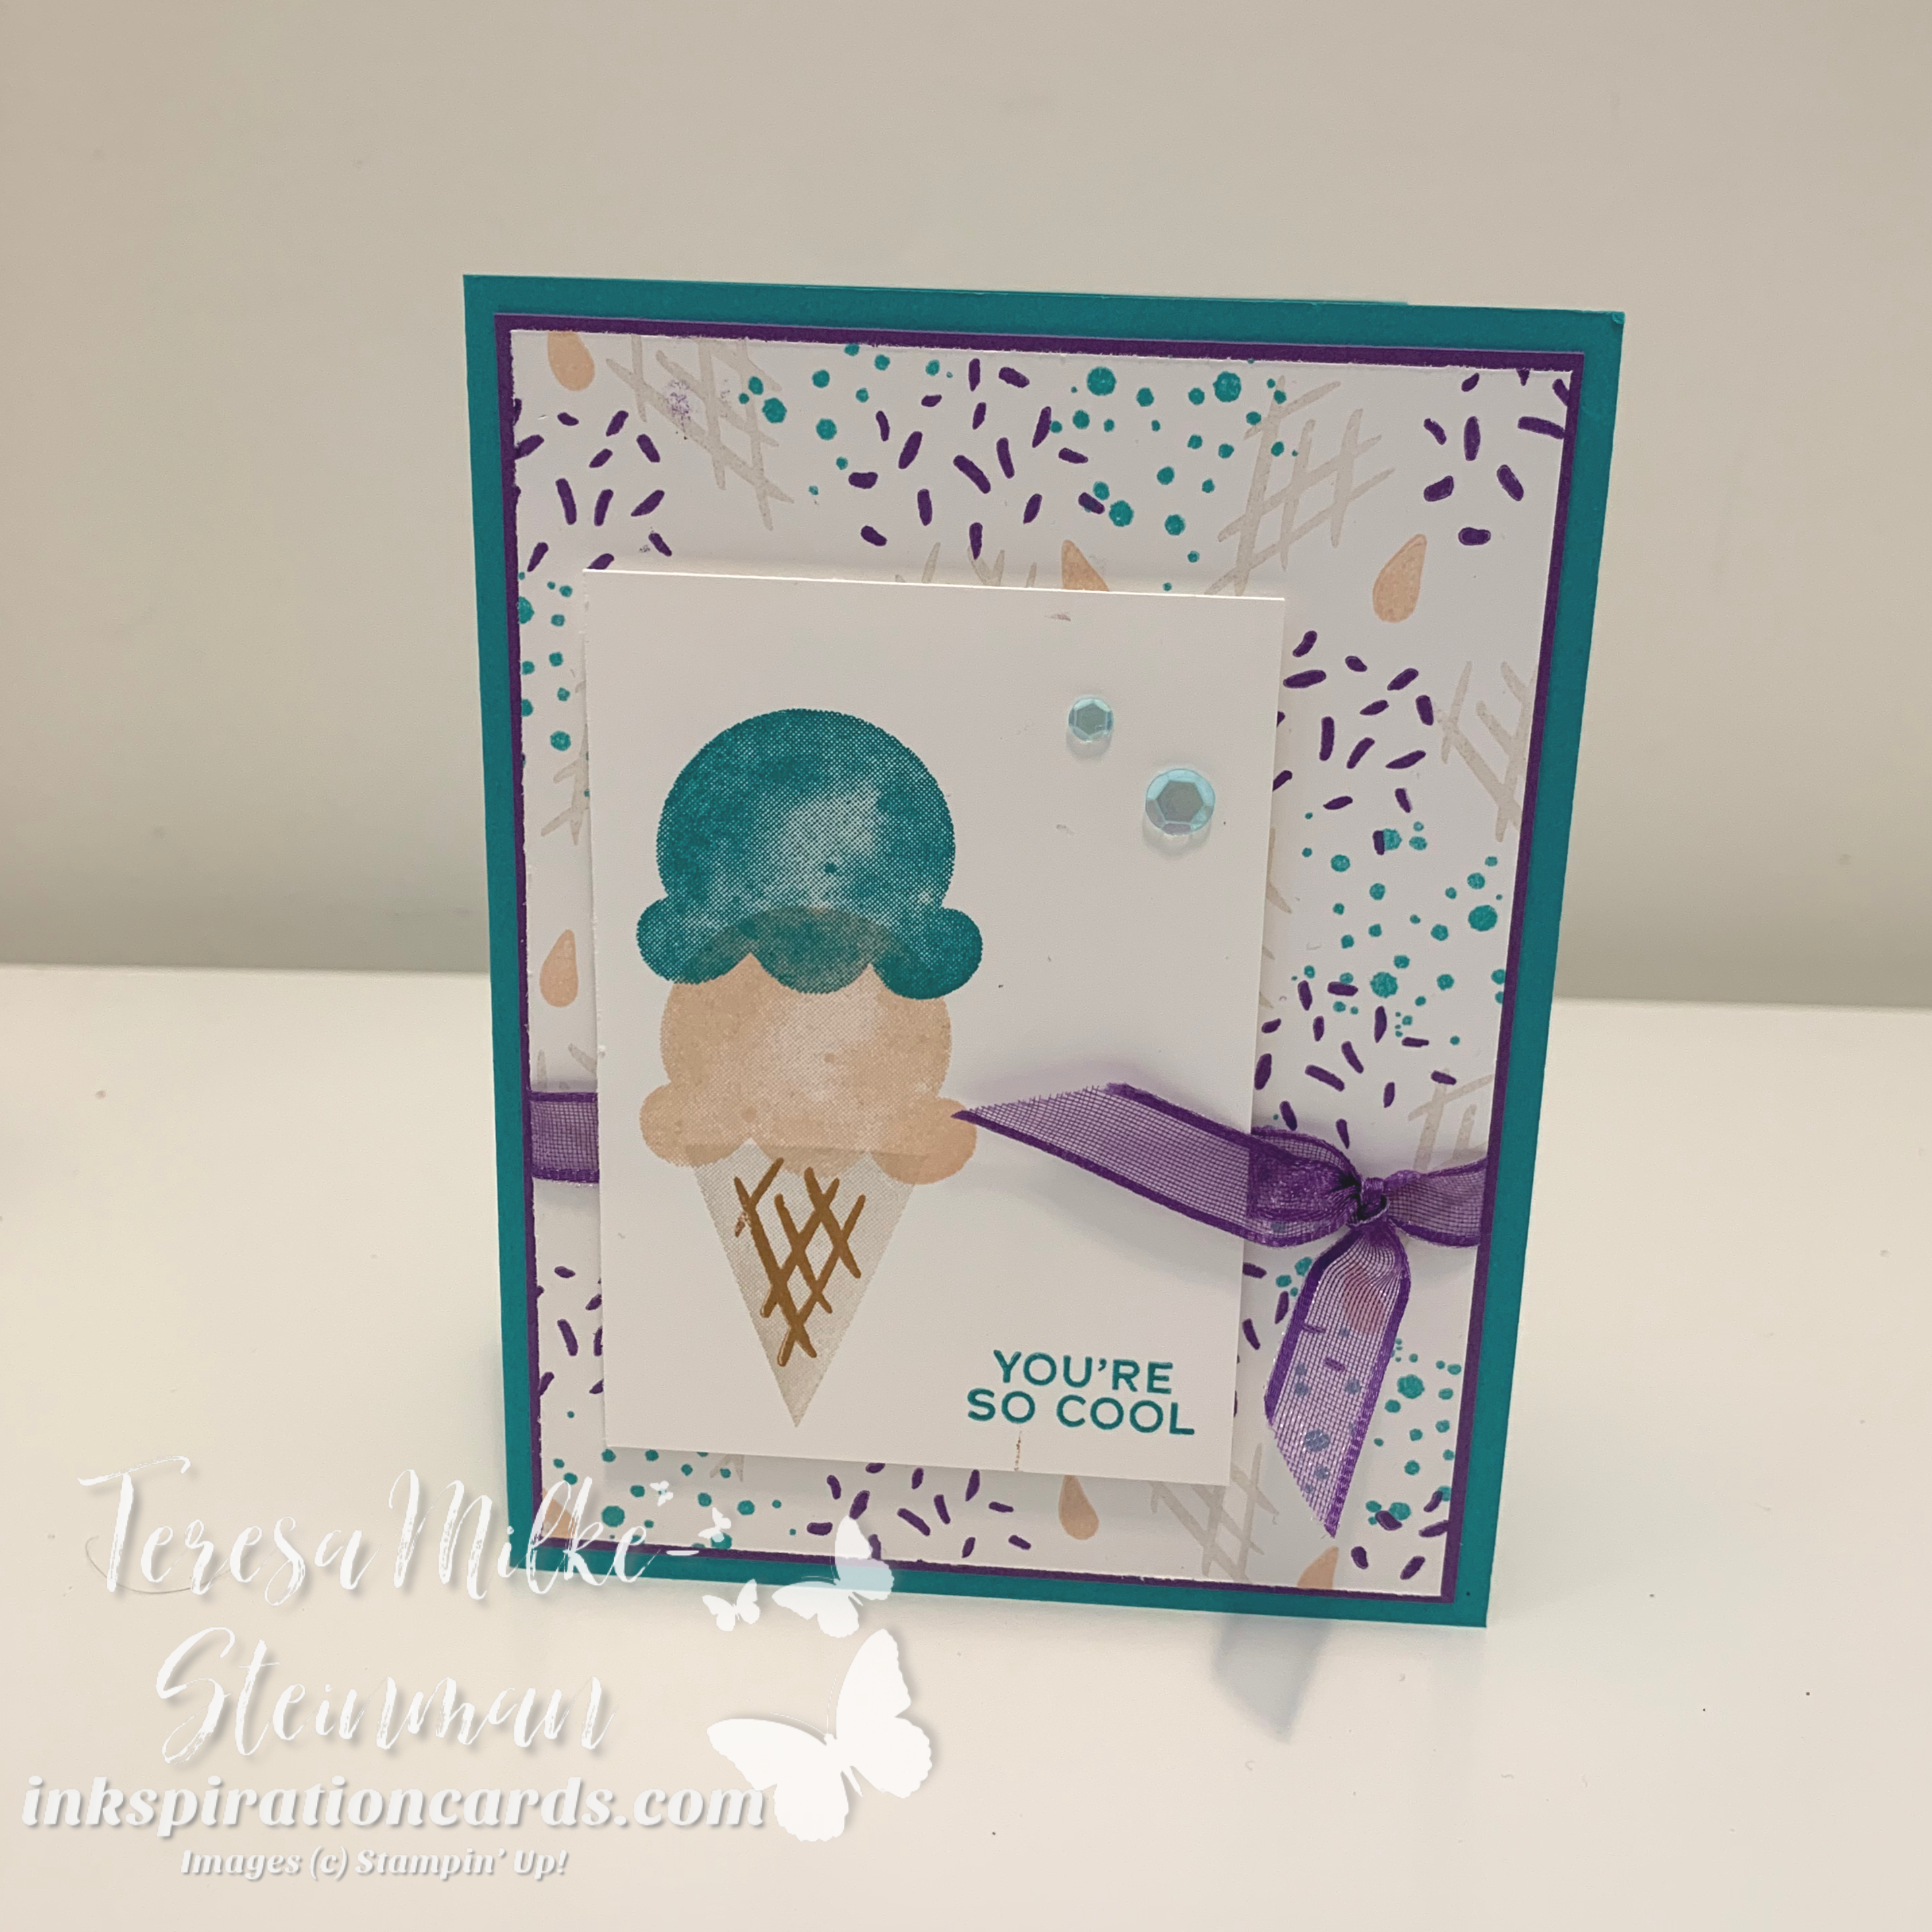
There’s only a week and a half left to get your favourite retiring products from the January-June Mini catalogue! This week I’m featuring some of the Ice Cream Corner suite of products. I love just about all of these products! My favourite, which is retiring, is the Ice Cream Corner Designer Series Paper. But for this card instead of showing off the paper I’m showing you how to make your own Designer Series Paper. (Heads up… the Sweet Ice Cream stamp set and coordinating punch isn’t a bundle in the new Annual catalogue so get your 10% while you still can!)

For this card design I started with the Sweet Ice Cream stamp set and the Gorgeous Grape Sheer ribbon. To go with the Gorgeous Grape I decided to use Bermuda Bay. This is a great colour to use with this stamp set! Actually they both are… they’re both such nice bright colours. Now to make my own DSP I had to pick a few other colours. So I went with Crumb Cake and Petal Pink. The important thing to remember when you want to make your own DSP is to start with the larger images. It’s easier to fill in any leftover spaces with smaller images. Then just randomly stamp your images over the cardstock.

make your own designer series paper

I also used Petal Pink for my other ice cream scoop and I paired Crumb Cake with Cinnamon Cider to make my cone. The other scoop and phrase were stamped with Bermuda Bay. I popped up this piece over the sheer ribbon using a few Stampin’ Dimensionals. And for my bit of bling I added a few of the Artistry Blooms Adhesive Backed Sequins.

This was a fun card to make! I think I need to do the make your own Designer Series Paper more often. Check out my YouTube channel for a walk through of this card. This was one I made for my Stamp & Jammies online card class. You can find out about my next Stamp & Jammies class here!

Weekly Inkspiration

I don’t know about you, but I’m always on the look out for new ideas. Even though I’ve been stamping and scrapbooking for a long time I still get excited for new folds, layouts and techniques. Which is what I try to do each week with my email newsletter… send some weekly inkspiration! There’s a lot in store when you sign up for my weekly email newsletter.

Each week I include an exclusive PDF tutorial complete with everything you need. Including a list of supplies, measurements and step by step instructions. You won’t find these projects anywhere else! I also share projects from my blog where I show different fancy folds, stamping techniques and other projects. This is also where I share my DIY home decor projects and my craft storage and organization solutions. But that’s not all!

This is also where I share sneak peeks about Paper Pumpkin and what’s going on with Stampin’ Up! Including special promotions and sales, like right now the list of retiring products from the Annual catalogue is out! (You can check that out in my online shop) Plus I also share stamping tips, feature products that I think are helpful to us crafters and answer any of your stamping/scrapbooking questions.

And if you live in Canada and want to get your hands on copies of the catalogues before they launch, then this is the place. I also offer extras to my customers! Like free gifts with qualifying orders and contests. You can also get all the info about my upcoming classes and events here. Right now all my classes are online, but I’m hoping in the not too distant future that I’ll be able to offer in-person events again.

There’s just so much to share! And I’m glad to be able to share it with you. Sign up for you dose of weekly inkspiration here and you’ll get a free PDF tutorial just for signing up!

Contact Me

How to Sponge your Projects

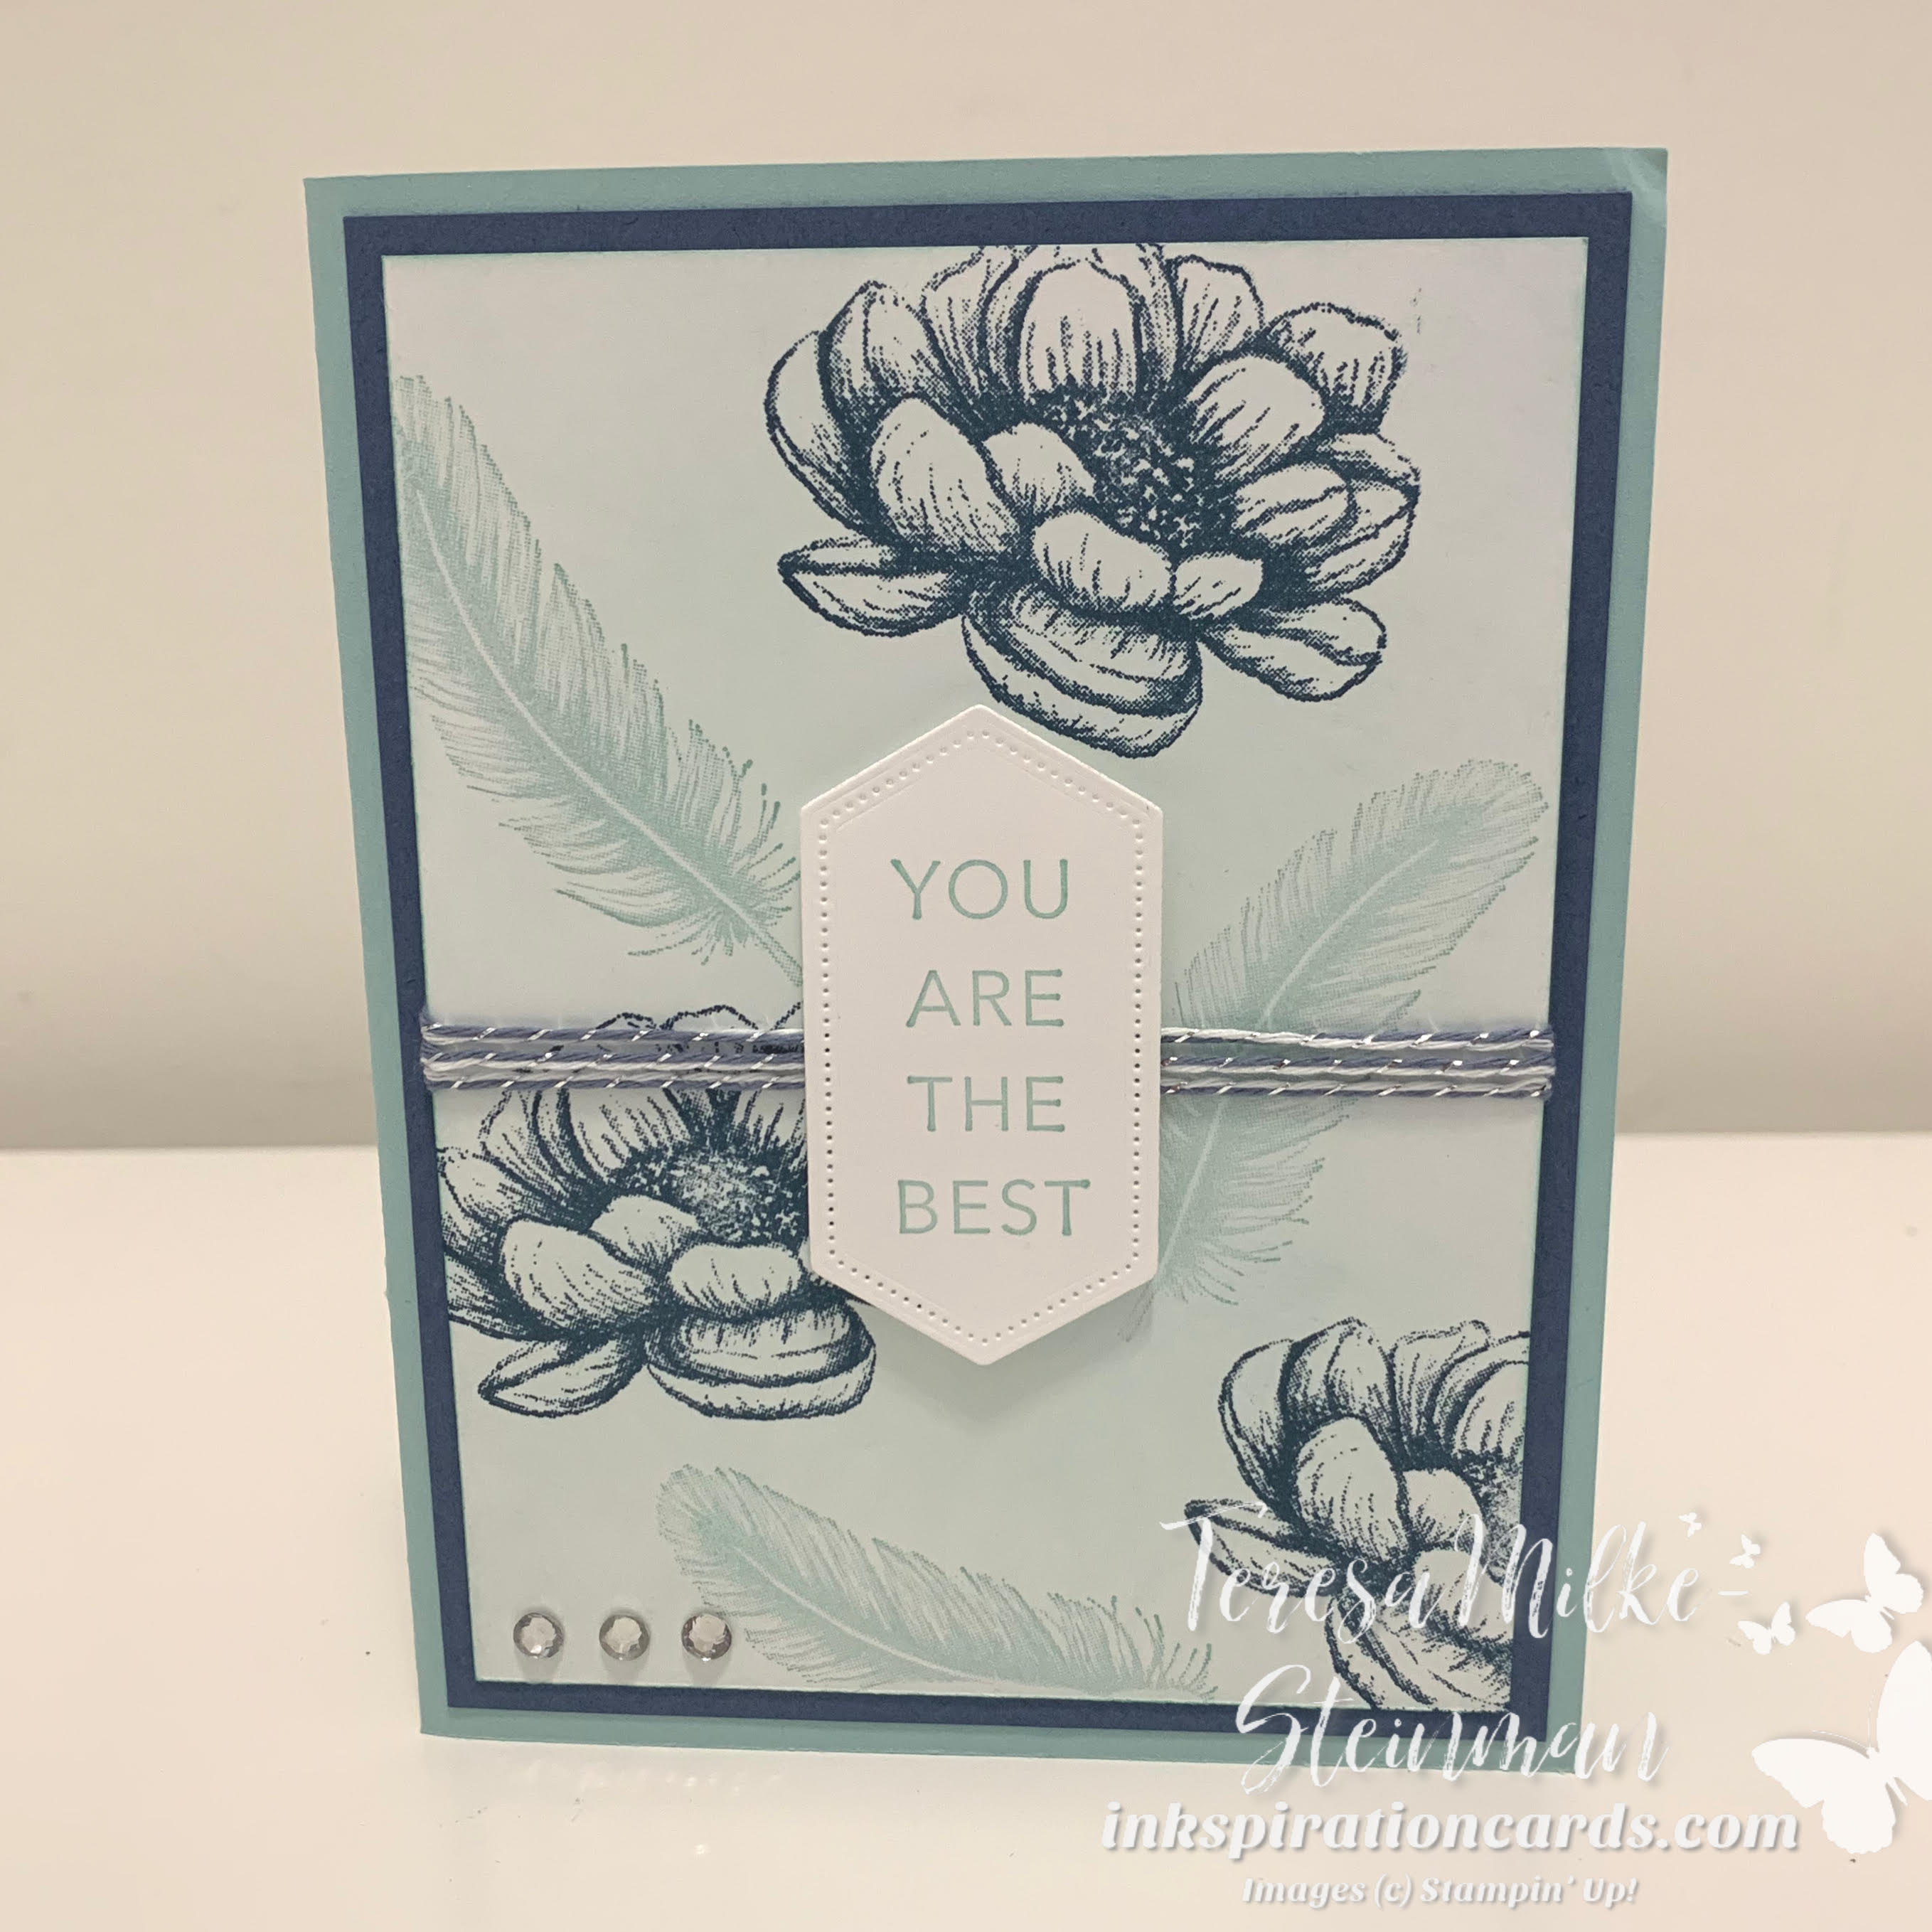
I’ve been having a lot of fun creating with the March Paper Pumpkin kit Here’s to You! To celebrate Paper Pumpkin’s birthday everyone who subscribed in March also received four 4×4 stencils and a Stampin’ Sponge. So I’ve been doing a lot of sponging with my stencils. And so I thought I’d share a project here to show you how to sponge your projects. It’s really easy, but there are a few tips to help make it even easier.

To help with this I shared a video on my YouTube channel on just how to do it. There are two important things to remember when you’re sponging. The first is to use circular motions with your sponge. This will help spread the ink more smoothly and evenly. And the other important thing to remember is to always start off the cardstock, or whatever it is that you’re sponging. You don’t want to end up with a blob of ink on your project!

In my video I sponged a piece of Basic White cardstock with Pool Party ink. So from there I picked a darker colour of cardstock that would help the sponged piece stand out. In this case I went with Misty Moonlight for the card mat and of course Pool Party for my card base. And the piece of Basic White in the centre of the card also helps show off the sponged piece of cardstock.

The phrase and images all came from the Tasteful Touches stamp set. Which is thankfully carrying over to the new Annual Catalogue. I stamped the phrase and feathers with Pool Party. And the blooms with Misty Moonlight. I cut out the phrase with the Stitched Nested Labels dies, which sadly are retiring soon. I also wrapped some of the Misty Moonlight/Silver Baker’s Twine from the Flowers for Every Season ribbon combo pack around the sponged cardstock. And to finish it off I add a few Rhinestone Basic Jewels. Here’s the finished card…

How to Sponge your projects

It’s been a while since I’ve done any sponging. And so it’s been nice to get back into it. I hope you found these how to sponge your projects tips helpful. And I’d love it if you’d share your sponging projects in the comments.

One last important thing… the Stampin’ Sponges are also on the list of products retiring May 3rd, if they last til then. So if you want to check out the full list of what’s retiring to see what else you want to grab before it’s gone, then check out my last chance post.