#SimpleStamping with Enchanted Butterfly

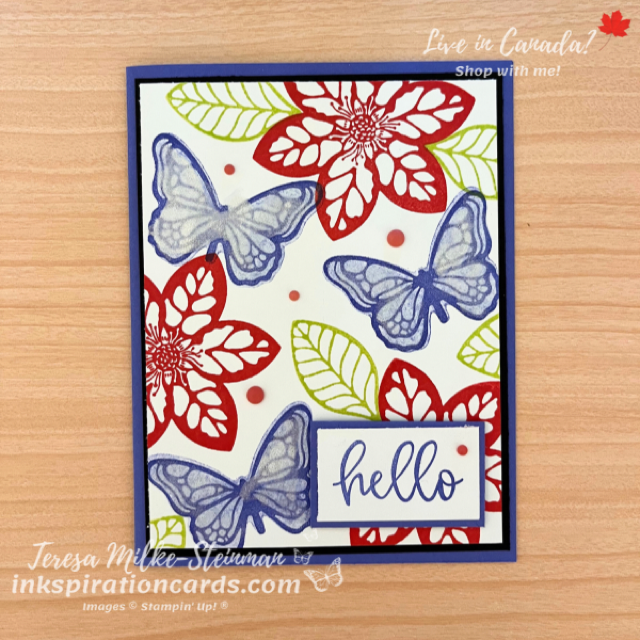
I recently invited my small team members over to hang out and craft. We made 2 cards. One was a Christmas card with some things from the new mini catalogue. And for the other card I wanted something more bright and summery. So I thought it’s be fun to do some #SimpleStamping with Enchanted Butterfly… one of my favourite stamp sets from the Annual catalogue.

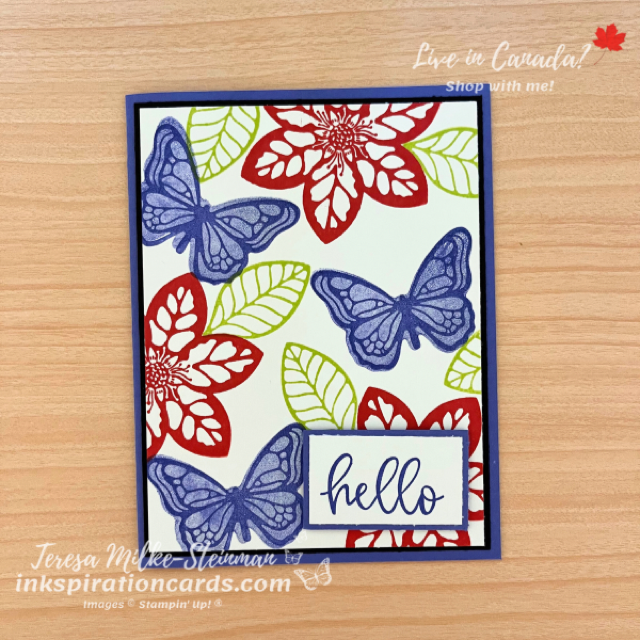
This is a great stamp set to do collage stamping with which is a great technique to use when you’re doing some #SimpleStamping. And to make it bright and summery I used some of the 2022-2024 In Colours. I used Orchid Oasis for my card base. I think this is my favourite of these In Colours. And I added a bit of Basic Black cardstock to help the colours pop.

I started the design using the large flowers with Sweet Sorbet ink. Then I added some Orchid Oasis butterflies. But before I flipped it over (because this stamp set is reversible) to ‘colour’ them in, I added some Parakeet Party leaves. I find it so much easier to start this kind of design with the largest image and work my way down.

For the sentiment I used one of the ‘hello’s from the Biggest Wish stamp set. I stamped that with Orchid Oasis ink and framed it with some Orchid Oasis cardstock. Then I popped it up with some Stampin’ Dimensionals.
#SimpleStamping with Enchanted Butterfly

At our get together I also offered the option of stepping the design up a little bit. I stepped mine up with some Wink of Stella Glitterbrush and a few 2022-2024 In Colour Ombre Matte Decorative Dots.
#SimpleStamping with Enchanted Butterfly

#SimpleStamping with Enchanted Butterfly is so easy. I love all the images in this stamp set! Check out another design I crafted with Enchanted Butterfly here.

If you want to add Enchanted Butterfly to your craft stash, you can find it in my online shop.
Colourful Butterflies

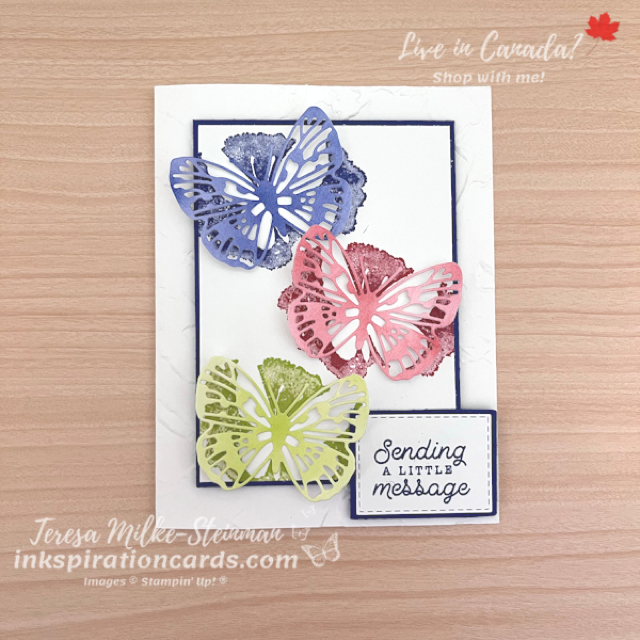
I’m always on the look out for ideas for projects. Sometimes to craft something different and sometimes because I just need ideas. And one stamp set that I’ve needed some ideas for is the Amazing Silhouettes stamp set. I really like the images in this stamp set, but I seem to get stuck. So this card design came from a few different cards I’ve seen lately. And I thought it’d be fun to add some colourful butterflies using some of the new In Colours.

To really help the colours pop I used a Basic White card base. But I didn’t want just a plain card base so I embossed the front of it using the Painted Texture 3D Embossing folder. Then to frame the images and phrase and help the colours stand out even more I used some Starry Sky cardstock. For the butterflies I first stamped the image from the Amazing Silhouettes stamp set in Starry Sky, Sweet Sorbet and Parakeet Party on a piece of Basic White cardstock.

To create the butterflies to layer on top I used my Blending Brushes with each of the ink colours on a few pieces of Basic White cardstock. Once they were dry I used one of the Brilliant Wings dies to cut out the butterflies. Then I used some Mini Glue Dots to adhere them to the stamped cardstock.

I popped up the framed cardstock with the butterflies using some Stampin’ Dimensionals. And the phrase I pulled from the Bottled Happiness stamp set. I cut it out with one of the smallest Stitched Rectangles dies and then used a bit of Stampin’ SEAL and Mini Stampin’ Dimensionals to have it on the same level as the butterflies.

Colourful Butterflies

I really love these colourful butterflies! This was such a simple card to make and I love how it turned out.

Check out this other card I made using the Amazing Silhouettes stamp set here. And you can grab the stamp set along with anything else you need in my online shop.

#SimpleStamping with Orchid Oasis

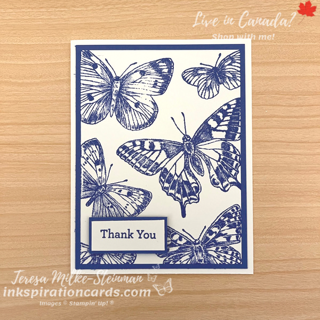
It’s been a couple weeks now since the new Annual catalogue launched. And I hope you’re enjoying it as much as I’ve been! To keep up with the excitement of the new catalogue I’m doing some #SimpleStamping with Orchid Oasis, one of the new In Colours. This is for this month’s #SimpleStamping challenge from Stampin’ Up! And this time it’s just the basics; stamps, ink and paper. No extras this month and we need to use our favourite new In Colour. I love purple so Orchid Oasis was a fairly easy choice for me… although there’s a lot of great colours in the 2022-2024 In Colours.

For my card design I decided I’d take advantage of the opportunity and make some thank you cards. I have a few customers I need to thank for their orders. So I’m using the “thank you” from the Beauty of Friendship stamp set. Then to really show off the Orchid Oasis I used the Butterfly Brilliance stamp set. It’s nice and big and I love butterflies so I love any chance I get to use this set! Plus using the Stamparatus makes it super easy to stamp big images like this one, especially when you need to stamp multiples.

To really make the Orchid Oasis pop I added some Orchid Oasis cardstock behind the butterflies and the phrase. I also popped up the phrase using some Stampin’ Dimensionals.

#SimpleStamping with Orchid Oasis

I love how this card turned out! It’s nice and simple and beautiful. This bit of #SimpleStamping with Orchid Oasis is also a great example of a monochromatic card.

Check out my card for last month’s #SimpleStamping challenge here. It’s also all about the new In Colours. And if you want to check out all the new In Colours or the Stamparatus, head over to my online shop.

Crafting with the New Catalogue

This past weekend I celebrated the new Annual Catalogue that launched last Tuesday. I had an online and in-person party and we had a lot of fun crafting with the new catalogue! It’s so much fun getting together with people and crafting. I’ve really missed it.

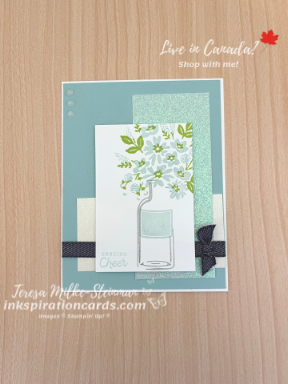
For my online party I did some live crafting on my Facebook page. Check that out here. At my in-person party we made two cards. The first card uses the Bottled Happiness stamp set. I paired Parakeet Party, one of the new In Colours, with Pool Party for my colour combination. Then to add a little something more to the card I used some of the Supple Shimmer and Iridescent Specialty Papers. I also added some of the Denim Ribbon and a few Polished Dots. (You can find the Supple Shimmer Specialty Paper and the Denim Ribbon in the January-June Mini catalogue.)

Crafting with the new Catalogue

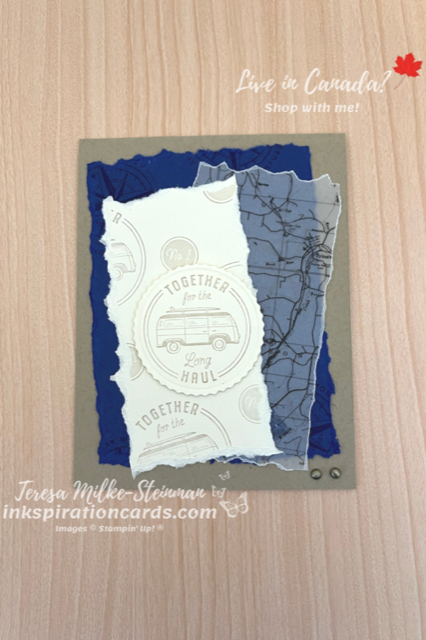
The second card uses the He’s All That bundle. I love this set! The stamp set is a nice versatile masculine set and the dies can be used with a variety of images and phrases, not just the ones from the stamp set. For this card I paired Starry Sky, another new In Colour, and Crumb Cake. And instead of Basic White cardstock I used Very Vanilla. It’s a little more subtle.

To add a distressed look to the card I tore the edges of the cardstock and the vellum. Just start with a little snip from your Paper Snips, or scissors, and tear away. The vellum came from the Vellum Layering Designs and I thought the map design works great for this card. Then to finish it off I added a few of the Brushed Metallic Dots.

Crafting with the new Catalogue

I’m having so much fun crafting with the new catalogue! And I can’t wait to share even more projects with you. In the meantime you can check it all out in my online shop. And if you live in Canada and want a copy of your very own just send me an email; inkspirationwithteresa@gmail.com. I’d be happy to send you one!

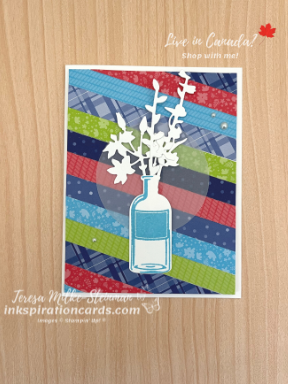
Scrappy Strip Technique with the new In Colours

I’m really liking how the 2022-2024 In Colours all work together. And so the idea popped in my head to use the Scrappy Strip Technique with the new In Colours. I haven’t done this technique in a long time. This is such an easy technique and it’s a great way to show off your Designer Series Paper. You can check out one of my last cards using this technique here.

The biggest part is cutting the Designer Series Paper into strips and then gluing them onto a piece of cardstock. You can make the strips as thick or thin as you want. And you can angle them any way you want onto the cardstock. You can even have the strips be uneven. Once the glue has dried, trim off the edges that are sticking out over the cardstock. For this design I alternated the colours and the designs. Then I popped up the whole piece of stripped cardstock onto a Basic White card base using some Stampin’ Dimensionals.

On top of my strips I wanted things to be nice and simple. To start I used the Layering Circles dies to create a vellum circle. On top of that I used some of the Meadow dies to create a Basic White bouquet for my ‘vase’. And the vase I made using the Bottled Happiness stamp set, Vintage Bottle punch and Tahitian Tide ink.

Since I already popped up the whole card mat I didn’t use any more Stampin’ Dimensionals. Although you could if you wanted to add even more depth to the card. Then to finish it off I added a few Pearl Basic Jewels.

Scrappy Strip Technique with the new In Colours

I love how colourful and bright this card is! Using the Scrappy Strip Technique with the new In Colours is definitely a win.

Check out the new Annual Catalogue in my online shop. Or if you live in Canada and want a copy of your very own, send me an email; inkspirationwithteresa@gmail.com. I’d be happy to send you one!

More Free Stuff

It’s an exciting day today! The new Annual Catalogue is out and I can’t wait for you all to see it. And what might be even more exciting is the chance at even more free stuff!

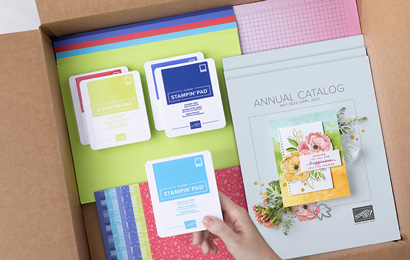
I’ve talked about Stampin’ Up!s Starter kit before. The Starter kit as it usually is gets you $165 worth of Stampin’ Up! product for only $135 (no tax or shipping on top). So $35 worth of product for free. But now and for the rest of this month you’ll get a bunch of extra new In Colour products too! What kind of new In Colour products you ask?! You’ll get a pack of In Colour grid paper, all 5 In Colour ink pads (Tahitian Tide, Sweet Sorbet, Parakeet Party, Orchid Oasis and Starry Sky), a pack of cardstock with all 5 In Colours AND a pack of In Colour 6″ x 6″ Designer Series Paper.

More Free Stuff

I love the new 2022-2024 In Colours. They’re so vibrant and colourful. I’m looking forward to crafting with them over the next two years.

If the more free stuff isn’t enough for you to take the plunge and join my team, maybe the discount of top quality products is. Or maybe it’s the stamping community. Since I joined Stampin’ Up! almost 10 years ago I’ve made so many great friends and met demonstrators from around the world. I call my larger Stampin’ Up! team my stamping family. I love, and miss, these people! They are so creative and fun and supportive no matter what you want to do when you sign up. And I know that when I finally do get to see them in person again it’ll feel like no time has passed… because that’s how it’s always felt.

I’m here to support you and answer any questions that you might have. And the bonus of joining my team is that you also get to be a part of my larger team. So anything I don’t know I know we’ll be able to figure out! Email me with any questions you have or if you’re ready to sign up you can do that here. I can’t wait to join you on your creative journey!

New In Colour #SimpleStamping

It’s taken me a while, but I’m finally getting around to this month’s #SimpleStamping challenge from Stampin’ Up! With the new Annual Catalogue set to launch on Tuesday the theme for this month is “new”. And we’re only allowed to use stamps, ink and paper, no extras this month! So for my design I thought I’d do some new In Colour #SimpleStamping.

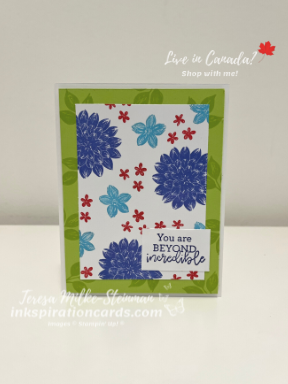
I am loving these colours and how they go together! And so I wanted to create something with all 5 of the new colours; Sweet Sorbet, Parakeet Party, Starry Sky, Orchid Oasis and Tahitian Tide. To pull in all the colours I decided to use the Dahlia Days stamp set from the January-June Mini Catalogue. The variety of images in this set makes it super easy to swap in different colours.

Since I’m using all 5 colours I used a Basic White card base. It’s like a nice clean canvas! From here I added a Parakeet Party card mat that I stamped leaves on, with the same ink. Then my Basic White card front is a little smaller than I usually use so that you can see the images and colour of the mat better. To fill in the card front I started with the larger dahlia image and then went with a smaller flower and then the 3 small flowers stamp. Each time switching to a different In Colour.

The last In Colour, Starry Sky, stamped the phrase. And then I adhered the card mat, card front and phrase together with Stampin’ SEAL. To adhere these layers to the card base I used some Stampin’ Dimensionals.

New In Colour #SimpleStamping

To step this design up you can add some Rhinestone Basic Jewels or some simple ribbon. Or even die cut the phrase and/or card front using the Stitched Rectangles dies. It was tempting, but I was able to stick with my new In Colour #SimpleStamping theme. Check out my last #SimpleStamping project here.

The new Annual Catalogue launches on Tuesday. So you can wait til then to head over to my online shop or you can check out retiring product that hasn’t sold out yet.