Spring Sampler

For some reason I’ve never made a Spring sampler. I’ve made a few different ones over the years… for summer, Christmas, Valentine’s Day even. And so I’ve been itching to make one recently. I’m using the Fresh like a Daisy Designer Series Paper pack as my feature. It’s so bright and has lots of floral designs. So it’s perfect for something like this! And I love one of the design especially because one side looks like it was designed to be cut up into panels. I’m using a couple of these designs on the top and bottom of my Spring sampler. And then I’ve got a couple other designs to fill in the top and bottom.

In the middle are three Basic White panels that are framed with Garden Green cardstock. The centre panel has images from the Notes of Nature and Bee My Valentine stamp sets. And the word “Spring” was made using the Garden Green cardstock and the Playful Alphabet dies. These dies are already retired, but you can easily swap in a different set. Then on either side of this panel are 2 small squares. The one on the left has a ladybug I made using the Ladybug Builder punch on top of some Bubble Bath flowers from the Hello Ladybug stamp set. And on the right is a bumblebee I made using the Bee My Valentine stamps and coordinating punch on top of some Wild Wheat honeycombs.

All these pieces are on a 12″ x 12″ piece of Basic White cardstock. And the only elements I popped up with Stampin’ Dimensionals are the ladybug and bumblebee. But I did add a few Brushed Brass Butterflies in the centre panel to add a little bit of bling.
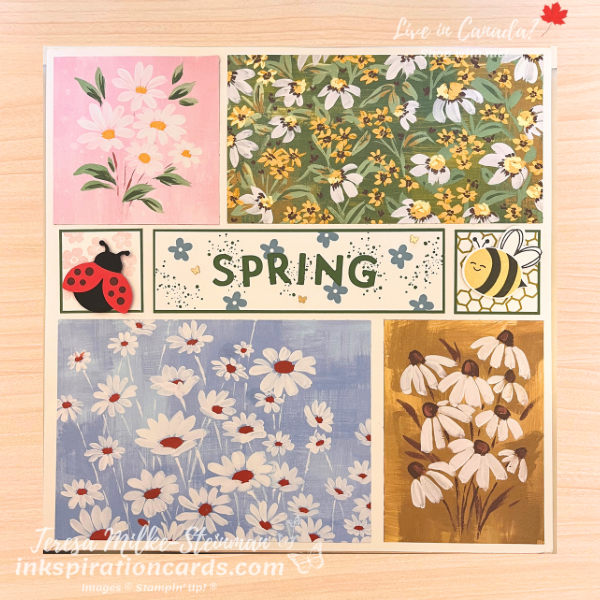
Spring Sampler

This was such a fun and simple Spring Sampler to make!

Sadly the Fresh like a Daisy Designer Series Paper is retiring soon. Along with Hello Ladybug and it’s coordinating punch. Check out a card I made using this paper pack and another retiring stamp set, Season of Chic, here.

Product List
Halloween Sampler with Them Bones

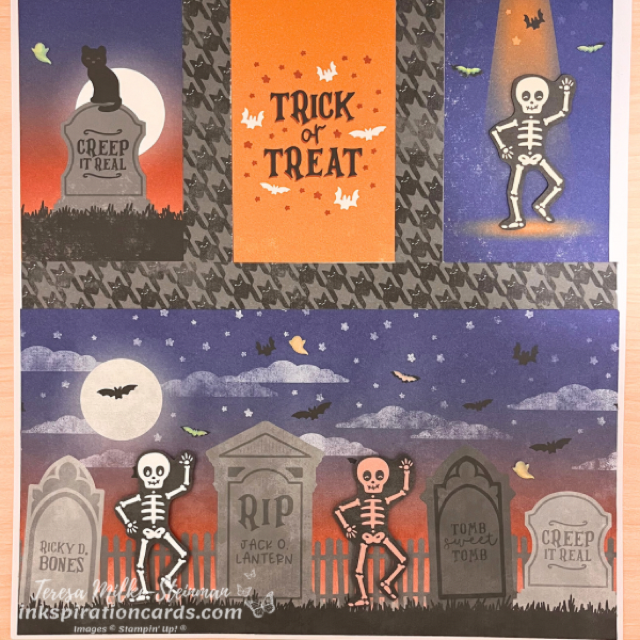
Now I’m getting to what I usually do for my Halloween crafting… home decor. The Them Bones suite is such a great one for any Halloween project! This time I’m making a Halloween sampler with Them Bones Designer Series Paper.

I started with an 11″ x 11″ piece of Basic White cardstock. Then I cut up a few different sheets from the patterned paper pack. These designs are so great! You don’t really need to add a lot else. I used almost half a sheet just along the bottom. Then I chose 3 smaller designs from another sheet for up top.

Usually when I make a sampler I add some coordinating cardstock to frame each of the boxes. But instead I used another design in between all the boxes. Then to add another layer I fussy cut some of the skeletons and popped them up with some Stampin’ Dimensionals. And to finish it off I added a few Glow in the Dark Bats & Ghosts.

Halloween Sampler Them Bones

I’ve made a few other samples with lots of stamping and die cut pieces. This Halloween sampler with Them Bones DSP is very simple!

Check out the matching Halloween cards and treat boxes I made using some different designs from the same pack of patterned paper here.

And you can check out the whole Them Bones suite over in my online shop!

Why I Love Craft Kits

My craft stash has a lot of different things in it. Stamps and ink make up a big part along with cardstock and patterned paper of course. But I also have wood, beads and other crafting supplies. I even have a few craft kits in my craft stash. These are great for a lot of different reasons. So here are a few reasons why I love craft kits.

Great for Beginners

If you’ve never crafted before or if you’re new to this kind of crafting, kits are a great place to start. They come complete with everything you need to make the kit’s project including instructions and adhesives. And the projects are simple and straight forward. Stamping and crafting can feel overwhelming sometimes, so it’s nice to not have to come up with your own ideas or designs! It’s also a great way to start your own craft stash.

Lots of Variety

There are so many kits to choose from! You can choose to stamp or not. There’s the choice of birthday, Christmas, thank you cards and more. If you don’t want to make cards, there’s kits to make tags. There’s even kits to craft home decor pieces and to help you keep all the birthdays, etc. that you need to send cards for organized! One of my munchkins’ favourites is the scrapbooking kit. There’s definitely not a shortage of craft kits to choose from and Stampin’ Up! adds new kits pretty regularly.

Great Quality

One of the other reasons why I love craft kits, is that the Stampin’ Up! kits are great quality. It’s hard to find stamps, ink and paper that’s better any where else. And their kits are the same! While I love shopping at my local dollar and craft store, there’s just certain things I won’t buy there.

There are so many other reasons why I love craft kits, but I’m only going to mention one more. And that’s that all this month (August) you can buy any of Stampin’ Up!s kits for up to 30% off! So get a head start on your Christmas crafting or grab a kit or two for yourself or the crafter in your life. See all the kits in my online shop.

And if you have any questions don’t hesitate to contact me!

Why I love craft kits

Handmade Placecards

I hope everyone enjoyed this past long weekend! And I hope you were able to spend at least some of it with loved ones. For us it was a busy weekend seeing both mine and my husband’s family. And even busier because we hosted dinner one of the nights. Since it’s been over 2 years since the last family dinner I wanted to make it even more special. So I decided to make handmade placecards.

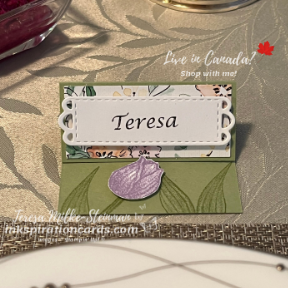
For the design I wanted nice bright colours for Spring. I thought that the soon to be retired Hand Penned Designer Series Paper would be perfect. Lots of colours and flowers! I used Pear Pizzazz cardstock to create an easel style base. A nice green for the DSP to pop off from. And for the names I simply printed them on Basic White cardstock and cut them out using one of the Meadows dies.

Along the bottom of the place card I stamped some leaves and a stem from the Timeless Tulips stamp set (also retiring soon) using Pear Pizzazz ink. Stampin’ Up! makes tone on tone stamping so easy! Then to hold the easel in place so we could see the names I used a tulip bloom. I stamped the smallest tulip image in a few different colours; Pale Papaya, Fresh Freesia, Daffodil Delight and Calypso Coral. Then I fussy cut them and popped them up with a Stampin’ Dimensional. (I also popped up the names using Stampin Dimensionals)

These handmade placecards turned out really nicely!…

Handmade Placecards

I’m really going to miss this stamp set. It’s so versatile and I often used it with the masking technique. I actually shared a project recently here doing just that.

There’s only 2 weeks left til the new Annual Catalogue launches and the retiring products will be gone forever… if they aren’t sold out already. Don’t miss out! Head over to my online shop and grab your favourites before they’re gone.

Fall Themed Sampler

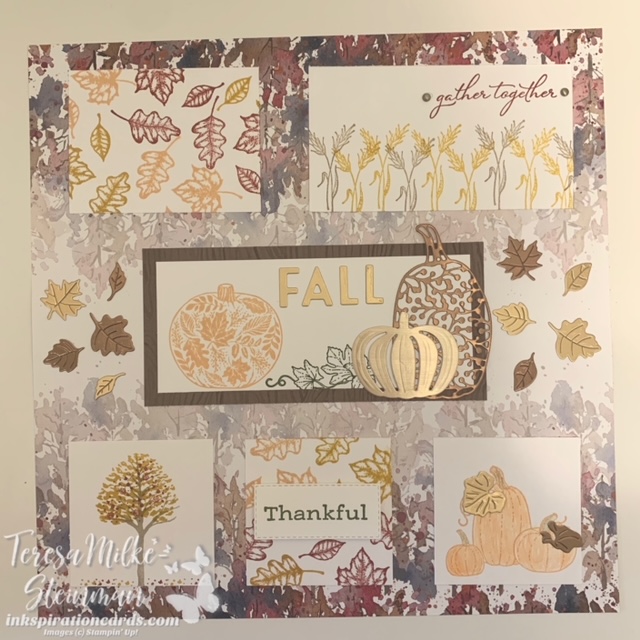
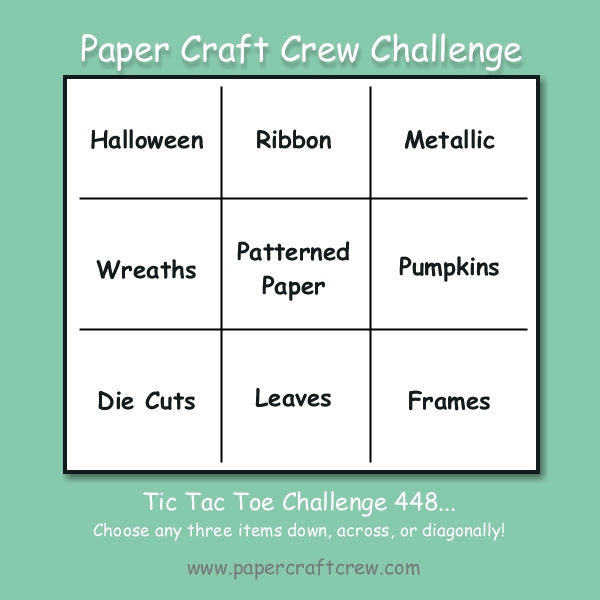
I’ve been thinking about making a Fall themed sampler for a while now. (If you’re not sure what that is, it’s similar in size to a scrapbook page and is meant as a home decor piece) I already had a couple of ideas of what I wanted to do, but just hadn’t had the chance to get to it. So when I saw this week’s Tic Tac Toe challenge from the Paper Craft Crew (PCC448) I was inkspired to get it done. For my row I went diagonal and chose Metallic, Patterned Paper and Die Cuts. Here are all the options…

Tic Tac Toe Challenge

I started my design with my patterned paper. I used one of the designs from the Beauty of the Earth Designer Series Paper pack as my base. Then I added a little bit of the wood grain design in the centre. For the die cuts I used the Detailed Pumpkins dies. I knew that one of the stamp sets I was going to use was the Pretty Pumpkins stamp set. So it made total sense to use those. Then for the metallic square I used some of the Brushed Metallic cardstock. I also added a couple of the Brushed Metallic Adhesive Backed Dots.

I love all the colours of fall! So it was nice to use a bunch of different colours for this piece. I used a combination of Cajun Craze, Bumblebee and Mossy Meadow from the DSP. And I also used some Crumb Cake and Pale Papaya. In terms of stamp sets I used a few different ones as well. Pretty Pumpkins of course, as well as Time of Giving and Beauty of Friendship.

I really like how this Fall themed sampler turned out! You can check out the other entries for this Tic Tac Toe challenge here. And you can check out one of my previous entries into the Paper Craft Crew Challenges here.

United through Creativity

I love colouring! But I don’t get to do it as often as I’d like with a full time job and two munchkins. So this last week I decided it was time to get back to it. I’ve been meaning to get creative with Stampin’ Up!s free digital stamps, United through Creativity, and with Canada coming up (yesterday) I thought it would be the perfect time. There’s a lot of different images and phrases to choose from, but for Canada Day the maple leaf image and those coordinating phrase were ideal!

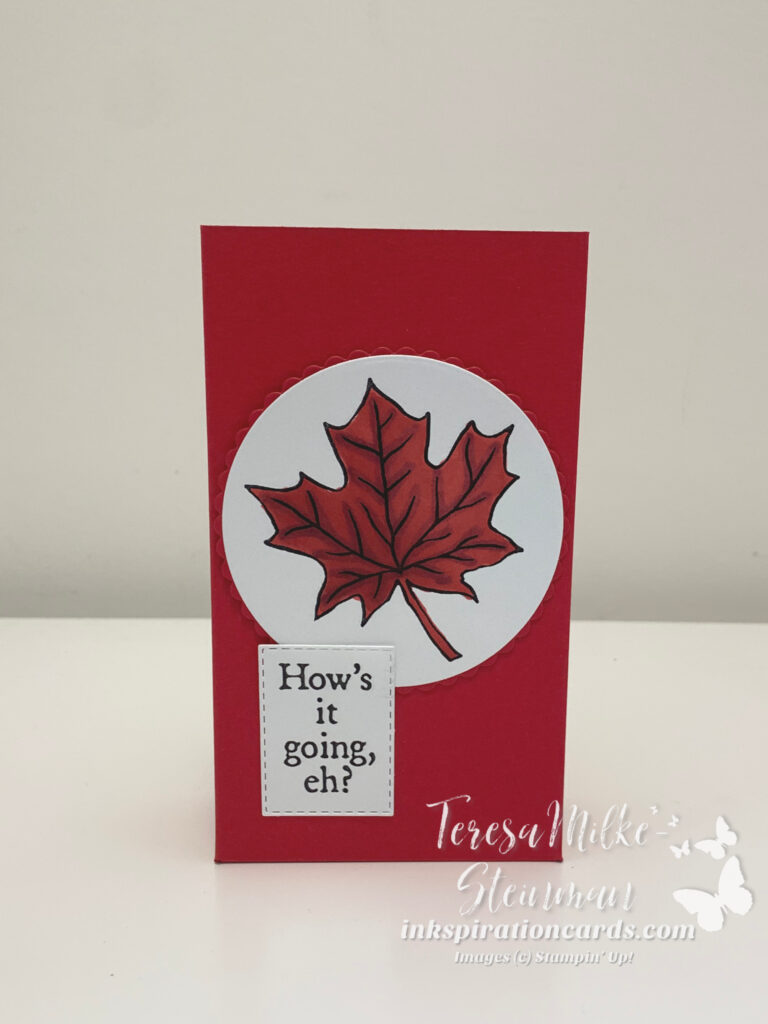
Once I printed all the maple leaves I needed I pulled out my Real Red Stampin’ Blends and got to some colouring. I wanted to make a couple of different projects so I needed to print a bunch of them. Since I wasn’t able to isolate the maple leaf image I just did some double-sided printing. I knew I only wanted the maple leaf so I didn’t mind the overlap.

The first project I had in mind was to create two treat bags for my two munchkins. Since there still aren’t any big celebrations going on I wanted to do something special. To make the treat box I just cut and scored some Real Red cardstock. Then I adhered it with some Tear & Tape adhesive. I cut out the coloured maple leaves and phrases using the Layering Circles and Stitched Rectangles dies. We had some candy leftover from the teacher gifts we had put together, so I used that and added a couple other treats to fill the bags.

United through Creativity

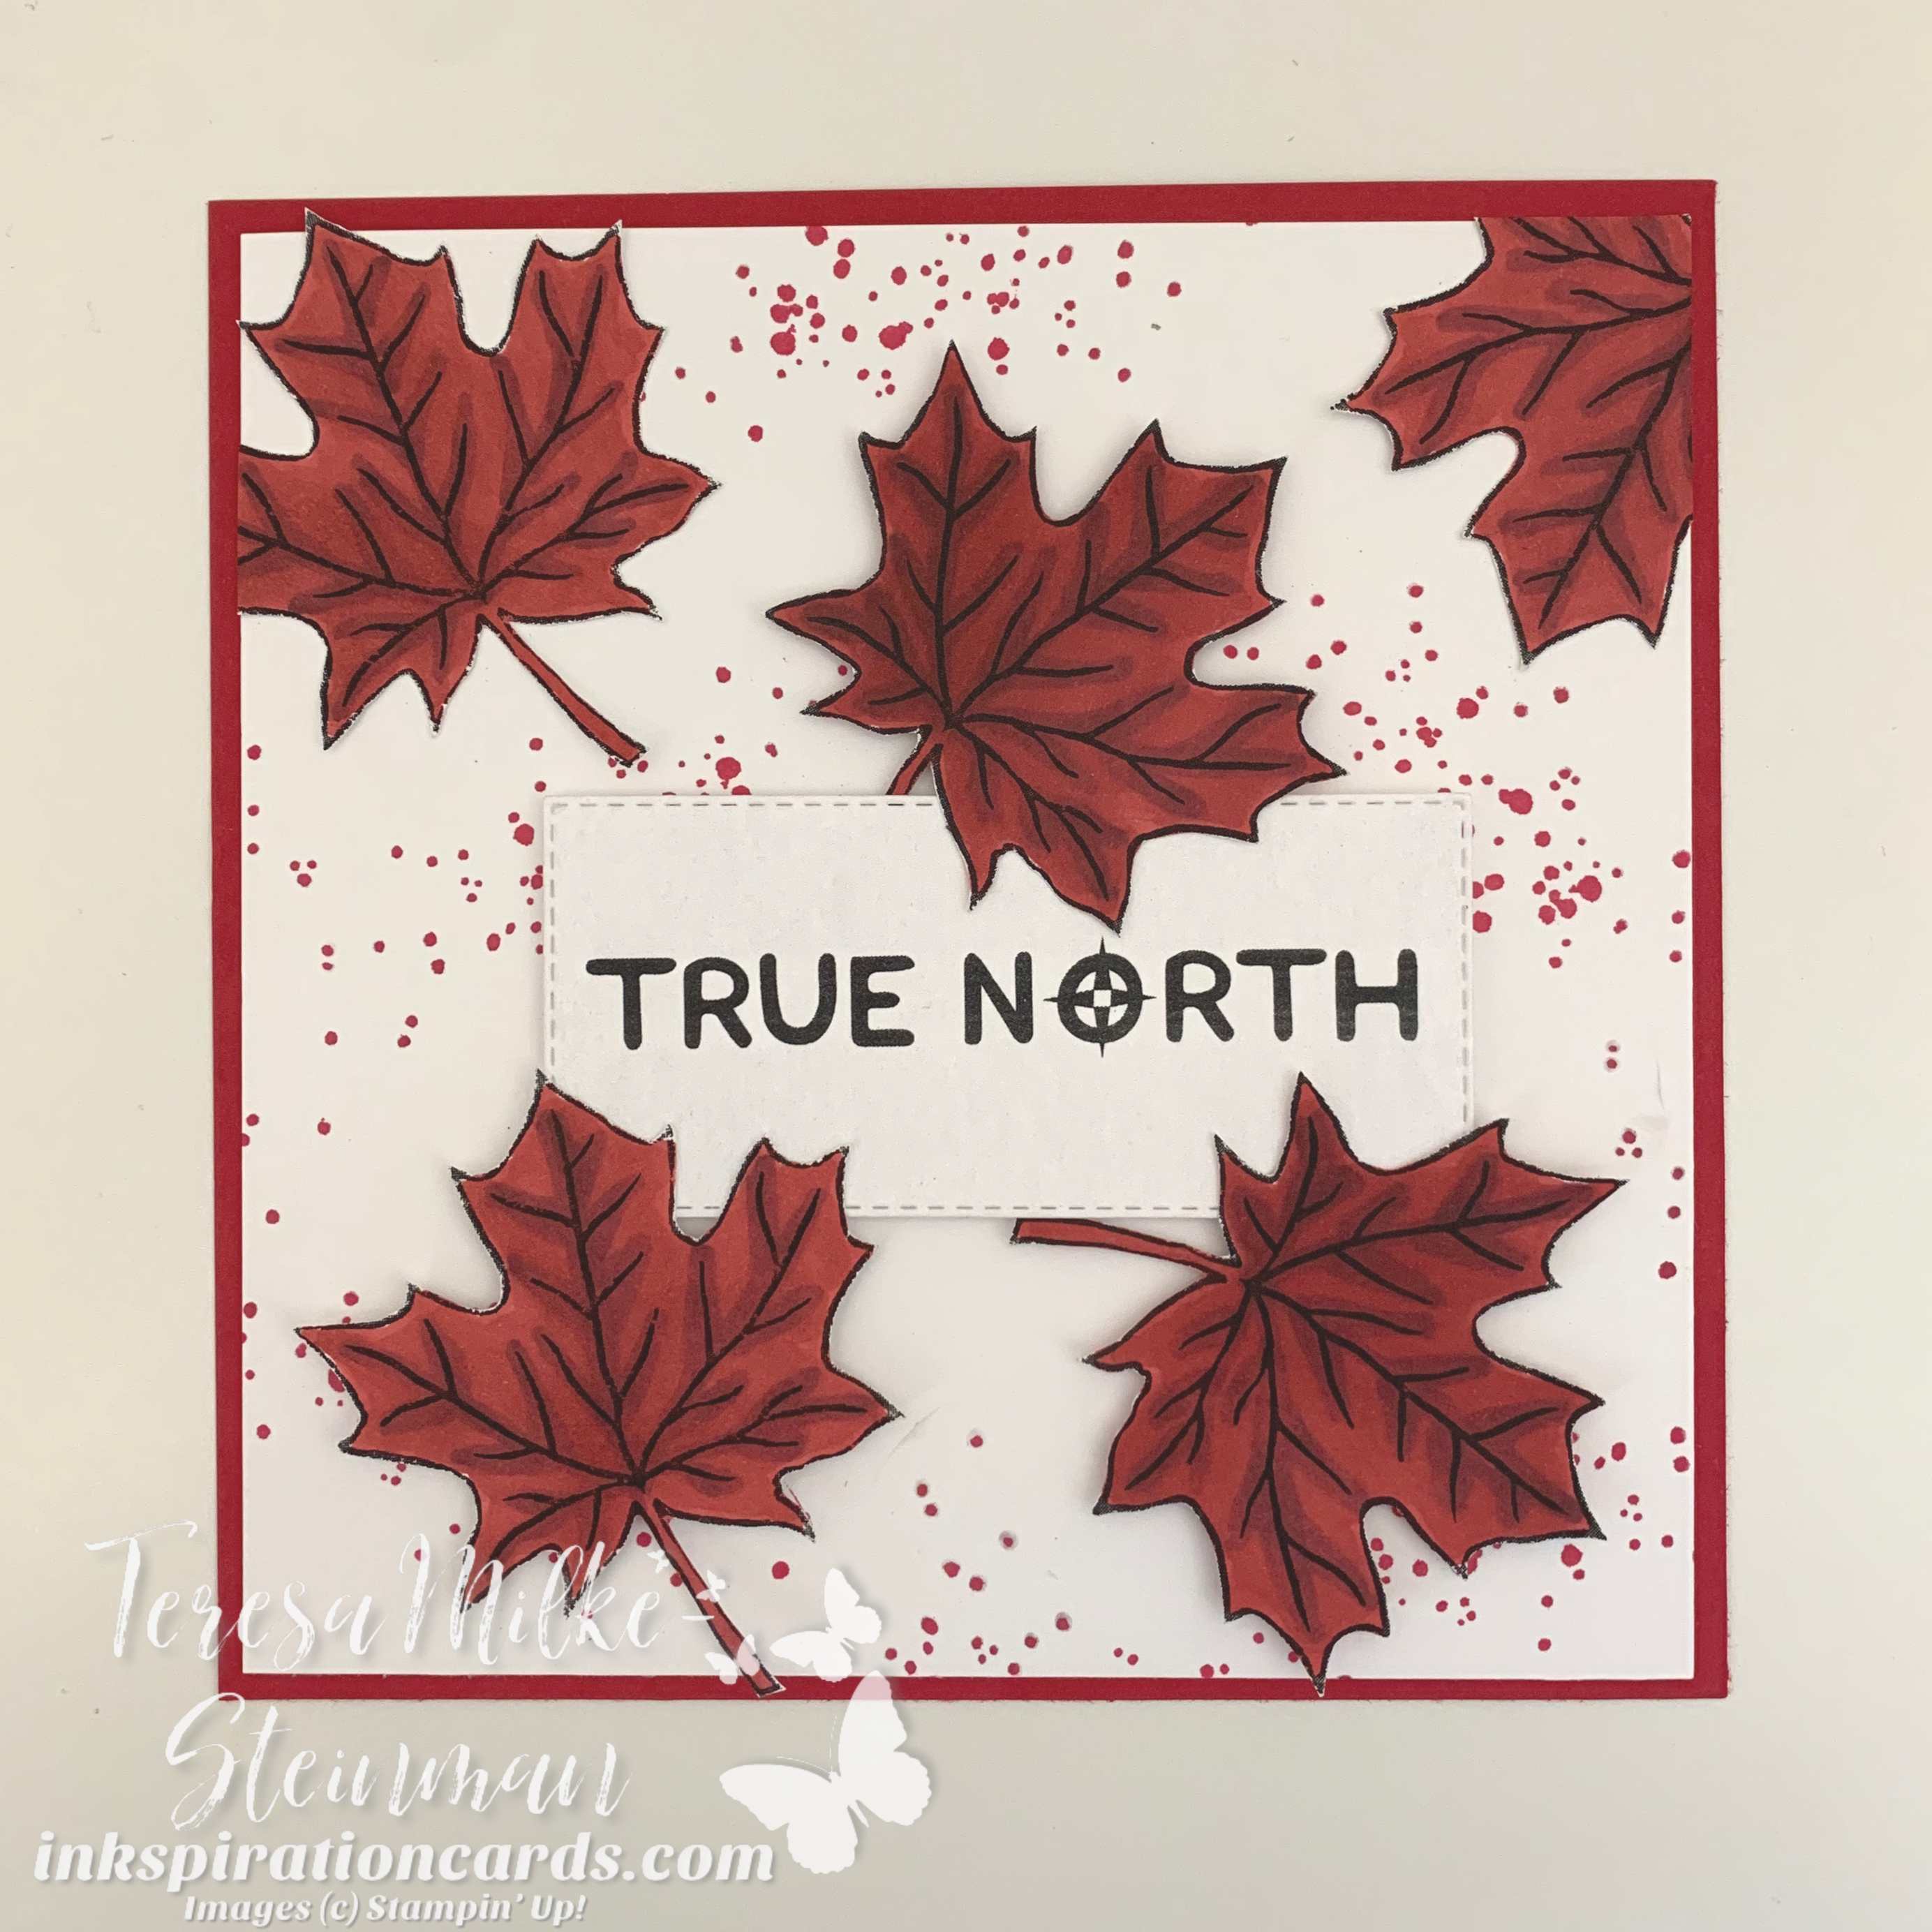
The other project I wanted to make was a framed home decor piece. I grab the 6×6 Shadowboxes from Michael’s whenever I get the chance so that’s the measurement I used for this. Now to keep my eyes peeled for a sale and some white ones!

I created the background with some Real Red and Basic White cardstock. And I stamped the Basic White cardstock using the ink splatter image from the Quiet Meadow stamp set and some Real Red ink. I fussy cut the rest of my coloured maple leaves. This is not something I do often, but it was a necessary evil for this project. I adhered a couple of the maple leaves right to the stamped cardstock. The others I adhered parts of the leaves directly to the cut out phrase, then adhered the phrase and other leaves to the stamped cardstock with some dimensionals.

United through Creativity

I LOVE how these turned out! And my munchkins loved their treat boxes. I’m excited to do some more colouring with the United through Creativity digital stamps. You can download yours here. And you can check out another colouring project I did here. Enjoy!

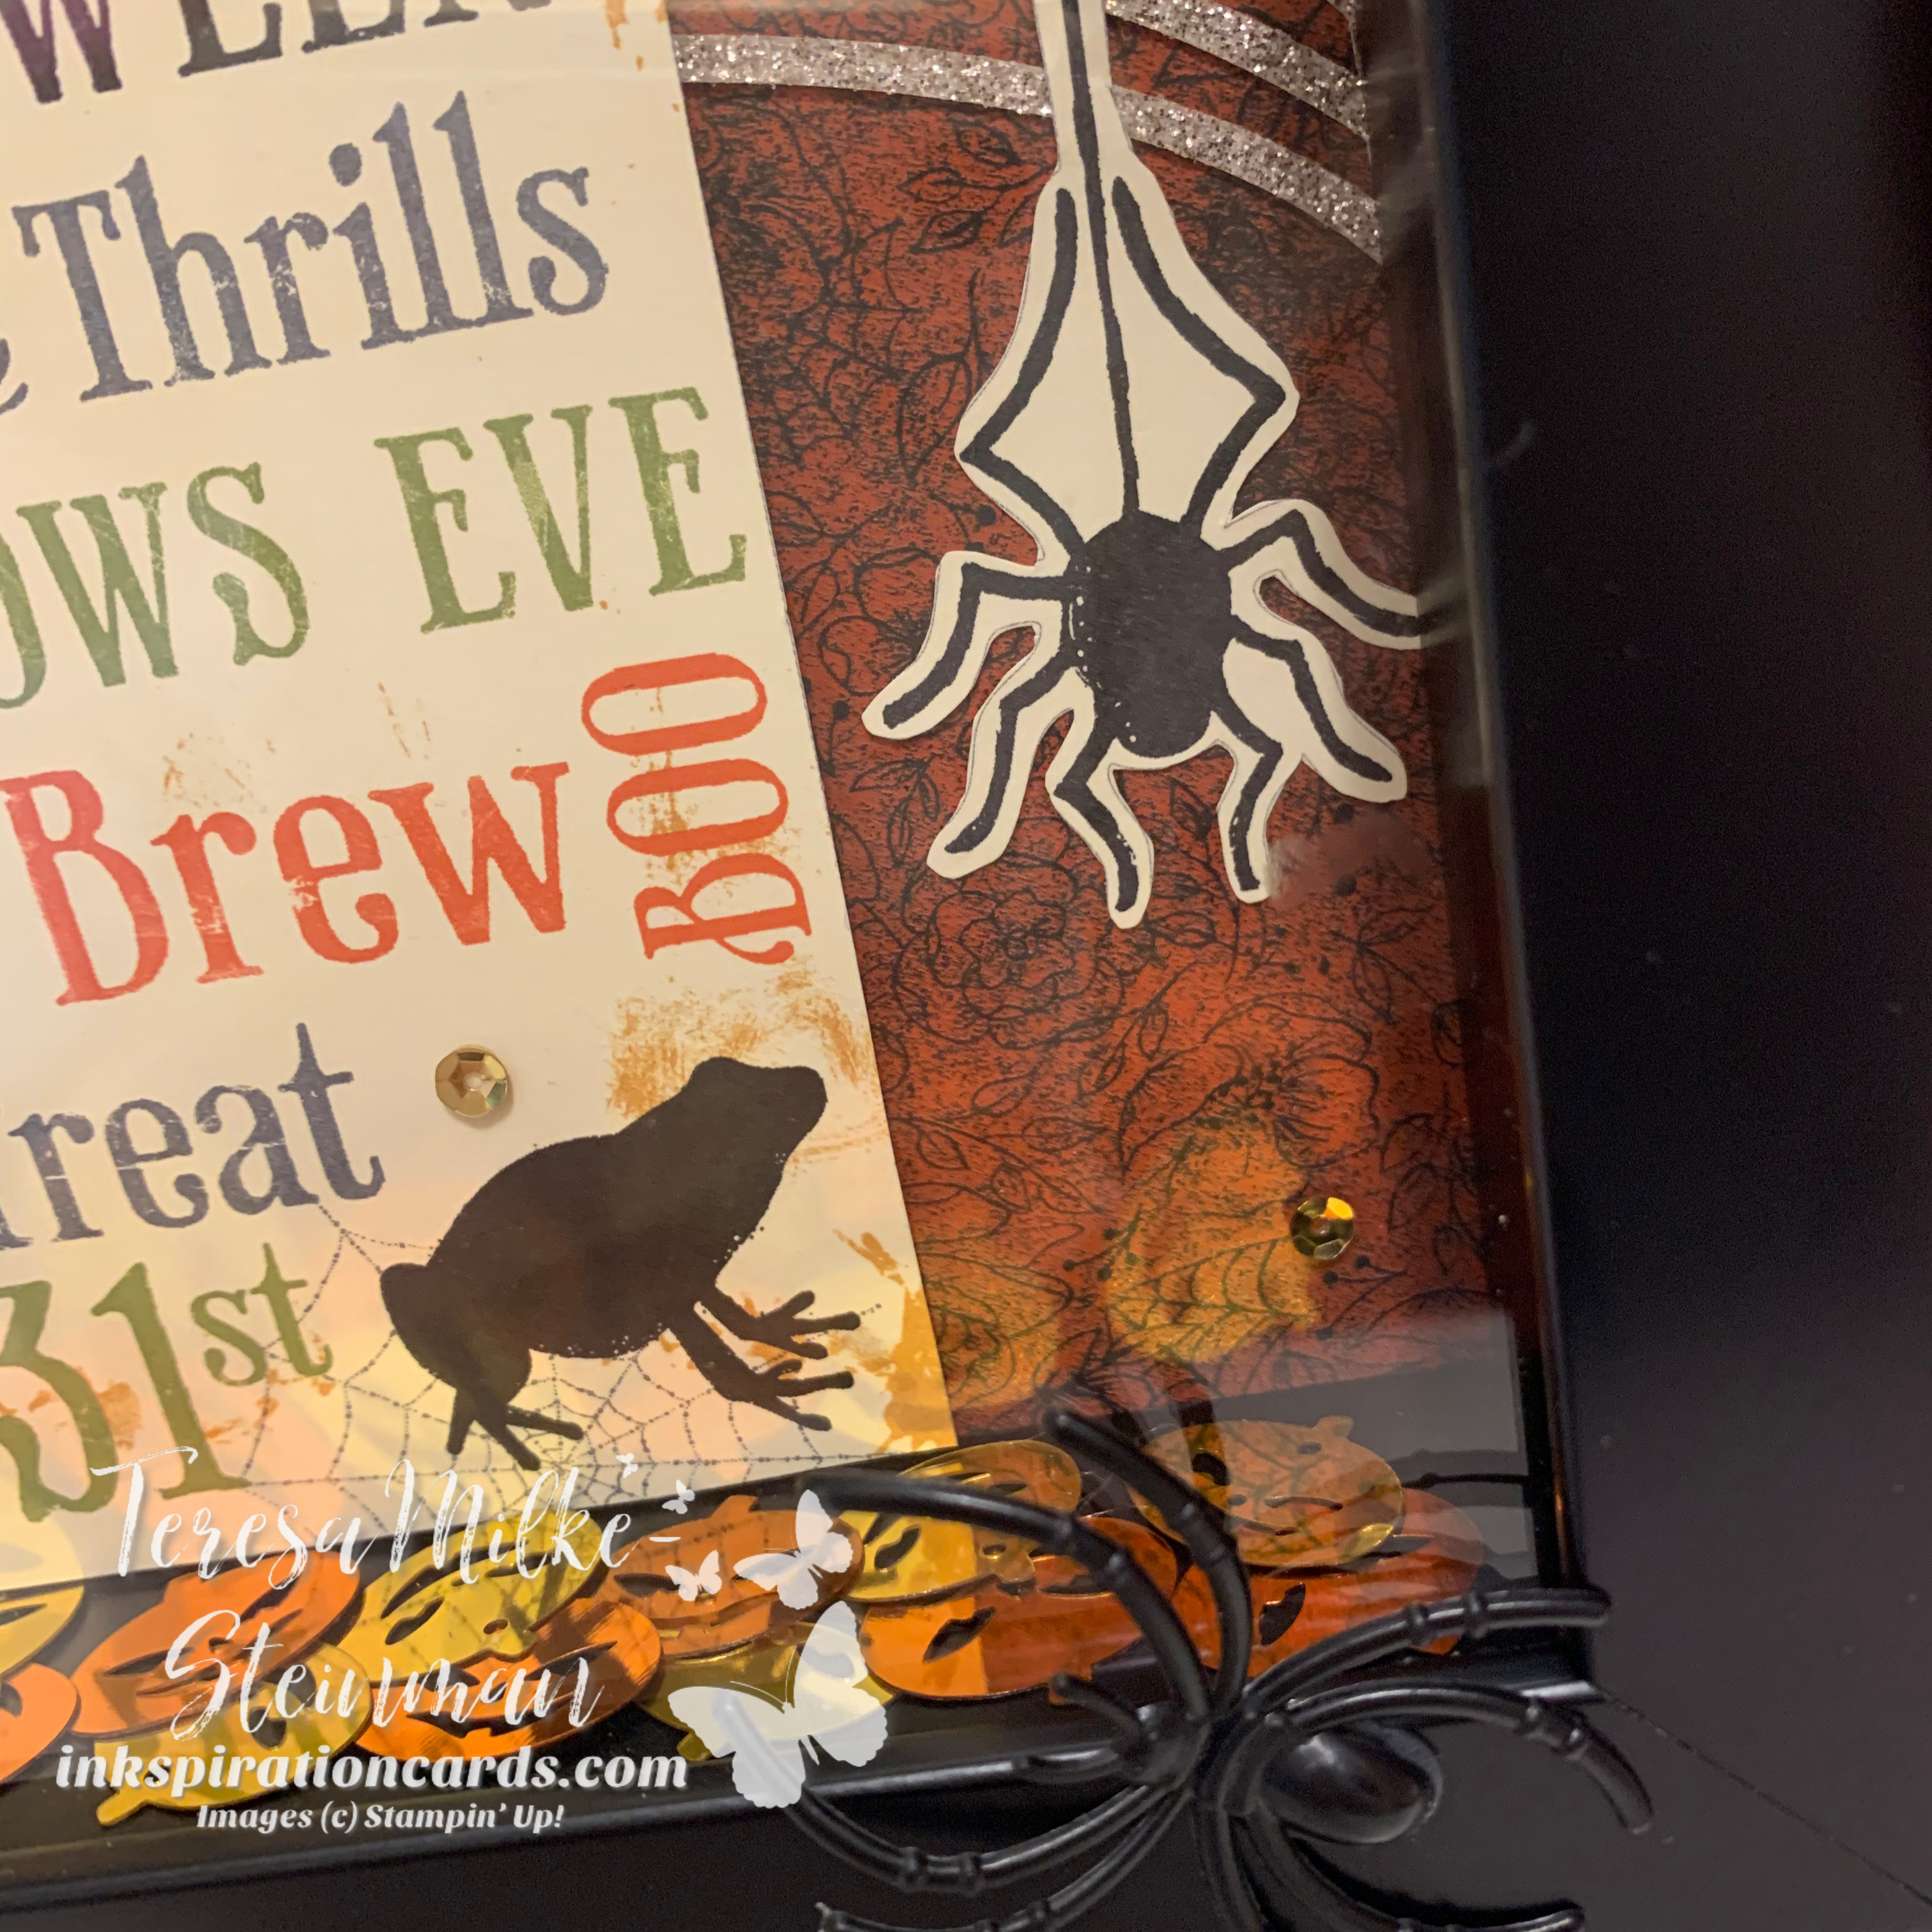
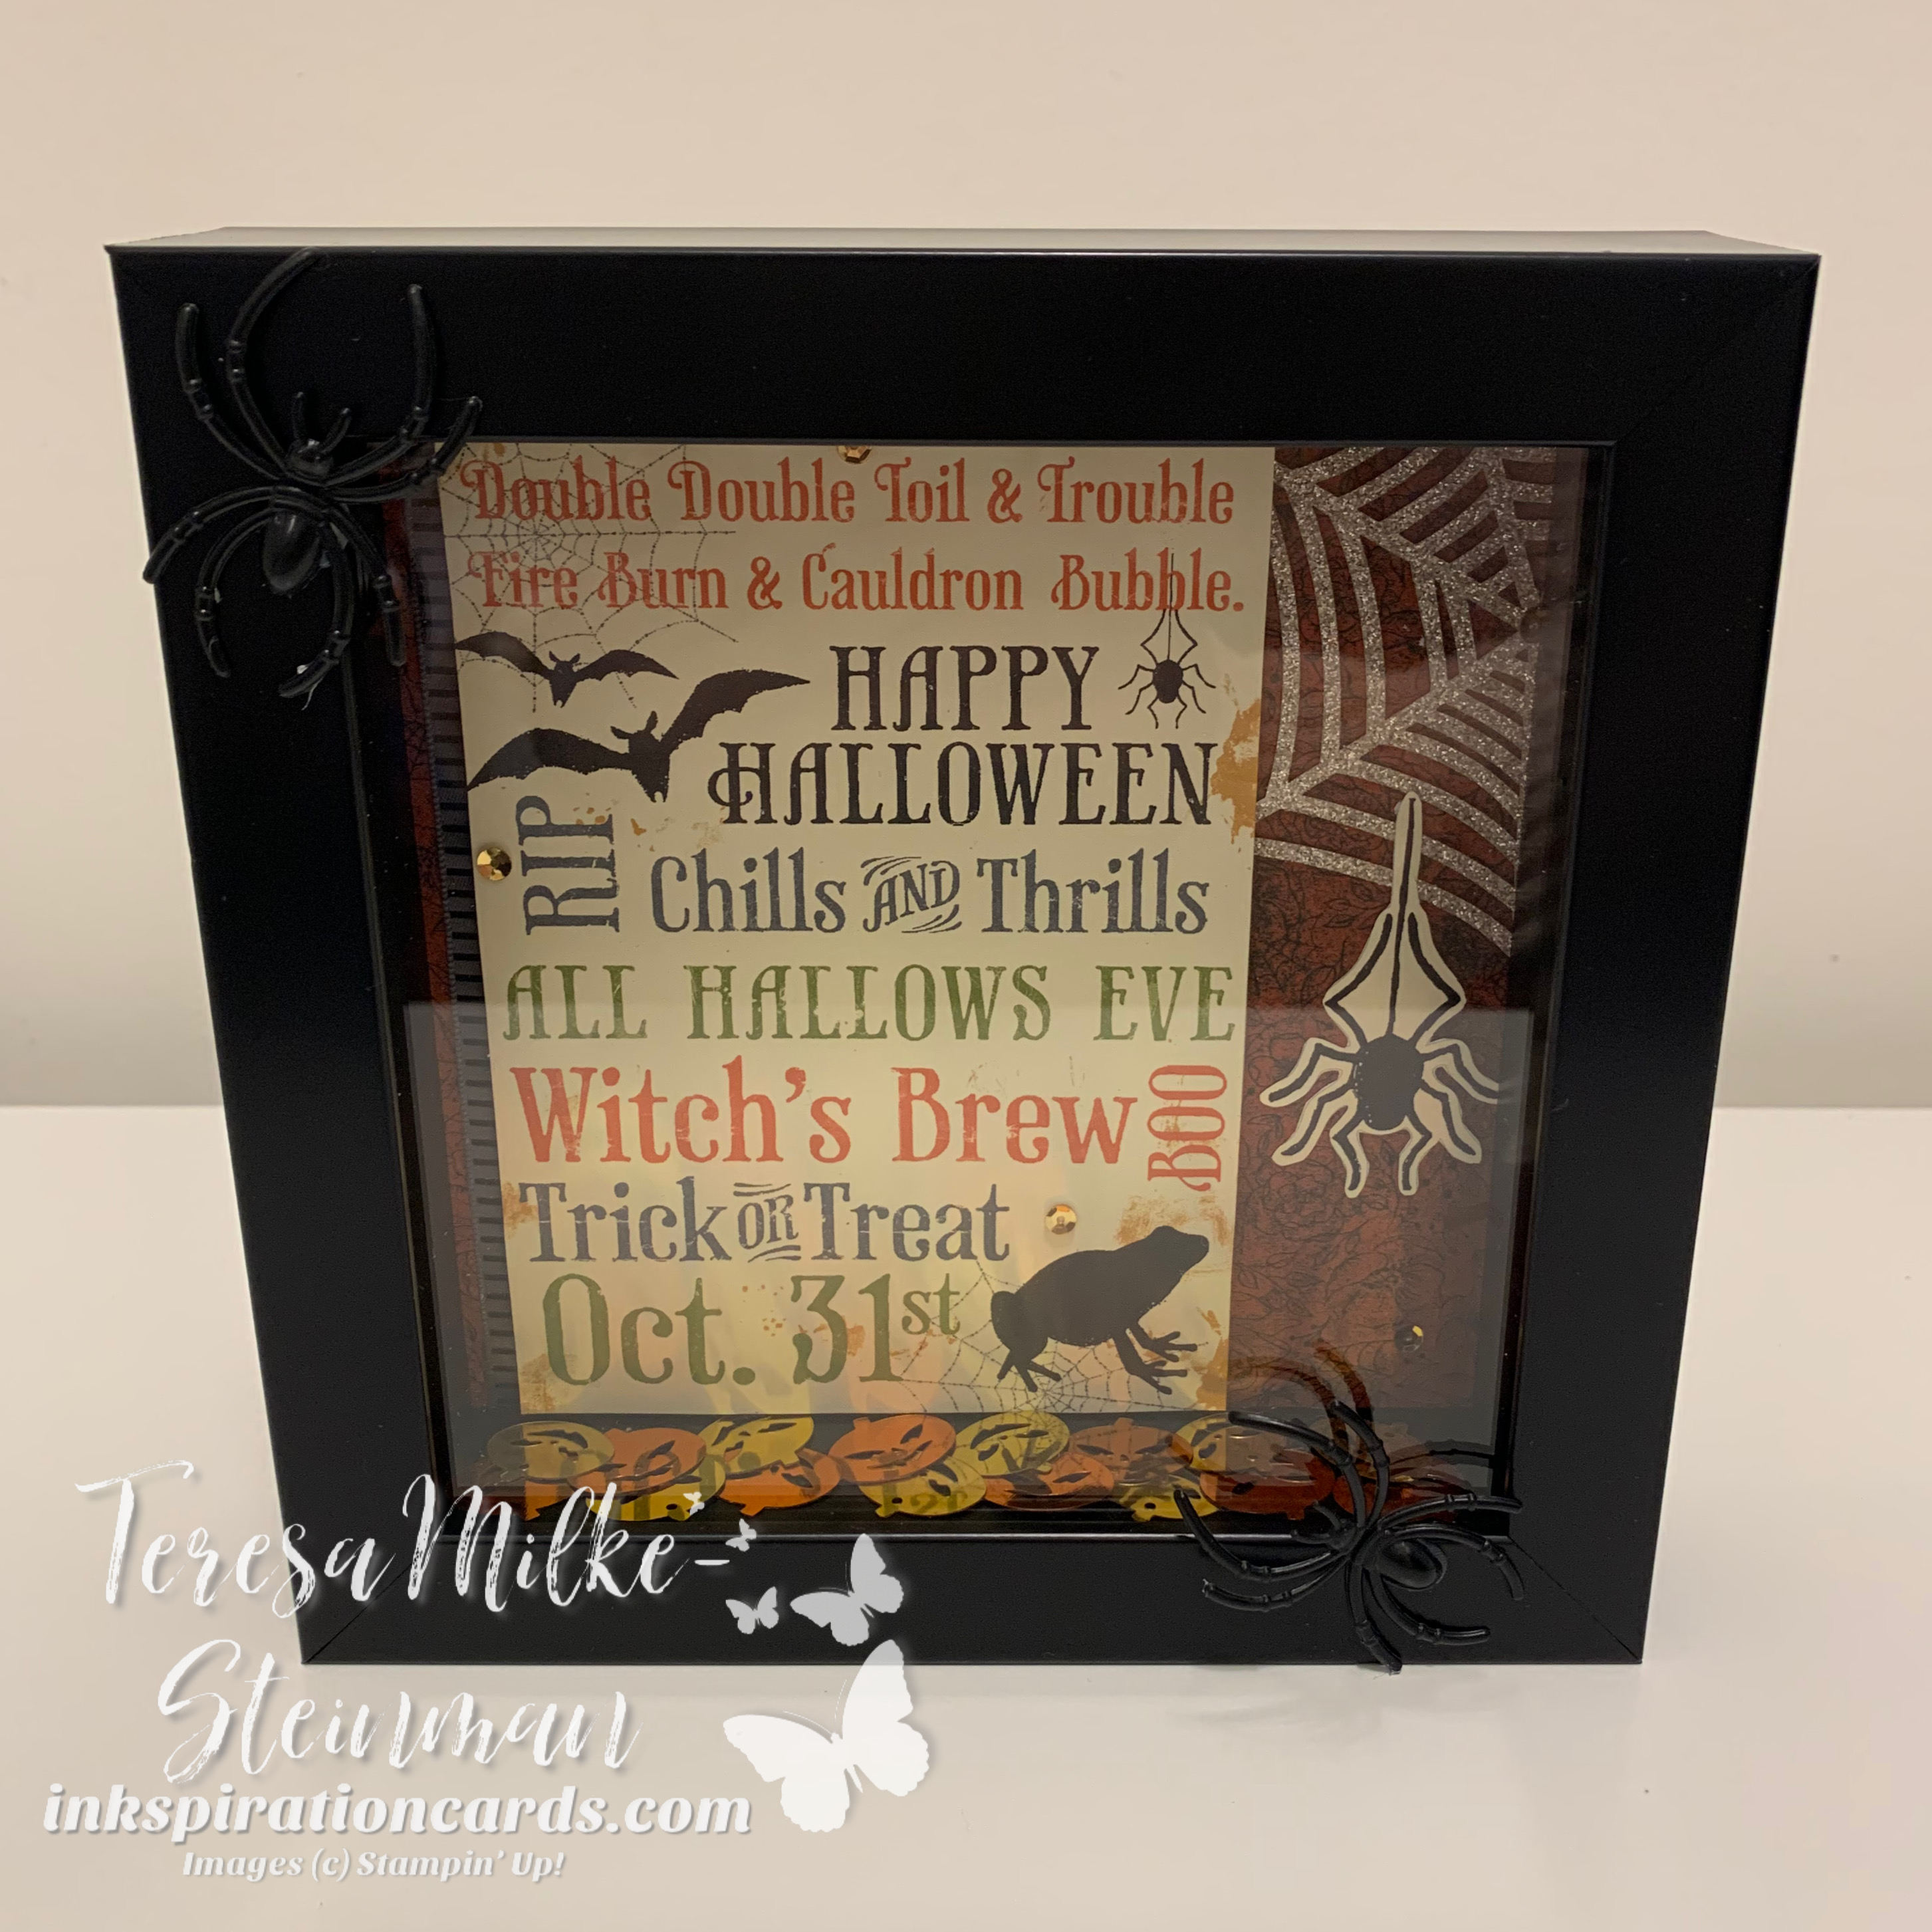
Halloween Shadow Box

Even though Halloween is looking a little different this year, we’re trying to make the best of it. My munchkins have been decorating inside and outside our house. Our pumpkins were carved earlier this week and I’m putting some treats together. I’ve also been having fun creating different projects for Halloween. Usually I’m not much for Halloween cards so I’ve been making treat boxes and other things. My last “big” project for Halloween this year is a Halloween shadow box.

I’ve had some of these supplies for a while and have used them in different projects. Recently when I was cleaning up my craft stash I found them and decided I’d pull them together to make a home decor piece. Then about a week ago when I was at a local Michael’s picking up some stuff for my daughter’s birthday I saw that they had shadow boxes and frames on sale. So of course I grabbed a shadow box, black of course, for my other pieces.

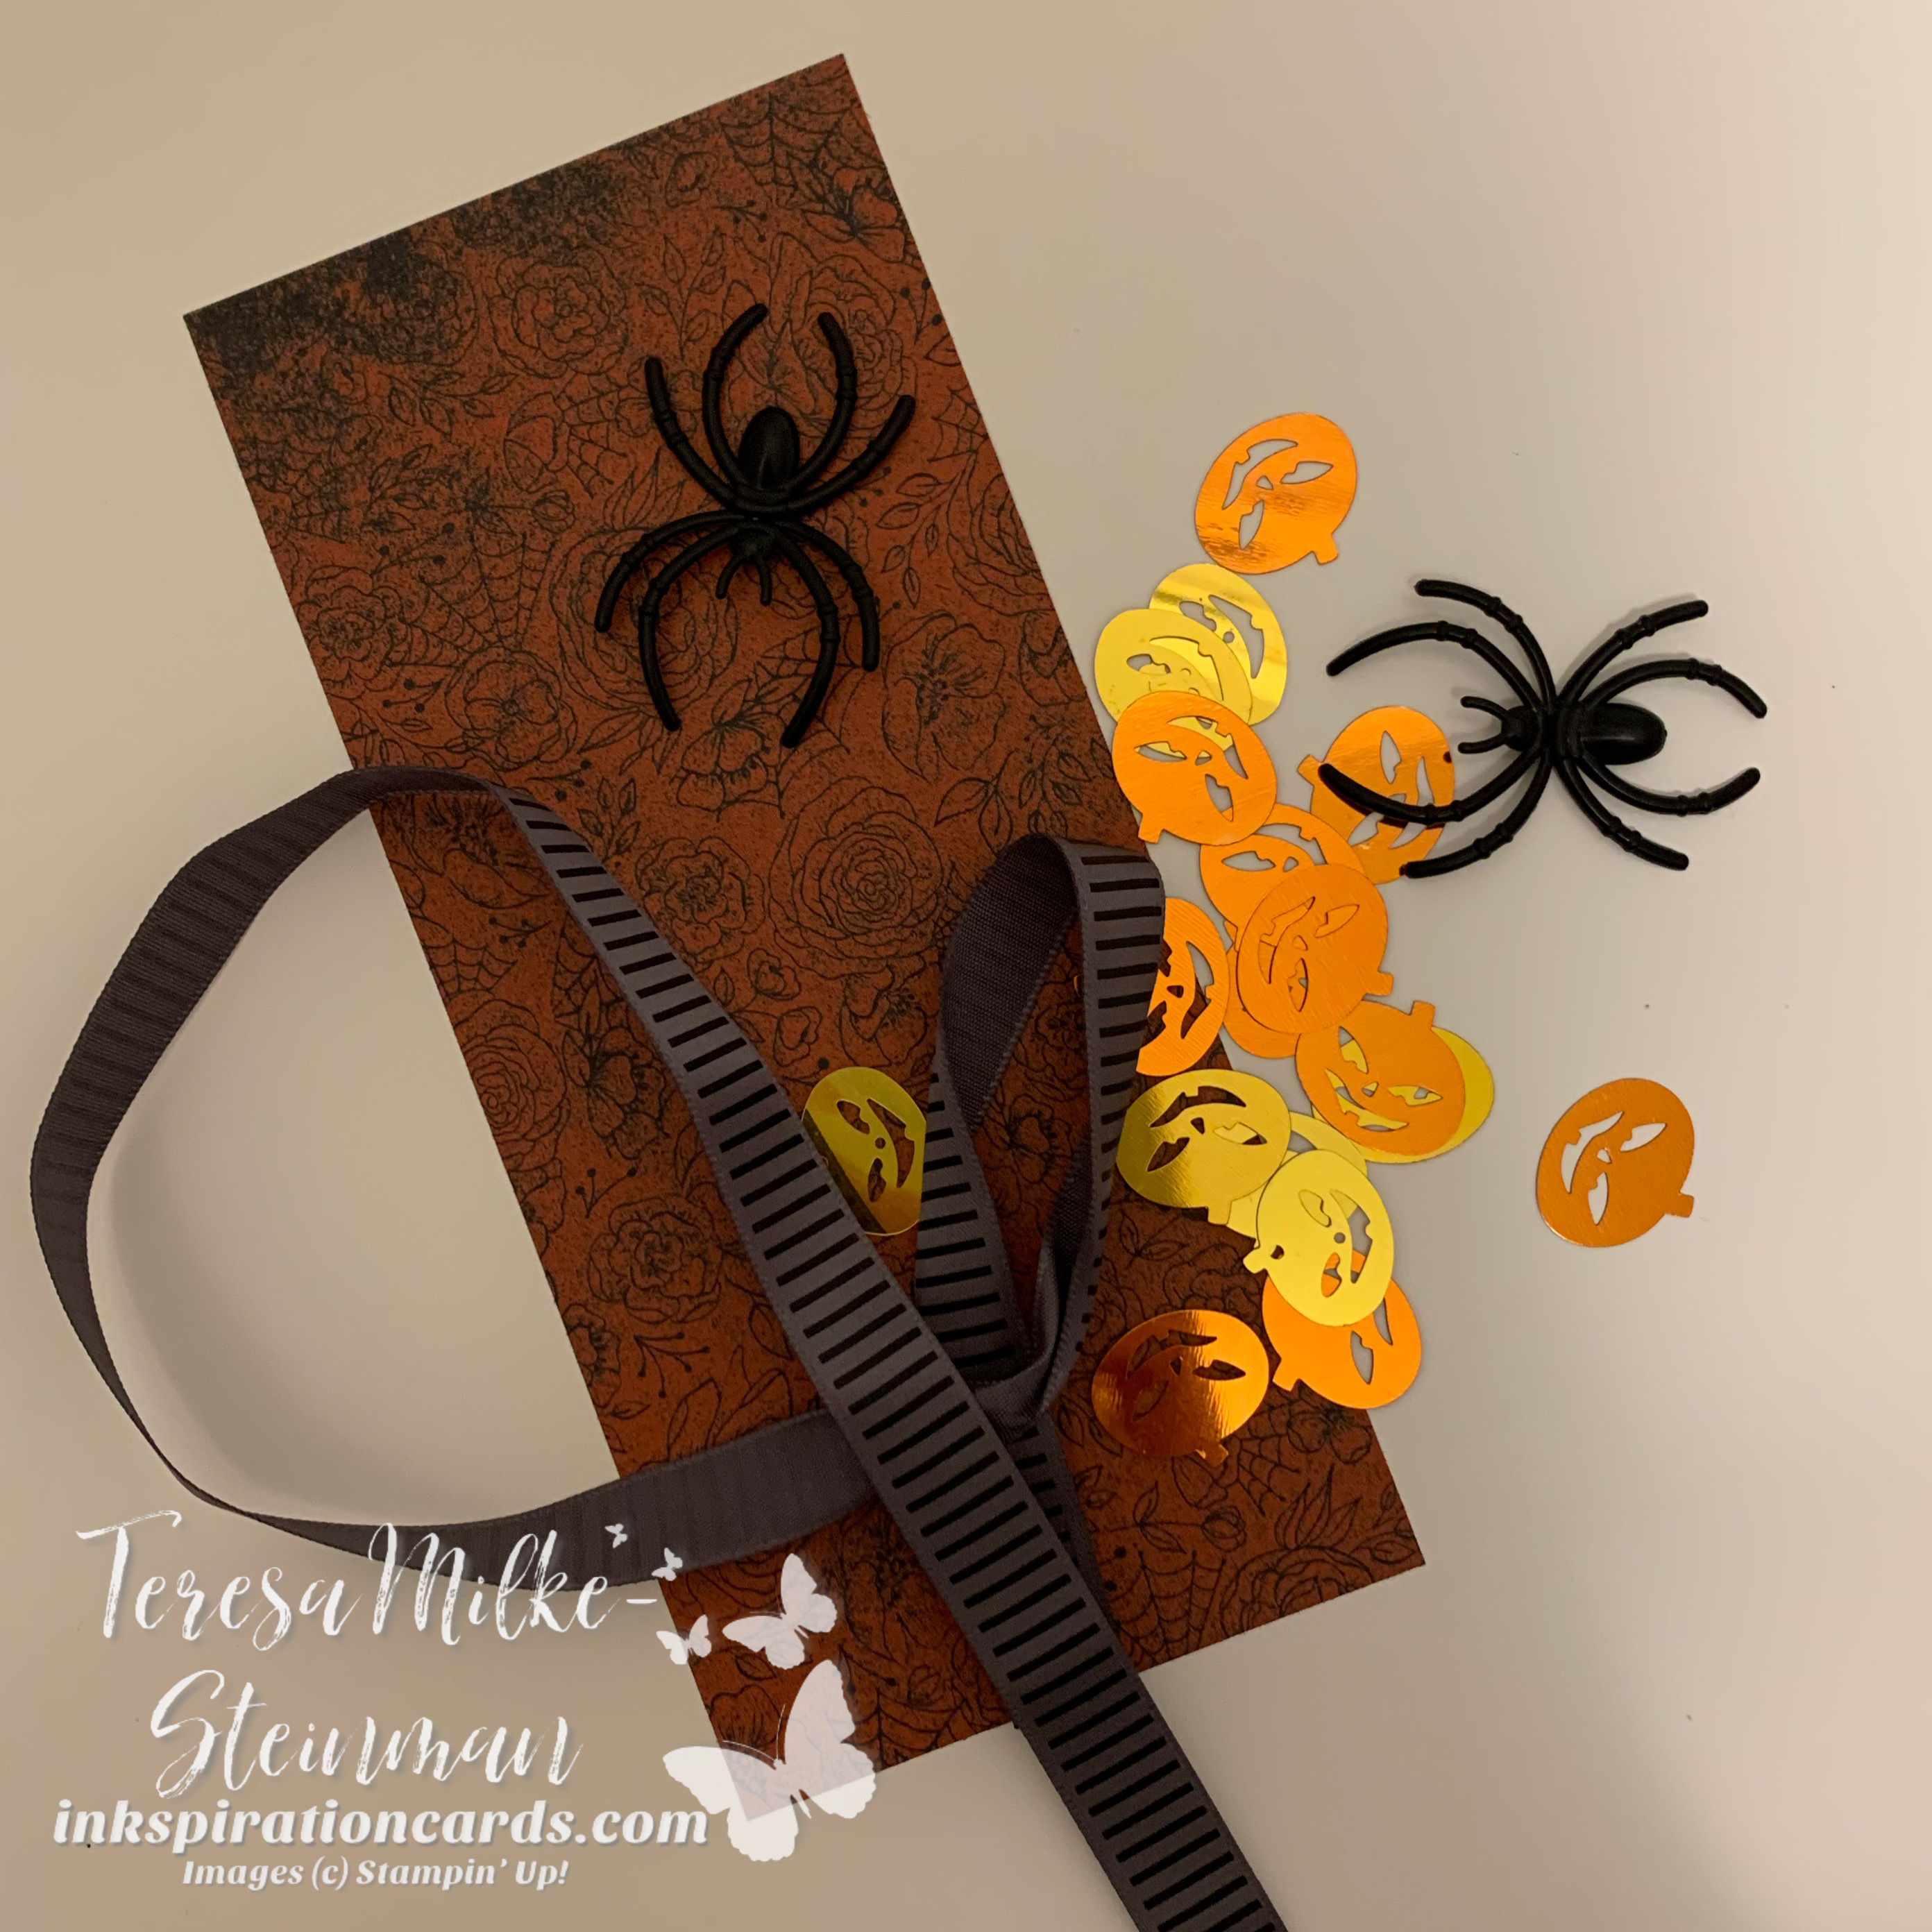
Here are some of the supplies I used…

Halloween Shadow Box

The Designer Series Paper I used came from the Magic in the Night pack, which is on sale until tomorrow. The spiders are ones that have usually ended up on our front porch with webs for decoration. The shiny pumpkins came from a local Dollarama and the ribbon was from a previous project.

Halloween Shadow Box

The other pieces came from project kit I got when I joined the Stampin’ Up! family. It came with a black tray, some other Halloween themed patterned paper and the ribbon I mentionned. The tray has recently been painted white because I decided I want to use it for something else. So I was left with the other pieces. I think the pieces I used worked really well together.

Halloween Shadow Box

I love how the Halloween shadow box turned out and I hope you do too. If you’re interested in how to make some easy Halloween themed treat boxes then you’ll definitely want to check out this post from a couple of weeks ago!

DIY Craft Storage

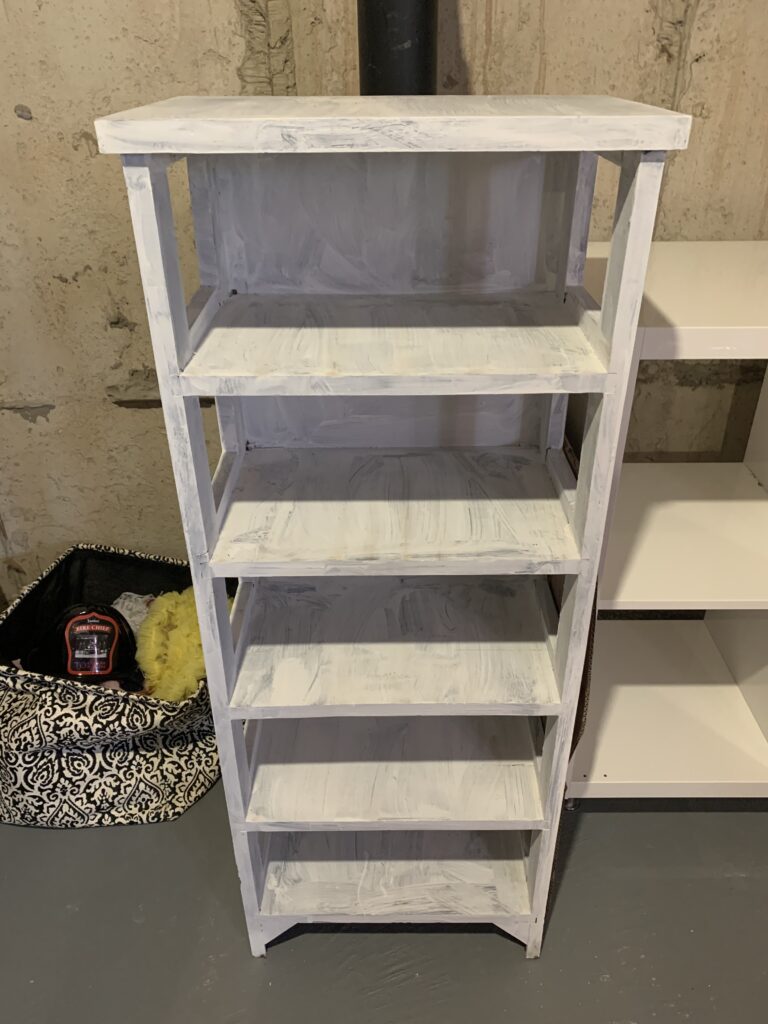
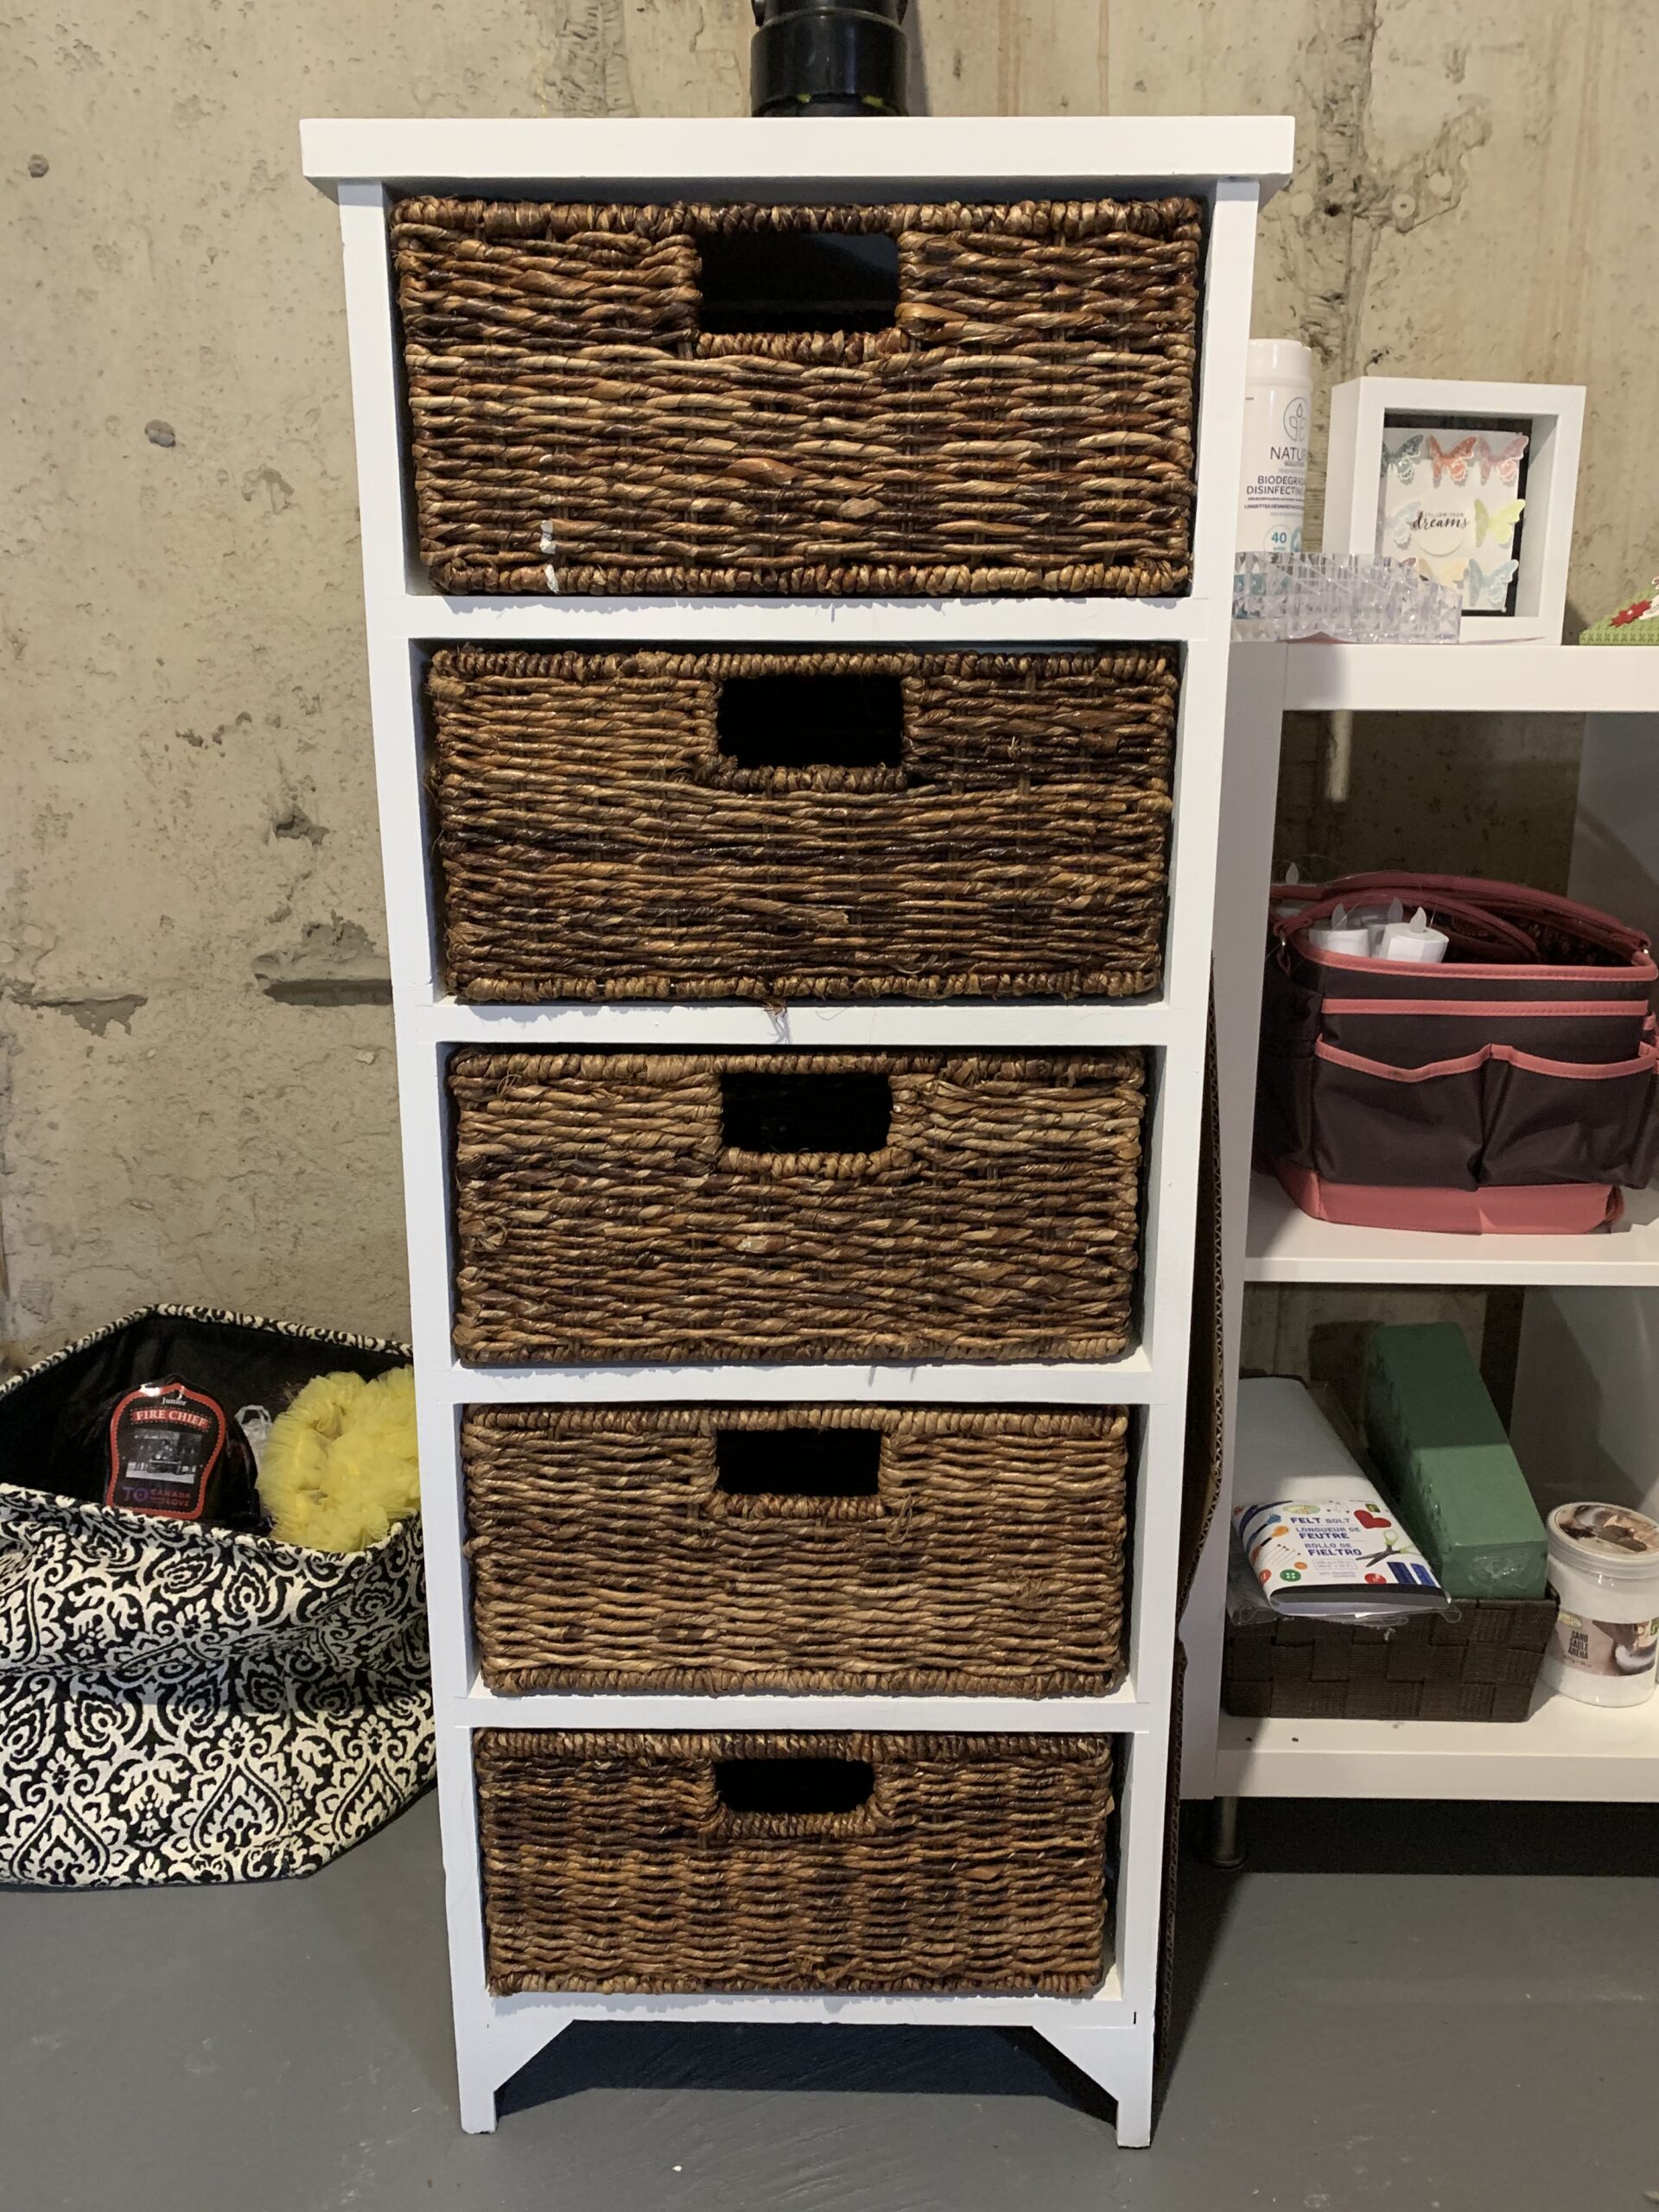
I found a shelving unit on a neighbour’s curb recently and decided to do a little DIY craft storage! I don’t know about you, but I never seem to have enough storage. As a crafter I always have a big stash of different supplies. I also do a lot of projects for my munchkins birthdays so there’s a real mix of stuff in our basement. So, as I’m pretty sure I’m not the only one, I thought I would share what I did with you all.

A couple of weeks ago when I was driving home a shelf unit on a neighbour’s curb. So once I dropped off my munchkins I circled back to take a closer look. I told myself if it was in good shape, and still there, I would grab it. And it was! The unit’s previous owners used it to hold jewelry and hair accessories… I found a few hairpins and an earring in a couple of the baskets. It also looked like they tried to paint it, but didn’t get very far. Here’s what it looked like when I found it…

DIY Craft Storage

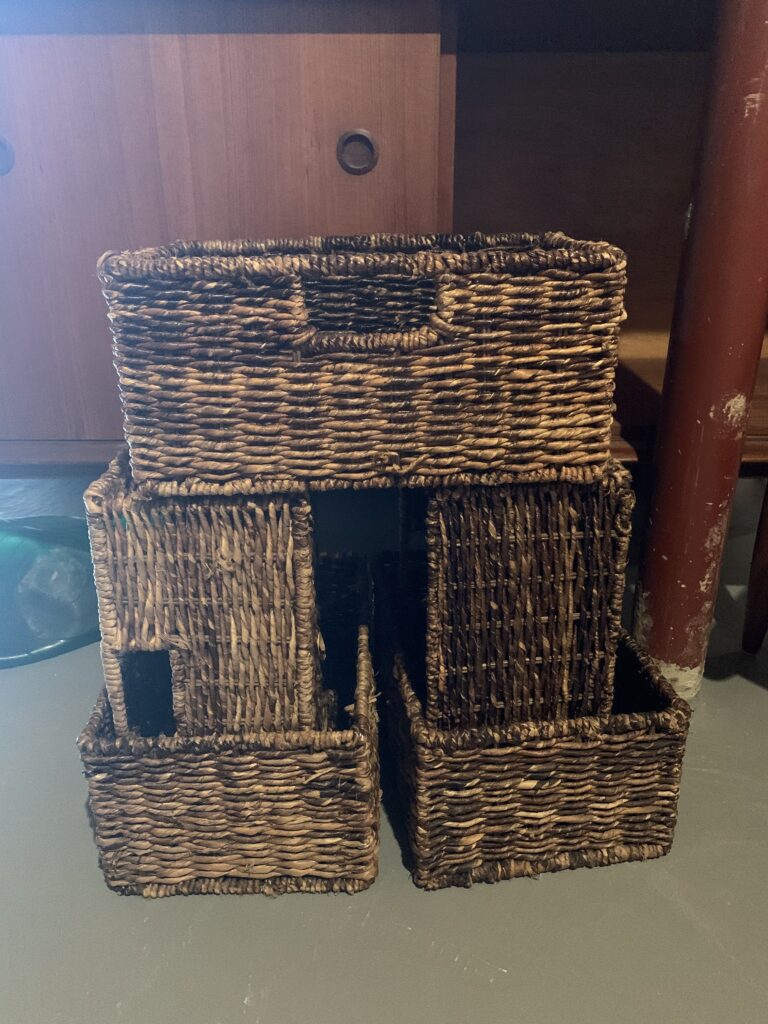
I’m not sure why they didn’t just give it a couple more coats of paint, but it worked out for me. Here are the baskets that it came with…

DIY Craft Storage

I love the natural look of the dark wicker baskets. Plus they’re a good size so they’ll work to hold just about any of my craft supplies.

First thing I did was spray down the baskets and wipe down the shelves. Then I put on a few more coats of white paint. This was super easy to do because my husband paints as his side-gig, so there’s always paint and rollers around.

Here’s the full finished unit…

DIY Craft Storage

I think it turned out nicely. Now all I have to do is fill the baskets, which will be no problem. The question is will this finally be enough storage. Fingers crossed!

If you like my DIY craft storage then check out the card display board I spruced up. I used a bit more than just paint on that one.