Wedding Cards with Abundant Beauty

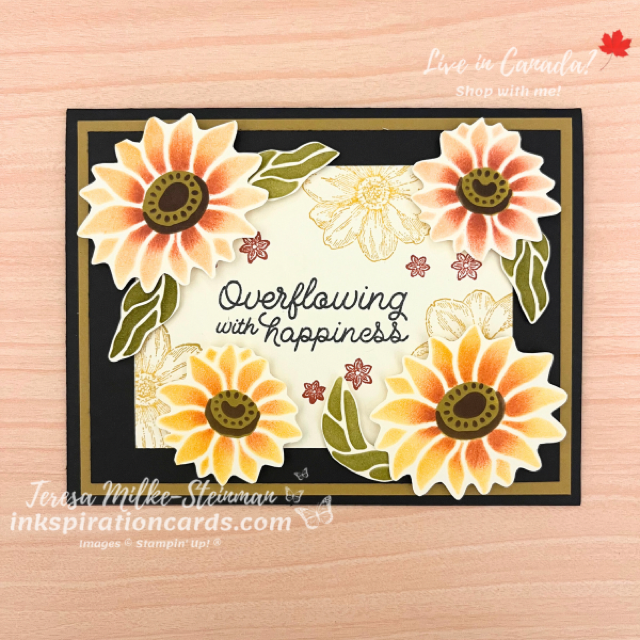
This weekend’s going to be a busy one for us! We’ve got two birthdays and a wedding to celebrate. I usually have a decent stash of birthday cards. But when it comes to weddings I try to get some inkspiration from the couple’s invitation. And as soon as I saw this one I’ve had a picture in my head of what I wanted to do! I knew I just had to make wedding cards with Abundant Beauty Decorative masks…. specifically the sunflower masks.

The invitation was full of flowers and deeper colours. So for the card base I’m using Basic Black, which was also one of the colours they used. On top of that I layered some Wild Wheat cardstock and another piece of Basic Black. The next layer is a stamped piece of Very Vanilla. I stamped the large flower from the Quiet Meadow stamp set with Crushed Curry. And a few smaller ones with Cajun Craze.

I also used these colours for my sunflowers. Starting with Crushed Curry and then adding a little Cajun Craze to the centre of my petals. Then I used Wild Wheat and Early Espresso for the centres. For the leaves I used Old Olive ink. I made a whole bunch because my mother-in-law asked if I could also make her a card to give to the couple. Thankfully it wasn’t too time consuming to fussy cut them all out!
Wedding Cards with Abundant Beauty

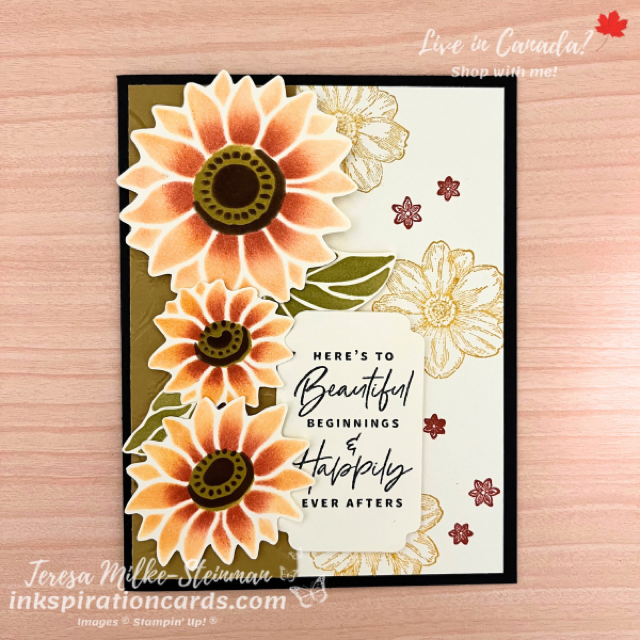
I switched it up a little bit for my mother-in-law’s card. The colours are the same, but I embossed a piece of Wild Wheat cardstock with the 3D Painted Texture embossing folder. I also used a sentiment from the Something Fancy stamp set which I die cut with one of the coordinating dies. The sunflowers on both cards are popped up with Stampin’ Dimensionals. But the sentiment on my card wasn’t.
Wedding Cards with Abundant Beauty

I just love how both of these wedding cards with Abundant Beauty turned out! These decorative masks will definitely be staying in my craft stash for a while after they retire.

Check out another card I made using the Abundant Beauty Decorative Masks here.

If you want to add these masks to your craft stash, don’t wait too long! These are on the list of retiring products and won’t be available after January 3rd… if they last that long. Find them and the other retiring products in my online shop.
Handmade Mother’s Day Card

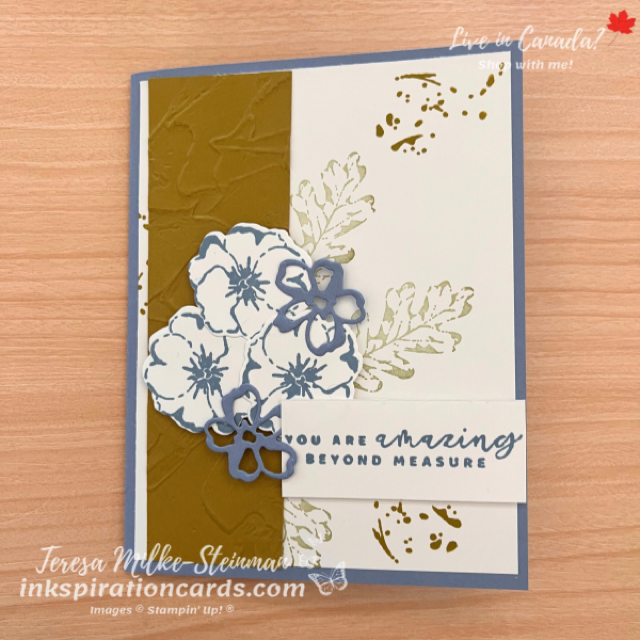
Somehow this year Mother’s Day snuck up on me. In the past I’ve made some fun fold cards for my mom. But this year it just didn’t quite work out. I still managed to craft a pretty handmade Mother’s Day card though.

For this year’s card I used the Season of Chic stamp set and dies. I’ve had my eye on this one for quite a while and I finally added it to my collection recently. The images are great and so versatile. And there’s a nice variety of sentiments too. Both things I LOVE in a stamp set!

For colours I used Boho Blue and Wild Wheat from the new 2023-2025 In Colours. I also added a splash of Old Olive for the leaves. The flowers and sentiment I stamped in Boho Blue. Then I cut out the flowers, along with a few extra, with the coordinating die cuts. And popped up the flowers and sentiment with Stampin’ Dimensionals. I used Wild Wheat for the splotchy image. And I also used a piece of Wild Wheat cardstock with the Painted Texture 3D Embossing Folder for a little something more.

Handmade Mother's Day Card

If you want to add a little something more to this handmade Mother’s Day card, you could add a few of the 2023-2025 In Colour Dots.

I can’t wait to craft some more seasonal projects with these! In the meantime you can check out one my previous Mother’s Day cards here. And you can take a look at the Season of Chic stamp set in my online shop here.

Green Handmade Card

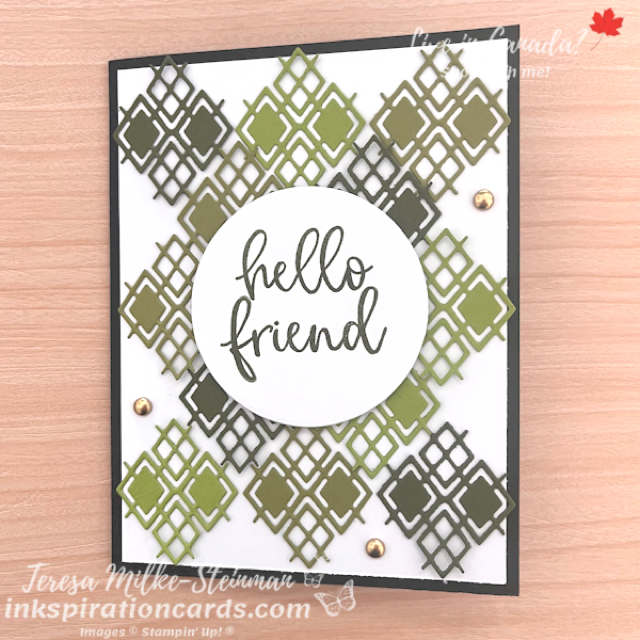
This Friday is St. Patrick’s Day! I don’t know about you, but I don’t do a lot of crafting for St. Patrick’s Day. Although I might enjoy a green beer. Instead I decided to make a simple green handmade card. Stampin’ Up! has SO many different greens to choose from. Fortunately, or unfortunately, I don’t have all of the different shades so I just looked at what I had and chose three.

I chose Granny Apple Green, Old Olive and Mossy Meadow for my card. The inspiration for this card came from a design I saw on Facebook that reminded me of an Argyle sweater. And the All That dies has a great die to create that same pattern. I haven’t used this die very often so I’m glad I had this idea. Once I had a whole bunch in each colour I stuck them on a piece of Basic White cardstock using Mini Glue Dots.

The card base is Basic Black to really show off the different shades of green. On top of my argyle background I stamped a simple sentiment using the Biggest Wish stamp set. Then I cut it out with one of the Layering Circles dies and popped it up with some Stampin’ Dimensionals. To finish it off I added a few of the Brushed Metallic Adhesive-Backed Dots.

Green Handmade Card

This green handmade card was fun to make! Check out my Facebook live here, which is where I first shared this card. You can also check out one of the other cards I made using the He’s All That bundle here. I love this bundle and hope it carries over to the upcoming new Annual Catalogue!

If you do like to do St. Patrick’s Day crafting then you should definitely check out the Lucky Clover stamp set! This is such a cute stamp set, but I have a feeling it’ll be retiring once the Mini Catalogue is finished.

Colouring with Happiness Abounds

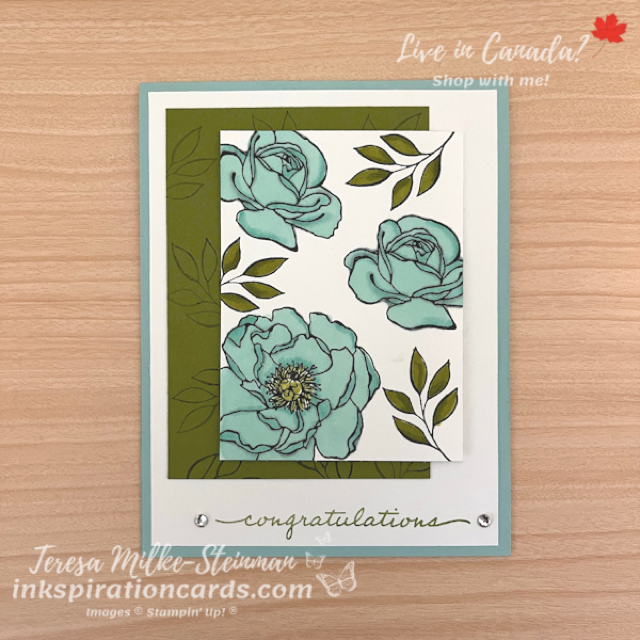
I crafted this card live on my Facebook page last night. Check out the replay here. I’ve been dying to do some colouring with Happiness Abounds! This stamp set from the new Annual catalogue is a great one. The images are perfect for colouring and the phrases are so versatile.

For this card I used Stampin’ Blends to colour. At some point I’ll use the Watercolour Pencils, but I love the depth of colour you get from these alcohol-based markers. For my colour combination I went with Pool Party and Old Olive. They really compliment each other. To start I stamped a phrase and some leaves using Old Olive ink. Then for the images I’m colouring I stamped them in Tuxedo Black Memento ink. Once that was dry I could get to colouring.

When I colour with Stampin’ Blends I tend to start with the light version. Then I add the dark where I want the depth and shadows. And to finish it off I do another layer of the light Stampin’ Blends. Some people start and finish with the dark version which also looks great. It just gives a different look.

Once the coloured images dried I popped them up with a few Stampin’ Dimensionals. And of course I needed to add some bling… so I added two Rhinestone Basic Jewels on either side of the “congratulations”. Here it is…

Colouring with Happiness Abounds

If you want to add a little something more to this card you can always use the Stitched Rectangles dies. It’s an easy way to cut your cardstock and add another level to your design.

I can’t wait to do some more crafting and colouring with Happiness Abounds! Check out the recent card I crafted using the coordinating Designer Series Paper here.