Heartfelt Hellos

After Christmas this is the most wonderful time of year! At least for crafters anyway… because it’s Sale-a-bration time. This is Stampin’ Up!s biggest promotion of the year. It’s such a great time to stock up on crafting essentials like cardstock and adhesive because it leads to FREE crafting supplies like the Heartfelt Hellos stamp set.

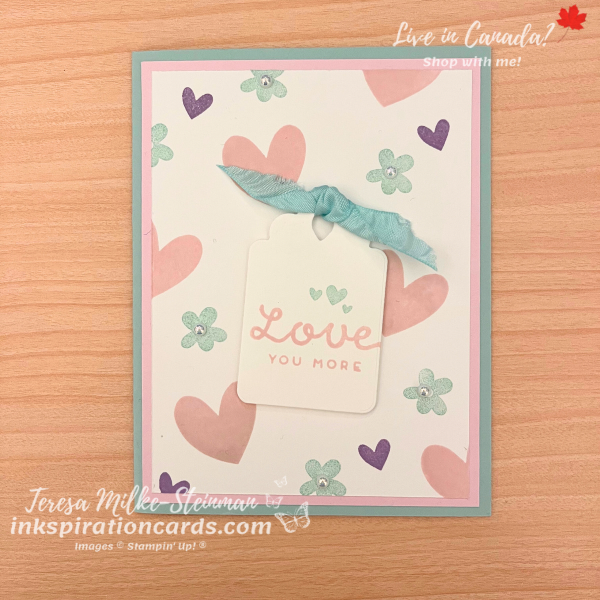
This stamp set is full of great sentiment, so I decided to pair it with the Bee My Valentine stamp set to make a cute Valentine’s day card. But the only traditional Valentine’s day colour I used on this card is pink. Well Bubble Bath actually. For this design I made my own background full of different images. I stamped the larger hearts in Bubble Bath ink. Then I stamped some flowers with Pool Party ink. And to fill in some of the gaps I stamped some little hearts in Highland Heather ink.

I used Pool Party for my card base so that I could also use the Pool Party ribbon that’s also part of Sale-a-bration. The sentiment from the Heartfelt Hellos stamp set is in Bubble Bath. And I added a few more little hearts in Pool Party. Next I die cut it with one of the Something Fancy dies to create a cute tag. Then I popped it up with some Stampin’ Dimensionals. And to finish it off I added some Iridescent Pearl Basic Jewels to the centres of the flowers. What girl doesn’t like a little sparkle for Valentine’s Day?! lol
Heartfelt Hellos

Other than the die cut tag, this is a nice simple Valentine’s Day card. And as much fun as I’ve been having with the bumblebee from the Bee My Valentine stamp set, it was nice to use a few of the other images.

Check out another card I made with the Bee Mine suite here.

I’ll be sharing all there is to know about Sale-a-bration in my next post so stay tuned! Or if you can’t wait until then, head over to my online shop.

Product List
Wedding Cards with Abundant Beauty

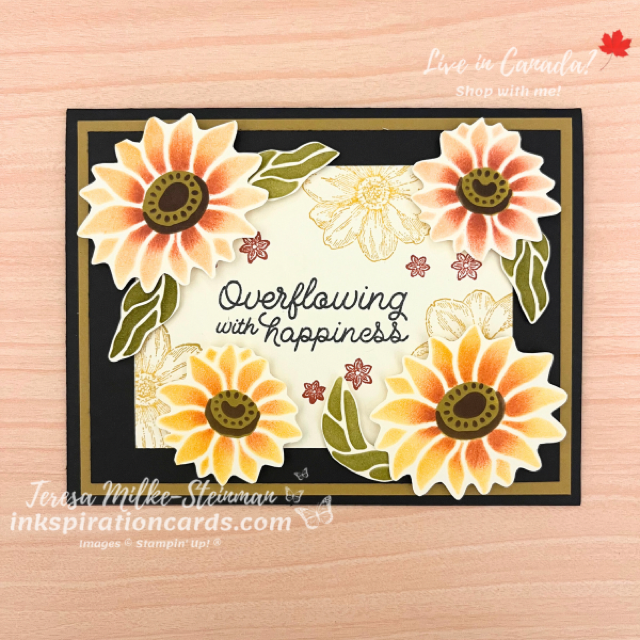
This weekend’s going to be a busy one for us! We’ve got two birthdays and a wedding to celebrate. I usually have a decent stash of birthday cards. But when it comes to weddings I try to get some inkspiration from the couple’s invitation. And as soon as I saw this one I’ve had a picture in my head of what I wanted to do! I knew I just had to make wedding cards with Abundant Beauty Decorative masks…. specifically the sunflower masks.

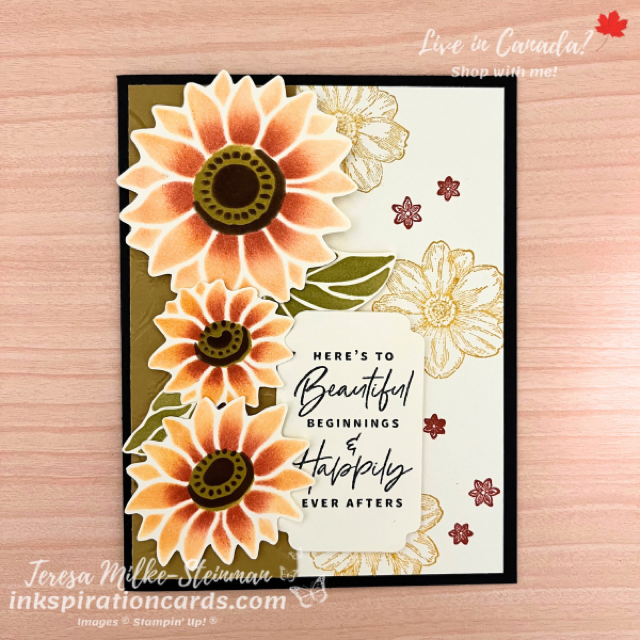
The invitation was full of flowers and deeper colours. So for the card base I’m using Basic Black, which was also one of the colours they used. On top of that I layered some Wild Wheat cardstock and another piece of Basic Black. The next layer is a stamped piece of Very Vanilla. I stamped the large flower from the Quiet Meadow stamp set with Crushed Curry. And a few smaller ones with Cajun Craze.

I also used these colours for my sunflowers. Starting with Crushed Curry and then adding a little Cajun Craze to the centre of my petals. Then I used Wild Wheat and Early Espresso for the centres. For the leaves I used Old Olive ink. I made a whole bunch because my mother-in-law asked if I could also make her a card to give to the couple. Thankfully it wasn’t too time consuming to fussy cut them all out!

Wedding Cards with Abundant Beauty

I switched it up a little bit for my mother-in-law’s card. The colours are the same, but I embossed a piece of Wild Wheat cardstock with the 3D Painted Texture embossing folder. I also used a sentiment from the Something Fancy stamp set which I die cut with one of the coordinating dies. The sunflowers on both cards are popped up with Stampin’ Dimensionals. But the sentiment on my card wasn’t.

Wedding Cards with Abundant Beauty

I just love how both of these wedding cards with Abundant Beauty turned out! These decorative masks will definitely be staying in my craft stash for a while after they retire.

Check out another card I made using the Abundant Beauty Decorative Masks here.

If you want to add these masks to your craft stash, don’t wait too long! These are on the list of retiring products and won’t be available after January 3rd… if they last that long. Find them and the other retiring products in my online shop.

Faux Quilting Technique

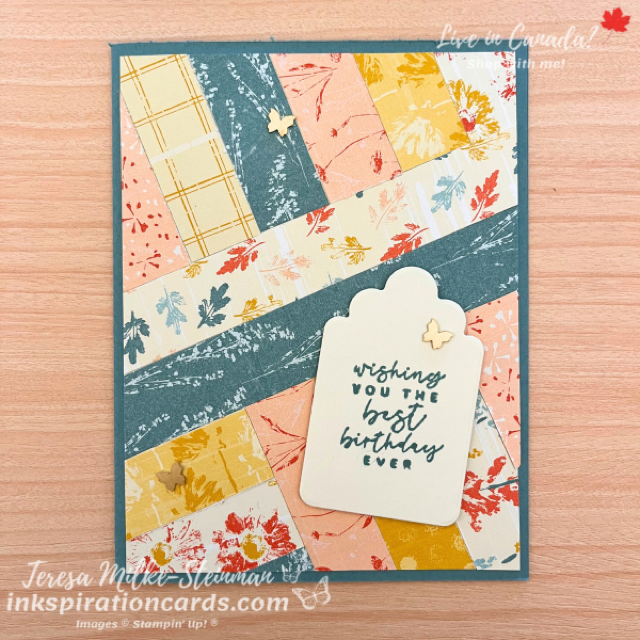
I love finding different ways to use my patterned paper! So when I saw the Faux Quilting technique I was excited to give it a try. It’s really easy and it’s a great way to use a lot of the different designs. I’m loving the Inked Botanicals Designer Series Paper, so that’s what I’m using for my design. And for the card base I’m using Lost Lagoon.

To create the quilting effect I cut a bunch of 3/4″ strips and adhered them to a piece of Basic White cardstock in batches. I started with the two strips across the middle. Then I laid out the strips across the top. Next I trimmed the edges and then used those strips to cover the bottom. First on the right hand side in one direction and then on the left hand side going another direction.

On top of that I added a sentiment from the Season of Chic stamp set. I die cut it with one of the Something Fancy dies and popped it up with some Stampin’ Dimensionals. Then to finish it off I added a few Brushed Brass Butterflies.

Faux Quilting Technique

I love how simple the Faux Quilting technique is! And I love how pretty it looks! This design will look great with just about any patterned paper. And it’s a great way to use up those scraps of patterned paper that we all have.

Find the Inked Botanicals pack of Designer Series Paper, along with many more, in my online shop. And check out this birthday card I made using the Inked Botanicals DSP here.

Enchanted Butterfly Slimline Card

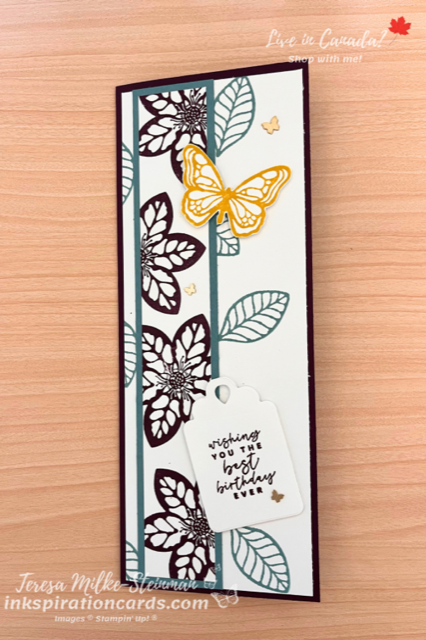
I haven’t made one of these cards in a while. And something about this stamp set told me I needed to make an Enchanted Butterfly slimline card. I’m just getting started with this new stamp set from the Annual Catalogue and can’t wait to see what I else I end up crafting! This set will definitely be used to make some thank you tags for my customers. In the meantime though this card was a lot of fun to make.

I decided to use Blackberry Bliss and Lost Lagoon for my colour combination. Since the return of Lost Lagoon I’m finding I’m using it ALOT! Plus it’s a nice compliment to the darker Blackberry Bliss. I used Blackberry Bliss for the card base and then added a strip of Lost Lagoon cardstock to frame the large Blackberry Bliss flowers.

Behind the flowers I have some Lost Lagoon leaves. Then on top of that I stamped a sentiment from the Season of Chic stamp set. I used one of the Something Fancy dies to cut out the sentiment and then popped it up with some Stampin’ Dimensionals. I had to add a butterfly of course! And this one is stamped with Crushed Curry. I kind of wish that there were coordinating dies for this stamp set, but the images aren’t too bad to fussy cut. The butterfly is popped up too. And to finish it off I added a few Brushed Brass Butterflies.

Enchanted Butterfly Slimline Card

This stamp set has a few larger images in it. So an Enchanted Butterfly slimline card, works out great!

Check out the card I shared earlier this week using the same stamp set here.

And you can find the Enchanted Butterfly stamp set in my online shop.

Window Easel Card

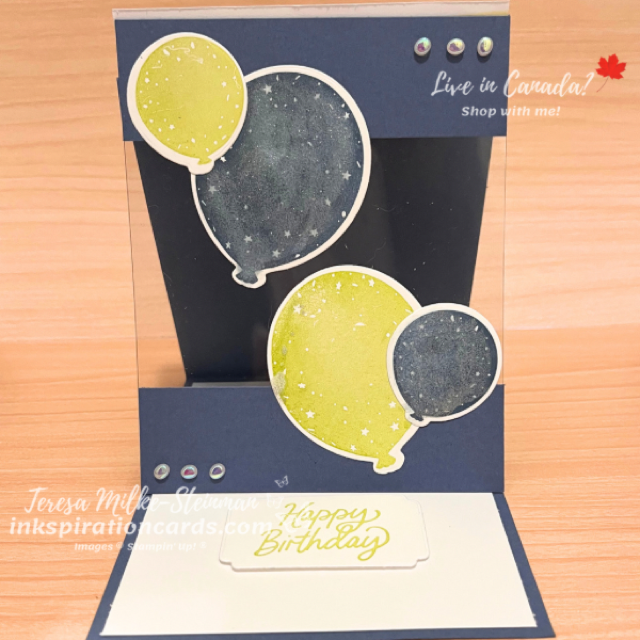
I thought of a fun fold card to make once I started crafting with the new Beautiful Balloons bundle. I’m not sure exactly what it’s called, but I’m calling it a Window Easel card. It is an easel card. But I wanted to add a piece of window sheet to make it look like the balloons are floating. Hence window easel card. If it goes by another name, I’d love to know.

For my colour combination I’m using Misty Moonlight and Lemon Lime Twist. I’m so glad that Stampin’ Up! brought Misty Moonlight back! This was a favourite colour of mine back when it was an In Colour. I paired it with Lemon Lime Twist. Two nice bright colours that would help each other pop.

The sentiment inside the card comes from the Beautiful Balloons stamp set. But I cut it out with one of the Something Fancy dies. And of course to make sure the card would stand up like an easel I used a couple Stampin’ Dimensionals.

To add a little something else to the outside I added some of the Bright & Beautiful Designer Series Paper. The window panel hides on the inside of the card for a nice surprise. Plus the DSP hides some of the back of the panel that sticks out a little bit.

Window Easel Card

To finish off this Window Easel card I added a little bit of bling. Some Wink of Stella Glitterbrush to the balloons and a few of the Flat Adhesive-Backed Pearls.

Window Easel Card

Check out another card I made with the Beautiful Balloons bundle here. And to see ALL the great new products from the new Annual Catalogue, check out my online shop! You can also request your very own copy of the catalogue if you live in Canada and contact me. I’m happy to mail it out to you!

Goodbye Polished Pink

For the past few weeks I’ve been featuring the 2021-2023 In Colours to get ready for this. This list of retiring products is now officially out! And that means it’s officially time to say goodbye Polished Pink. I’ll talk more about the list next week, so stay tuned. And over the next couple of weeks I’ll be featuring some of the retiring products in my projects. But if there’s something you really want, don’t wait! Things are selling out already!

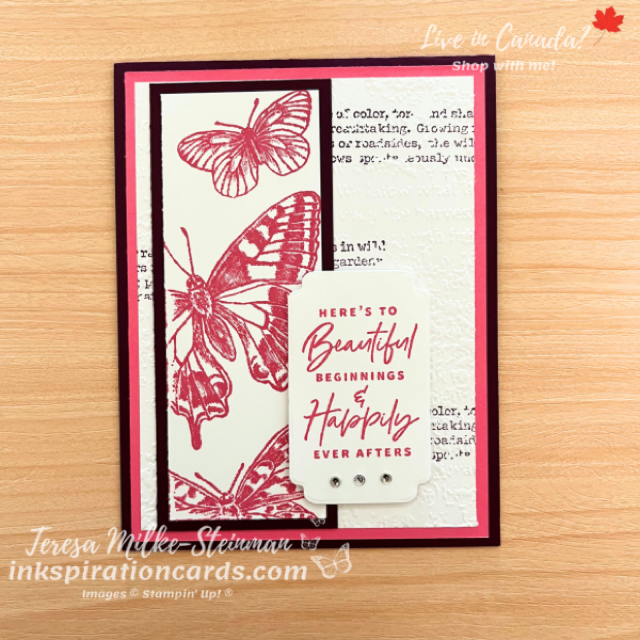
For this card my main colour is Polished Pink, of course. And I’m pairing it with one of my favourite colours Blackberry Bliss. This is a bit of an unlikely colour combination but it works. Polished Pink is definitely a colour that’s had me scratching my head at times to figure out what to pair it with. And now that I’m getting the hang of it, it’s retiring. Grr!

The images I’m using for this card are also retiring. I’m really sad that Butterfly Brilliance is retiring (dies too), but I’ll be holding on to this one. I stamped the butterflies in Polished Pink and the sentiment too, which is from Something Fancy. To keep Polished Pink as the focus I used Blackberry Bliss mainly as a background colour. Including the typed text from Quiet Meadow.

To add a little something more to the card I also embossed the piece of cardstock with the stamped text using the Timeworn Type 3D embossing folder. Then on top of that, and the butterflies, I used one of the Something Fancy dies to frame the sentiment. To finish it off I popped up the sentiment and added a few Rhinestone Basic Jewels for a little bling.

Goodbye Polished Pink

While I’m sad that it’s time to say goodbye Polished Pink… and Butterfly Brilliance, I’m excited for the new catalogue. And I can’t wait for my pre-order to arrive so I can start sharing some new projects with you!

Check out a couple more retiring colours here. I can’t believe that Pear Pizzazz is retiring too! This summer is going to be a busy one with purging and reorganizing my craft stash!

For the latest on what is still in stock from the retiring list, check out my online shop. I’ve never seen things sell out this quickly before so don’t wait!!

Online Exclusives

Stampin’ Up! is offering something sort of new. They’ve done this once or twice before, but now they’re making it a regular things… online exclusives! So these are products you’ll only be able to find online. No use looking in any of the catalogues! And right now there are a bunch of online exclusive products. One of my favourites is the Hello Irresistible Designer Series Paper!

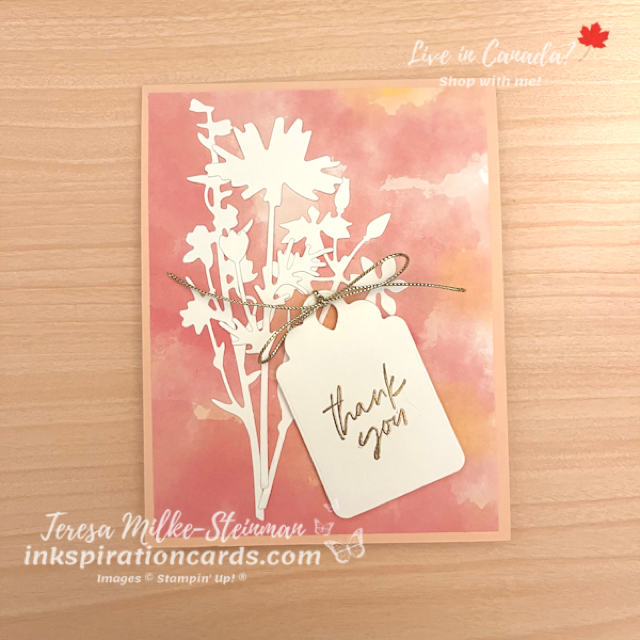
There are some great colours and designs in this pack of patterned paper. And so I wanted to have this be the focus of my card. I’m using Petal Pink as my card base since it’s one of the colours in this more pink design.

On top of this pretty paper I added some Basic White die cut pieces using the Meadows dies. The “thank you” is from the Something Fancy stamp set. I heat embossed it with gold. And then cut it out with one of the coordinating dies. Next I popped up my tag and added some of the gold trim from the Simply Elegant Trim pack.

Online Exclusives

I just love the colours and designs of the Hello Irresistible DSP!

Be sure to check out all the online exclusives in my online shop. There isn’t a timeline for how long these will be available and not all of these will be restocked. So don’t wait long if you see something you love!

And if you have any questions don’t hesitate to contact me!

Decorative Borders

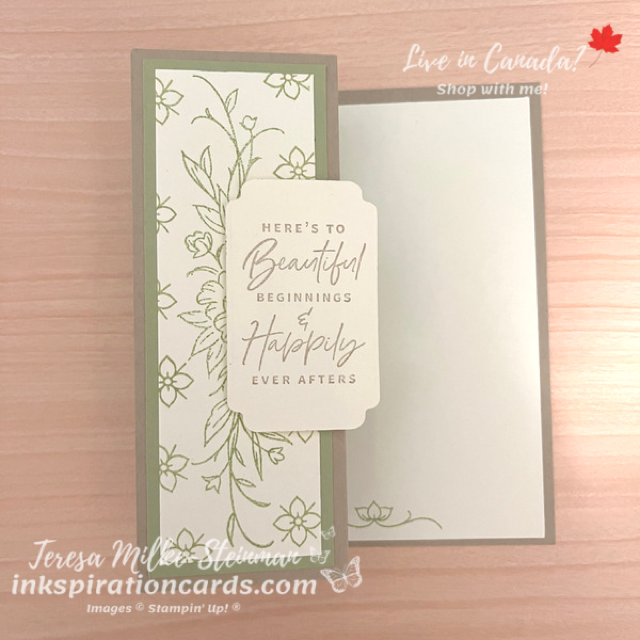
I got the Decorative Borders stamp set back in November at OnStage. That’s when I was knee deep in my holiday crafting and not too long after that we were off to Disney. So I haven’t really had a chance to craft with it yet. Finally I’m digging it out!

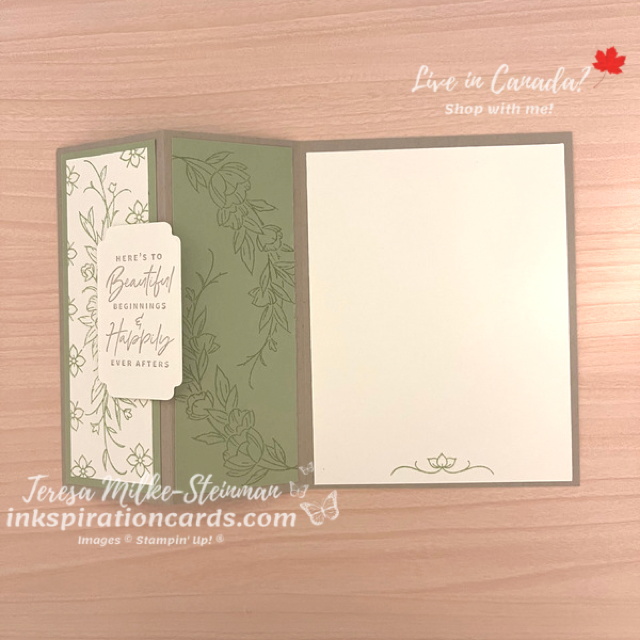
For this card I decided to make a Z-fold card. This is one of my favourite fun folds. And for my colour combination I’m using Pear Pizzazz and Crumb Cake. Pear Pizzazz is probably my favourite colour for leaves and other greenery. And with Spring coming I have a feeling I’ll be using it alot!

To start, I stamped a little something on the inside piece of Very Vanilla cardstock. Then I stamped a wall of foliage for the outer panel using Pear Pizzazz. I also did some tone on tone stamping for the middle panel.

The sentiment comes from the Something Fancy stamp set. I stamped it with Crumb Cake ink and cut it out with one of the coordinating dies. Then I popped it up some some Stampin’ Dimensionals.

A few more ideas popped in my head as I was making this card. So I’m looking forward to crafting some more with the Decorative Borders stamp set.

Check out another card I made with this stamp set here. Sadly the other stamp set I used, Adorable Owls, is no longer available. But you can really swap in any stamp set from your craft stash.

Need some supplies? Head over to my online shop and grab the Decorative Borders stamp set… along with whatever else you need!

Favored Flowers

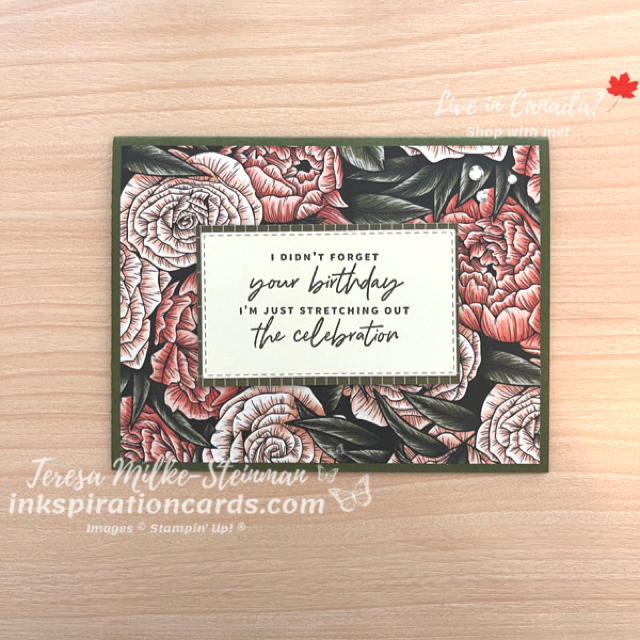
At first when I saw the Favored Flowers Designer Series Paper in the Sale-a-bration catalogue I was not a big fan. I love flowers, but I wondered if the patterns were a bit much for me. But I’ve been seeing some card designs lately that are helping change my mind. So I pulled out my pack and I think the designs look much better in real life. This pack of patterned paper uses some of my favourite colours and some of the blooms are easy enough for fussy cutting. I’m not fussy cutting for this card, but I did want to show off some of this pretty paper.

This card is a nice simple one because I really want the DSP to be the focus. I started with deciding which design I wanted to use for this card. This one has Petal Pink and Calypso Coral in it for the flowers. And Mossy Meadow and Evening Evergreen for the leaves. I used Mossy Meadow for my card base because it’s a nice neutral colour and not too dark. Plus it really helps the colours from the blooms to stand out.

Next I stamped a phrase from the Something Fancy stamp set using Mossy Meadow ink. I cut it out using one of the Stitched Rectangles dies. And then I framed it with the flip side of the same sheet of patterned paper. Finally I popped it all up with a few Stampin’ Dimensionals and added a few Rhinestone Basic Jewels for a bit of bling.

Favored Flowers

I’m so glad I opened the Favored Flowers pack of Designer Series Paper! It really is pretty!

There’s lots of great patterned paper that you can earn for free during Sale-a-bration. Check out this card that I made using the Dainty Flowers DSP here. And you can see all the great free Sale-a-bration products over in my online shop! Don’t wait too long though! Sale-a-bration is only here until the end of February and things could sell out before then.