Season of Chic

I love the versatility of the Season of Chic stamps and dies! I’ve only been crafting with these for a little bit. And so I feel like I’m only starting to scratch the surface of what I can do with them. So far I’ve mostly been using the stamps. This time I want the dies to be more of a focus.

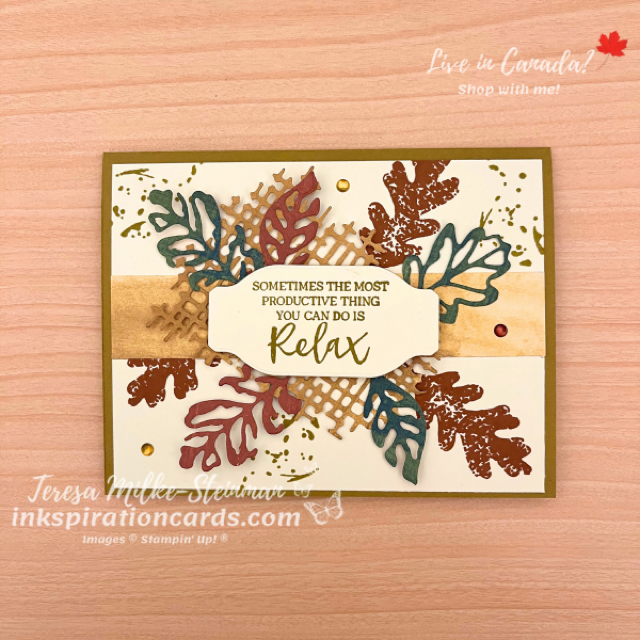
The newest In Colours are great fall like colours. And so I used those as the inkspiration for my colour combination. I used Wild Wheat for the card base. But decided not to have a card mat. Instead I used a piece of Basic White that I stamped with some leaves using Copper Clay ink and splatter with Wild Wheat ink.

On top of that I added a strip of Designer Series Paper from the Fresh as a Daisy pack. This pack uses a lot of the 2023-2025 In Colours. I really wanted to add lots of layers for this card, so on top of that I added the mesh die cut using Wild Wheat cardstock. Then on top of that I added some more leaves using a couple other designs from the same pack of patterned paper. One design is Copper Clay and the other is Garden Green.

While I love the sentiments in the Season of Chic stamp set, I wanted something different for this card. Fall is all about letting go, slowing down and getting ready for winter. So this sentiment from the In the Moment stamp set is perfect. I stamped it with Wild Wheat ink. Then I die cut it with one of the Something Fancy dies and popped it up with a few Stampin’ Dimensionals. To finish it off I added a few of the 2023-2025 In Colour Dots.
Season of Chic

If you’re looking for a stamp set that will cover most of your stamping needs, I highly encourage you to check out the Season of Chic stamp set!

Check out another card I crafted using the Season of Chic stamp set here.

And if you want to see all the images and dies that come with this set, check out my online shop.
Fall Watercolour

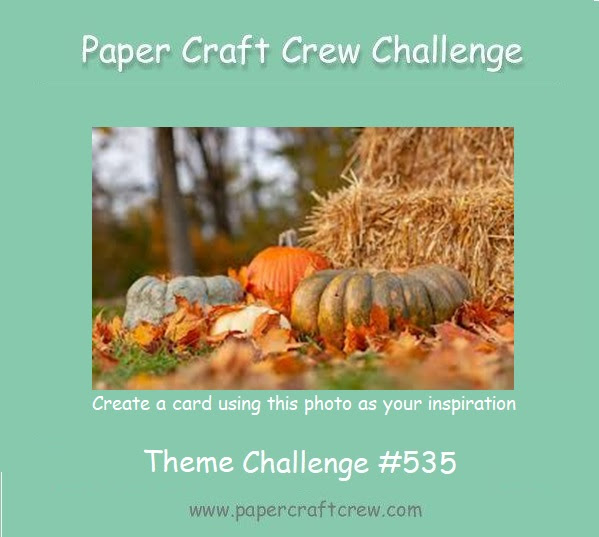
This week’s challenge from the Paper Craft Crew is a theme challenge (PCC 535). And it’s all about Fall. I can’t believe the first day of Fall is this Saturday already! Where has this year gone?! Anyway… the design for my card started with the idea of a Fall watercolour. Here’s the picture that sparked the inkspiration for my design…

Fall Watercolouring

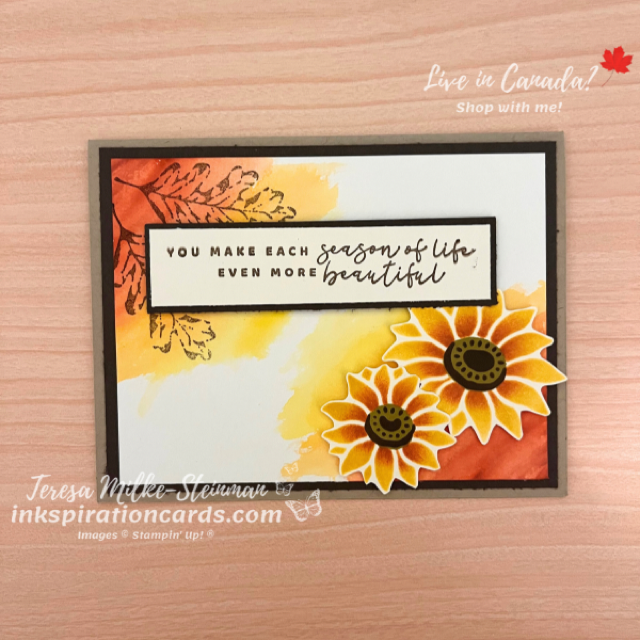
Now some people might go for a pumpkin theme. But I decided to go a different route. I used Crushed Curry, Pumpkin Pie and Cajun Craze to create my watercolour background. Then once that was dry I stamped a couple of leaves from the Season of Chic stamp set in Early Espresso. The sentiment is also from Season of Chic and I framed that with some Early Espresso cardstock and popped it up with some Stampin’ Dimensionals.

In the bottom right hand corner I added a couple of sunflowers. These sunflowers I created using the Abundant Beauty Decorative Masks and my Blending Brushes. I started with Crushed Curry and then added a little Cajun Craze to the petals. Then for the centre, I started with Wild Wheat and added Early Espresso. These were pretty easy to fussy cut and then I popped them up too.

Fall Watercolouring

I quite like my Fall watercolour background. And I just love the Abundant Beauty Decorative Masks! It’s so much fun crafting with these.

Check out all the other designs for this week’s theme challenge from the Paper Craft Crew here.

And you can check out another fall themed card I made using one of the other Abundant Beauty Decorative Masks here.

Abundant Beauty Decorative Masks

The new Abundant Beauty decorative masks were one of the first things that caught my eye in the new mini catalogue! I don’t use decorative masks often, but I’m hoping the designs in this pack will change that.

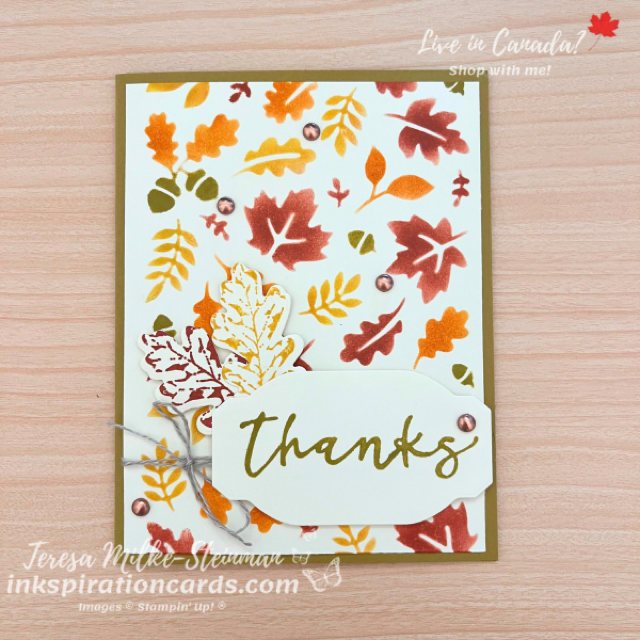
For this card design I’m using one of the fall designs and some Sponge Daubers. You can use Blending Brushes with decorative masks too, but when the images are small like these ones I prefer to use daubers. I used Crushed Curry, Cajun Craze, Pumpkin Pie and Wild Wheat inks to create this colourful piece of cardstock.

The card base is Wild Wheat and I wrapped some Linen Thread around the sponged cardstock. On top of that I layered some leaves and a sentiment from the Season of Chic stamp set. I stamped the leaves with Crushed Curry and Cajun Craze ink and used the coordinating dies to cut them out. But for the sentiment I used Wild Wheat ink and one of the Something Fancy dies. Then I popped these all up with some Stampin’ Dimensionals. And to finish it off I added a few of the Brushed Metallic Dots.

Abundant Beauty Decorative Masks

I love the Abundant Beauty decorative masks! And I can’t wait to use the sunflower and snowflake masks.

The new mini catalogue launches this Wednesday September 6th! If you live in Canada and want your very own copy, contact me. I’d be happy to mail one out to you… along with a few goodies!

In the meantime, check out some more Fall crafting I did with some of the new mini catalogue products here. Or check out what’s available now in my online shop.

Happy crafting!

Colouring with Circle Sayings

With all the hustle of working mom life I don’t colour as often as I’d like to. It’s definitely been way too long since I did some colouring for a project. And one of the reasons I love the Circle Sayings bundle is because the images are great for colouring. So this week I decided to finally get around to some colouring with Circle Sayings. And since it’s still July I’m going with a summer themed card.

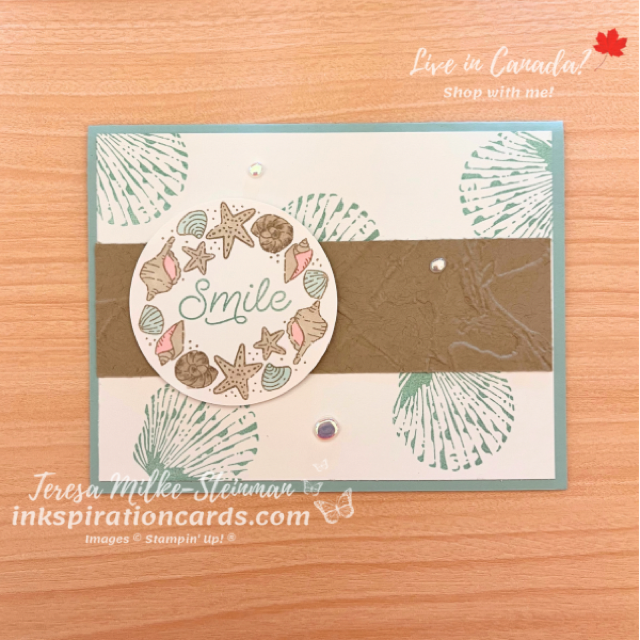
So that’s where I started with my design. With the seashell image as my jumping off point, I went with Pool Party and Crumb Cake as my colour combination. I just love these colours for a summer/beach themed card. So I have Pool Party for my card base and then I added a strip of Crumb Cake across the centre. But not before I embossed it with the 3D Painted Texture embossing folder.

Behind the strip of embossed Crumb Cake cardstock are a few seashells. These ones are from the Season of Chic stamp set. Then on top of these layers I have my little seashells from Circle Sayings. I stamped it twice with Crumb Cake ink to create a ring. Usually when I’m colouring with my Stampin’ Blends I stamp with Tuxedo Black Memento ink. Fortunately it worked out for me. I used mostly the light Crumb Cake blend. But there’s also some light Pool Party, light Petal Pink and a little bit of the dark Crumb Cake.

Once that dried I punched it out and popped it up with some Stampin’ Dimensionals. Then to finish it off I added a few of the Flat Adhesive Backed Pearls.

Colouring with Circle Sayings

I definitely need to do some more colouring with Circle Sayings! Maybe next time I’ll use the Watercolour Pencils.

Check out another card I made using the Circle Sayings bundle here. And you can find the bundle in my online shop here.

Faux Quilting Technique

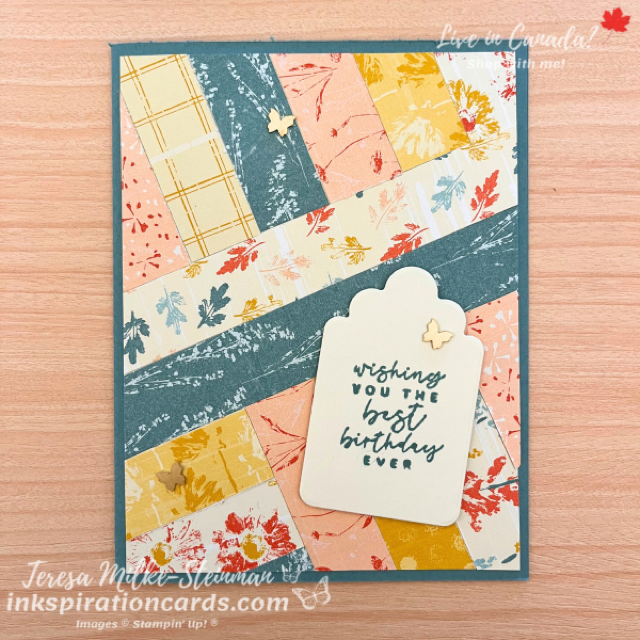
I love finding different ways to use my patterned paper! So when I saw the Faux Quilting technique I was excited to give it a try. It’s really easy and it’s a great way to use a lot of the different designs. I’m loving the Inked Botanicals Designer Series Paper, so that’s what I’m using for my design. And for the card base I’m using Lost Lagoon.

To create the quilting effect I cut a bunch of 3/4″ strips and adhered them to a piece of Basic White cardstock in batches. I started with the two strips across the middle. Then I laid out the strips across the top. Next I trimmed the edges and then used those strips to cover the bottom. First on the right hand side in one direction and then on the left hand side going another direction.

On top of that I added a sentiment from the Season of Chic stamp set. I die cut it with one of the Something Fancy dies and popped it up with some Stampin’ Dimensionals. Then to finish it off I added a few Brushed Brass Butterflies.

Faux Quilting Technique

I love how simple the Faux Quilting technique is! And I love how pretty it looks! This design will look great with just about any patterned paper. And it’s a great way to use up those scraps of patterned paper that we all have.

Find the Inked Botanicals pack of Designer Series Paper, along with many more, in my online shop. And check out this birthday card I made using the Inked Botanicals DSP here.

Double Fan Fold Card

Fancy Folds Design Team

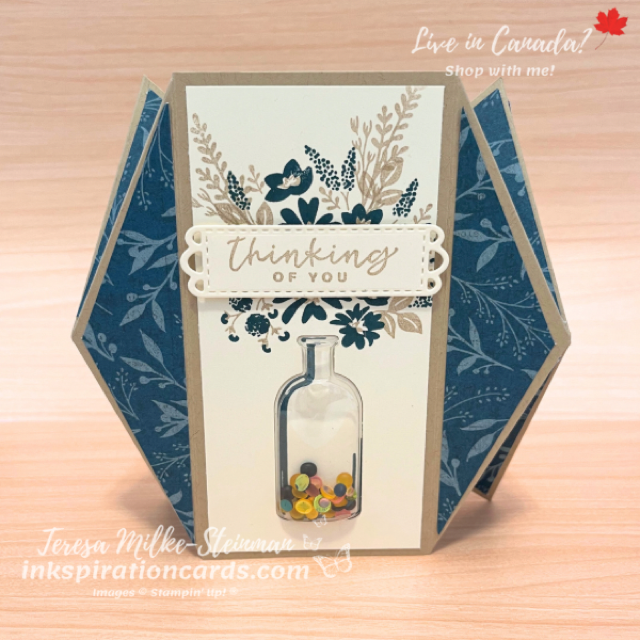
This month the Fancy Folds Design Team is making a Double Fan Fold card. I wasn’t sure what to expect from the name. The video from Brenda Quintana, a Stampin’ Up! demonstrator from the US, was helpful. Check that out here. My design started once I figured out what images I wanted to put in the centre. I went with Bottles of Happiness. Great flowers and I can use the coordinating punch to make it a shaker card. I love the Vintage Bottle Shaker Domes and Loose Frosted Dots!

Usually I stamp first and then punch. But this time I switched it around. I wanted to make sure that I got the punch up as far as I could. Once I punched then I stamped the bottle outline. Doing it this way also make it much easier to stamp the flowers and foliage in the right place. I stamped the centres and foliage first in Crumb Cake ink. Then I stamped the flowers on top in Pretty Peacock.

The sentiment is from the Season of Chic stamp set. And I die cut it using one of the Meadows dies. I popped that up with a couple of Stampin’ Dimensionals. Then to decorate the side panels, I used a Pretty Peacock design from the Masterfully Made Designer Series Paper pack.

Double Fan Fold Card

Check out the next Double Fan Fold card by Mette Nordling Shaw from Australia here. And then keep hopping around the world to see more!

And you can find last month’s hop here. Last month we made a Double Decker Pop Out card.

Enchanted Butterfly Slimline Card

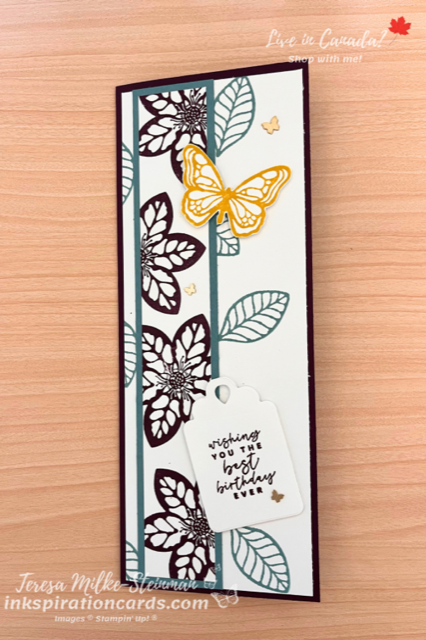
I haven’t made one of these cards in a while. And something about this stamp set told me I needed to make an Enchanted Butterfly slimline card. I’m just getting started with this new stamp set from the Annual Catalogue and can’t wait to see what I else I end up crafting! This set will definitely be used to make some thank you tags for my customers. In the meantime though this card was a lot of fun to make.

I decided to use Blackberry Bliss and Lost Lagoon for my colour combination. Since the return of Lost Lagoon I’m finding I’m using it ALOT! Plus it’s a nice compliment to the darker Blackberry Bliss. I used Blackberry Bliss for the card base and then added a strip of Lost Lagoon cardstock to frame the large Blackberry Bliss flowers.

Behind the flowers I have some Lost Lagoon leaves. Then on top of that I stamped a sentiment from the Season of Chic stamp set. I used one of the Something Fancy dies to cut out the sentiment and then popped it up with some Stampin’ Dimensionals. I had to add a butterfly of course! And this one is stamped with Crushed Curry. I kind of wish that there were coordinating dies for this stamp set, but the images aren’t too bad to fussy cut. The butterfly is popped up too. And to finish it off I added a few Brushed Brass Butterflies.

Enchanted Butterfly Slimline Card

This stamp set has a few larger images in it. So an Enchanted Butterfly slimline card, works out great!

Check out the card I shared earlier this week using the same stamp set here.

And you can find the Enchanted Butterfly stamp set in my online shop.

In Color Thank You Cards

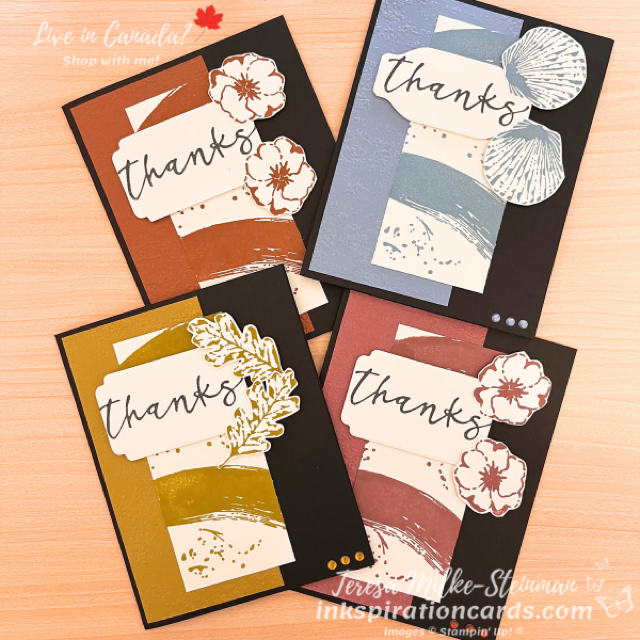
I went through my last batch of thank you cards for my customers. And with the recent launch of the new Annual Catalogue, of course I need some more. So this time I’m making some In Color thank you cards. I’m still getting used to some of the new colours and so I thought this would be a good chance to play with more than one of them.

The design for this card is this month’s creative challenge for my small team. There was also an extra piece this time… use at least on of the new colours. To keep it simple, I’m using a Basic Black card base for all of them. And instead of using the 2023-2025 In Color Designer Series Paper, I took a piece of cardstock and embossed it using the Timeworn Type 3D embossing folder.

On top of that layer I stamped on pieces of Basic White cardstock using the different In Colours and the Season of Chic stamp set. The “thanks” also comes from this stamp set. Then I die cut the sentiment using the Something Fancy dies and popped it up with some Stampin’ Dimensionals. Next I used a few of the different images from the same stamp set and die cut them with the coordinating dies. I wanted them on the same level as the sentiment so I popped them up too. And to finish them off I added a few of the coordinating In Colour Dots.

In Color Thank You Cards

I hope my customers like these In Color thank you cards!

Check out another thank you card I made a while back here.

And find the stamps, dies and In Colour products in my online shop.

Easy Wiper Pop Up Card

Fancy Folds Design Team

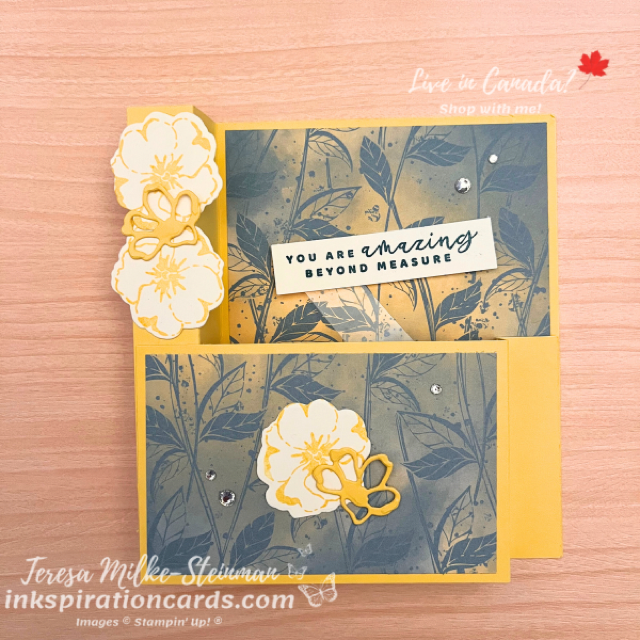
I wasn’t able to join last month’s blog hop, so I’m excited to get back to it! This month we’re making an Easy Wiper Pop Up card. I think we did something similar quite a while back, but this one was definitely easy! For all the measurements and step by step instructions check out this video from Jacque, a demonstrator from New Zealand (I’m pretty sure).

For my design I wanted to add some pretty Designer Series Paper. I just love the Hello Irresistible DSP! The colours and designs are so pretty. And I wanted to use a design I haven’t used yet. The one I chose has Daffodil Delight and Pretty Peacock as it’s colours. So I decided to use Daffodil Delight for my card base. I also used Daffodil Delight to stamp a few flowers using the Season of Chic stamp set and coordinating dies.

For the sentiment I stamped with Pretty Peacock ink. Then I attached it to a piece of Window Sheet which is attached to the mechanism that makes it pop up. And to finish it off I added a bunch of Rhinestone Basic Jewels.

Easy Wiper Pop Up Card

Check out the next Easy Wiper Pop Up card over on Mette Nordling Shaw’s blog here. And then be sure to keep hopping around the world to see them all!

And you can check out the similar wiper card that I mentioned earlier here.

Handmade Mother’s Day Card

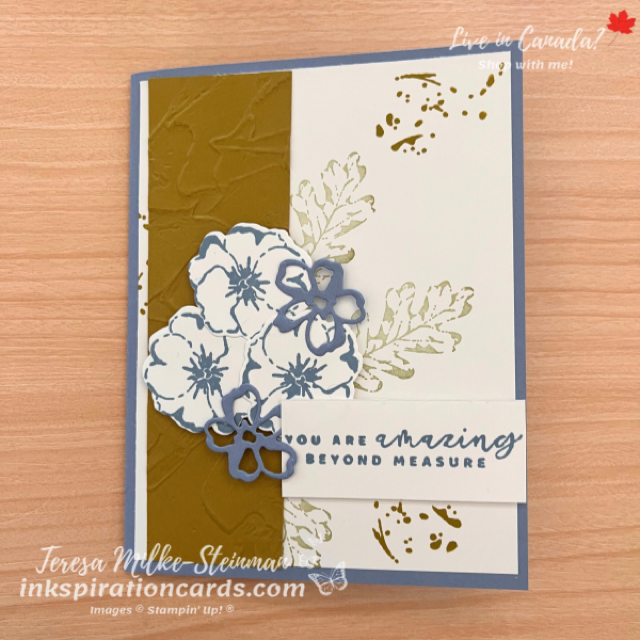
Somehow this year Mother’s Day snuck up on me. In the past I’ve made some fun fold cards for my mom. But this year it just didn’t quite work out. I still managed to craft a pretty handmade Mother’s Day card though.

For this year’s card I used the Season of Chic stamp set and dies. I’ve had my eye on this one for quite a while and I finally added it to my collection recently. The images are great and so versatile. And there’s a nice variety of sentiments too. Both things I LOVE in a stamp set!

For colours I used Boho Blue and Wild Wheat from the new 2023-2025 In Colours. I also added a splash of Old Olive for the leaves. The flowers and sentiment I stamped in Boho Blue. Then I cut out the flowers, along with a few extra, with the coordinating die cuts. And popped up the flowers and sentiment with Stampin’ Dimensionals. I used Wild Wheat for the splotchy image. And I also used a piece of Wild Wheat cardstock with the Painted Texture 3D Embossing Folder for a little something more.

Handmade Mother's Day Card

If you want to add a little something more to this handmade Mother’s Day card, you could add a few of the 2023-2025 In Colour Dots.

I can’t wait to craft some more seasonal projects with these! In the meantime you can check out one my previous Mother’s Day cards here. And you can take a look at the Season of Chic stamp set in my online shop here.