Christmas Card with Winter Meadow

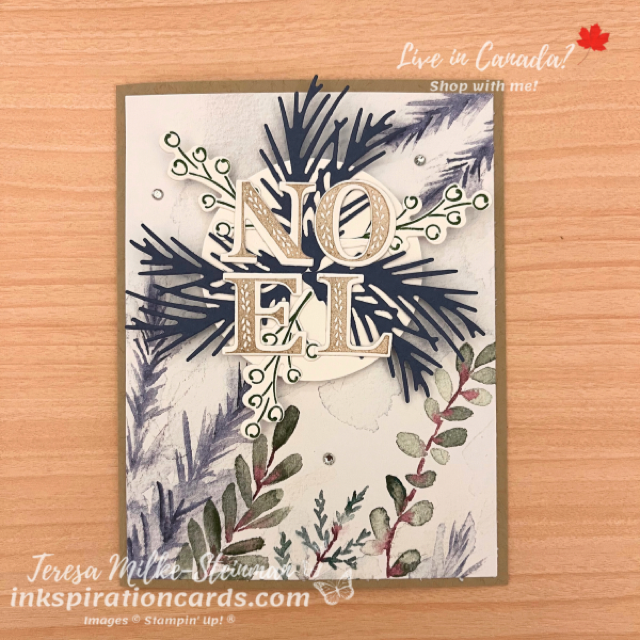
Patterned paper can make it so easy to create beautiful handmade cards! And the Winter Meadow Designer Series Paper pack is no exception. The colours and designs are so pretty. And one thing I really like about this pack is that it’s not your typical Christmas patterned paper. I really didn’t need to add much to craft this beautiful Christmas card with Winter Meadow DSP.

I started with choosing the design from the pack of patterned paper. And this one is great just on it’s own. So I decided to use it as my card mat. For the card base I went neutral… Crumb Cake. The other colours came from the patterned paper; Misty Moonlight and Garden Green.

I paired it with the Joy of Noel bundle. The pines branches are Misty Moonlight cardstock. And the berries I stamped in Garden Green. Then for NOEL I used Crumb Cake. To make it easy to pop all this up with some Stampin’ Dimensionals I punched out a Basic White circle and layered them on. And to finish it off I added some Wink of Stella to the NOEL, along with a few Rhinestone Basic Jewels.
Christmas Card with Winter Meadow

I really like this Christmas card with Winter Meadow DSP. And I can’t wait to craft some more!

Check out a fun fold card I made using the Joy of Noel bundle here.

And if you want to see all the different designs in the Winter Meadow DSP pack, then head over to my online shop.
By the Bay

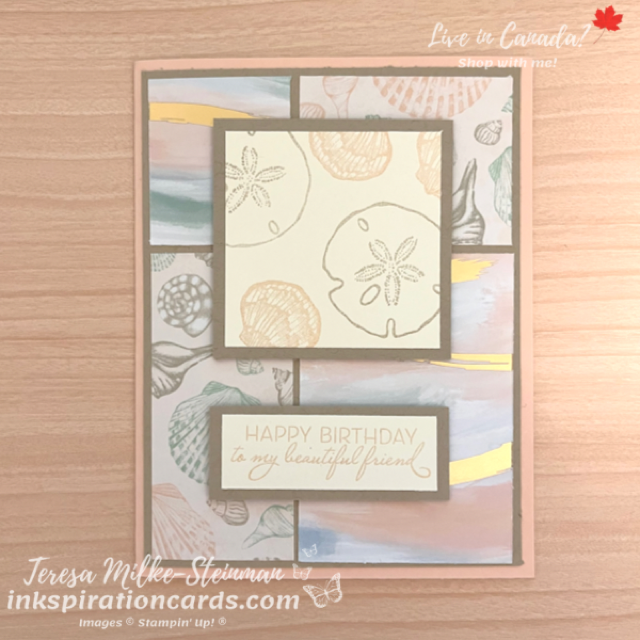
At the beginning of this month I put out a sketch challenge for my direct team. Just something fun and to spark some creativity! I often use sketches when I’m stuck for an idea or as a starting point for a design. But this one I stuck with because it’s a great one for showing off patterned paper. And goodness knows there’s a lot of great patterned paper right now in the Sale-a-bration and Janaury-April Mini catalogues! For this design I’m using the By the Bay 6″ x 6″ Specialty Designer Series Paper. It has so many beautiful designs and I love the gold foil!

With the sketch I already had the layout/design for my card. And I knew I what DSP I was using. So all that was left was to choose my colour combination and stamp set. I pulled my colours from the DSP of course. Originally I thought I’d be using more blues. But it turned into a Petal Pink and Sahara Sand card.

Since I ended up going for a summer/seaside themed card, I decided to use the Friends are like Seashells stamp set. I’ve said this before and I’ll say it again… I love how versatile this stamp set is! I framed the seashells and sentiment with some Sahara Sand cardstock. Then I popped them both up on top of the patterned paper using Stampin’ Dimensionals. And instead of adding some pearls or jewels to add a bit more bling, I added some Wink of Stella to the seashells. Too bad it doesn’t really come through in the picture.

By the Bay

I had a lot of fun with this first team sketch challenge! And I hope my team did too!

Check out another card I made using the By the Bay Designer Series Paper here.

You can get this great pack of patterned paper along with some beautiful and FREE patterned paper until Tuesday! That’s the last day of Sale-a-bration. Don’t miss out! Check it all out in my online shop.

Blossoming Happiness

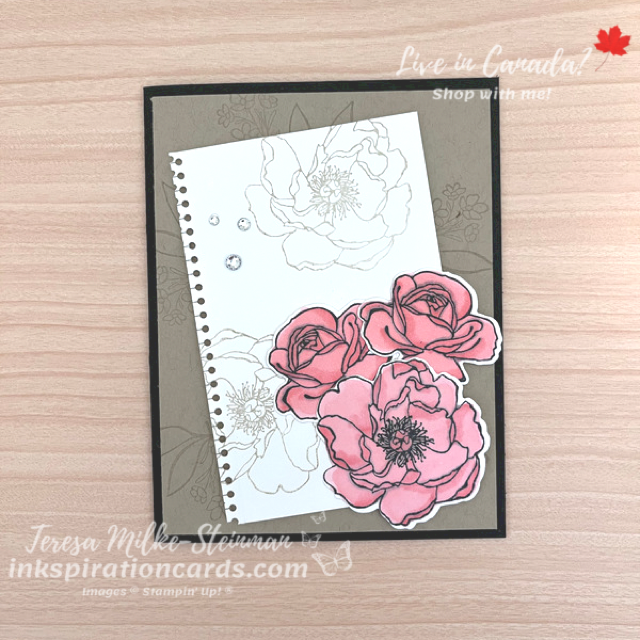
Usually my cards are fairly simple… pretty but simple. I’ve seen some cards with layers upon layers of different things and can appreciate the work that goes into them. For me those designs can be a bit much sometimes. But lately I’ve been wanting to add some more layers to my cards while still keeping it simple. I think it all started with the Hues of Happiness suite. The images from the stamp set and Designer Series Paper are so pretty and the Blossoming Happiness dies lend themselves well to layering.

So in the spirit of keeping it simple I went with a neutral colour combination, Basic Black and Crumb Cake. Then I added a pop of colour with Flirty Flamingo. I stamped some leaves and one of the smaller bouquet of flowers images around the edge of the piece of Crumb Cake using Crumb Cake ink. The tone on tone stamping keeps it subtle and really helps the Flirty Flamingo stand out.

I also stamped a couple of the larger flowers on a piece of Basic White cardstock using Crumb Cake ink. Once that was dry I used one of the Blossoming Happiness dies to create a torn notebook page look. This is such a cool die! I added that to the Crumb Cake card mat on an angle with some Stampin’ Dimensionals.

Then for my last layer I stamped a few flowers using Tuxedo Black Memento ink on some Basic White cardstock. And here’s where the Flirty Flamingo comes in. I coloured the flowers using the Flirty Flamingo Stampin’ Blends. I just love colouring with these markers!! Then I cut them out using the coordinating dies and added them to my card. To finish it off I added a few Rhinestone Basic Jewels and some Wink of Stella to the centre of the coloured flowers.

Blossoming Happiness

I’m slowly easing my way into adding more layers to my cards. It’s a new kind of design, so it’ll take me a few attempts before I start to get the hang of it. But I love the Blossoming Happiness dies and know that they will definitely be a part of future layered creations!

Check out one of my other cards using the Happiness Abounds stamp set here. And you can check out the full Hues of Happiness suite in my online shop.