Hues of Happiness

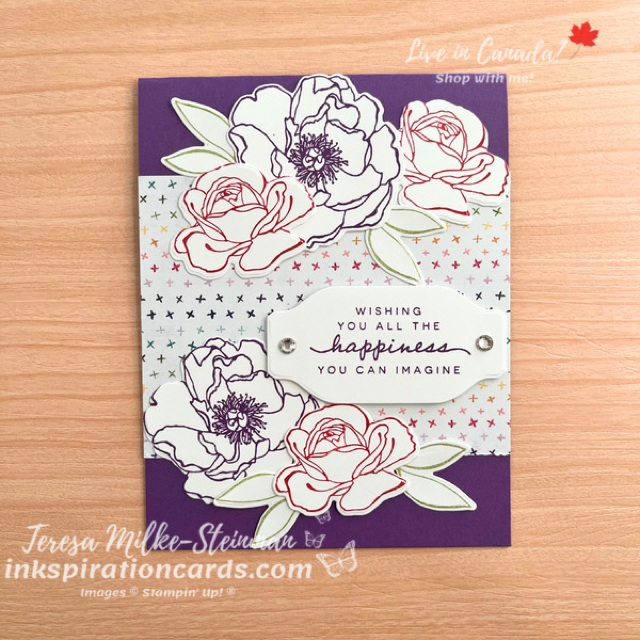
The Hues of Happiness Designer Series Paper has been my favourite patterned paper from this Annual catalogue. And I’m so sad to see the whole suite is retiring! So before it’s gone for good I’m sharing one last card.

I’ve actually managed to use almost all the paper from this DSP pack. So for my colour combination I started with picking a design from what I have left. The rainbow design offers lots of options. But I went with Gorgeous Grape and Melon Mambo, with a little bit of Pear Pizzazz. Gorgeous Grape is the card base to help the DSP and other elements really pop.

I stamped the large flowers and sentiment using Gorgeous Grape ink. And for the smaller flowers I used Melon Mambo. The leaves are of course stamped with Pear Pizzazz. Then I cut them all out using the coordinating dies for the leaves and flowers. I used one of the Something Fancy dies for the sentiment.

I layered the flowers and leaves straight onto the DSP. If you want, you can play around with this a little bit and pop up a couple of the flowers with Stampin’ Dimensionals. With this card just the sentiment is popping up. Then to finish it off I added two of the large Rhinestone Basic Jewels.
Hues of Happiness

While I’m sad that the Hues of Happiness DSP is retiring, I know it won’t last long! There’s lot of gorgeous paper coming in the new Annual catalogue that launches on Tuesday.

If you live in Canada and would like a copy of your own contact me. I’d be happy to send you one!

And don’t forget there’s still a few more days to get retiring products, or products that are increasing in price. Head over to my online shop before it’s too late!
Love Cats

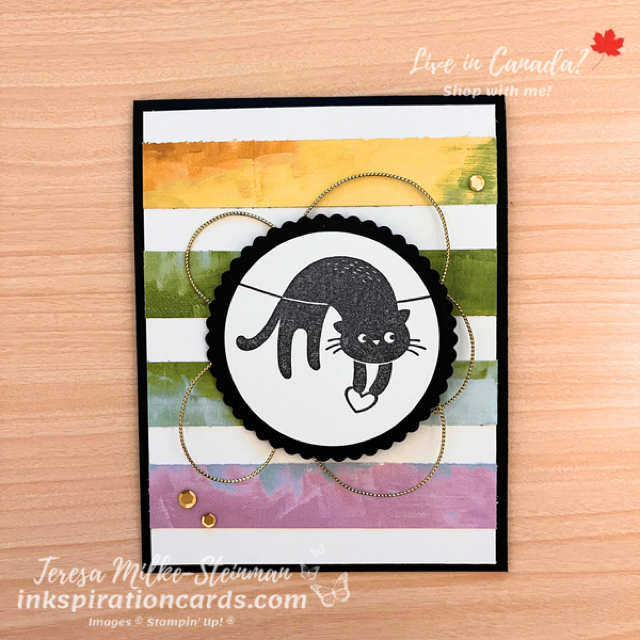
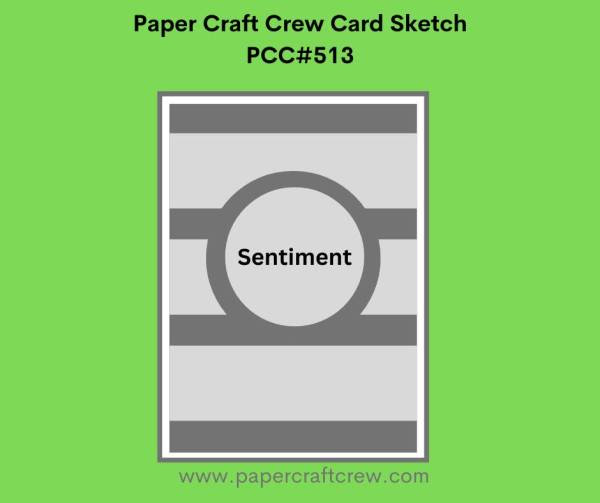
There’s only a couple of weeks left before the new Annual catalogue launches! But before I start sharing new products I’m spending some time saying goodbye to some of the retiring products. Each week I’ve been featuring one or more retiring products in my projects and this week it’s the Love Cats. I’m pairing it up with this week’s sketch challenge from the Paper Craft Crew (PCC513). It’s a vertical sketch challenge…

Love Cats

I knew I wanted to use the Love Cats in the centre. So I tried to think of what would look cool behind it. I decided to use the Hues of Happiness Designer Series Paper. Another one of my favourites that I’m sad is retiring. Using Basic Black for my card base and ink colour, I thought the rainbow colours would really pop.

I used the Layering Circles dies to frame the kitty. Then behind that I put some gold metallic thread. I popped that all up with some Stampin’ Dimensionals. And to finish it off I added a few of the gold Pastel Adhesive-Backed Gems.

Love Cats

I’m so sad that Love Cats is retiring. But I’m probably more upset about the Layering Circles dies.

Check out last week’s card featuring the By the Bay DSP and Friends are like Seashells stamp set here. Last time I checked these were all still in stock, but it has been a couple of days so who knows now.

And don’t forget to check out all the other Paper Craft Crew challenge cards here.

Handmade Teenage Birthday

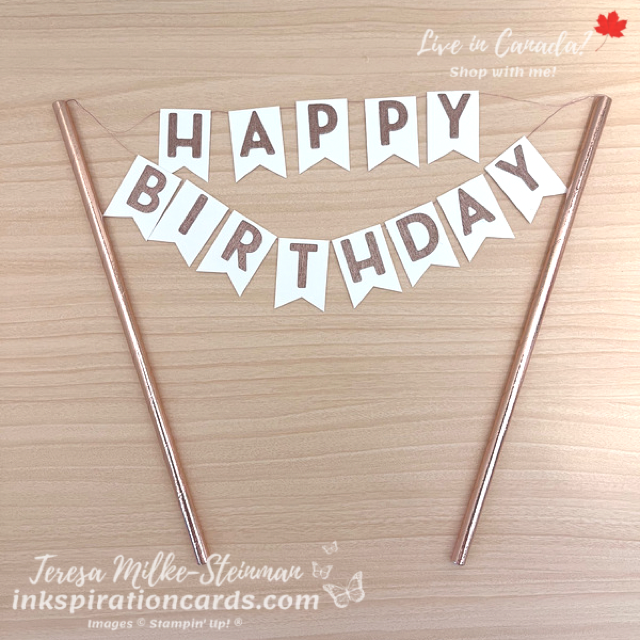
I can’t believe it… I’m the mother of a teenager now! How did that happen?! Anyway… She wants to be more involved in the planning and designing now, but I still wanted to do something special for her party. I have to admit, crafting a handmade teenage birthday is a little trickier than I’m used to. Usually I have a theme to guide my design. This time it’s a colour… rose gold. A great colour. One of my favourites… but not quite what I’m used to working with.

So I went looking at a local dollar store for ideas in their party section. When I was there I found a very colourful cake topper and decided to create my own. To do it I used the retired Playful Alphabet dies to spell out “Happy Birthday” in Rose Gold Specialty paper. Then I simply stuck the letters to pieces of Basic White cardstock and cut triangles out of the bottom. To create the banner I folded the cardstock over some retired Rose Gold Metallic thread and used some Mini Glue Dots to attach it to a couple of rose gold straws.

Handmade Teenage Birthday

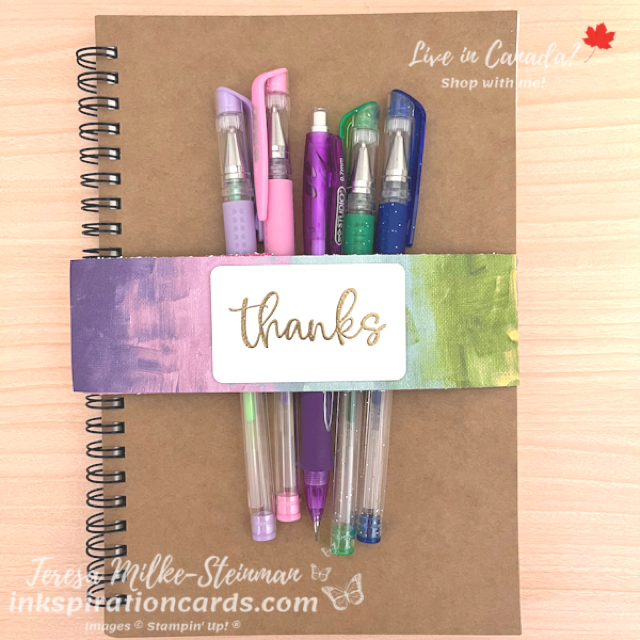
The other thing I needed to figure out were the thank yous for my daughter’s friends. This idea was sparked by something I found on Pinterest. It’s a simple belly band wrapped around a kraft journal. I used the Hues of Happiness Designer Series Paper for the band. And I heat embossed “thanks” from the Biggest Wish stamp set in gold (sadly no rose gold embossing powder). Then I used one of the All That dies to cut it out and added it to the band.

Handmade Teenage Birthday

I hope she likes how these handmade teenage birthday favours turned out! You can check out the birthday card I made for her here. And stock up on any stamping supplies you need in my online shop.

Triple Floating Diamond Card

Fancy Folds Design Team

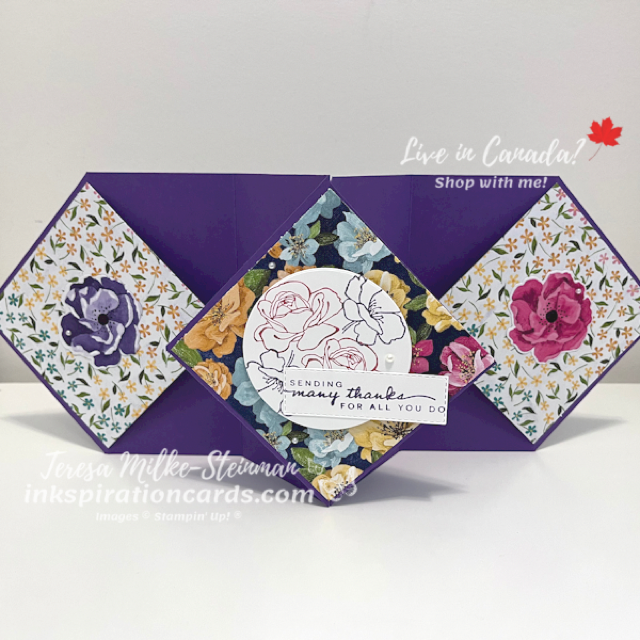
The Fancy Folds Design team is back for another blog hop! And this month we’re making a Triple Floating Diamond card. It’s a little bit of a bigger card than I usually make so I’ll need to find or make my own envelope, but it’s such a pretty card. You can check out Amanda’s video here. She’s the Scrimpingmommy, from the UK and give you the measurements and steps so you can follow along if you need to.

For my card I decided to not make a holiday card this time. I’m not quite in full holiday crafting mode yet. Instead I’m using the Hues of Happiness Designer Series Paper. It’s so pretty! And I decided to make a sort of thank you card using the coordinating Happiness Abounds stamp set. The colour combination I chose came from the DSP, of course. I used Gorgeous Grape cardstock for the card base. Then I used 2 different designs from the DSP pack for my diamonds. For my ink colours I used Gorgeous Grape and Melon Mambo.

I used a simpler design for my outer diamonds and a darker one in the centre. That way I could have my phrase and stamped flowers stand out. I cut out the flowers using one of the Layering Circles dies and my phrase with one of the Stitched Rectangles dies. Plus I popped these up using some Stampin’ Dimensionals. Then to add a little something more to the outer diamonds I used the Blossoming Happiness dies to cut out a couple of the larger flowers from one of the other designs.

Triple Floating Diamond Card

The Triple Floating Diamond card is such a cool looking card right?!

Make sure to keep hopping so you can see all the cards! Up next is Gina Conner and you can see her card here.

And if you want to check out last month’s blog hop where we made a Curvy Pop-Up card, you can start that hop here.

Pretty Patterned Paper

I love pretty patterned paper! Sometimes I love it so much that I have trouble cutting it up and using it. Who’s with me?! Anyway… I think that’s why I love the two cards I’m sharing today from our larger team’s Annual Catalogue card swap. They really show off some great designs featuring two of my favourite Designer Series Paper packs!

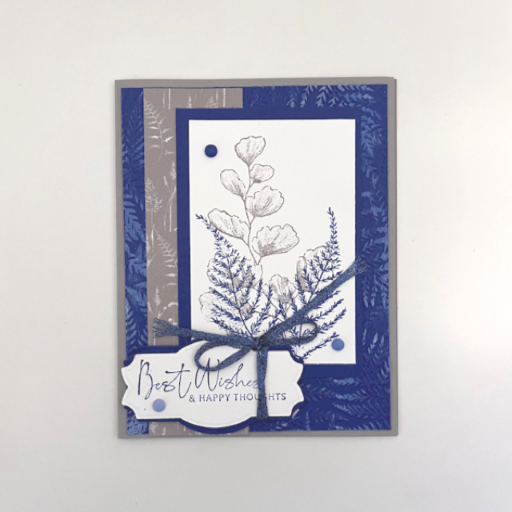
This first card was made by Paulette Melanson. She uses the gorgeous Sunprints DSP and Fern 3D embossing on some Starry Sky cardstock to create something that looks like it comes from the same DSP pack. The stamped images come from the coordinating Nature’s Prints stamp set. And the phrase also comes from that set. She also added a few of the Starry Sky dots from the 2022-2024 In Colour Decorative Matte Dots and some of the Starry Sky Metallic Woven ribbon. So pretty!

Pretty Patterned Paper

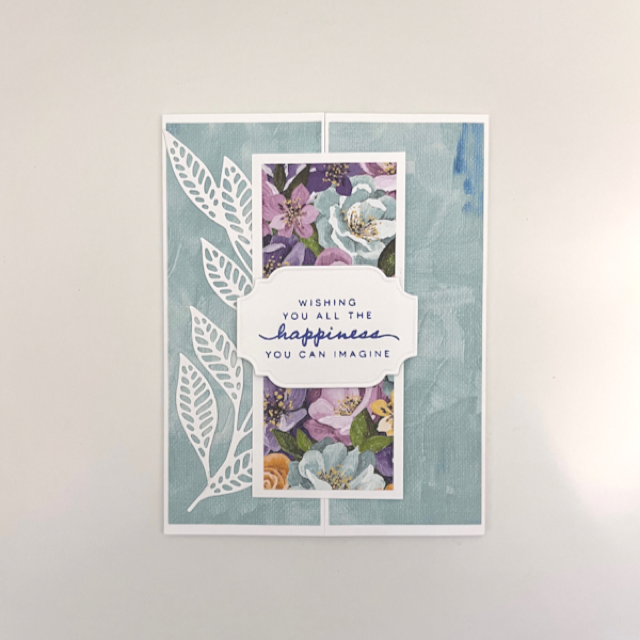
The other card was made by Rosina Petrella. I love how she layers one of the more colourful designs from the Hues of Happiness DSP on top of one of the more simple designs. She uses a gatefold for this design and uses the more colourful design to keep the card closed. The phrase comes from the coordinating Happiness Abounds stamp set which she stamped using Orchid Oasis and cut out using one of the All That dies. And the die cut leaves are made using the Artistic dies.

Pretty Patterned Paper

I love my team! And I love all of Stampin’ Up!s pretty patterned paper! So of course these two cards are some of my favourites from our team Annual Catalogue card swap.

Check out my card for our Annual catalogue swap here. And if you want to get in on the fun… and the discount… then join my team here!

Fun Fold Card

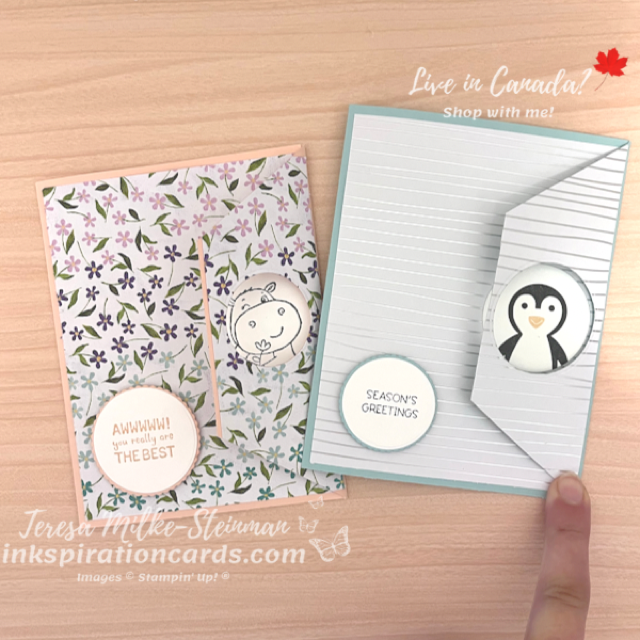
I saw a post from Jo Blackman a couple of weeks ago showing this cute fun fold card and I knew that I wanted to give it a try. My first thought was to use the Penguin Place stamp set for my design. For the other design that I used for my YouTube channel, I picked the Sale-a-bration stamp set Hippest Hippos. Check out my video here.

From here I needed to pick the Designer Series Paper I was using so I could get my colour combination. For the Penguin Place card design I paired it with the Sale-a-bration Silver & Gold Designer Series Paper, so I used a Pool Party card base. And for the Hippest Hippos card I used one of the designs from the Hues of Happiness pack of Designer Series Paper with a Petal Pink card base. This piece of patterned paper also helped me pick the hippo for my card!

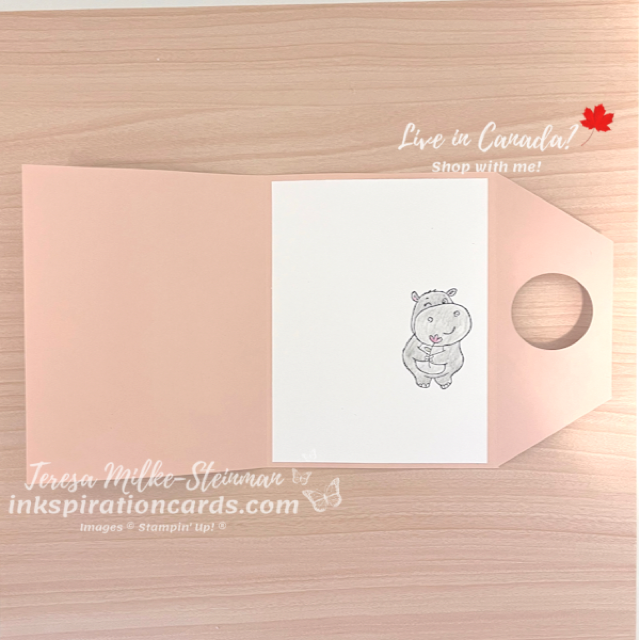
On the inside of the card I stamped the full versions of my cute critters. Adding some of the cute accessories for my penguin and the Watercolour Pencils to colour my hippo. My critters and phrases were all die cut using the Layering Circles dies, even the scalloped cardstock. Then I popped up the framed phrases using Stampin’ Dimensionals. But my plain critters I kept on the same level as the DSP.

Fun Fold Card

I kept the outside of the cards simple. If you want you can add some Rhinestone Basic Jewels or Brushed Brass Butterflies. That would add a little something more to this fun fold card.

Fun Fold Card

You can check out another of my recent fun fold cards here. Each month I join the Fancy Folds Design team for a blog hop and earlier this month we made a Mirror Fold card.

Watercolouring with Happiness Abounds

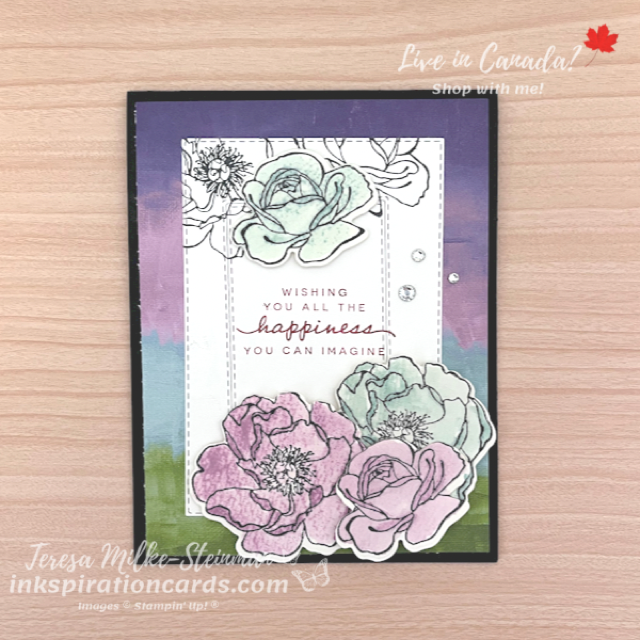
I’m really enjoying all this watercolouring for World Watercolouring month! It’s something I love to do, I just don’t always think of it when I’m designing my cards. Hopefully that’ll change after this month. In the meantime I’m enjoying myself and watercolouring with Happiness Abounds is so much fun. The images in this stamp set make it so easy! Plus the Hues of Happiness Designer Series Paper makes for a nice background. And that’s exactly where I started for this card.

To pull my design together I started with choosing the piece of DSP. All these designs are so colourful, but I wanted to choose a design that wasn’t too busy. I wanted the watercolouring to be the main focus. The piece I chose was nice and simple, plus I love purples and blues. Then to really help the colours pop I used a Basic Black card base.

Layered on top of my patterned paper I stamped some flowers on a piece of Basic White cardstock using Tuxedo Black Memento ink. Next I used 2 different Stitched Rectangles dies to add a little something more to the stamped cardstock.

For the other flowers I stamped them using the same ink but on some of the Fluid 100 Watercolour paper. Just to be sure I gave them lots of time to dry. Then I used my Water Painters to add Pool Party and Rich Razzleberry ink to them. To get the darker colours I added the ink straight onto the stamped watercolour paper. And for the lighter shades I brushed off a little bit of ink onto the side of the ink pad lid before colouring. Once these dried I cut them out using the Blossoming Happiness dies and popped them up with some Stampin’ Dimensionals. Then to finish it off I added a few Rhinestone Basic Jewels. Gotta add some bling!

Watercolouring with Happiness Abounds

So pretty! I just love how this card turned out. Watercolouring with Happiness Abounds is super easy. This suite has become a fast favourite of mine… if you haven’t noticed yet, lol! Check out another card I created using Happiness Abounds here. And you can check out the entire Hues of Happiness suite in my online shop.

Don’t forget about Sale-a-bration too! Products are starting to sell out and we’re not even half way done. Remember to use this month’s host code when you shop with me online. When you do and your order is $49 or more you’ll receive a FREE card making tutorital complete with a list of supplies and step by step instructions.

Blossoming Happiness

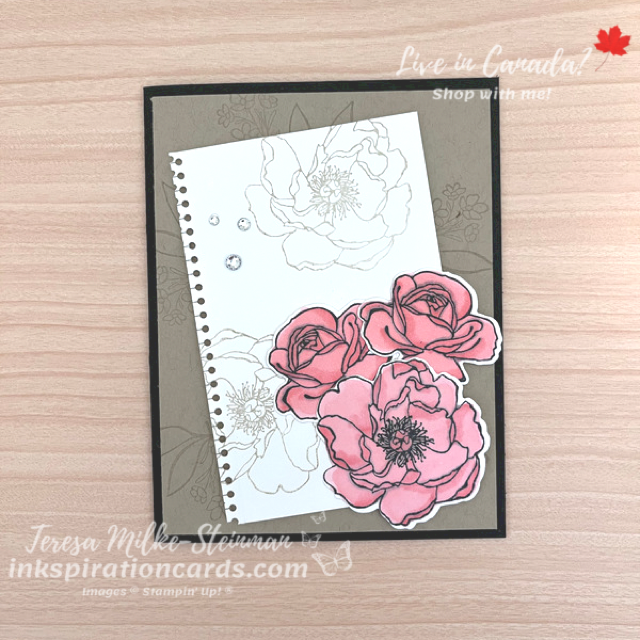
Usually my cards are fairly simple… pretty but simple. I’ve seen some cards with layers upon layers of different things and can appreciate the work that goes into them. For me those designs can be a bit much sometimes. But lately I’ve been wanting to add some more layers to my cards while still keeping it simple. I think it all started with the Hues of Happiness suite. The images from the stamp set and Designer Series Paper are so pretty and the Blossoming Happiness dies lend themselves well to layering.

So in the spirit of keeping it simple I went with a neutral colour combination, Basic Black and Crumb Cake. Then I added a pop of colour with Flirty Flamingo. I stamped some leaves and one of the smaller bouquet of flowers images around the edge of the piece of Crumb Cake using Crumb Cake ink. The tone on tone stamping keeps it subtle and really helps the Flirty Flamingo stand out.

I also stamped a couple of the larger flowers on a piece of Basic White cardstock using Crumb Cake ink. Once that was dry I used one of the Blossoming Happiness dies to create a torn notebook page look. This is such a cool die! I added that to the Crumb Cake card mat on an angle with some Stampin’ Dimensionals.

Then for my last layer I stamped a few flowers using Tuxedo Black Memento ink on some Basic White cardstock. And here’s where the Flirty Flamingo comes in. I coloured the flowers using the Flirty Flamingo Stampin’ Blends. I just love colouring with these markers!! Then I cut them out using the coordinating dies and added them to my card. To finish it off I added a few Rhinestone Basic Jewels and some Wink of Stella to the centre of the coloured flowers.

Blossoming Happiness

I’m slowly easing my way into adding more layers to my cards. It’s a new kind of design, so it’ll take me a few attempts before I start to get the hang of it. But I love the Blossoming Happiness dies and know that they will definitely be a part of future layered creations!

Check out one of my other cards using the Happiness Abounds stamp set here. And you can check out the full Hues of Happiness suite in my online shop.

Happiness Abounds

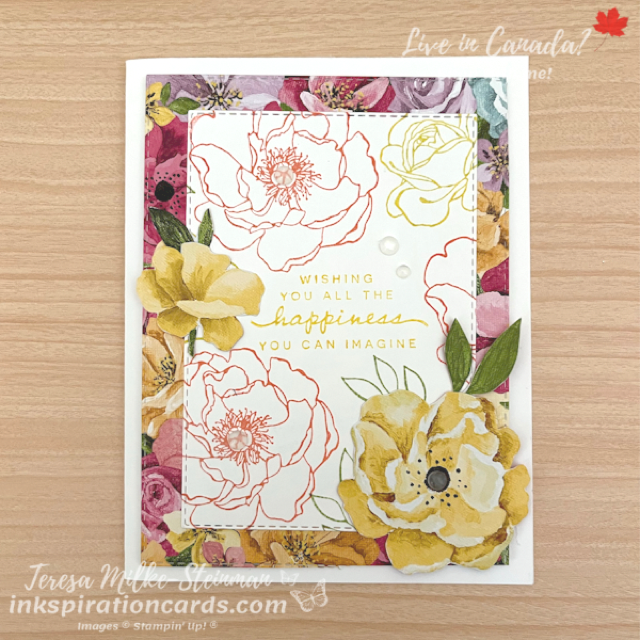
I’m finally getting to some crafting with the new Happiness Abounds bundle from the new Annual Catalogue! This is one of the sets that was at the top of my list when I first saw it. But the He’s All That bundle just snuck in front for my pre-order back in April, so I was super excited when these finally arrived. I’m also loving the Designer Series Paper that’s part of this suite! I’ve already got a bunch of ideas in my head and think I might need to order another pack.

For this card I wanted to show it all off. So I have a Basic White card base to really help keep the focus on the other colours. Most of the colour for this card comes from the piece of Happiness DSP that I used for a card mat. Then I pulled the ink colours and colour for the other flower from there. I used Flirty Flamingo and Daffodil Delight for the phrase and flowers. And I threw in a little bit of Pear Pizzazz for the stamped leaves. Then I cut out both the DSP and stamped cardstock using the Stitched Rectangles dies.

I fussy cut a couple of Daffodil Delight flowers and some leaves to layer on top. (I started this design up at my in-laws farmhouse so I didn’t have my Stampin’ Cut & Emboss machine to use the dies.) But it wasn’t too bad to do the fussy cutting. I layered the extra flowers and stamped piece of cardstock onto the DSP card mat. And then popped it ALL up using some Stampin’ Dimensionals.

To finish it off I added a few Polished Dots. I always need to add a little bit of bling to my cards. Who’s with me?!

Happiness Abounds

I’m looking forward to crafting even more with the Happiness Abounds bundle, so stay tuned for more! In the meantime you can check out this card using the He’s All That stamp set here… Father’s Day is just around the corner!

And you can check out the full Hues of Happiness suite here in my online shop.