Handmade Valentine’s Day Card

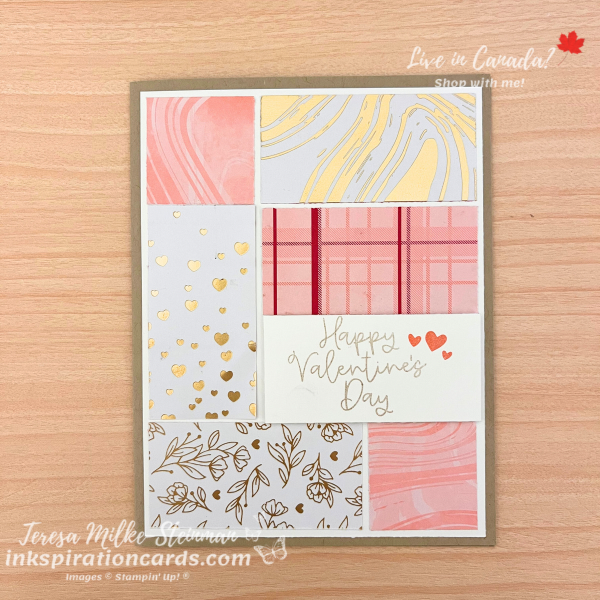
I’m having a lot of fun crafting Valentine’s Day cards! And the Most Adored Specialty Designer Series Paper pack makes it really easy to make a pretty handmade Valentine’s Day card. The colours are perfect for Valentine’s Day. And I just love the gold foil designs. So I had a hard time picking what designs to use for this card.

The inkspiration for this card design came from a picture I saw in a Facebook group I’m a part of. It’s such a great way to show off pretty patterned paper like this! I’m keeping the card base neutral with Crumb Cake to help the colours from the Designer Series Paper stand out. Once I picked my designs I stuck them to a piece of Basic White cardstock.

My “Happy Valentine’s Day” comes from the Bee My Valentine stamp set in the January-April Mini catalogue. I stamped it with Crumb Cake ink. Then I added some cute little hearts from the same stamp set with Flirty Flamingo ink. Finally I popped up that piece of cardstock with a couple Stampin’ Dimensionals.
Handmade Valentine's Day Card

I love that Stampin’ Up! has a pack of patterned paper with gold foil as one of the free products in the Sale-a-bration catalogue this year! Check out another handmade Valentine’s Day card I shared using some of the other Sale-a-bration products here.

And you can find everything you need to make your own handmade Valentine’s Day cards in my online shop.

Product List
Faux Wood Paneling Card

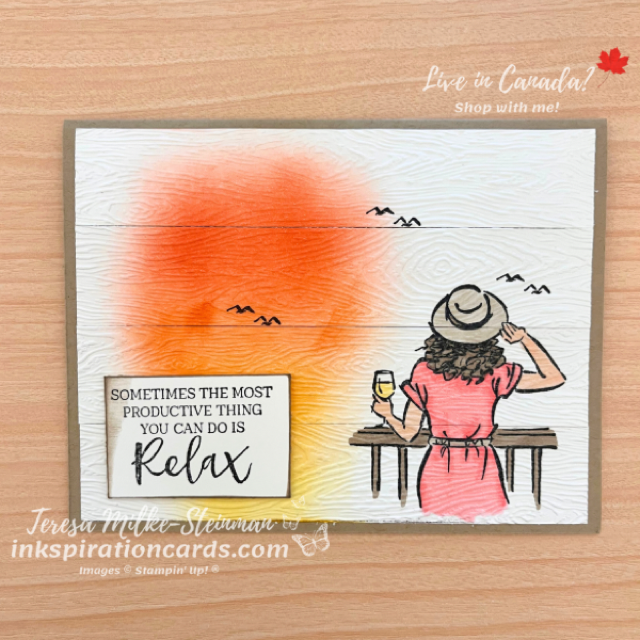
The idea for this card came from a picture I saw of a home decor project. I really liked how they had an image on what looked like wood panels and thought it would make for a pretty cool card design. I’m calling it the Faux Wood Paneling card for obvious reasons. If you can think of another name, or if there is already a name, let me know. I’d love to hear it!

I wish I still had some of the recently retired Sahara Sand cardstock. It would have looked really nice! Crumb Cake is too dark and so I’m using Basic White. The softer colour of Very Vanilla would maybe work even better for this card design. I did use Crumb Cake for my card base though.

The biggest tip for this design is to do ALL your stamping, colouring, etc. first. Embossing first would make it alot harder to get nice even colour. I stamped one of the images from the In the Moment stamp set using Tuxedo Black Memento ink. Then I stamped the birds from that same image a couple more times. To avoid getting any unwanted leftover ink on your cardstock, make sure to use a scrap piece of paper or cardstock to cover the rest of the image.

To create the sunset I used my Blending Brushes along with 3 different colours. I started at the bottom of the cardstock with Crushed Curry. Then I used Flirty Flamingo and finally Calypso Coral. These 3 colours go really well together and blend well too!

Next I coloured the image with Stampin’ Blends. I used Dark Crumb Cake for the railing, the band on the hat and the hair. Then Light Crumb Cake on the hat and belt. For the dress I used both the Light and Dark Flirty Flamingo Stampin’ Blends. And for the wine I used Light Daffodil Delight. If you’re more of a red wine person Merry Merlot would work well.

Once that was done I embossed it with the Timber 3D embossing folder and cut it into 1″ strips. To finish it off I stamped a phrase from the same stamp set with Memento ink and then added some Crumb Cake ink around the edges. Then I popped it up with some Stampin’ Dimensionals.

Faux Wood Paneling Card

This Faux Wood Paneling card was fun to make! I don’t think I’ve used so many different techniques on one card before.

Check out another card I made using the In the Moment stamp set here. And you can find this stamp set along with everything else you need in my online shop!

Patterned Paper Birthday Card

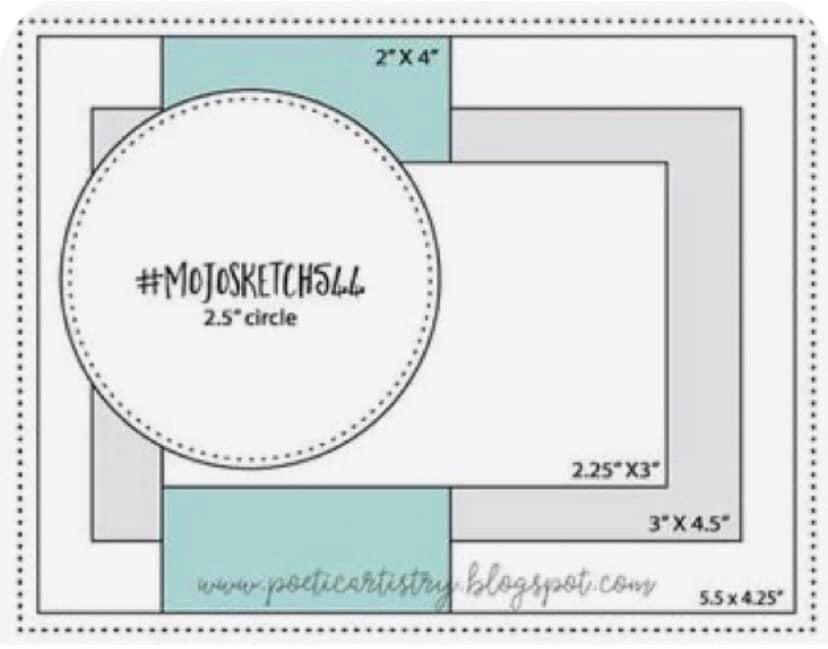
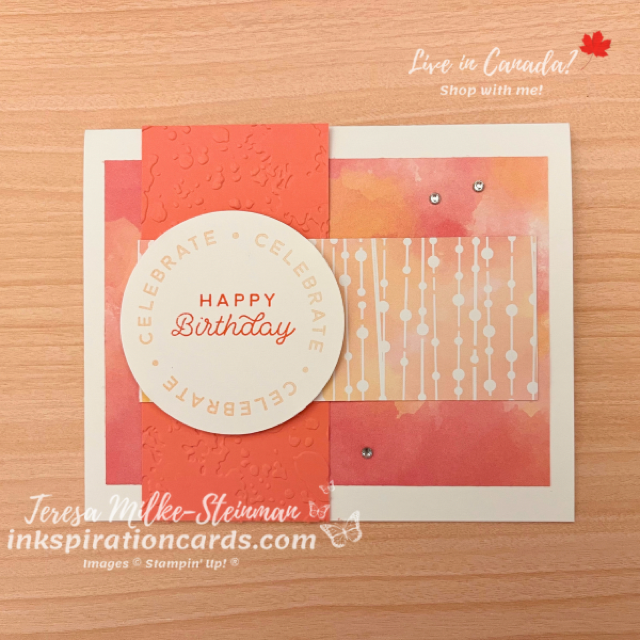
Without even realizing it I chose a great sketch design for Designer Series Paper for my team’s monthly creative challenge! Each month I choose a sketch design, theme or colour combination for them to use to spark some inkspiration and have some creative fun. They use whatever they have on hand and then post a pic in our Facebook group. For mine I’m making a patterned paper birthday card.

Patterned Paper Birthday Card

I’m having a lot of fun right now crafting with the online exclusive Hello Irresistible DSP. The colours… the designs… so pretty! I especially like the designs using Petal Pink and Flirty Flamingo. To help the colors from the patterned paper stand out I’m using a Basic White card base. Then I layered 2 different designs on top. In between the 2 layers of DSP I have an embossed piece of Flirty Flamingo cardstock. I embossed it using the splatter 3D embossing folder.

Then to make it a birthday card I used a couple of sentiments from the Circle Sayings stamp set. I used Petal Pink ink for one and Flirty Flamingo ink for the other. Once I punched them out using the coordinating punch, I popped it up with some Stampin’ Dimensionals. And to finish it off I added a few Rhinestone Basic Jewels.

Stampin’ Up!s DSP packs make it really easy to create a pretty patterned paper birthday card… or any kind of card really!

Check out the card I made earlier this week using the same pack of DSP here.

If you want to join in on all the fun then join my team! I’m surrounded by a wonderful and creative bunch of people on both my smaller and larger team. PLUS if you join before June 30th you’ll get $206 worth of Stampin’ Up! product instead of $165 for only $135 (no tax or shipping depending on the province)!!! Sign up here!

#SimpleStamping with Hello Irresistible

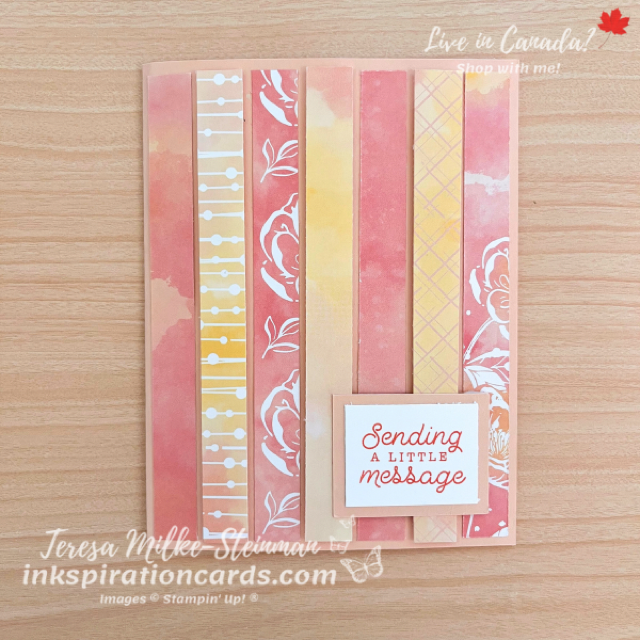
This week instead of a particular stamp set to feature, I chose some pretty patterned paper! And for this card I’m doing some #SimpleStamping with Hello Irresistible. This month’s #SimpleStamping challenge from Stampin’ Up! is to make any kind of card you want using stamps, ink, paper… and some Designer Series Paper.

The online exclusive Hello Irresistible 6×6 DSP is one of my favourites right now. And with this design I get to show off a few of the different designs in this pack. The designs I chose are using Petal Pink, Flirty Flamingo and Daffodil Delight. So for my card base I’m using Petal Pink.

I popped up every other strip of the DSP using Stampin’ Dimensionals. Then on top of that I added a sentiment from the Bottled Happiness stamp set. I stamped it using Flirty Flamingo ink and then framed it with a piece of Petal Pink cardstock. And since some of the strips are already popped up, I just layered that on top using some Stampin’ SEAL.

#SimpleStamping with Hello Irresistible

It’s hard to stick with #SimpleStamping with Hello Irresistible DSP! I’m so tempted to add some Brushed Brass Butterflies or die cut the sentiment with the Something Fancy dies. I might just have to make another stepped up version.

Check out another card I made using the Hello Irresistible DSP here.

And check out all the packs of patterned paper that are on sale this month, including Hello Irresistible, in my online shop. They’re all on sale for 15% off. Don’t miss out!

Blossoming Happiness

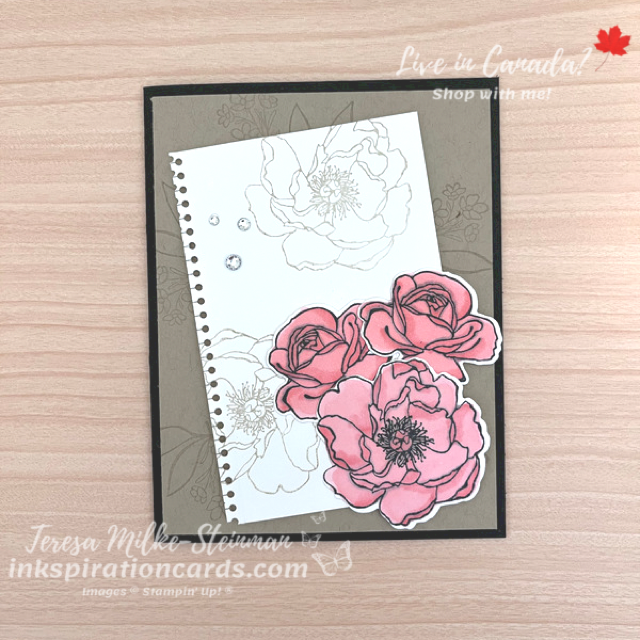
Usually my cards are fairly simple… pretty but simple. I’ve seen some cards with layers upon layers of different things and can appreciate the work that goes into them. For me those designs can be a bit much sometimes. But lately I’ve been wanting to add some more layers to my cards while still keeping it simple. I think it all started with the Hues of Happiness suite. The images from the stamp set and Designer Series Paper are so pretty and the Blossoming Happiness dies lend themselves well to layering.

So in the spirit of keeping it simple I went with a neutral colour combination, Basic Black and Crumb Cake. Then I added a pop of colour with Flirty Flamingo. I stamped some leaves and one of the smaller bouquet of flowers images around the edge of the piece of Crumb Cake using Crumb Cake ink. The tone on tone stamping keeps it subtle and really helps the Flirty Flamingo stand out.

I also stamped a couple of the larger flowers on a piece of Basic White cardstock using Crumb Cake ink. Once that was dry I used one of the Blossoming Happiness dies to create a torn notebook page look. This is such a cool die! I added that to the Crumb Cake card mat on an angle with some Stampin’ Dimensionals.

Then for my last layer I stamped a few flowers using Tuxedo Black Memento ink on some Basic White cardstock. And here’s where the Flirty Flamingo comes in. I coloured the flowers using the Flirty Flamingo Stampin’ Blends. I just love colouring with these markers!! Then I cut them out using the coordinating dies and added them to my card. To finish it off I added a few Rhinestone Basic Jewels and some Wink of Stella to the centre of the coloured flowers.

Blossoming Happiness

I’m slowly easing my way into adding more layers to my cards. It’s a new kind of design, so it’ll take me a few attempts before I start to get the hang of it. But I love the Blossoming Happiness dies and know that they will definitely be a part of future layered creations!

Check out one of my other cards using the Happiness Abounds stamp set here. And you can check out the full Hues of Happiness suite in my online shop.

Happiness Abounds

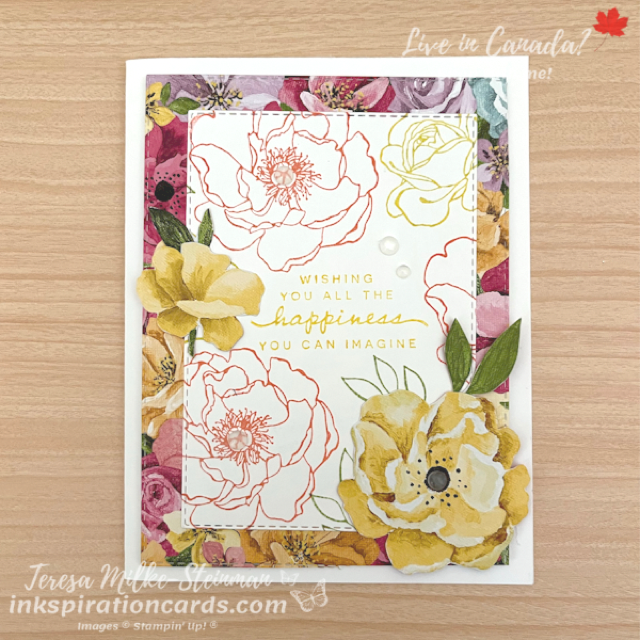
I’m finally getting to some crafting with the new Happiness Abounds bundle from the new Annual Catalogue! This is one of the sets that was at the top of my list when I first saw it. But the He’s All That bundle just snuck in front for my pre-order back in April, so I was super excited when these finally arrived. I’m also loving the Designer Series Paper that’s part of this suite! I’ve already got a bunch of ideas in my head and think I might need to order another pack.

For this card I wanted to show it all off. So I have a Basic White card base to really help keep the focus on the other colours. Most of the colour for this card comes from the piece of Happiness DSP that I used for a card mat. Then I pulled the ink colours and colour for the other flower from there. I used Flirty Flamingo and Daffodil Delight for the phrase and flowers. And I threw in a little bit of Pear Pizzazz for the stamped leaves. Then I cut out both the DSP and stamped cardstock using the Stitched Rectangles dies.

I fussy cut a couple of Daffodil Delight flowers and some leaves to layer on top. (I started this design up at my in-laws farmhouse so I didn’t have my Stampin’ Cut & Emboss machine to use the dies.) But it wasn’t too bad to do the fussy cutting. I layered the extra flowers and stamped piece of cardstock onto the DSP card mat. And then popped it ALL up using some Stampin’ Dimensionals.

To finish it off I added a few Polished Dots. I always need to add a little bit of bling to my cards. Who’s with me?!

Happiness Abounds

I’m looking forward to crafting even more with the Happiness Abounds bundle, so stay tuned for more! In the meantime you can check out this card using the He’s All That stamp set here… Father’s Day is just around the corner!

And you can check out the full Hues of Happiness suite here in my online shop.