Welcome Inn

I realized the other day that I haven’t shared any of my Paper Pumpkin cards in a long time. So here I am with a couple alternative cards with June’s kit Welcome Inn. I love the blues and grays in this kit!

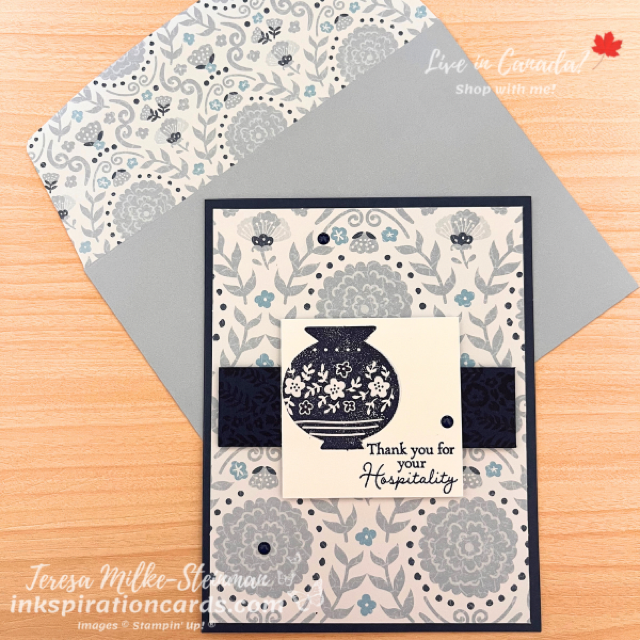
For the first alternative I used a Night of Navy card base and cut one of the patterned card bases to make the card mat. On top of that I layered a strip of Night of Navy cardstock that I stamped with Night of Navy ink which I popped up with Stampin’ Dimensionals. And on top of that I have a small piece of Basic White cardstock that I stamped a sentiment on and a die cut vase that I stamped on as well. To finish it off I added a few of the Navy Dots. These are so cute!
Welcome Inn

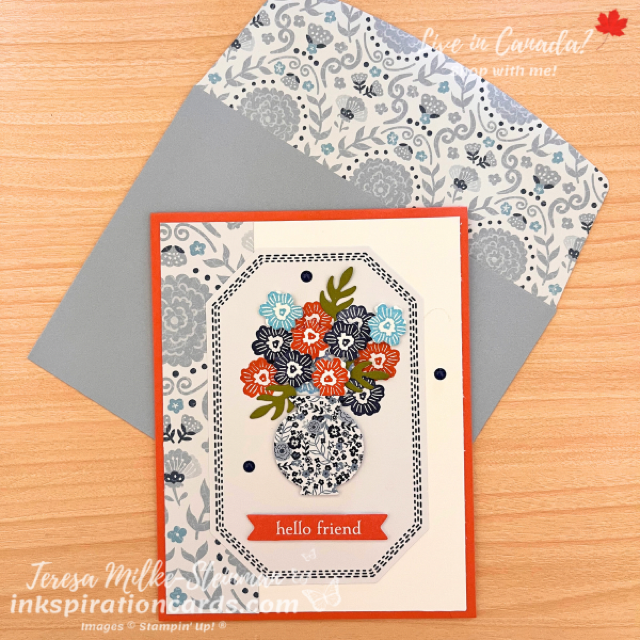
The second card has a Calypso Coral base and a strip of the same patterned card base from the first card. Then I layered one of the larger die cuts on top. On that I used one of the die cut vases and stamped some flowers on top. I also stamped a few extra flowers on a separate piece of Basic White cardstock that I die cut along with a few leaves using the add-on dies. I popped these flowers and the die cut vase up with some Stampin’ Dimensionals along with one of the die cut sentiments from the kit. Then to finish it off I of course needed to add a few of the Navy Dots.
Welcome Inn

I had a lot of fun with the Welcome Inn Paper Pumpkin kit! And I’m looking forward to this month’s kit. I don’t think I’ve ever made an accordion-fold card before!

In the meantime I’ll be crafting with some old Paper Pumpkin kits on our camping trip this weekend. I always take Paper Pumpkin with me when we go. It’s easy to bring along and my munchkins love them too!

See what I bring with me when I travel here. And if you missed out on this month’s Paper Pumpkin kit, don’t worry! You have until August 10th to sign up for next month’s kit. It looks really pretty! Sign up here.
Handmade Father’s Day Card

June is here! Soon it’ll be summer and in just a couple of weeks is Father’s Day. There’s lot going on around here. Hopefully it settles down soon so I can get to my garden. In the meantime I’m sharing a handmade Father’s Day card. I was very glad to hear that the He’s All That stamp set and dies were carrying over to the new Annual Catalogue! This was one of the first sets I got when it came out in last year’s catalogue and I’ve been enjoying crafting with it. It’s definitely made making masculine cards a lot easier!

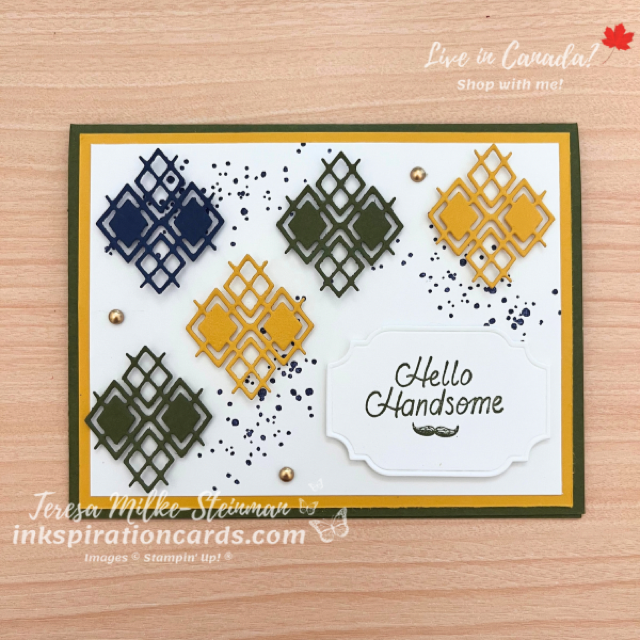
For this card I put Mossy Meadow and Crushed Curry together for my colour combination. I also added in a splash of Night of Navy. The sentiment is from the He’s All That stamp set, of course. Next I die cut it using one of the coordinating dies and then popped it off with a couple of Stampin’ Dimensionals.

In the background I stamped some paint splatter using the Quiet Meadow stamp set. And added a few of the argyle die cuts around the sentiment. For these I used all three colours and popped them up using some of the Mini Stampin’ Dimensionals. Then to finish it off I added a few Brushed Metallic Dots. A nice way to add some bling to your masculine cards!

Handmade Father's Day Card

Now this isn’t the handmade Father’s Day card I’ll be giving to my dad. But I’ll definitely be using the He’s All That stamps and dies!

Check out another card I made using He’s All That here.

And grab the stamp set and dies over in my online shop.

Joyful Flurry Christmas Card

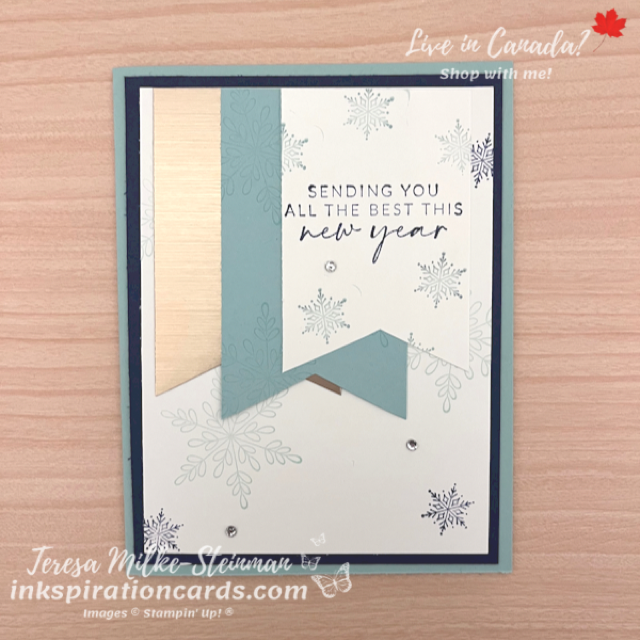
I’ve had this bundle on my wishlist for a while now! So I’m excited to finally have it and get crafting with it. This Joyful Flurry Christmas card is just the first of many to come! I’m definitely a big fan of snowflakes with my holiday crafting and cardmaking. So of course this is one of my favourites from the July-December mini catalogue. And since my main image is snowflakes I’m using blues for my first card.

For this card design I went with Pool Party and Night of Navy. Two nice shades of blue that contrast each other really well. And with just a little bit of Night of Navy, the Pool Party really stands out. I used Pool Party for the card base and Night of Navy for the card mat. And even with the stamping I stuck with Pool Party as my main colour. Stamping the larger snowflakes in Pool Party for the background and then surrounding the sentiment with Pool Party snowflakes.

For the banners I layered some Brushed Metallic cardstock with a piece of Pool Party cardstock that I stamped with Pool Party snowflakes. Then there’s the banner with the sentiment on top. No Stampin’ Dimensionals this time. Although that would look really nice too. Instead I kept it simple and just added a few of the small Rhinestone Basic Jewels to finish it off.

Joyful Flurry Christmas Card

I just love this Joyful Flurry Christmas card! And I can’t wait to see what I can really do with the coordinating dies!

Check out some other samples from a recent team card swap using this same bundle here. And if you’re looking to get this in time for some holiday crafting, then head over to my online store.

Classic Handmade Masculine Birthday Card

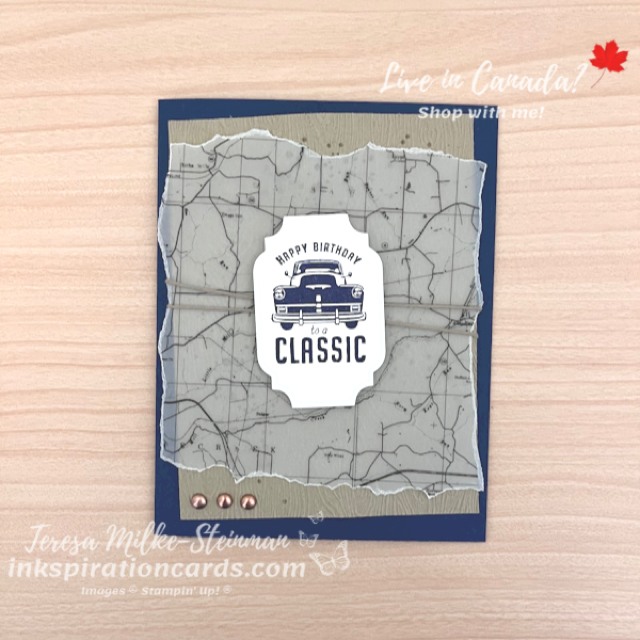
Just a couple of weekends ago was my father-in-laws birthday. He’s big into classic cars and so the He’s All That bundle is perfect for this classic handmade masculine birthday card. And to step it up a bit there were a few things I wanted to pair it with for this card design.

For the card base I used Night of Navy and then layered a few different things on top. The first layer is a piece of Crumb Cake cardstock that I stamped with the paint splatter image from the Quiet Meadow stamp set. Next I embossed it using the Timber 3D embossing folder. Then I tore a piece of the Vellum 12 x 12 Layering Designs. To hide the adhesive I placed it in the centre so I could cover it up with the phrase.

The phrase came from the He’s All That stamp set. Of course I went with the one with the classic card! Then I cut it out with one of the coordinating dies. I popped it up with a few Stampin’ Dimensionals and then added a bit of Crumb Cake twine behind it. To top it all off I added a few Brushed Metallic Adhesive-Backed Dots.

Classic Handmade Masculine Birthday Card

I really like how this classic handmade masculine birthday card turned out. And I hope my father-in-law enjoys it!

Since I got the He’s All That bundle, making masculine cards has been so much easier! I know I’m not the only one that finds these kinds of cards trickier to design. To help spark some more inkspiration, check out this other card I made with this great set of stamps and dies here. And make sure to head over to my online shop where you’ll find the Brushed Metallic Adhesive-Backed Dots on sale as part of Stampin’ Up!s Weekly Deals!

Floating Element Technique

I found a new technique recently and I’m excited to share it with you! It’s the floating element technique. So basically you make certain elements of your card look like they’re floating. This one I’m sharing today is a great one to use when you don’t know what to do with your scraps of Designer Series Paper. So I’m using some of the scraps from my Sale-a-bration Silver & Gold DSP.

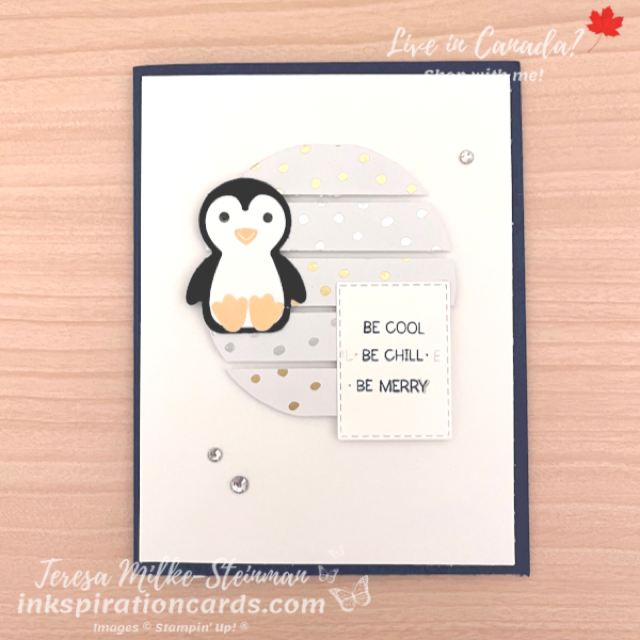
To go with the Silver & Gold DSP I’m using a Night of Navy card base. For the image and phrase I’m using the Penguin Place bundle. I love these penguins! They’re super cute! And this time I decided to make a penguin using the Penguin Builder Punch. The cardstock I used for the penguin is, of course, Basic Black and Basic White. For the feet I used Pale Papaya. I just love this colour for my penguins. Then for the face I used Tuxedo Black Memento ink for the eyes and Pale Papaya for the beak.

Behind my penguin are my scraps of Silver & Gold DSP. To create this effect I started by lining up all my scraps, alternating between silver and gold. Then I made the circle using one of the Layering Circles dies. Once I had my circle, I added it to my Basic White card front using Stampin’ Dimensionals making sure to leave a little bit of a gap between each strip.

From here I layered my penguin and phrase on top. I stamped the phrase using Night of Navy ink and used some scrap paper to layer the words on top of each other instead of leaving them in a straight line. Then I used the smallest Stitched Rectangles die to cut it out. To finish it off I added a few Rhinestone Basic Jewels.

Floating Element Technique

Super cute right! I love the floating element technique and definitely be making more like this!

Don’t forget that tomorrow is the last day of Sale-a-bration! After August 31st the Silver & Gold DSP won’t be available, along with the other great free and exclusive products. Head over to my online shop before they’re gone! And you can check out one of the other projects I made using the Hippest Hippos which are also from the Sale-a-bration catalogue here.

He’s All That

June is here! Which means that summer’s coming and Father’s Day is around the corner. In just over two weeks acutally. Maybe that’s why I’ve been making so many masculine cards lately… or maybe it’s because I just love the He’s All That bundle. Either way I thought I’d share another card using this bundle. Check out this one that I made for a Paper Craft Crew vertical sketch challenge here.

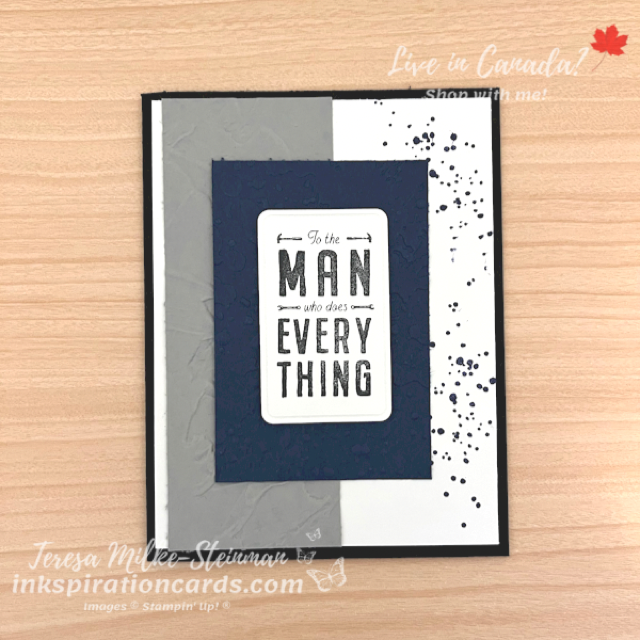
For this card I went with all neutral colours. Yes navy is a neutral colour. I used Basic Black for the card base. Then I mixed in some Smoky Slate and Night of Navy. To add a little something to the smaller pieces of cardstock I embossed them. I embossed the piece of Smoky Slate using the Painted Texture 3D embossing folder. And the piece of Night of Navy cardstock with the splatter folder from the Stripes & Splatter 3D embossing folders.

For the stamping I added a little bit of ink splatter from the Quiet Meadow stamp set using Night of Navy ink. And the phrase, from the He’s All That stamp set, I stamped in Tuxedo Black Memento ink. To cut out the phrase I just used one of the coordinating dies. Then to finish it off I popped up the phrase with a few Stampin’ Dimensionals. Here it is…

He's All That

The He’s All That stamp set and dies are great for masculine cards… and for Father’s Day. These kinds of cards are definitely more of a challenge for me so I’m glad to have something that makes it so much easier! Check out the whole suite of products in my online shop. I especially love the Designer Series Paper and can’t wait to get my hands on that too!