Crafting with You

This year for my ScrapFest Make & Take I’m using a very themed stamp set… Crafting with You. If you’ve seen the stamp set and dies then you’ll know why I couldn’t resist. I mean just the paper trimmer and emboss machine that’s part of this set make it a great addition to any paper crafter’s craft stash!

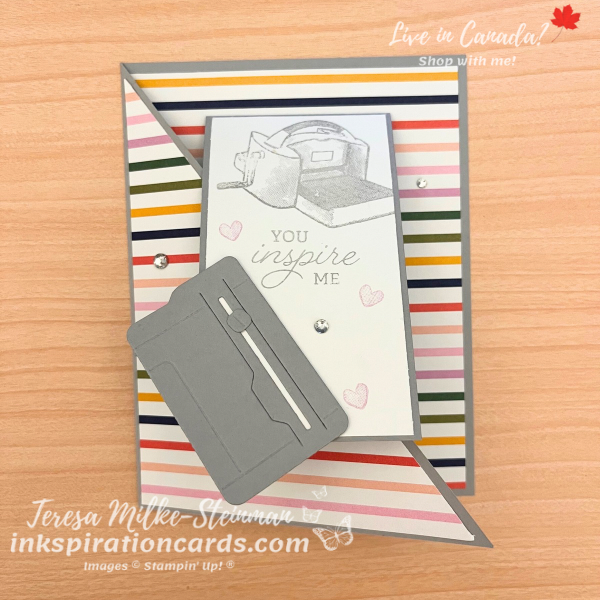
I’m pairing it with the Delightfully Eclectic Designer Series Paper pack that’ll soon be retired. It’s nice and colourful! And I cut up a couple of different designs to give some options with this fun fold card. I wanted to do something a bit different, but still easy enough to copy from the sample. And because I have a couple of different designs of patterned paper, I’m using a nice neutral card base; Smoky Slate. Plus this is the perfect colour for the paper trimmer and scissors I die cut in advance.

To make the base, you’ll start with a standard 5 1/2″ x 8 1/2″ card base. I highly recommend that you score it in half (at 4 1/4″) before you diagonally cut half of the front of the card base off. It definitely makes it easier! Then I added another piece of Smoky Slate cardstock which I folded in half and added some Basic White to the inside and outside.

From here I simply stamped a sentiment and an emboss machine of the outside piece of Basic White cardstock using Smoky Slate ink. Then to pull a little colour from the DSP, I stamped a few little hearts with Fresh Freesia ink. Next I added a die cut paper trimmer. And to finish it off a few Rhinestone Basic Jewels for some bling.
Crafting with You

I hope that everyone at ScrapFest enjoys crafting with Crafting with You as much as I have been! I’m so glad to see that it’s sticking around for a while longer.

Sadly the Delightfully Eclectic DSP pack is not. Check out a masculine themed card I made with this great pack of patterned paper here.

And don’t forget the last chance sale is only for a little while longer!

Product List
Happy Chanukah

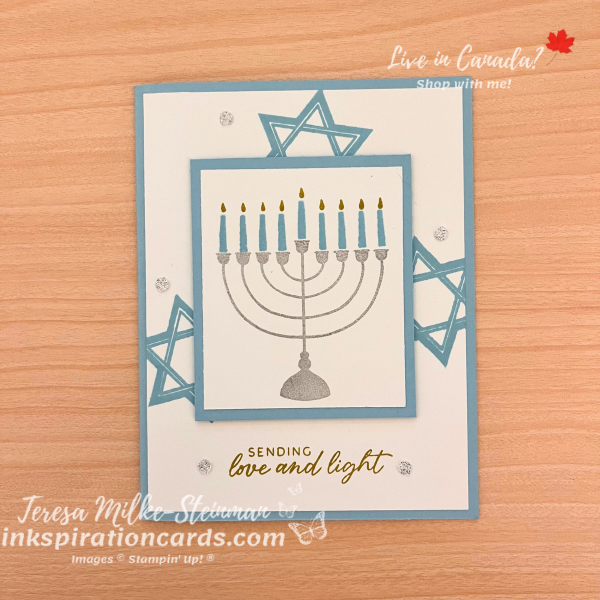
Happy Chanukah everyone! Last night was the first of 8 nights of celebrating. To celebrate we light the candles and there are a few presents. We don’t do gifts every night like my youngest wants, but we do play dreidel and have fun. I also make cards to send out to all our Jewish family and friends. Since I need to make more than 2 dozen cards just for Chanukah, I keep the design simple. And the Celebrate the Miracle stamp set makes it easy to make simple AND pretty cards.

For the card base I’m using Balmy Blue. Balmy Blue is also my main ink colour. To start I stamped a few Stars of David in the background with Balmy Blue ink. But the sentiment, “sending love and light”, I stamped with Wild Wheat. It’s such a lovely golden colour! I also used Wild Wheat for my candle flames. Chanukah candles are often colourful, so I stamped those with Balmy Blue ink. And the Chanukkiah is stamped with Smoky Slate. I popped up my lit Chanukkiah with a few Stampin’ Dimensionals. Then I added a few Adhesive Backed Glitter Sequins to add a little more sparkle.

Happy Chanukah

The Celebrate the Miracle stamp set makes it so easy to make Chanukah cards. This stamp set is definitely going into my permanent stash! I can’t wait to see how my projects for our upcoming family dinner turn out!

Check out another card I made with the Celebrate the Miracle stamp set here. And you can find this online exclusive stamp set in my online shop.

Happy Chanukah everyone!

World Card Making Day 2023

This past Saturday I celebrated World Card Making day 2023. It actually didn’t look much different than other Saturdays. Except for maybe a little extra crafting time when I joined Stampin’ Up!s free online event! It was a lot of fun. And they shared a sneak peek at some upcoming online exclusive products coming out next month.

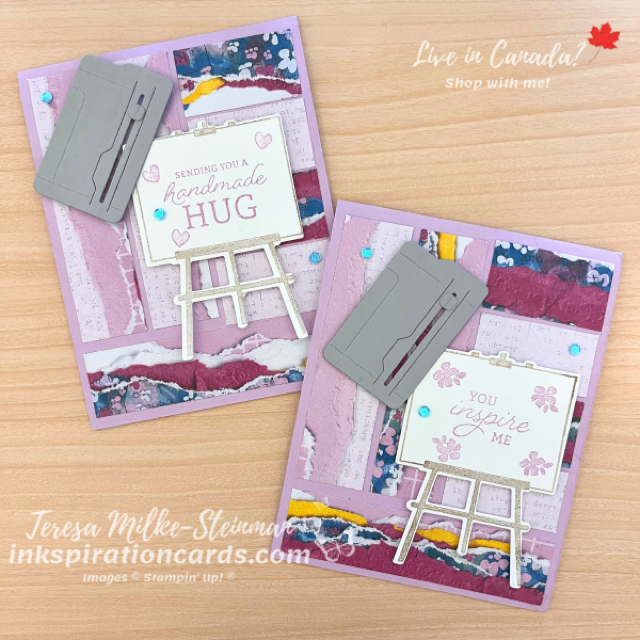
Before the online event I shared this card over on my YouTube channel. It shows off the Crafting with You bundle which I thought was very fitting for the day. I’m just starting to craft with this bundle and can’t wait to make some more projects with it! For this card I used a Fresh Freesia card base. Then I layered a few strips of the Masterfully Made Designer Series Paper to create a kind of quilted background.

On top of that I have an easel that I stamped with Crumb Cake ink and decorated with a Fresh Freesia sentiment and flowers. Once I die cut that out, I popped it up with a few Stampin’ Dimensionals. Then I created a Smoky Slate paper trimmer. I added the ‘moving’ blade with a Mini Glue Dot and then popped that up too. To finish it off I added a few of the blue Pastel Adhesive-Backed Sequins.

World Card Making Day 2023

Check out the video I shared for World Card Making day 2023 here!

And if you’re looking for more ideas and stamping tips then sign up for my weekly newsletter! Every week I share project ideas, stamping tips, sneak peeks and much more. Plus right now, exclusively for my newsletter subscribers, I’m also sending holiday themed projects every week. Complete with a supply list and step by step instructions to help you have an awesome holiday season! Find more information here.

#SimpleStamping Birthday Card

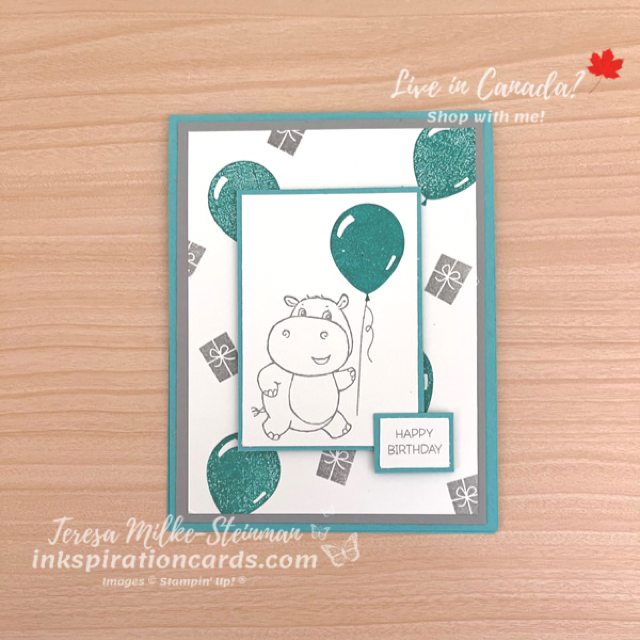
For this month’s #SimpleStamping challenge Stampin’ Up! is looking for a #SimpleStamping birthday card using stamps, ink, paper and a Sale-a-bration item. I’ve been having a lot of fun crafting with some of the Sale-a-bration products so I’m excited for this challenge. Especially since it gives me the chance to use these super cute hippos again! Check out one of my other cards using the Hippest Hippos here.

For this card I’m using a nice bright colour for my card base, Coastal Cabana. And Smoky Slate for my hippos. Then to make this a birthday card I’m pairing the Hippest Hippos from the Sale-a-bration catalogue with the Penguin Place stamp set from the July-December Mini catalogue.

I wanted the hippo to be the main focus for the card so I framed it with some more Coastal Cabana cardstock and popped it up with some Stampin’ Dimensionals. The “happy birthday” is also framed and popped up. Behind these I stamped a nice simple background. I used Coastal Cabana for the balloons and Smoky Slate for the presents.

#SimpleStamping Birthday Card

Both these stamp sets are super cute! And I love how they worked together to create this #SimpleStamping birthday card.

To step this card up you can add some Wink of Stella Glitterbrush to one or more of the balloons. And you could colour in the hippos using Stampin’ Blends or Watercolour pencils. Adding some bling is another easy way to step this card up and there are so many options to choose from.

Check out the Hippest Hippos and the other Sale-a-bration products over in my online shop. Sale-a-bration ends on August 31st, but don’t wait til then to put in your order things are already starting to sell out!

He’s All That

June is here! Which means that summer’s coming and Father’s Day is around the corner. In just over two weeks acutally. Maybe that’s why I’ve been making so many masculine cards lately… or maybe it’s because I just love the He’s All That bundle. Either way I thought I’d share another card using this bundle. Check out this one that I made for a Paper Craft Crew vertical sketch challenge here.

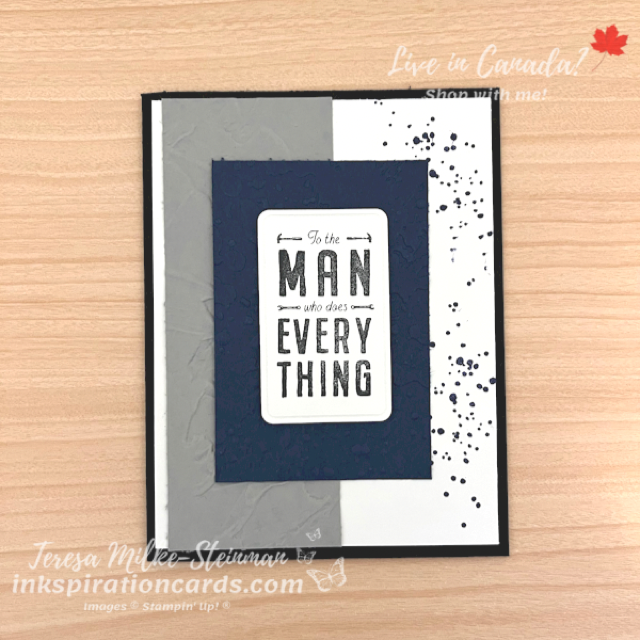
For this card I went with all neutral colours. Yes navy is a neutral colour. I used Basic Black for the card base. Then I mixed in some Smoky Slate and Night of Navy. To add a little something to the smaller pieces of cardstock I embossed them. I embossed the piece of Smoky Slate using the Painted Texture 3D embossing folder. And the piece of Night of Navy cardstock with the splatter folder from the Stripes & Splatter 3D embossing folders.

For the stamping I added a little bit of ink splatter from the Quiet Meadow stamp set using Night of Navy ink. And the phrase, from the He’s All That stamp set, I stamped in Tuxedo Black Memento ink. To cut out the phrase I just used one of the coordinating dies. Then to finish it off I popped up the phrase with a few Stampin’ Dimensionals. Here it is…

He's All That

The He’s All That stamp set and dies are great for masculine cards… and for Father’s Day. These kinds of cards are definitely more of a challenge for me so I’m glad to have something that makes it so much easier! Check out the whole suite of products in my online shop. I especially love the Designer Series Paper and can’t wait to get my hands on that too!