#SimpleStamping Birthday Card

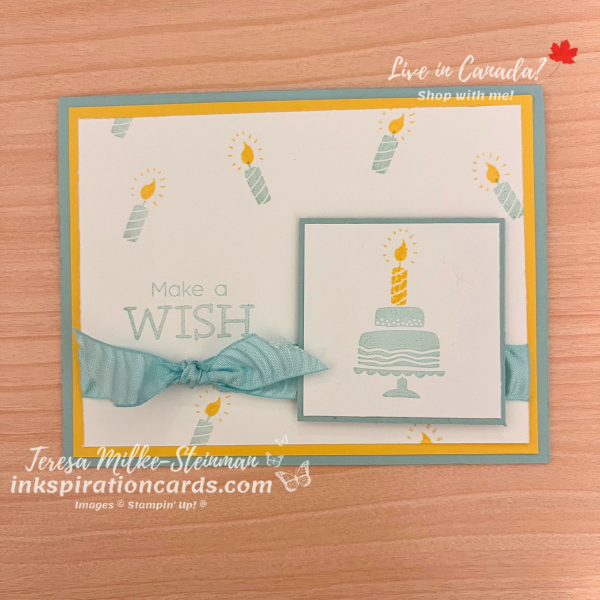
I’m getting back to some #SimpleStamping with this card. As much as I like using patterned paper, die cuts and embellishments, pretty cards don’t have to be complicated! This month’s challenge from Stampin’ Up! is to make a #SimpleStamping birthday card with a Sale-a-bration item. I had a hard time choosing because there are so many great products to choose from right now. But for this card I’m excited to stamp with one of the new stamp sets from the January-April Mini catalogue… Hooray for Surprises. And so I’m using the Pool Party Crinkled ribbon as my Sale-a-bration item.

For my card base I’m using Pool Party cardstock of course! I’m pairing it with Daffodil Delight to keep the colour combination nice and bright. Plus it’s a great colour for all the candle flames.

To make my background, I stamped a bunch of candles, using Pool Party and Daffodil Delight ink, around my sentiment… which is in Pool Party ink. Then I stamped a birthday cake on a smaller piece of Basic White cardstock using more Pool Party. The candle and flame are in Daffodil Delight. I framed that with another piece of Pool Party cardstock and then popped it up with a few Stampin’ Dimensionals on top of my Sale-a-bration ribbon. To finish it off, I added a little bit more of the ribbon with a simple know.
#SimpleStamping Birthday Card

I’m so tempted to add some Wink of Stella to this #SimpleStamping birthday card. Or maybe even a few Rhinestone Basic Jewels. Heat embossing the flames would be another great way to level up this card design.

Check out another one of my #SimpleStamping cards here.

Product List
Enchanted Butterfly Slimline Card

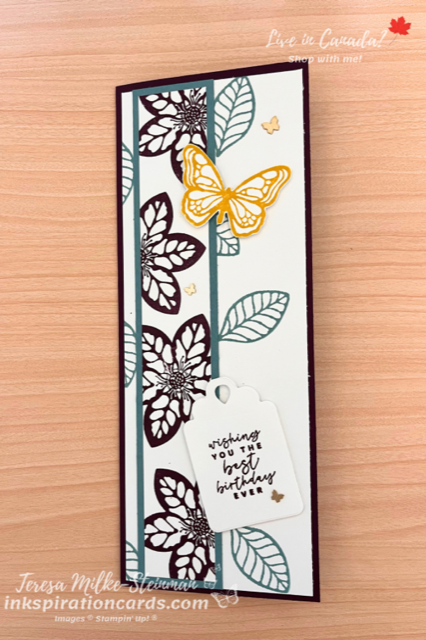
I haven’t made one of these cards in a while. And something about this stamp set told me I needed to make an Enchanted Butterfly slimline card. I’m just getting started with this new stamp set from the Annual Catalogue and can’t wait to see what I else I end up crafting! This set will definitely be used to make some thank you tags for my customers. In the meantime though this card was a lot of fun to make.

I decided to use Blackberry Bliss and Lost Lagoon for my colour combination. Since the return of Lost Lagoon I’m finding I’m using it ALOT! Plus it’s a nice compliment to the darker Blackberry Bliss. I used Blackberry Bliss for the card base and then added a strip of Lost Lagoon cardstock to frame the large Blackberry Bliss flowers.

Behind the flowers I have some Lost Lagoon leaves. Then on top of that I stamped a sentiment from the Season of Chic stamp set. I used one of the Something Fancy dies to cut out the sentiment and then popped it up with some Stampin’ Dimensionals. I had to add a butterfly of course! And this one is stamped with Crushed Curry. I kind of wish that there were coordinating dies for this stamp set, but the images aren’t too bad to fussy cut. The butterfly is popped up too. And to finish it off I added a few Brushed Brass Butterflies.

Enchanted Butterfly Slimline Card

This stamp set has a few larger images in it. So an Enchanted Butterfly slimline card, works out great!

Check out the card I shared earlier this week using the same stamp set here.

And you can find the Enchanted Butterfly stamp set in my online shop.

Enchanted Butterfly Birthday Card

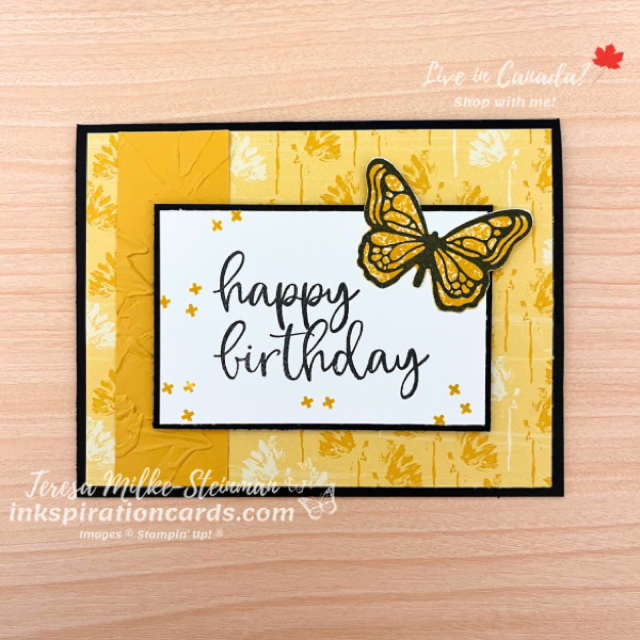
I was so excited when I saw this new stamp set from Stampin’ Up! If you’ve been following me for a while then you’ll know I LOVE butterflies and that I was pretty sad when the Butterfly Brilliance stamps and dies retired. (I’m holding on to those for sure!) Enchanted Butterfly was not part of the demonstrator pre-order back in April, so I had to wait. But I finally have it now and I’m so excited to get crafting with it! My first project is an Enchanted Butterfly birthday card.

Recently a team member shared a card in our group and I liked her design. (Thanks Diane Kent!) So I used that as my starting point and tweaked it as I went. I of course was adding a butterfly so I flipped through the Inked Botanicals Designer Series Paper pack for a design that would work for my background. Usually I don’t use a lot of yellows when I craft, but I loved this Crushed Curry design. It’s so simple and so pretty! To help it pop I’m using Basic Black cardstock for my base and for the centre frame.

On top of my DSP card mat I layered a piece of Crushed Curry cardstock that I embossed with the Painted Texture 3D embossing folder. This is one of my favourite embossing folders right now. It just adds that little something more you know. Then on top of that I used a “happy birthday” from the Biggest Wish stamp set. I stamped that with Tuxedo Black Memento ink and sprinkled some crosses around it using Crushed Curry ink.

Next I stamped the front facing butterfly image with Memento ink on a separate piece of Basic White cardstock. Once that was dry I flipped over the stamp to colour it in using Crushed Curry ink. Because this stamp set is reversible you can get nice clean images no matter what side you use. With other, non-reversible, stamp sets the image doesn’t line up when you flip them over. Then I popped up the butterfly and sentiment using some Stampin’ Dimensionals.

Enchanted Butterfly Birthday Card

If you want to add a little something more to this Enchanted Butterfly birthday card, you could add some Wink of Stella to the butterfly. Or you could add some Brushed Brass Butterflies.

You can find the Enchanted Butterfly stamp set and Inked Botanicals DSP in my online shop.

And you can check out this project I made using the recently retired Butterfly Brilliance stamp set here. I’ll be sharing another project using Enchanted Butterfly later this week, so make sure to follow my blog to get notified when I post!

Patterned Paper Birthday Card

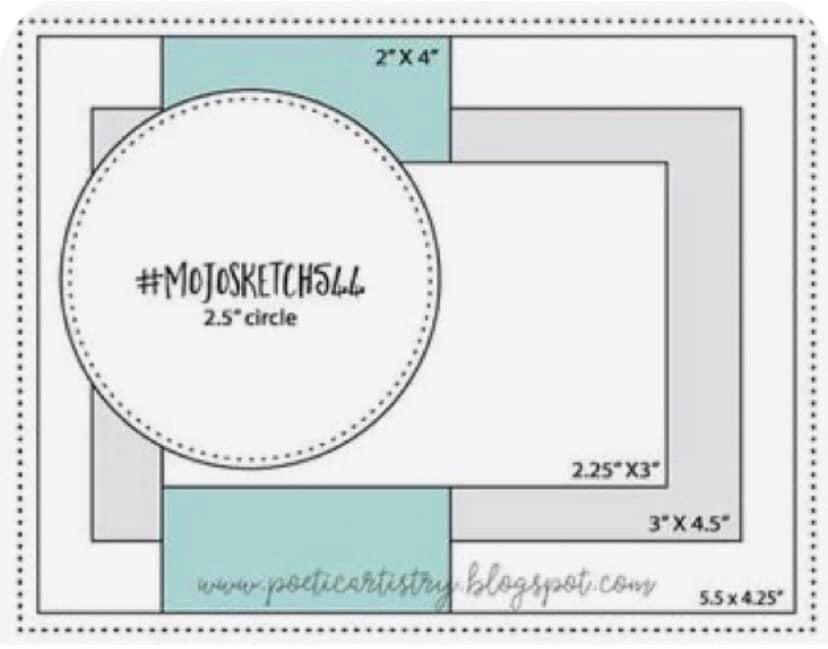
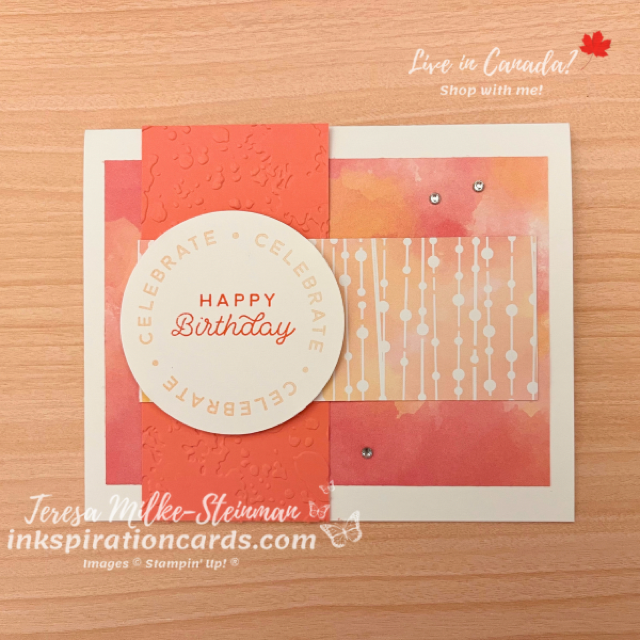
Without even realizing it I chose a great sketch design for Designer Series Paper for my team’s monthly creative challenge! Each month I choose a sketch design, theme or colour combination for them to use to spark some inkspiration and have some creative fun. They use whatever they have on hand and then post a pic in our Facebook group. For mine I’m making a patterned paper birthday card.

Patterned Paper Birthday Card

I’m having a lot of fun right now crafting with the online exclusive Hello Irresistible DSP. The colours… the designs… so pretty! I especially like the designs using Petal Pink and Flirty Flamingo. To help the colors from the patterned paper stand out I’m using a Basic White card base. Then I layered 2 different designs on top. In between the 2 layers of DSP I have an embossed piece of Flirty Flamingo cardstock. I embossed it using the splatter 3D embossing folder.

Then to make it a birthday card I used a couple of sentiments from the Circle Sayings stamp set. I used Petal Pink ink for one and Flirty Flamingo ink for the other. Once I punched them out using the coordinating punch, I popped it up with some Stampin’ Dimensionals. And to finish it off I added a few Rhinestone Basic Jewels.

Stampin’ Up!s DSP packs make it really easy to create a pretty patterned paper birthday card… or any kind of card really!

Check out the card I made earlier this week using the same pack of DSP here.

If you want to join in on all the fun then join my team! I’m surrounded by a wonderful and creative bunch of people on both my smaller and larger team. PLUS if you join before June 30th you’ll get $206 worth of Stampin’ Up! product instead of $165 for only $135 (no tax or shipping depending on the province)!!! Sign up here!

Summer Themed Birthday Card

Yes September is here. And yes Fall is less than two weeks away. But I’m still enjoying the warm summer weather. I think that’s where the inkspiration came from for today’s card. Plus I wanted to do some colouring! So that’s where I started… with the stamped image I wanted to colour. The In the Moment works great for this summer themed birthday card. I love all the images in this stamp set, but to keep with a summer theme there was only one choice.

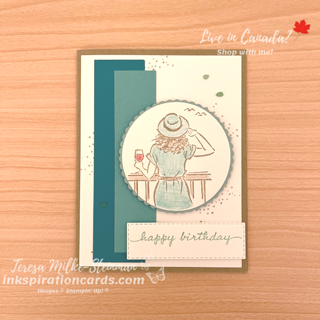
Then I picked my colour combination. I love blues and browns together and they’re a great combo for summer too! I used Crumb Cake as my base colour; the card base and the specs of sand behind all the other elements. Then I have 3 different blues. The blues are Bermuda Bay, Coastal Cabana and Pool Party. I liked the idea of the shades going from dark to light and so I simply used some strips of the different shades.

The image in the centre is stamped with Crumb Cake and then coloured with the Watercolour Pencils. I used Early Espresso from the first assortment. And Coastal Cabana and Cherry Cobbler from the second. I added a Pool Party scalloped circle behind it (using the Layering Circles dies) and popped them up with Stampin’ Dimensionals. The phrase is from the Happiness Abounds stamp set and I stamped in with Pool Party ink. Before I popped it up I die cut it using the Stitched Rectangles dies. And to finish it off I added a few of the blue-green Faux Sea Glass Shapes.

Summer Themed Birthday Card

I really like how this summer themed birthday card turned out! And I might need to add to my cardstock stash so I can do something similar with some Fall colours.

Check out one of the first cards I made with the In the Moment stamp set here. And you can find it here in my online shop.

Classic Handmade Masculine Birthday Card

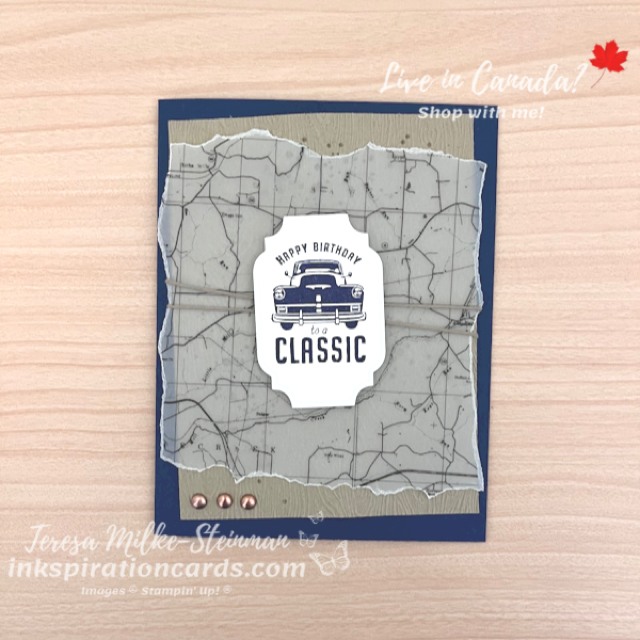
Just a couple of weekends ago was my father-in-laws birthday. He’s big into classic cars and so the He’s All That bundle is perfect for this classic handmade masculine birthday card. And to step it up a bit there were a few things I wanted to pair it with for this card design.

For the card base I used Night of Navy and then layered a few different things on top. The first layer is a piece of Crumb Cake cardstock that I stamped with the paint splatter image from the Quiet Meadow stamp set. Next I embossed it using the Timber 3D embossing folder. Then I tore a piece of the Vellum 12 x 12 Layering Designs. To hide the adhesive I placed it in the centre so I could cover it up with the phrase.

The phrase came from the He’s All That stamp set. Of course I went with the one with the classic card! Then I cut it out with one of the coordinating dies. I popped it up with a few Stampin’ Dimensionals and then added a bit of Crumb Cake twine behind it. To top it all off I added a few Brushed Metallic Adhesive-Backed Dots.

Classic Handmade Masculine Birthday Card

I really like how this classic handmade masculine birthday card turned out. And I hope my father-in-law enjoys it!

Since I got the He’s All That bundle, making masculine cards has been so much easier! I know I’m not the only one that finds these kinds of cards trickier to design. To help spark some more inkspiration, check out this other card I made with this great set of stamps and dies here. And make sure to head over to my online shop where you’ll find the Brushed Metallic Adhesive-Backed Dots on sale as part of Stampin’ Up!s Weekly Deals!

#SimpleStamping Birthday Card

For this month’s #SimpleStamping challenge Stampin’ Up! is looking for a #SimpleStamping birthday card using stamps, ink, paper and a Sale-a-bration item. I’ve been having a lot of fun crafting with some of the Sale-a-bration products so I’m excited for this challenge. Especially since it gives me the chance to use these super cute hippos again! Check out one of my other cards using the Hippest Hippos here.

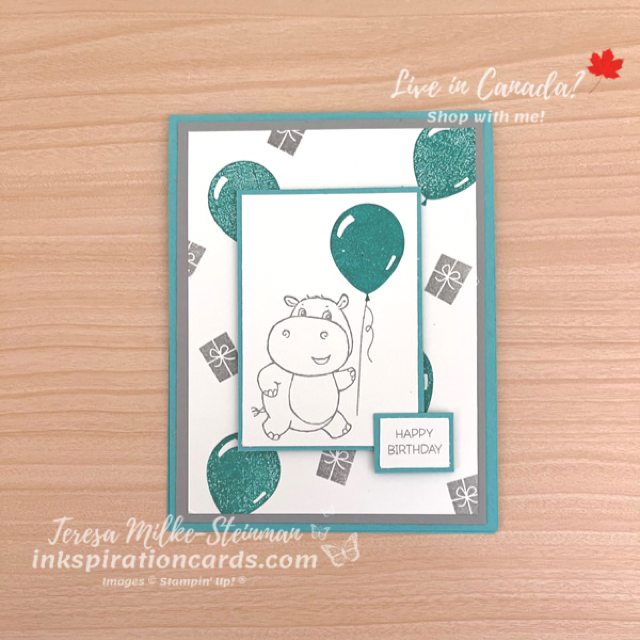
For this card I’m using a nice bright colour for my card base, Coastal Cabana. And Smoky Slate for my hippos. Then to make this a birthday card I’m pairing the Hippest Hippos from the Sale-a-bration catalogue with the Penguin Place stamp set from the July-December Mini catalogue.

I wanted the hippo to be the main focus for the card so I framed it with some more Coastal Cabana cardstock and popped it up with some Stampin’ Dimensionals. The “happy birthday” is also framed and popped up. Behind these I stamped a nice simple background. I used Coastal Cabana for the balloons and Smoky Slate for the presents.

#SimpleStamping Birthday Card

Both these stamp sets are super cute! And I love how they worked together to create this #SimpleStamping birthday card.

To step this card up you can add some Wink of Stella Glitterbrush to one or more of the balloons. And you could colour in the hippos using Stampin’ Blends or Watercolour pencils. Adding some bling is another easy way to step this card up and there are so many options to choose from.

Check out the Hippest Hippos and the other Sale-a-bration products over in my online shop. Sale-a-bration ends on August 31st, but don’t wait til then to put in your order things are already starting to sell out!

Mirror Fold Card

Fancy Folds Design Team

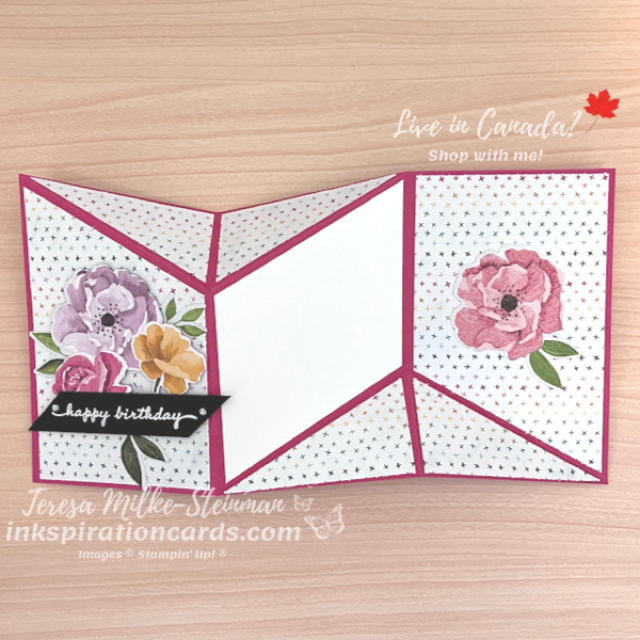
It’s blog hop time again! And this month the Fancy Folds Design Team is making a Mirror Fold Card. I saw this card a little while ago and am excited to share it with you. For measurements and steps to try this yourself check out my YouTube video. Just as a heads up there were a couple of parts that were a bit tricky, but I still love how these cards turned out.

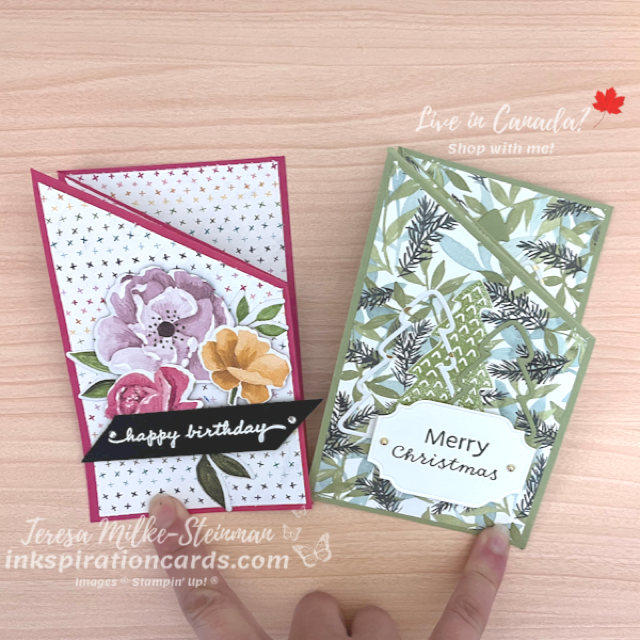
For whatever reason I decided to make two different versions of this card. Maybe it’s the excitement from the newly launched July-December mini catalogue. Who knows?! Anyway… I made one version using the Hues of Happiness suite of products to make a birthday card. And the other version is a Christmas card using the All Spruced Up bundle.

For the birthday card I used Melon Mambo for the card base and a simple design for my patterned paper. The Hues of Happiness Designer Series Paper is sssooo pretty, but I wanted a simple design so the the flowers would be the focus. I cut out the flowers using the coordinating dies. Don’t you just love it when the dies work for both the stamped images AND the images in the DSP pack? I know I do! I popped up the flowers on the front panel using some Stampin’ Dimensionals and then heat embossed “happy birthday” in white on a piece of Basic Black cardstock. Then to finish it off I added a couple of Rhinestone Basic Jewels.

Mirror Fold Card

For the Christmas card I used Pear Pizzazz for my card base and the Painted Christmas Designer Series Paper. I’m so glad this pack of patterned paper is back! The designs are so pretty and some can be used for occasions other than Christmas too. To decorate this version I used the All Spruced Up dies with a few different papers, including the Gold & Silver Foil DSP from the Sale-a-bration catalogue. I cut out the phrase with one of the He’s All That dies and popped it up with some Stampin’ Dimensionals. And when I finally found my Festive Pearls I added a couple of the gold ones to the card to finish it off.

Mirror Fold Card

I hope you enjoy this month’s fun fold! Keep hopping around the world and check out the next Mirror Fold Card from Mette Nordling Shaw here.

And you can always check out what we made last month, which was a Diamond Z Fold card. Check out that hop starting here.