Crafting with You

This year for my ScrapFest Make & Take I’m using a very themed stamp set… Crafting with You. If you’ve seen the stamp set and dies then you’ll know why I couldn’t resist. I mean just the paper trimmer and emboss machine that’s part of this set make it a great addition to any paper crafter’s craft stash!

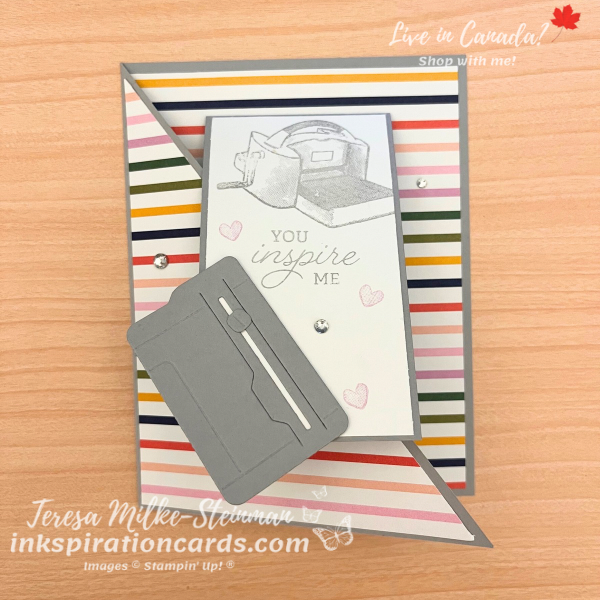
I’m pairing it with the Delightfully Eclectic Designer Series Paper pack that’ll soon be retired. It’s nice and colourful! And I cut up a couple of different designs to give some options with this fun fold card. I wanted to do something a bit different, but still easy enough to copy from the sample. And because I have a couple of different designs of patterned paper, I’m using a nice neutral card base; Smoky Slate. Plus this is the perfect colour for the paper trimmer and scissors I die cut in advance.

To make the base, you’ll start with a standard 5 1/2″ x 8 1/2″ card base. I highly recommend that you score it in half (at 4 1/4″) before you diagonally cut half of the front of the card base off. It definitely makes it easier! Then I added another piece of Smoky Slate cardstock which I folded in half and added some Basic White to the inside and outside.

From here I simply stamped a sentiment and an emboss machine of the outside piece of Basic White cardstock using Smoky Slate ink. Then to pull a little colour from the DSP, I stamped a few little hearts with Fresh Freesia ink. Next I added a die cut paper trimmer. And to finish it off a few Rhinestone Basic Jewels for some bling.
Crafting with You

I hope that everyone at ScrapFest enjoys crafting with Crafting with You as much as I have been! I’m so glad to see that it’s sticking around for a while longer.

Sadly the Delightfully Eclectic DSP pack is not. Check out a masculine themed card I made with this great pack of patterned paper here.

And don’t forget the last chance sale is only for a little while longer!

Product List
Handmade Thinking of You Card

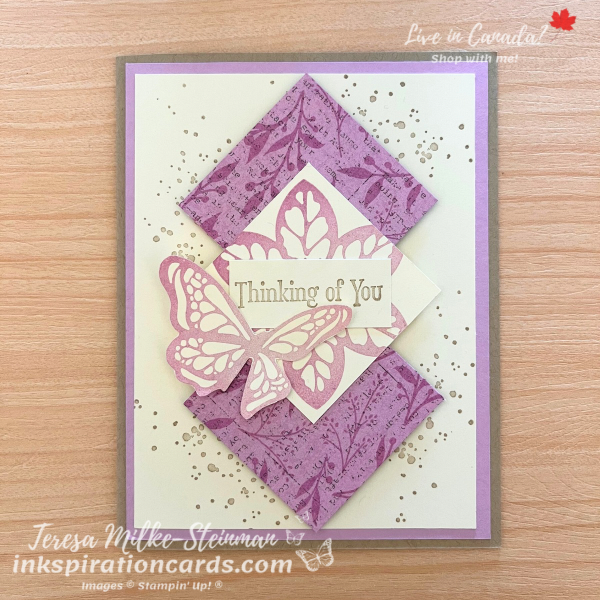
Over the next few weeks I’m going to be sharing projects using some of the products that are retiring very soon. This week I’m using the Quiet Meadow stamp set and Masterfully Made Designer Series Paper to make a handmade thinking of you card. This is also the theme for this month’s #SimpleStamping challenge from Stampin’ Up! For this challenge we can use some DSP along with the usual stamps, ink and paper.

I used my patterned paper design choice to lead to my ink and cardstock colours. The Fresh Freesia design in the Masterfully Made DSP pack has been my favourite, so I’m using some of my last pieces for this design. I’m also using some Crumb Cake to tone down the brightness of the Fresh Freesia to keep with the more subdued theme of the thinking of you card.

So the card base is Crumb Cake cardstock with some Fresh Freesia layered on top for the card mat. Then I stamped some Crumb Cake ink splatter to create a simple background. On top of that are two pieces of the Masterfully Made DSP Fresh Freesia design. I thought it’d be fun to layer some diamonds on top of the background. The centre diamond is a Fresh Freesia flower from the Enchanted Butterfly stamp set… which sadly is also retiring. I popped up all three diamonds with some Stampin’ Dimensionals. Then to finish it off I added the “thinking of you” from the Quiet Meadow stamp set in Crumb Cake ink. I added that right on top of the flower. And then I fussy cut a Fresh Freesia butterfly, also from the Enchanted Butterfly stamp set.

Handmade Thinking of You Card

To step up this #SimpleStamping handmade thinking of you card, you can simply add a few Brushed Brass Butterflies. Or maybe a couple of die cut butterflies from the coordinating Meadow dies.

Keep checking back for more projects featuring some of the soon to be retired products. And as soon as I can, I’ll share some projects with some things from the upcoming new Annual catalogue.

In the meantime, check out this fun slimline card I made using the Enchanted Butterfly stamp set.

Product List

Fun Card with Hooray for Surprises

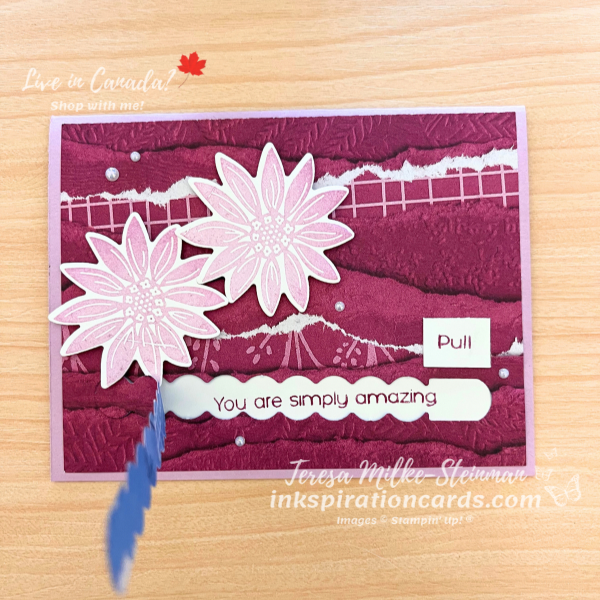
I finally tracked down my Hooray for Surprises dies! And so I’m excited to use all the different dies in the set. There are some more typical dies in this set. But there’s also some that will make a different kind of card. Here’s my first fun card with Hooray for Surprises… the dies AND stamps.

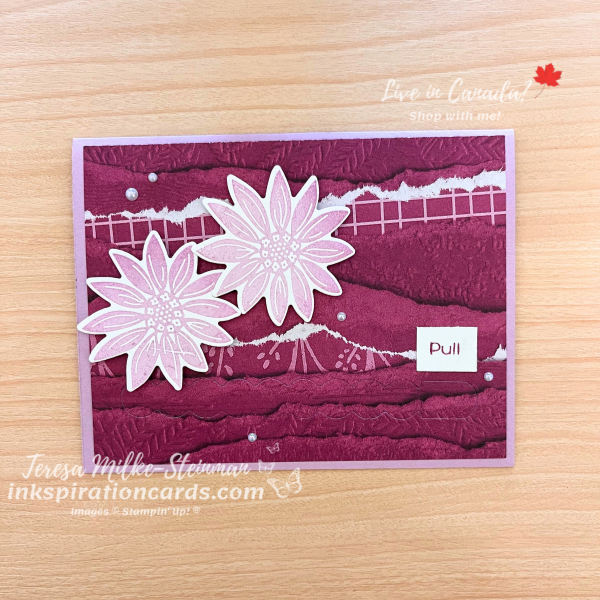
For this first card I’m using the die that makes a “pull me” kind of card. It’s kind of like when you pull a tab to open a box or envelope… except way more fun! And so with that idea in mind, I thought I’d use one of the designs from the Masterfully Made Designer Series Paper pack that looks like it’s torn. This one is Berry Burst, one of the retired colours that came back in last year’s Colour Refresh. I die cut the “pull me” tab towards the bottom of the design. And I stamped my sentiment in Berry Burst ink on a piece of Basic White cardstock to put behind it.

The card base is Fresh Freesia. Which is also my other ink colour. I used it to stamp two flowers. Then I die cut them and popped them up with some Stampin’ Dimensionals. To finish it off I added a few Iridescent Pearl Basic Jewels.

Check out another fun card with Hooray for Surprises that I made here.

Product List

Valentine’s Day Card with Hello Ladybug

I think I might be almost done with my Valentine’s Day crafting for this year. And part of me is kind of sad about it because I’ve been having so much fun! But before I’m done I need to share a cute Valentine’s Day card with Hello Ladybug. And while this isn’t necessarily a Valentine’s Day stamp set per se, it’s easy enough to add a “Happy Valentine’s Day” to these cute ladybugs.

For my colours I’m pulling from one of the designs of the Sale-a-bration Flight & Airy Designer Series Paper… Fresh Freesia and Bubble Bath. Not exactly traditional Valentine’s Day colours, but I love the combination and I think this patterned paper will make pretty wings.

My card base is Bubble Bath. And then I used a little bit of both for my ink colours. The little hearts around the edges are Bubble Bath. Next I layered a piece of Basic Black cardstock and a piece of the DSP. I made my bumblebee with Bubble Bath and Tuxedo Black Memento ink. And for my ladybug, I used some Basic Black cardstock and some of the DSP.

When I first say the bumblebee builder punch, I saw speech bubbles instead of the body. So I used that idea to add a cute sentiment for each bug. And then I popped them all up with some Stampin’ Dimensionals.

Valentine's Day Card with Hello Ladybug

I’m so glad I remember to make a Valentine’s Day card with Hello Ladybug. These bugs are just too cute!

Check out another Valentine’s Day card I made using the Bee My Valentine bundle here.

Product List
Handmade Thank You Card

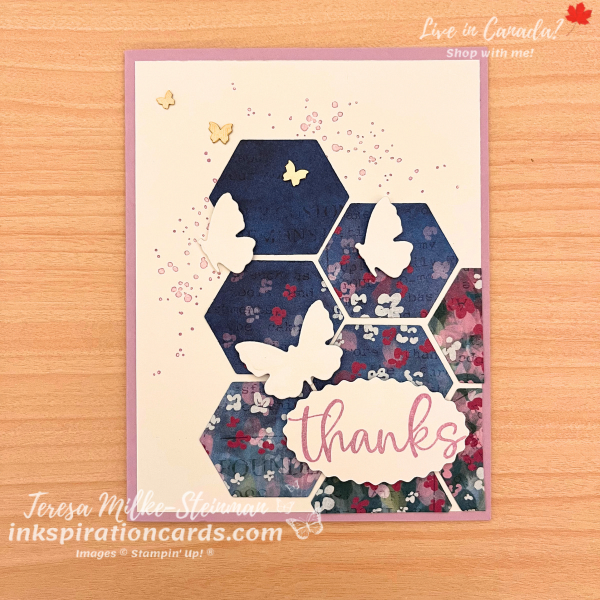
The original inkspiration for this handmade thank you card design came from a colouring page image I saw on Pinterest. Go figure! I really like the idea of popping images up on top of different shapes. And I just love butterflies so that’s where I started with my design.

To go with the butterfly theme I debated a couple of patterned paper options; Fresh like a Daisy and Masterfully Made. I really love the colours, smaller sized flowers and other elements in the Masterfully Made Designer Series Paper pack, so that was the winner. From there I pulled Fresh Freesia as my card base and ink colour.

Then to contrast the darker and eventually busier patterned paper, I stamped the simple ink splatter image from the Quiet Meadow stamp set. And I stamped off on a scrap piece of paper first to make the Fresh Freesia even lighter. Next I added the hexagon shapes that I cut using one of the Something Fancy dies. Starting with just one and spreading out as I went down the cardstock.

For my butterflies I used two different ones. I started with the smaller Brushed Brass Butterflies and then die cut some larger ones using the Meadow dies. I popped up the cardstock butterflies with some Mini Stampin’ Dimensionals. And the “thanks” comes from the Biggest Wish stamp set. I punched that out with the Double Oval Punch and then popped it up with some Stampin’ Dimensionals.

Handmade Thank You Card

This handmade thank you card design is such a nice one! I think I’ll have to try it with some different shapes and/or images next time.

Check out another card I made using the Masterfully Made Designer Series Paper pack here.

Product List

World Card Making Day 2023

This past Saturday I celebrated World Card Making day 2023. It actually didn’t look much different than other Saturdays. Except for maybe a little extra crafting time when I joined Stampin’ Up!s free online event! It was a lot of fun. And they shared a sneak peek at some upcoming online exclusive products coming out next month.

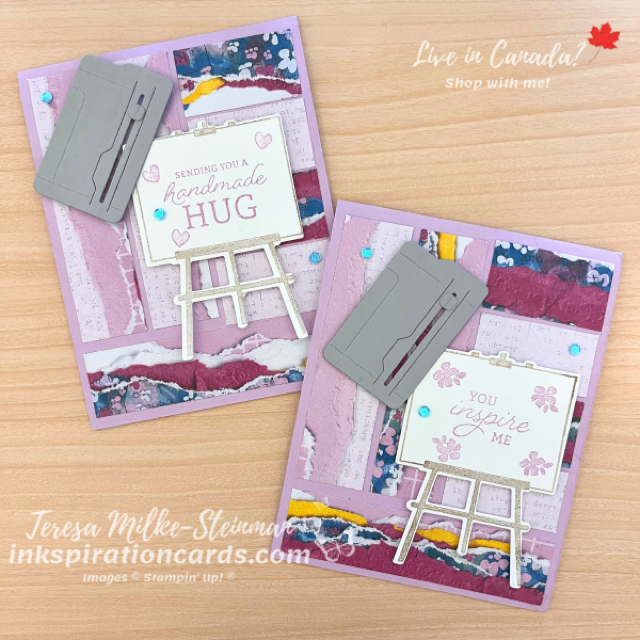
Before the online event I shared this card over on my YouTube channel. It shows off the Crafting with You bundle which I thought was very fitting for the day. I’m just starting to craft with this bundle and can’t wait to make some more projects with it! For this card I used a Fresh Freesia card base. Then I layered a few strips of the Masterfully Made Designer Series Paper to create a kind of quilted background.

On top of that I have an easel that I stamped with Crumb Cake ink and decorated with a Fresh Freesia sentiment and flowers. Once I die cut that out, I popped it up with a few Stampin’ Dimensionals. Then I created a Smoky Slate paper trimmer. I added the ‘moving’ blade with a Mini Glue Dot and then popped that up too. To finish it off I added a few of the blue Pastel Adhesive-Backed Sequins.

World Card Making Day 2023

Check out the video I shared for World Card Making day 2023 here!

And if you’re looking for more ideas and stamping tips then sign up for my weekly newsletter! Every week I share project ideas, stamping tips, sneak peeks and much more. Plus right now, exclusively for my newsletter subscribers, I’m also sending holiday themed projects every week. Complete with a supply list and step by step instructions to help you have an awesome holiday season! Find more information here.

Bright & Beautiful Handmade Birthday Card

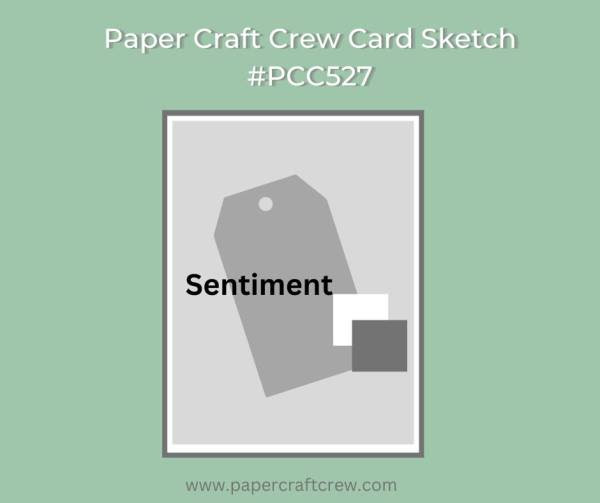
This week’s Paper Craft Crew challenge is a sketch challenge; PCC 527. At first I wasn’t sure what I wanted to do. But then I thought of the Beautiful Balloons stamps and dies… actually the whole Bright & Beautiful suite. It’s been a little while since I crafted with them, but I think this sketch works great to make a Bright & Beautiful handmade birthday card. Here’s the sketch design we’ve been given…

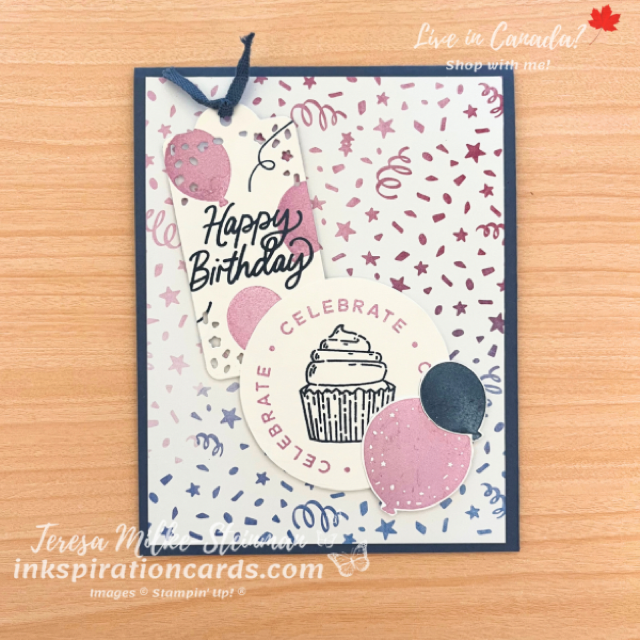
From here I picked my Designer Series Paper design. I went with one of the more simple designs that uses Misty Moonlight and Fresh Freesia. So for the card base I used Misty Moonlight cardstock. I layered on a nice big piece of the DSP for my card mat. Then I popped up a tag I made using some Fresh Freesia balloons and Misty Moonlight ribbons. I love the little confetti holes that this die makes! The ‘happy birthday’ is also in Misty Moonlight. And the ribbon is from my retired stash. I still have a little bit of the Misty Moonlight cotton trim.

Then I layered on a Misty Moonlight cupcake from the Circle Sayings stamp set. The ‘celebrate’ circle is also from this stamp set and I punched it all out with the coordinating punch. I popped this up too. Along with a couple of balloons that I stamped and die cut.

Bright & Beautiful Handmade Birthday Card

As I’m typing this I’m wondering why I didn’t add some Rhinestone Basic Jewels! You totally should! Even without them I still like this Bright & Beautiful handmade birthday card.

Check out all the other cards for this week’s Paper Craft Crew sketch challenge here.

And check out my last card for the Paper Craft Crew here.

Goodbye Fresh Freesia

Stampin’ Up! shared how they’re freshening up their colours for the upcoming catalogue with demonstrators this week. I’m sad and excited about what’s to come and I think you will be too! With the new Annual Catalogue coming in just a few weeks I’ve been taking some time to share projects with the 2021-2023 In Colours. As part of this I’ve been sharing projects this week to say goodbye Fresh Freesia. So imagine my surprise when I find out that I don’t have to!

Fresh Freesia is one of my favourites of the 2021-2023 In Colours. So I decided to use it to craft my card for my team’s monthly sketch challenge. Here’s the sketch we’re working with…

goodbye fresh freesia

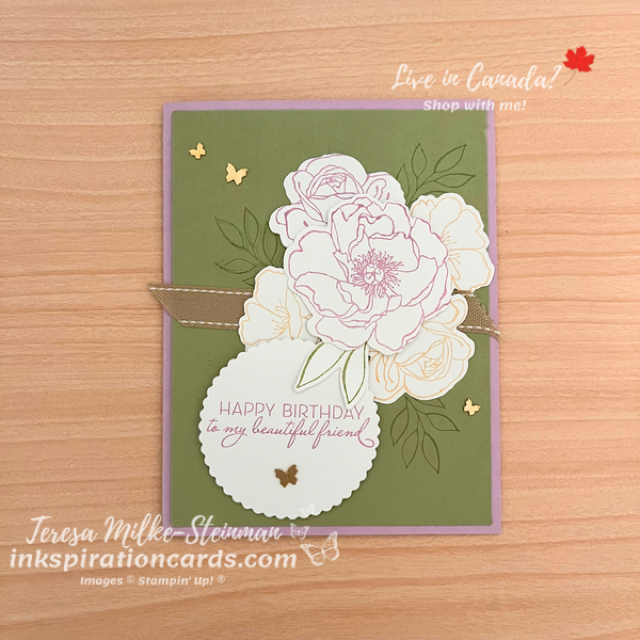
For my design I’m using the Happiness Abounds bundle (which sadly is retiring) to create a pretty bouquet of flowers. Fresh Freesia is the main colour, of course, but I’m also using Pale Papaya and Pear Pizzazz. I did a little bit of tone on tone stamping with Pear Pizzazz for the leaves. And then I used Fresh Freesia and Pale Papaya for the different kinds of flowers.

Behind the flowers I added a strip of Burlap ribbon from the Real Red & Burlap ribbon combo pack. Then popped up the centre, larger flower with some Stampin’ Dimensionals. The sentiment comes from the Friends are like Seashells stamp set. And I stamped that with Fresh Freesia ink and then used the Layering Circles dies. To have it on the same level as the centre flower I added a few more Dimensionals. Then finally to finish it off I added a few Brushed Brass Butterflies.

Goodbye Fresh Freesia

I’m so glad I don’t have to say goodbye Fresh Freesia! Sadly we do have to say goodbye to Pale Papaya. Check out one of the projects I featured last week using that colour here.

And if you want a sneak peek at some of the new colours, check out this YouTube video from Stampin’ Up!

Diamond Flip Fold Card

Fancy Folds Design Team

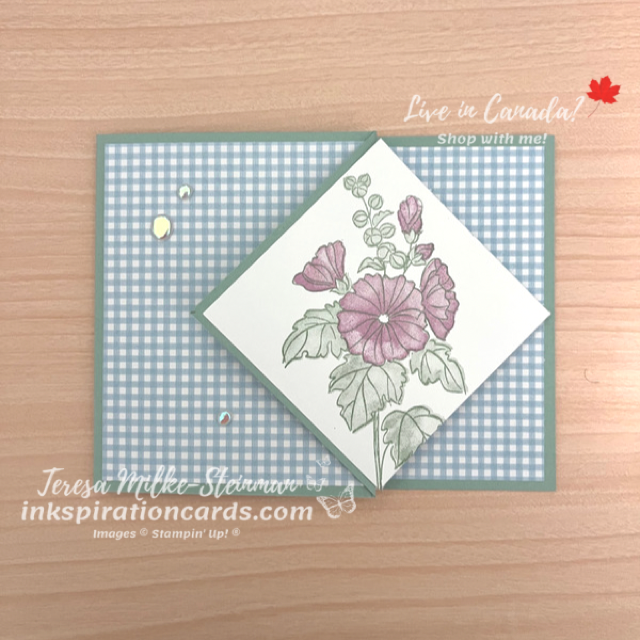
The Fancy Folds Design team is back for another year of fun fancy folds! And this month we’re making a Diamond Flip Fold card. It’s a nice simple fun fold card to ease back into things. For measurements and video instructions, check out this video from Linda Bauwin, a Stampin’ Up! demonstrator from the United States. And the measurements I used for my Basic White squares is 2 7/8″ x 2 7/8″.

This week I’m crafting with the Beautifully Happy stamp set from the Sale-a-bration catalogue. So I started my design with that in mind. One of my colours is of course a green (Mint Macaron) and so I pulled out the Country Gingham 6 x 6 Designer Series Paper. The smaller design from this sheet really helps the flowers be the focal point. Then to go with the Mint Macaron I chose Fresh Freesia. It’s such a pretty purple and I love pairing greens and purples together!

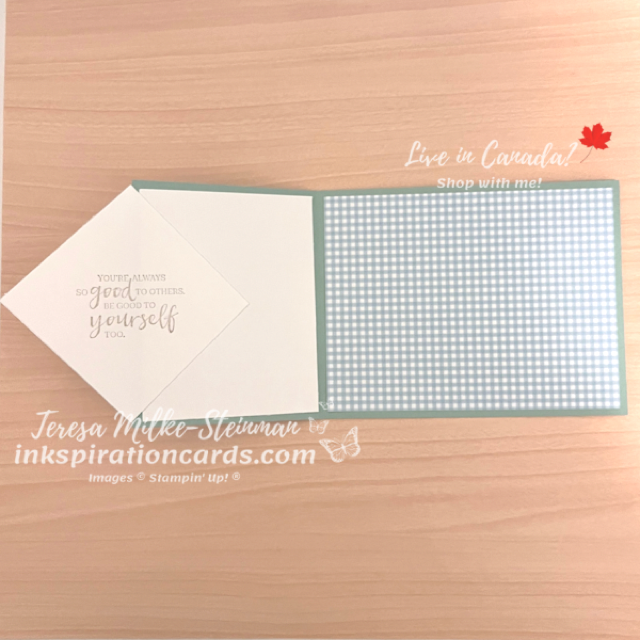
For the stamping I stamped the outline with full strength Mint Macaron. But for the “filling in” I stamped off for the leaves and buds. Then it was back to full strength for the flowers. I added a sentiment from the In the Moment stamp set to go on the inside. And went with Crumb Cake for my ink colour. As much as I love Fresh Freesia, I wanted a more subtle colour for the sentiment I chose. Then to finish it off I added a few of the Flat Adhesive Backed Pearls to add a little bit of bling. I also added some Wink of Stella to the flowers once they were fully dry.

To keep going on this month’s Diamond Flip Fold card hop, check out Mette Nordling Shaw’s card here.

You can also check out last month’s hop here, where we made a Shaded Gatefold card. That was definitely a fun one!

And don’t forget… Sale-a-bration is almost over! So if you’d like to earn the Beautifully Happy stamp set that I used in today’s card then head over to my online shop before February 28th!

Beautifully Happy

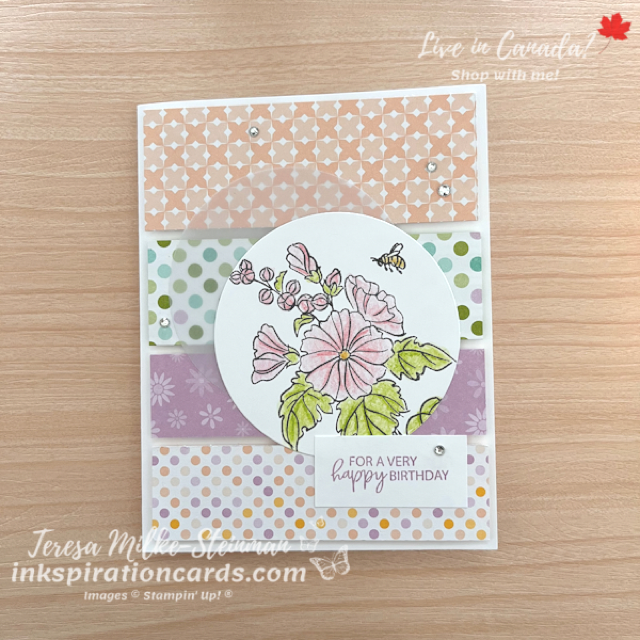
This year I decided to focus on featuring one products in all my projects for the week. For this week it’s the Dandy Designs Designer Series Paper from the Sale-a-bration catalogue. And for this card I’m pairing it with the Beautifully Happy stamp set, which is also from the Sale-a-bration catalogue. This is such a great stamp set! There are lots of different sentiments that make it versatile. And you can use the images for colouring or for 2-Step stamping.

For this card I started with a few different strips from the Dandy Designs DSP pack. To help the colours pop I’m using a Basic White card base and I decided to pop up the strips with some Stampin’ Dimensionals to be a bit different this time. On top of the DSP strips I added a piece of vellum that I cut using one of the Layering Circles dies. Then on top of that I have another die cut circle of the same size in Basic White.

Instead of doing 2-Step stamping I wanted to colour my images. So I stamped them with Tuxedo Black Memento ink. Once it was dry I used the Watercolor Pencils, assortment 2, to colour them in. I used Flirty Flamingo for the flowers and buds. And to give a little more depth to them I pressed more firmly in certain areas to get a darker shade. For the centre of the flower and the bee I used Crushed Curry. And then for the leaves and stems I used Granny Apple Green.

To finish it off I stamped the sentiment with Fresh Freesia ink. And then added a few Rhinestone Basic Jewels.

Beautifully Happy

I’m going to miss the Beautifully Happy stamp set. I can’t believe that Sale-a-bration is already more than half over!

If you want to learn more about this year’s one and only Sale-a-bration check out this post. And to take advantage, and earn FREE exclusive products, before February 28th head to my online shop!