#SimpleStamping Just Because

Before this month is done I want to make sure I do this month’s #SimpleStamping challenge! This month we’re making a #SimpleStamping just because card. A card to say ‘hello’. And this month we can use something extra. This month we can use a punch on top of the usual stamps, ink and paper.

This time I’m using some retiring products and colours for my card. Two of my favourite colours are retiring; Rich Razzleberry and Pear Pizzazz. I’m especially sad about Pear Pizzazz. That’s been my go-to colour for leaves and foliage. So I had to use it one more time with the Happiness Abounds stamp set (which is also retiring).

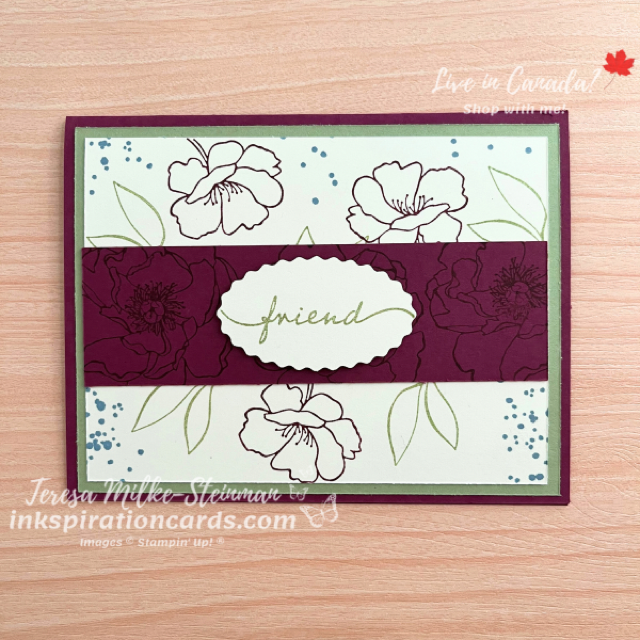
Rich Razzleberry is my card base. And Pear Pizzazz is my card mat. Then in the background I stamped a mix of Pear Pizzazz leaves and Rich Razzleberry flowers. I also added a splash of Boho Blue, one of the new In Colours from the upcoming Annual catalogue. Then along the centre strip of Rich Razzleberry cardstock I did some tone on tome stamping with the large flower.

To make this a simple card to say hello, I stamped “friend” in Pear Pizzazz ink. Then I punched it out with the scalloped oval from the Double Oval punch. And to add at least a little something to the card, I popped up my word with some Stampin’ Dimensionals.
#SimpleStamping Just Because

I enjoy making cards for all occasions, so to do some #SimpleStamping just because was pretty fun!

Check out the card I made for last month’s #SimpleStamping challenge here. It also features the Happiness Abounds stamp set.

And there’s only one more week to get any of the retiring products. Don’t miss out! See what’s still available before it’s gone for good in my online shop here.
Goodbye Fresh Freesia

Stampin’ Up! shared how they’re freshening up their colours for the upcoming catalogue with demonstrators this week. I’m sad and excited about what’s to come and I think you will be too! With the new Annual Catalogue coming in just a few weeks I’ve been taking some time to share projects with the 2021-2023 In Colours. As part of this I’ve been sharing projects this week to say goodbye Fresh Freesia. So imagine my surprise when I find out that I don’t have to!

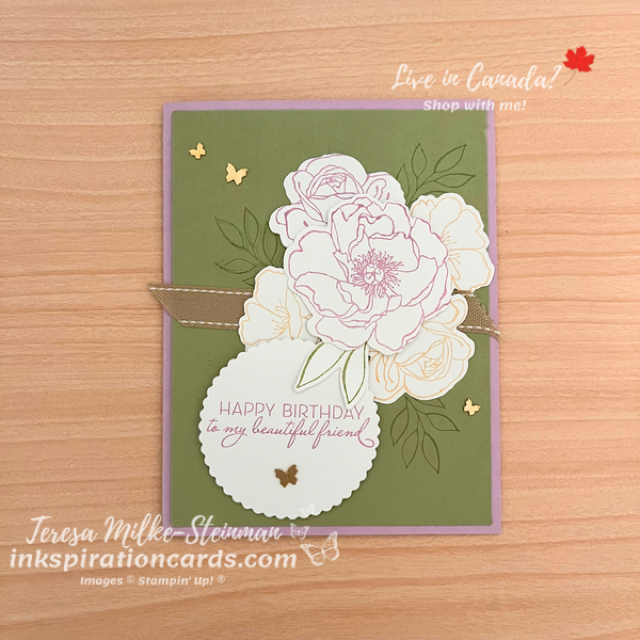
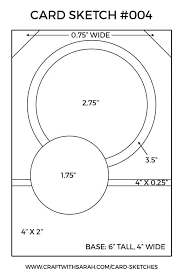
Fresh Freesia is one of my favourites of the 2021-2023 In Colours. So I decided to use it to craft my card for my team’s monthly sketch challenge. Here’s the sketch we’re working with…

goodbye fresh freesia

For my design I’m using the Happiness Abounds bundle (which sadly is retiring) to create a pretty bouquet of flowers. Fresh Freesia is the main colour, of course, but I’m also using Pale Papaya and Pear Pizzazz. I did a little bit of tone on tone stamping with Pear Pizzazz for the leaves. And then I used Fresh Freesia and Pale Papaya for the different kinds of flowers.

Behind the flowers I added a strip of Burlap ribbon from the Real Red & Burlap ribbon combo pack. Then popped up the centre, larger flower with some Stampin’ Dimensionals. The sentiment comes from the Friends are like Seashells stamp set. And I stamped that with Fresh Freesia ink and then used the Layering Circles dies. To have it on the same level as the centre flower I added a few more Dimensionals. Then finally to finish it off I added a few Brushed Brass Butterflies.

Goodbye Fresh Freesia

I’m so glad I don’t have to say goodbye Fresh Freesia! Sadly we do have to say goodbye to Pale Papaya. Check out one of the projects I featured last week using that colour here.

And if you want a sneak peek at some of the new colours, check out this YouTube video from Stampin’ Up!

#SimpleStamping with Happiness Abounds

I’m sharing another #SimpleStamping challenge today! This time I’m doing some #SimpleStamping with Happiness Abounds. And this month we’re only allowed to use stamps, ink and paper to make a birthday card.

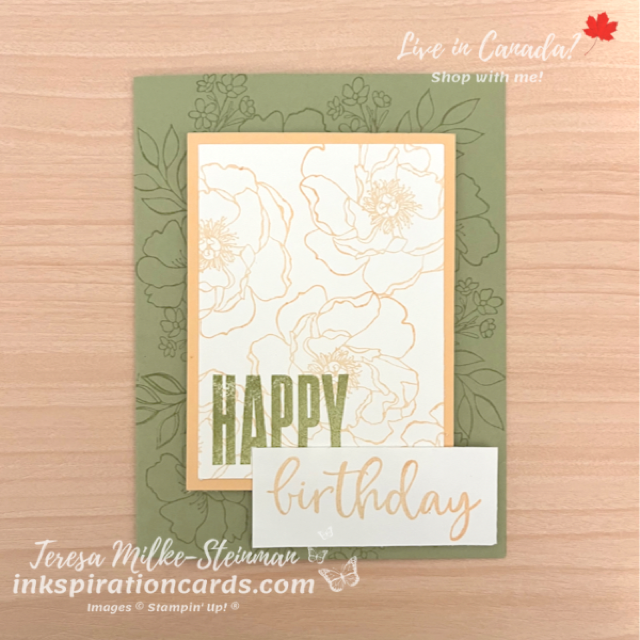
For this design I wanted to use Pale Papaya. Each week over the next few weeks I’m featuring one of the soon to be retiring 2021-2023 In Colours. I’m sad that this colour is retiring soon! This have been one of my favourites from this group. So to go with the Happiness Abounds stamp set and Pale Papaya, I’m using Pear Pizzazz to finish off my colour combination. I’m using the Pear Pizzazz for the card base. And then I’m also doing some tone on tone stamping to create a border with some of the smaller images.

With the Pale Papaya, I stamped a few of the larger flowers on a piece of Basic White cardstock. Then framed it with some Pale Papaya cardstock. To make it a birthday card I stamped “happy” in one font from the Biggest Wish stamp set right on top of the flowers. Then on a separate piece of cardstock I stamped “birthday” in a different font with Pale Papaya. And then I popped all these up with some Stampin’ Dimensionals.

#SimpleStamping with Happiness Abounds

To step this card up there are a few different options. You can add some Wink of Stella to the flowers in the centre. Or you can add a few Rhinestone Basic Jewels. And if you want to you could use some of the great rectangular dies!

Even without those, I really like this card using #SimpleStamping with Happiness Abounds. Simple can still look pretty!

Check out the In Colours I featured last week here… or here. Since it was St. Patrick’s Day last week I ended up using both Soft Succulent and Evening Evergreen in my projects.

And don’t forget to stock up on any of the 2021-2023 In Colour products soon! Polished Pink inkpads are already on low inventory! Once these sell out they are gone! Here’s the link to my online shop.

Decorative Borders

I got the Decorative Borders stamp set back in November at OnStage. That’s when I was knee deep in my holiday crafting and not too long after that we were off to Disney. So I haven’t really had a chance to craft with it yet. Finally I’m digging it out!

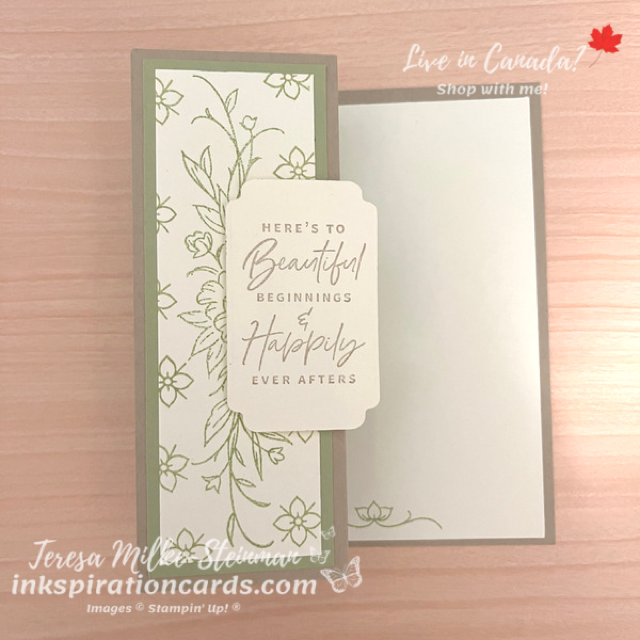
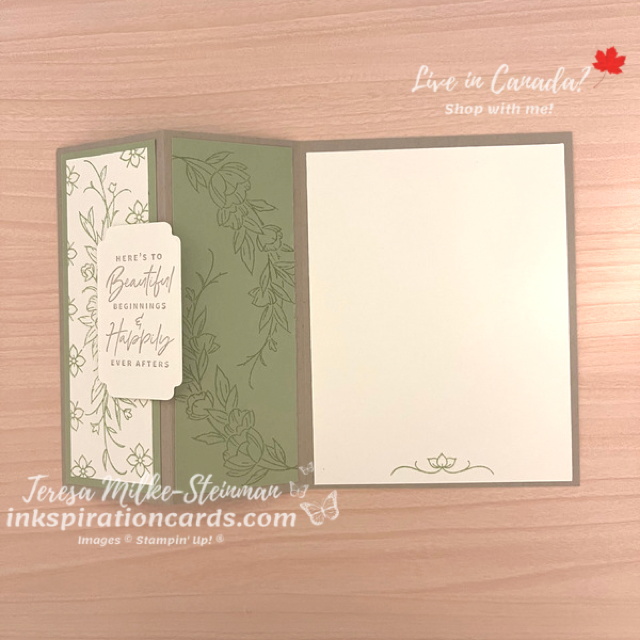
For this card I decided to make a Z-fold card. This is one of my favourite fun folds. And for my colour combination I’m using Pear Pizzazz and Crumb Cake. Pear Pizzazz is probably my favourite colour for leaves and other greenery. And with Spring coming I have a feeling I’ll be using it alot!

To start, I stamped a little something on the inside piece of Very Vanilla cardstock. Then I stamped a wall of foliage for the outer panel using Pear Pizzazz. I also did some tone on tone stamping for the middle panel.

The sentiment comes from the Something Fancy stamp set. I stamped it with Crumb Cake ink and cut it out with one of the coordinating dies. Then I popped it up some some Stampin’ Dimensionals.

A few more ideas popped in my head as I was making this card. So I’m looking forward to crafting some more with the Decorative Borders stamp set.

Check out another card I made with this stamp set here. Sadly the other stamp set I used, Adorable Owls, is no longer available. But you can really swap in any stamp set from your craft stash.

Need some supplies? Head over to my online shop and grab the Decorative Borders stamp set… along with whatever else you need!

Mirror Fold Card

Fancy Folds Design Team

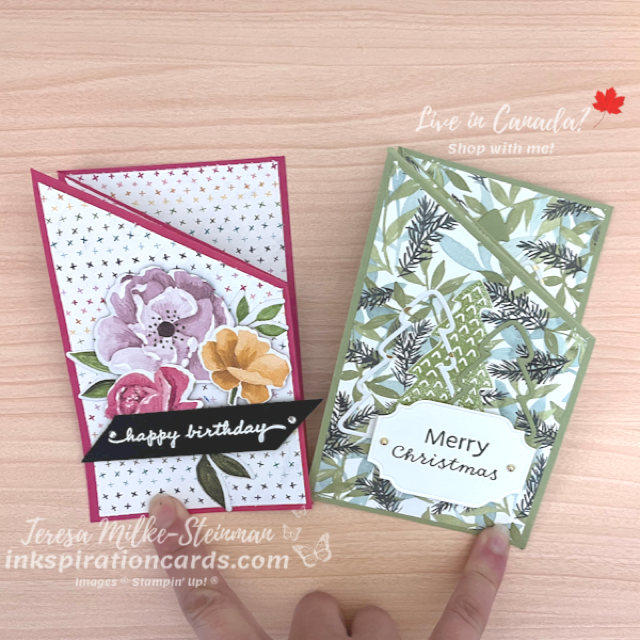
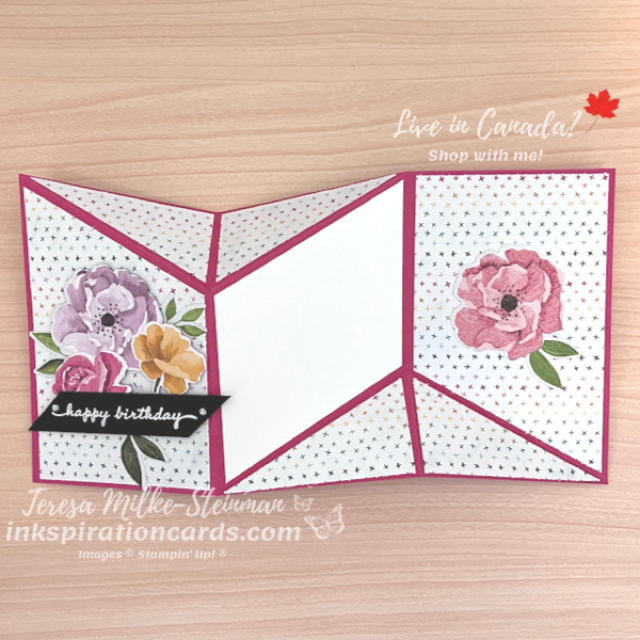
It’s blog hop time again! And this month the Fancy Folds Design Team is making a Mirror Fold Card. I saw this card a little while ago and am excited to share it with you. For measurements and steps to try this yourself check out my YouTube video. Just as a heads up there were a couple of parts that were a bit tricky, but I still love how these cards turned out.

For whatever reason I decided to make two different versions of this card. Maybe it’s the excitement from the newly launched July-December mini catalogue. Who knows?! Anyway… I made one version using the Hues of Happiness suite of products to make a birthday card. And the other version is a Christmas card using the All Spruced Up bundle.

For the birthday card I used Melon Mambo for the card base and a simple design for my patterned paper. The Hues of Happiness Designer Series Paper is sssooo pretty, but I wanted a simple design so the the flowers would be the focus. I cut out the flowers using the coordinating dies. Don’t you just love it when the dies work for both the stamped images AND the images in the DSP pack? I know I do! I popped up the flowers on the front panel using some Stampin’ Dimensionals and then heat embossed “happy birthday” in white on a piece of Basic Black cardstock. Then to finish it off I added a couple of Rhinestone Basic Jewels.

Mirror Fold Card

For the Christmas card I used Pear Pizzazz for my card base and the Painted Christmas Designer Series Paper. I’m so glad this pack of patterned paper is back! The designs are so pretty and some can be used for occasions other than Christmas too. To decorate this version I used the All Spruced Up dies with a few different papers, including the Gold & Silver Foil DSP from the Sale-a-bration catalogue. I cut out the phrase with one of the He’s All That dies and popped it up with some Stampin’ Dimensionals. And when I finally found my Festive Pearls I added a couple of the gold ones to the card to finish it off.

Mirror Fold Card

I hope you enjoy this month’s fun fold! Keep hopping around the world and check out the next Mirror Fold Card from Mette Nordling Shaw here.

And you can always check out what we made last month, which was a Diamond Z Fold card. Check out that hop starting here.

Simple Handmade Wedding Card

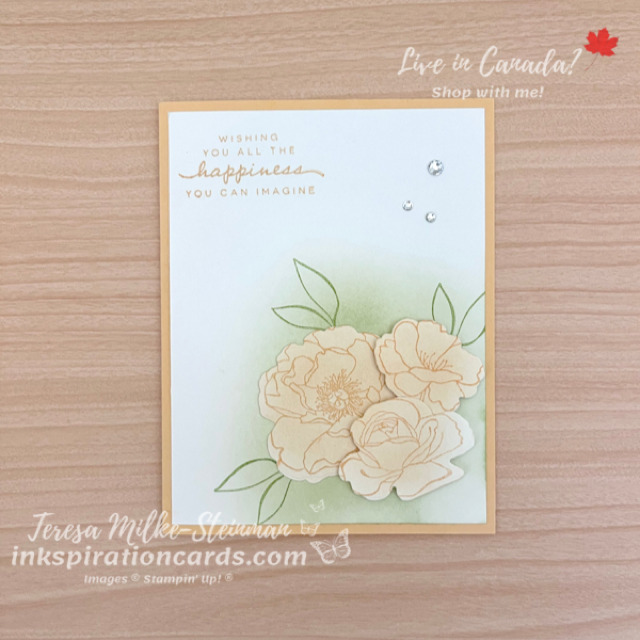
I’m finally getting around to sharing the card I made for my team’s recent Annual Catalogue card swap. With every new catalogue we always do one and I just love all the different card samples I get! I can’t wait to share some of my favourites with you. In the meantime here’s my simple handmade wedding card.

For our swaps we have to use a new stamp set as our main focus. And we need to have an embellishment of some kind. It could be Designer Series Paper, ribbon, jewels. Just something a little extra to step up your card design. For my design I used the Happiness Abounds stamp set. I wanted to make something simple as I needed to make 15 cards. While I sometimes enjoy making cards with a few different pieces/layers, those cards do tend to take a little bit more time.

For my colour combination I used Pale Papaya and Pear Pizzazz. Both are such nice soft colours and they go so nicely together. And instead of adding some of the coordinating DSP, Hues of Happiness, I added some extra colour using the Blending Brushes. I added some Pear Pizzazz behind the flowers and Pale Papaya to colour the flowers. You can stamp the flowers first and then use the Blending Brushes or vice versa. It’s completely up to you. Just make sure if you stamp first that you give plenty of time for the ink to dry so you don’t end up smudging the lines from the stamped images.

From here I used the Blossoming Happiness dies to cut out the two smaller flowers. Then I popped those up with some Stampin’ Dimensionals. And the embellishment I used was a few of the Rhinestone Basic Jewels. If you want to add a bit more sparkle you can add some using the Wink of Stella Glitterbrush to the flowers.

Simple Handmade Wedding Card

Such a simple handmade wedding card! Check out this other card I made using the Happiness Abounds products here. And you can check all the products from this suite in my online shop.

Goodbye to Dahlia Days

The clock is ticking as we get closer to summer, warmer weather and of course the end of the January-June Mini catalogue. I’m always sad when Stampin’ Up! releases it’s list of retiring products. But at least that doesn’t last that long as there are new goodies on the way! In the meantime I’m sharing some projects over the next few weeks featuring some of the products that will soon no longer be available. This week I’m saying goodbye to Dahlia Days! I have been having so much fun crafting with this bundle. This is definitely one that I’m particularly sad to see retiring. I just love the images and phrases… this might be one that I hold on to even after it’s retired.

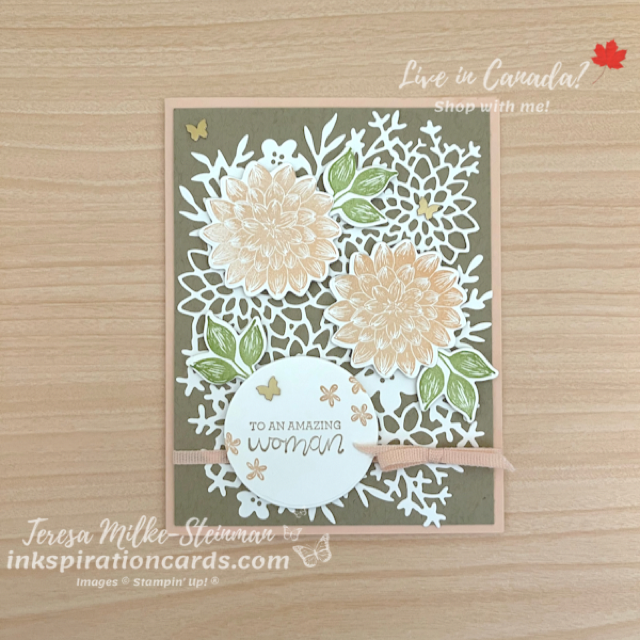
Anyway… for this card I wanted to show off both the stamp set and the coordinating dies. For my colour combination I used Petal Pink, Pear Pizzazz and Crumb Cake. Petal Pink is such a nice soft pink and Pear Pizzazz has become my go to colour when I’m stamping leaves, etc. The Crumb Cake is a nice, soft neutral colour to help the others pop.

Once I stamped my large dahlias and leaves I cut them out using the coordinating dies. For the phrase and smaller flowers I used one of the smaller Layering Circles dies. Then behind it all I used the more detailed die with some Basic White cardstock. I thought about using some Sponge Daubers to add some colour to the detailed die cut, but I like the simplicity of this. Plus it doesn’t take away from the other stamped images which I popped up using Stampin’ Dimensionals.

To add a little something more to this card I added some of the Petal Pink cotton ribbon from the Cotton Ribbon Combo pack. (this ribbon is retiring as well) And of course I needed to add a little bit of bling. But in this case I added a few of the largest Brushed Brass Butterflies.

Goodbye to Dahlia Days

I’m so sad that I have to say goodbye to Dahlia Days. If you love this stamp set too then make sure to head over to my online shop before it’s sold out. The sale is only on until June 30th!

You can also check out a project I did with another retiring bundle, Sweet Talk, here.

Handmade Card for Spring

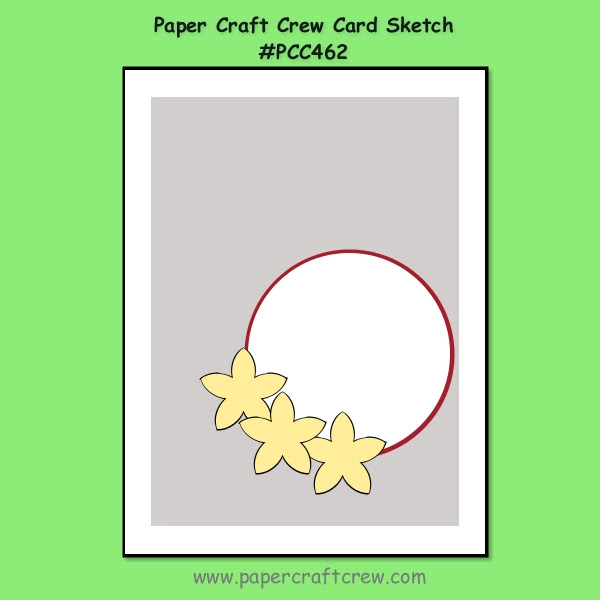
I couldn’t resist when I saw this week’s vertical sketch challenge from the Paper Craft Crew (PCC 462). As soon as I saw it I knew I had to use the Dahlia Days stamp set to make a handmade card for Spring. Here’s the sketch…

Handmade Card for Spring

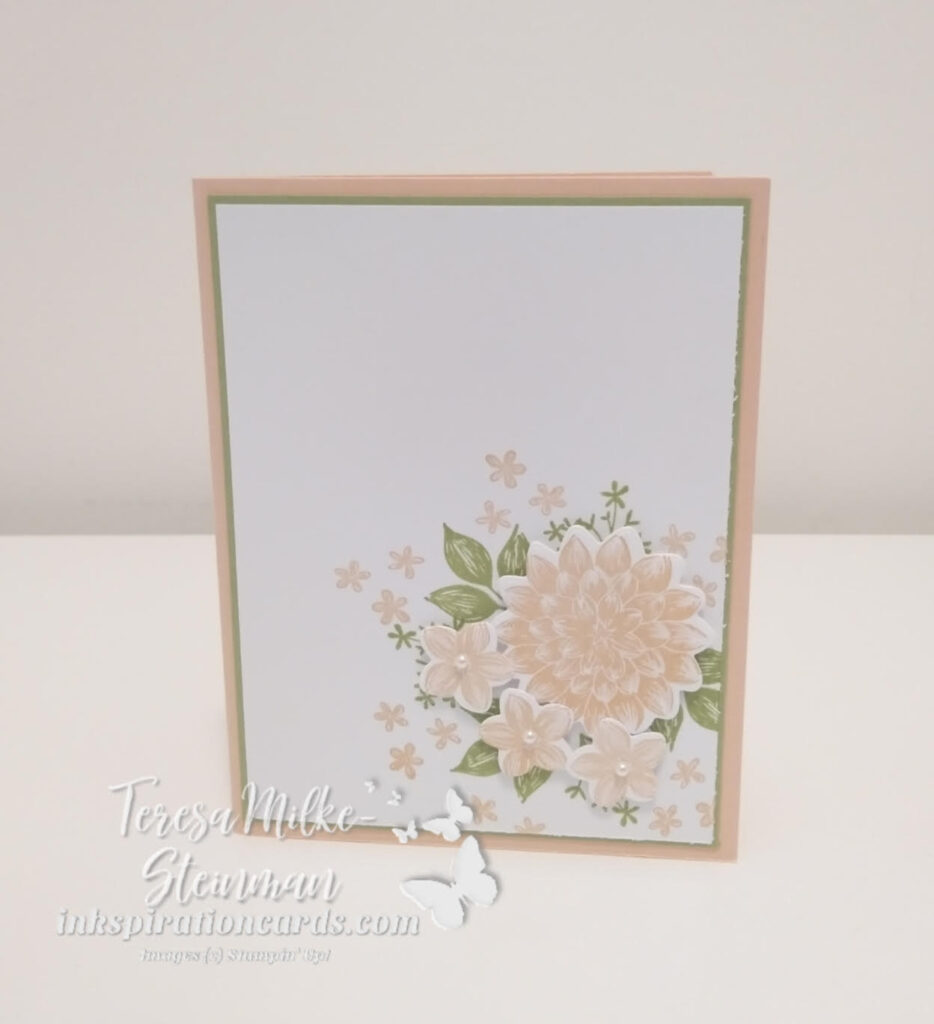
For my colours I chose Petal Pink and Pear Pizzazz. That’s a lot of Ps, lol! These are such nice, bright Spring colours, so I thought they’d work well. I knew I wanted to use the large dahlia image for the main focus. But for the other pieces in the sketch I went back and forth between using smaller flowers or leaves. In the end I decided to use the leaves and some other foliage as a kind of background. Then I added a few more small bunches of flower to bring in more Petal Pink.

To really make the larger flowers pop I die cut them using the coordinating dies and then used some Stampin’ Dimensionals to pop them up. Then I added some Pearl Basic Jewels to the centres of the smaller die cut flowers. I debated about adding a phrase to the card, but thought I’d keep this a simple handmade card for Spring. Here’s my card…

Handmade Card for Spring

Check out all the other cards for this week’s Paper Craft Crew Challenge (PCC462) here. And you can check out one of my other cards for a previous Paper Craft Crew Challenge here.